

Quotations
A request for quotation (RFQ) asks a vendor for a price on products you want to buy. You build it, send it by email and, when the vendor agrees, confirm it. The RFQ then becomes a purchase order.
In simple words: An RFQ is a draft purchase. Nobody is committed until you click Confirm Order.
Open Purchase → Orders → Request for Quotation. The page title is Request For Quotations.
Settings
Some fields appear only when a setting is on. Set them in Purchase → Settings → Manage Orders or Manage Products.
| Field or column | Setting that shows it |
|---|---|
| Agreement | Purchase Agreements |
| Unit | Unit of Measure |
| Packaging Qty and Packaging | Packagings |
| Deliver To | The Inventory app is installed |
Overview
The list shows every order that is not yet hidden by a tab.
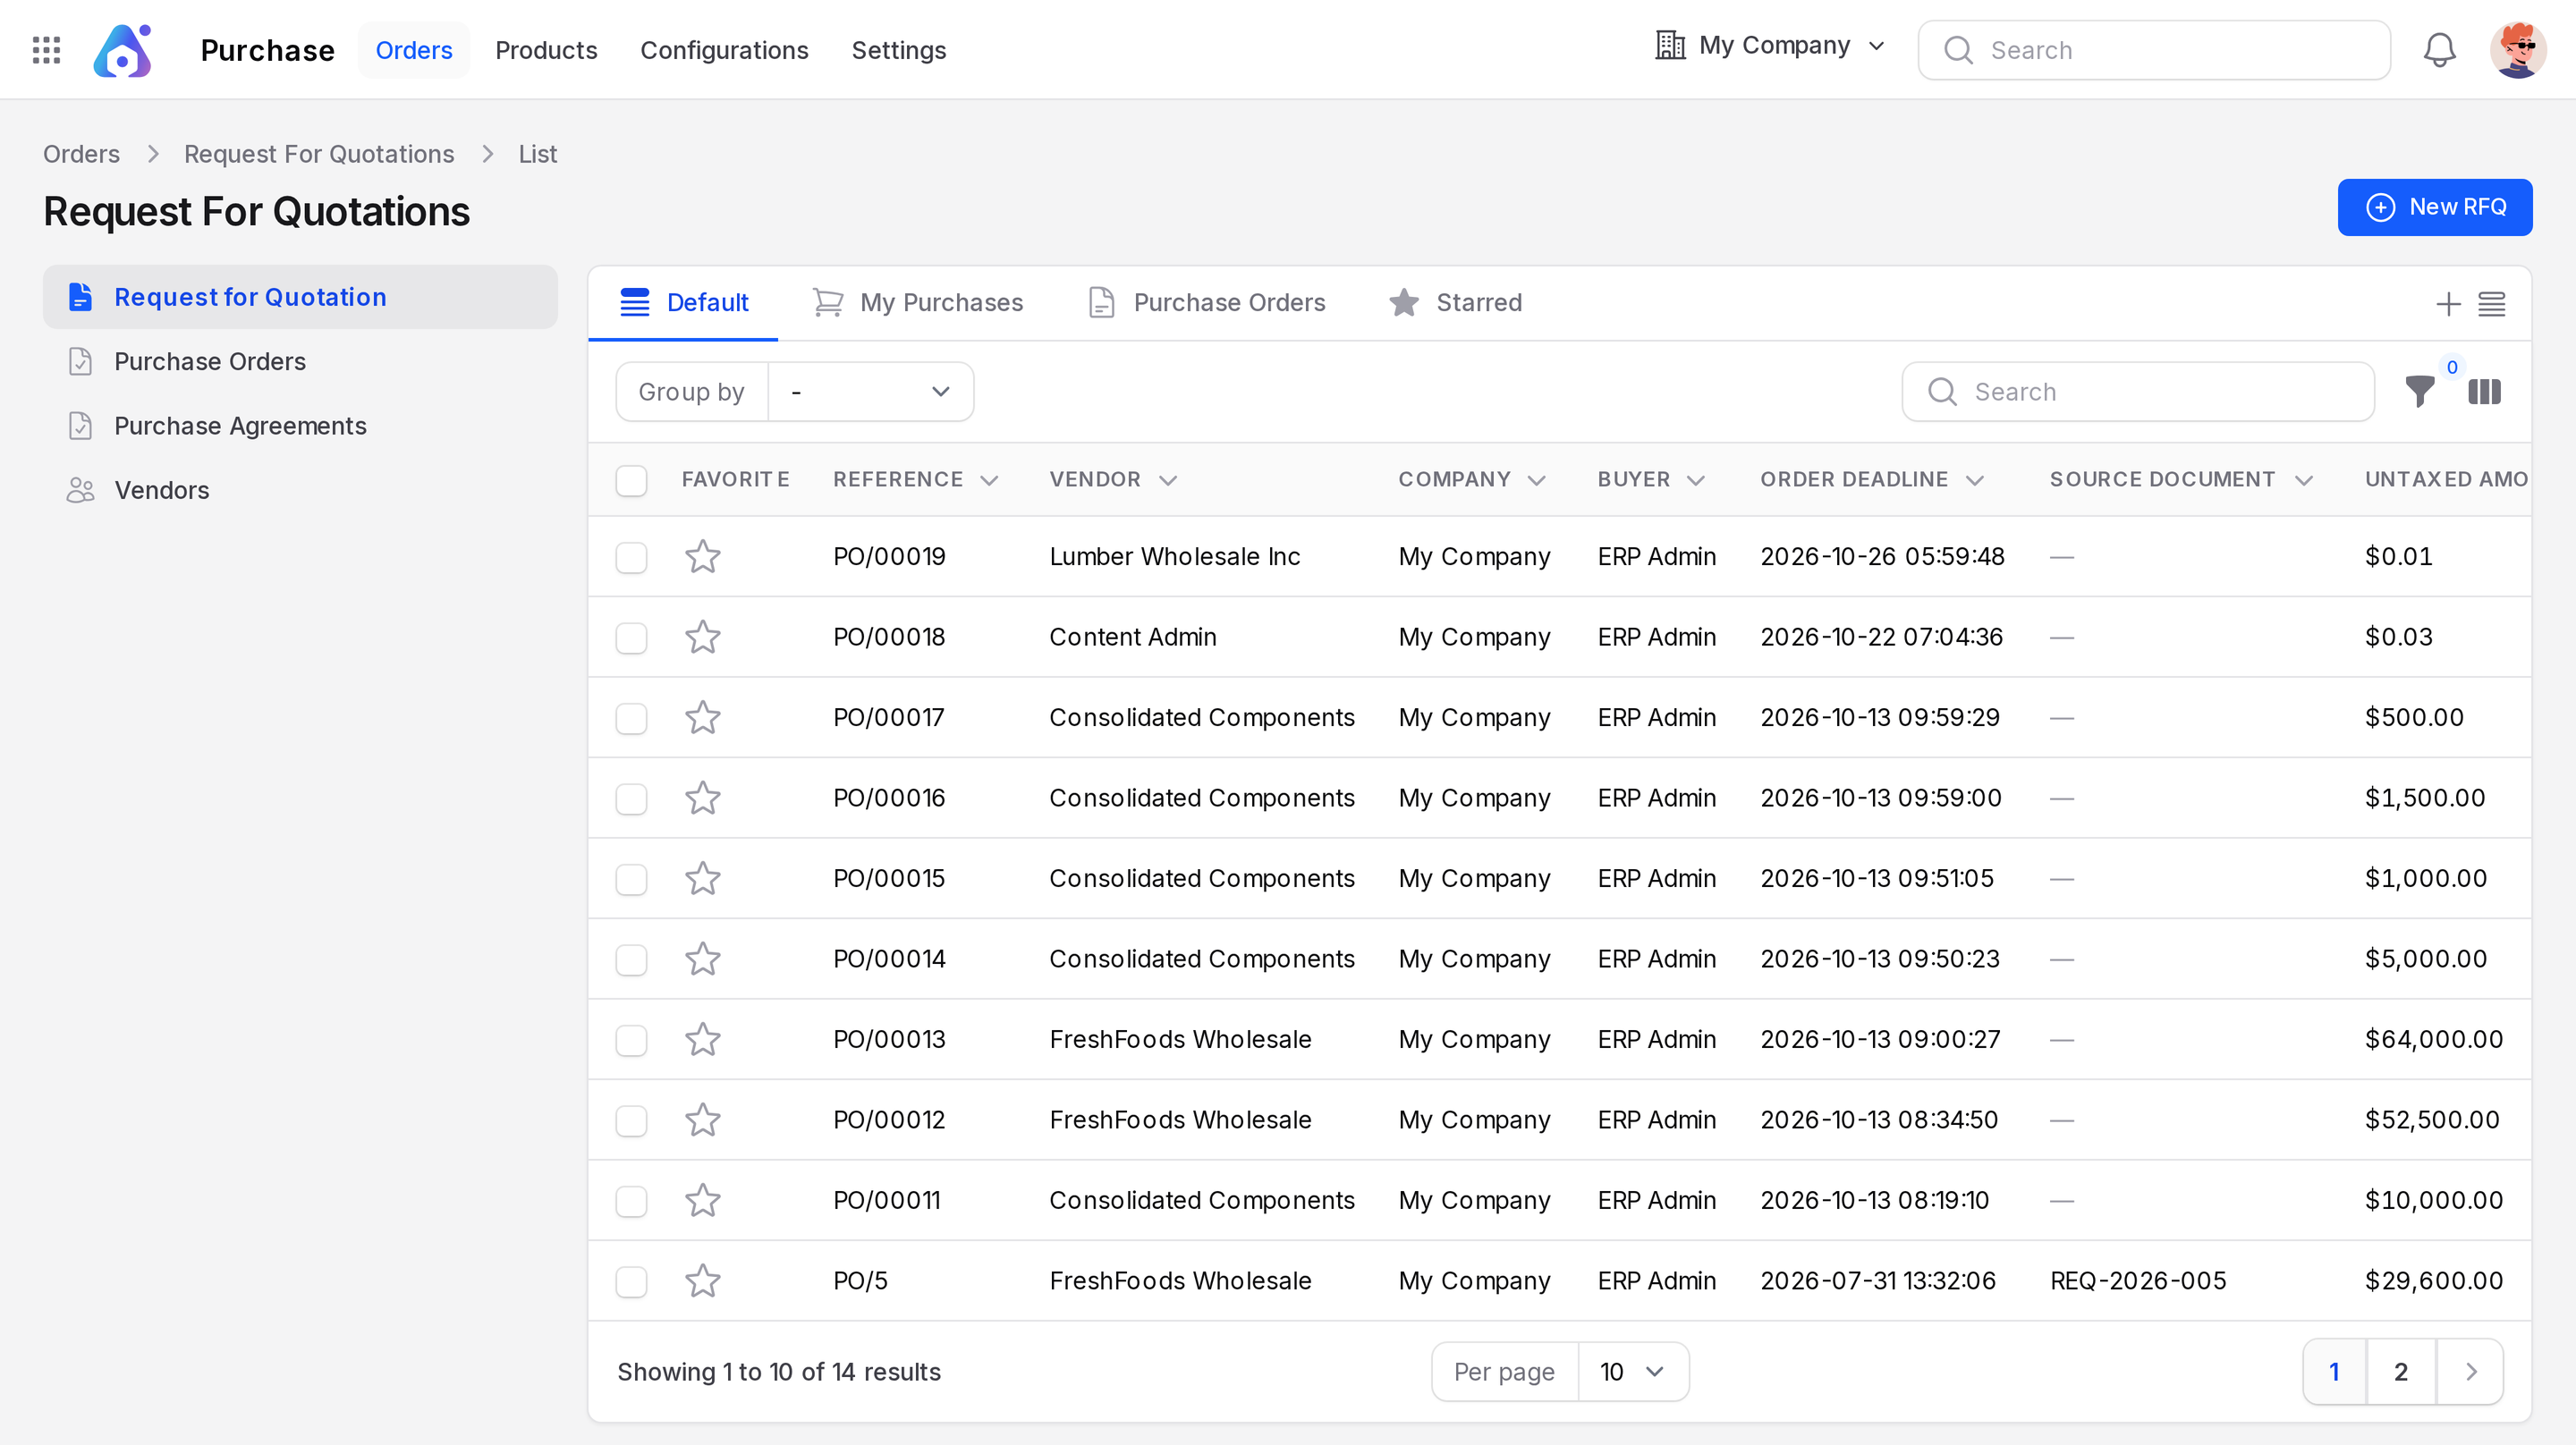
- Tabs: Default, My Purchases (your own orders), Purchase Orders (confirmed ones) and Starred.
- Group by: Vendor, Buyer, State, Created At, Updated At.
- Search: type a reference or vendor name.
- Favorite star: click the star in the first column to mark an order. The Starred tab lists them.
- Columns: Reference, Vendor, Company, Buyer, Order Deadline, Source Document, Untaxed Amount, Total Amount, Status. You can also show Vendor Reference, Billing Status and Receipt Status.
Create an RFQ
Scenario: you need 20 SSD 512GB from FreshFoods Wholesale.
- Click New RFQ.
- Fill the General section.
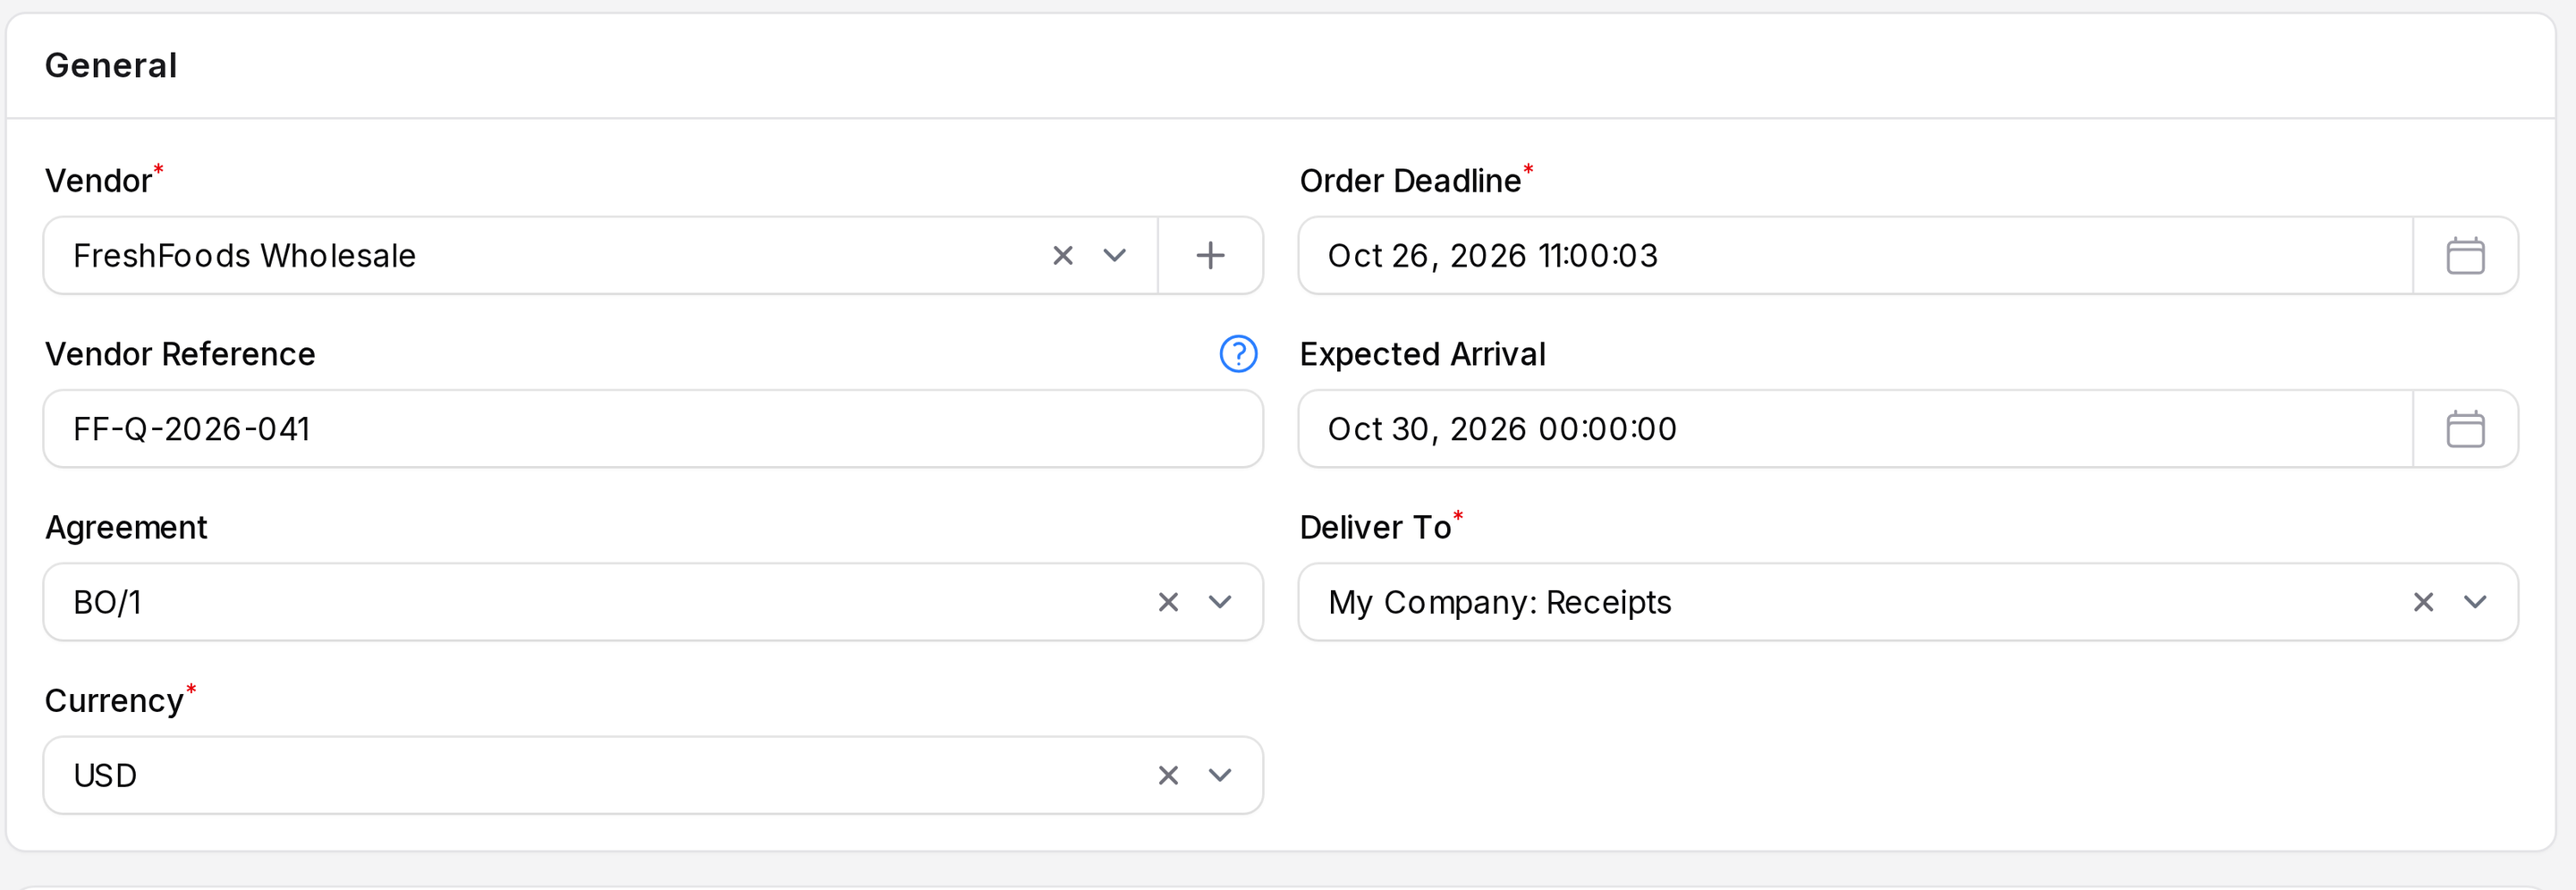
- Vendor: Required. Pick the supplier. Create one in Contacts first if needed.
- Vendor Reference: The vendor's own quote or order number. It helps match their delivery note.
- Agreement: Link a blanket order or template. Shown only with Purchase Agreements on.
- Currency: Required. It defaults to your company currency.
- Confirmation Date: Aureus fills it in when you click Confirm Order.
- Order Deadline: Required. The last day the vendor can accept.
- Expected Arrival: The date you want the goods.
- Deliver To: Required with Inventory. The warehouse receipt type that receives the goods, such as My Company: Receipts. Keep the default for one warehouse.
- Open the Products tab and click Add Product.
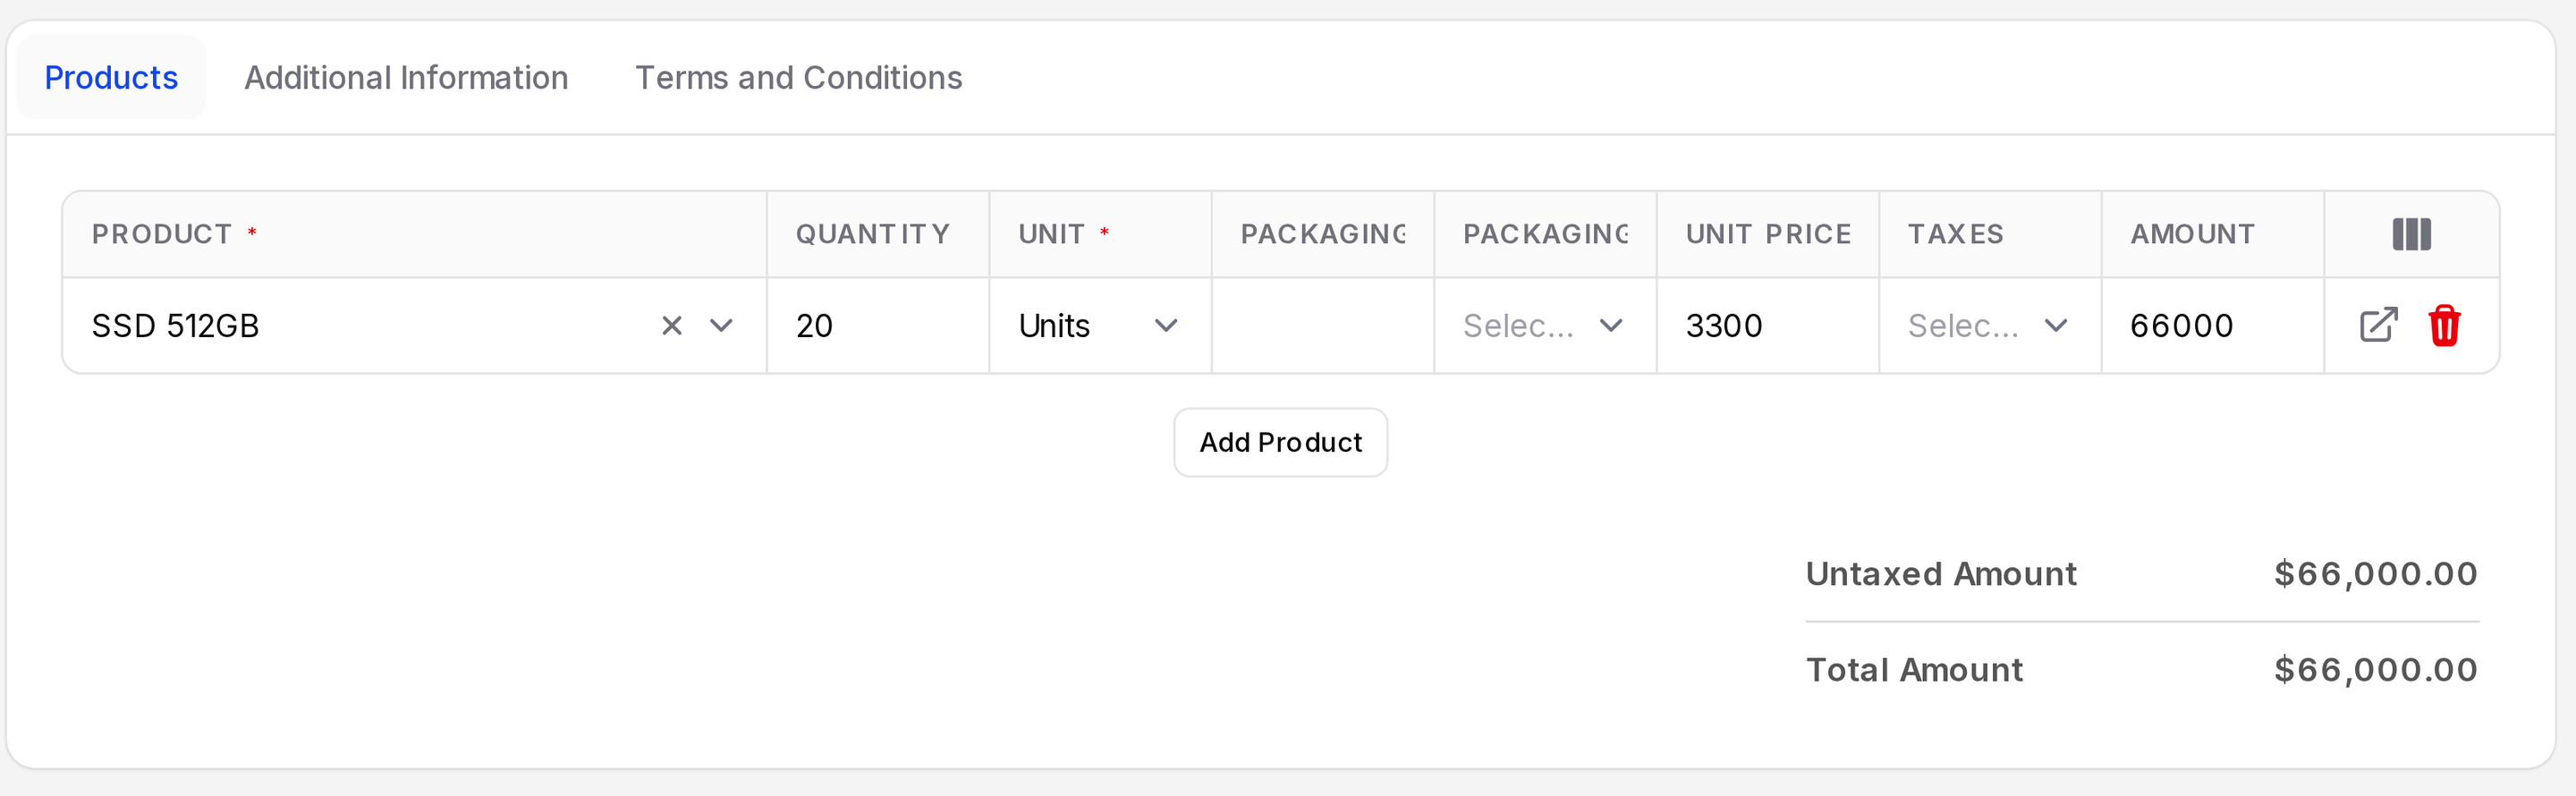
Each line has these columns:
- Product: Required. Pick the item.
- Expected Arrival: The date for this line.
- Quantity: How many you want.
- Received and Billed: Appear after you confirm. They fill themselves.
- Unit: The unit of measure. Needs Unit of Measure.
- Packaging Qty and Packaging: Need Packagings.
- Taxes: The tax on the line.
- Discount (%): A percentage off the price.
- Unit Price: The price for one unit. A vendor price fills it when one matches.
- Amount: Calculated for you.
Use Add Section to add a heading line and Add Note to add a text line between products. The summary below shows Untaxed Amount, Tax and Total Amount.
- Open Additional Information if needed.
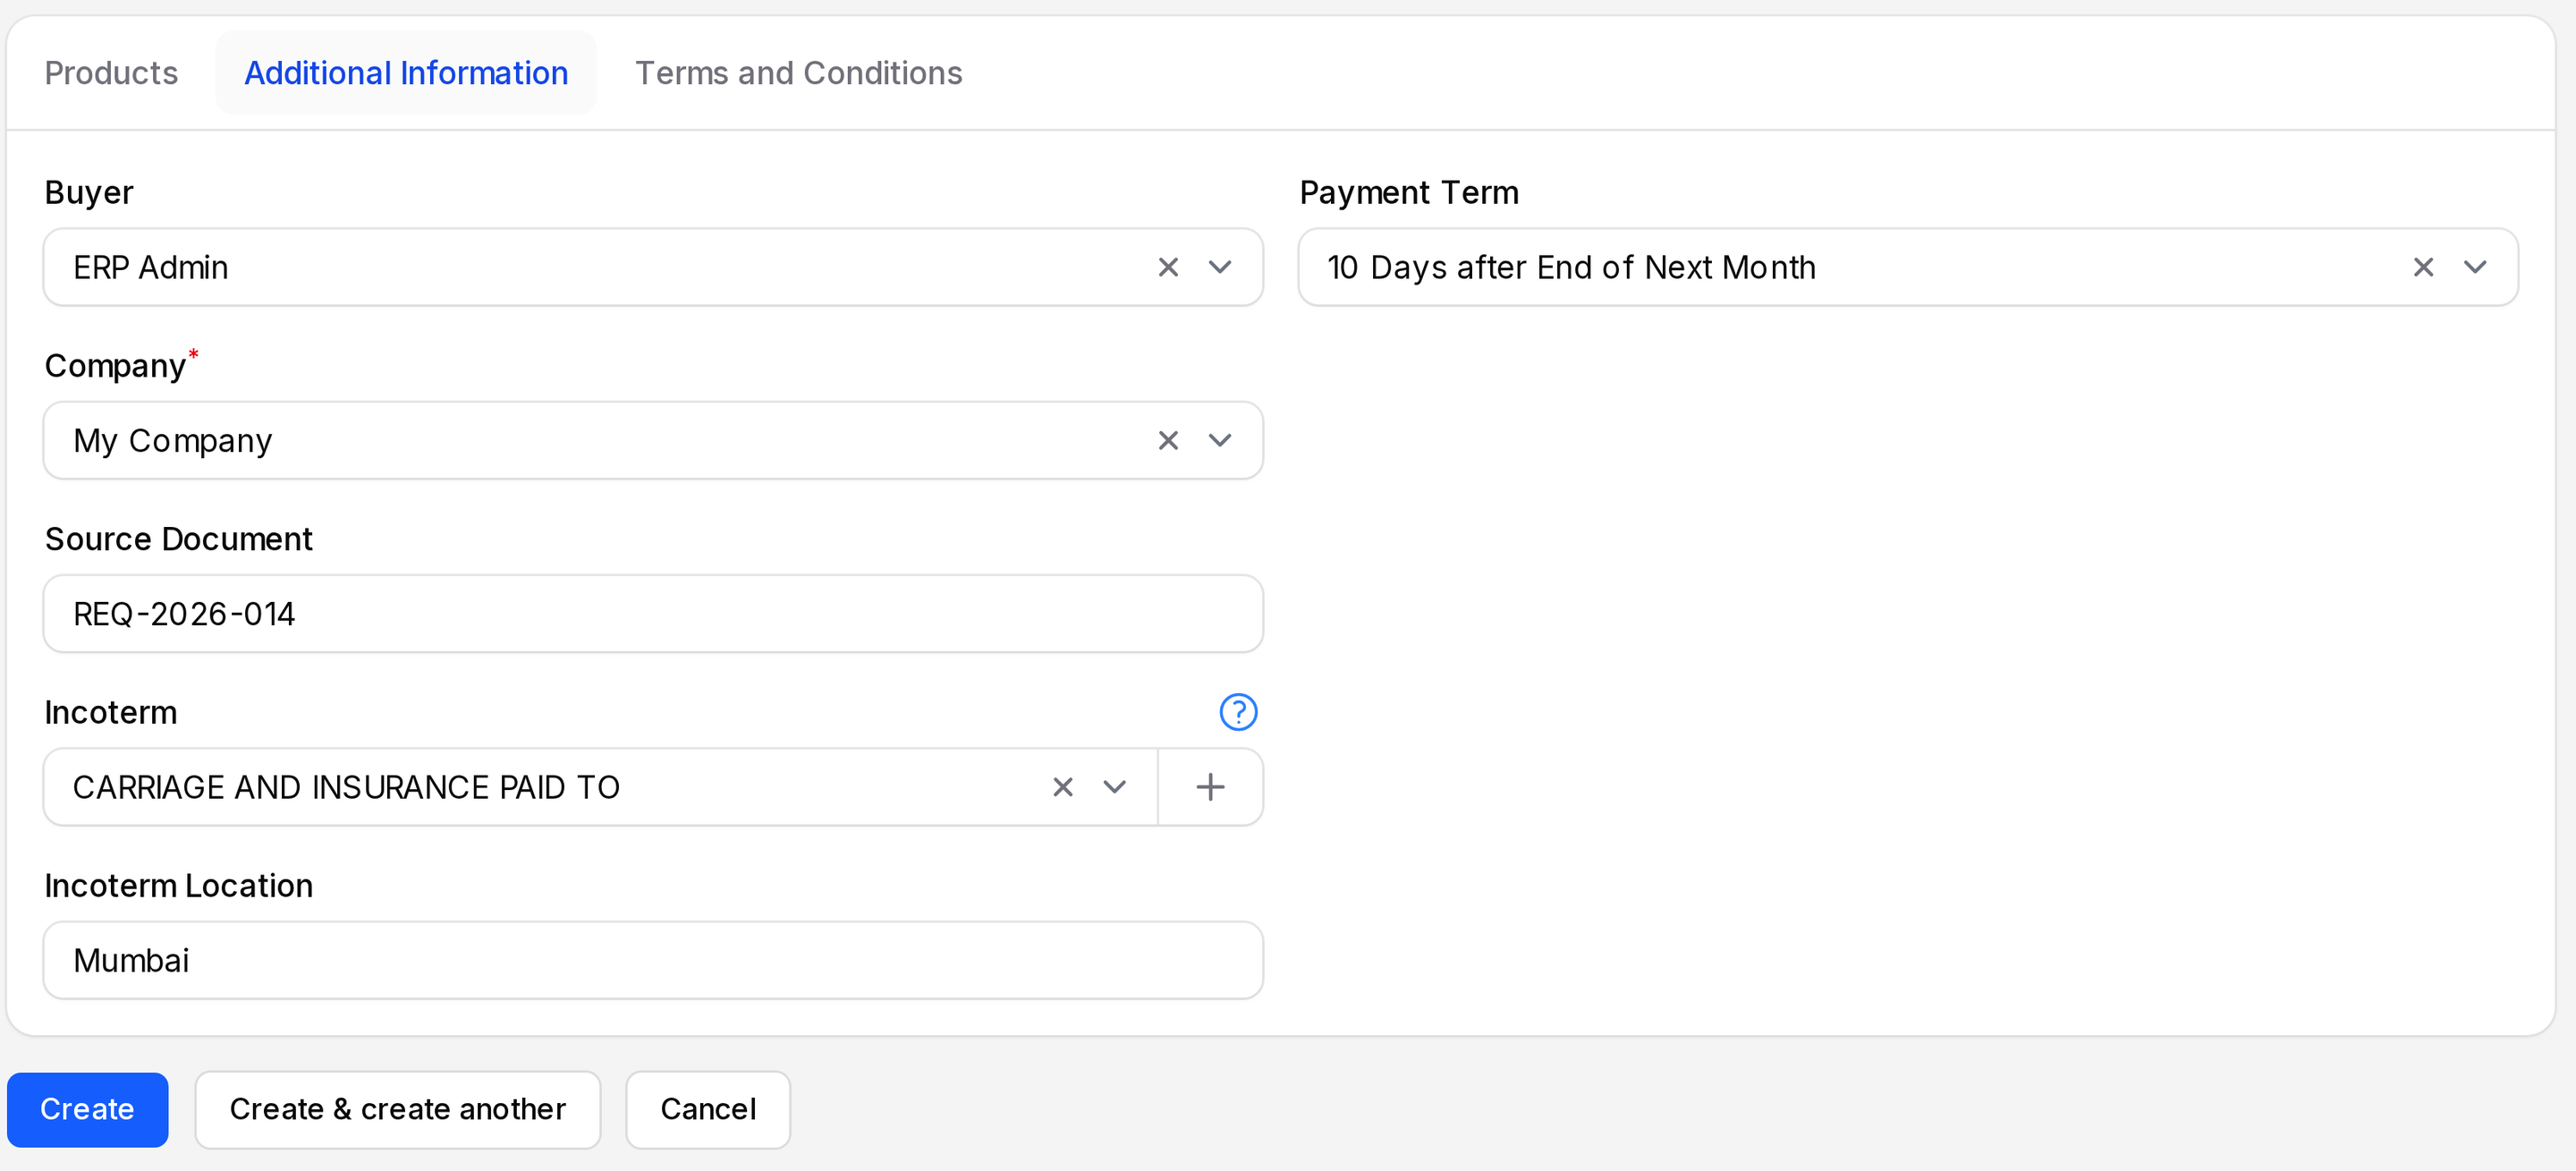
- Buyer: The person in charge.
- Company: The buying company.
- Source Document: Your own origin reference.
- Incoterm and Incoterm Location: The delivery terms.
- Payment Term: When you pay.
- Open Terms and Conditions to write terms for the vendor.
- Click Create. The order gets a number such as PO/00012 and the status RFQ.
TIP
Click Create & create another to enter several RFQs in a row.
Send the RFQ
- Open the RFQ and click Send By Email.
- Check the window.
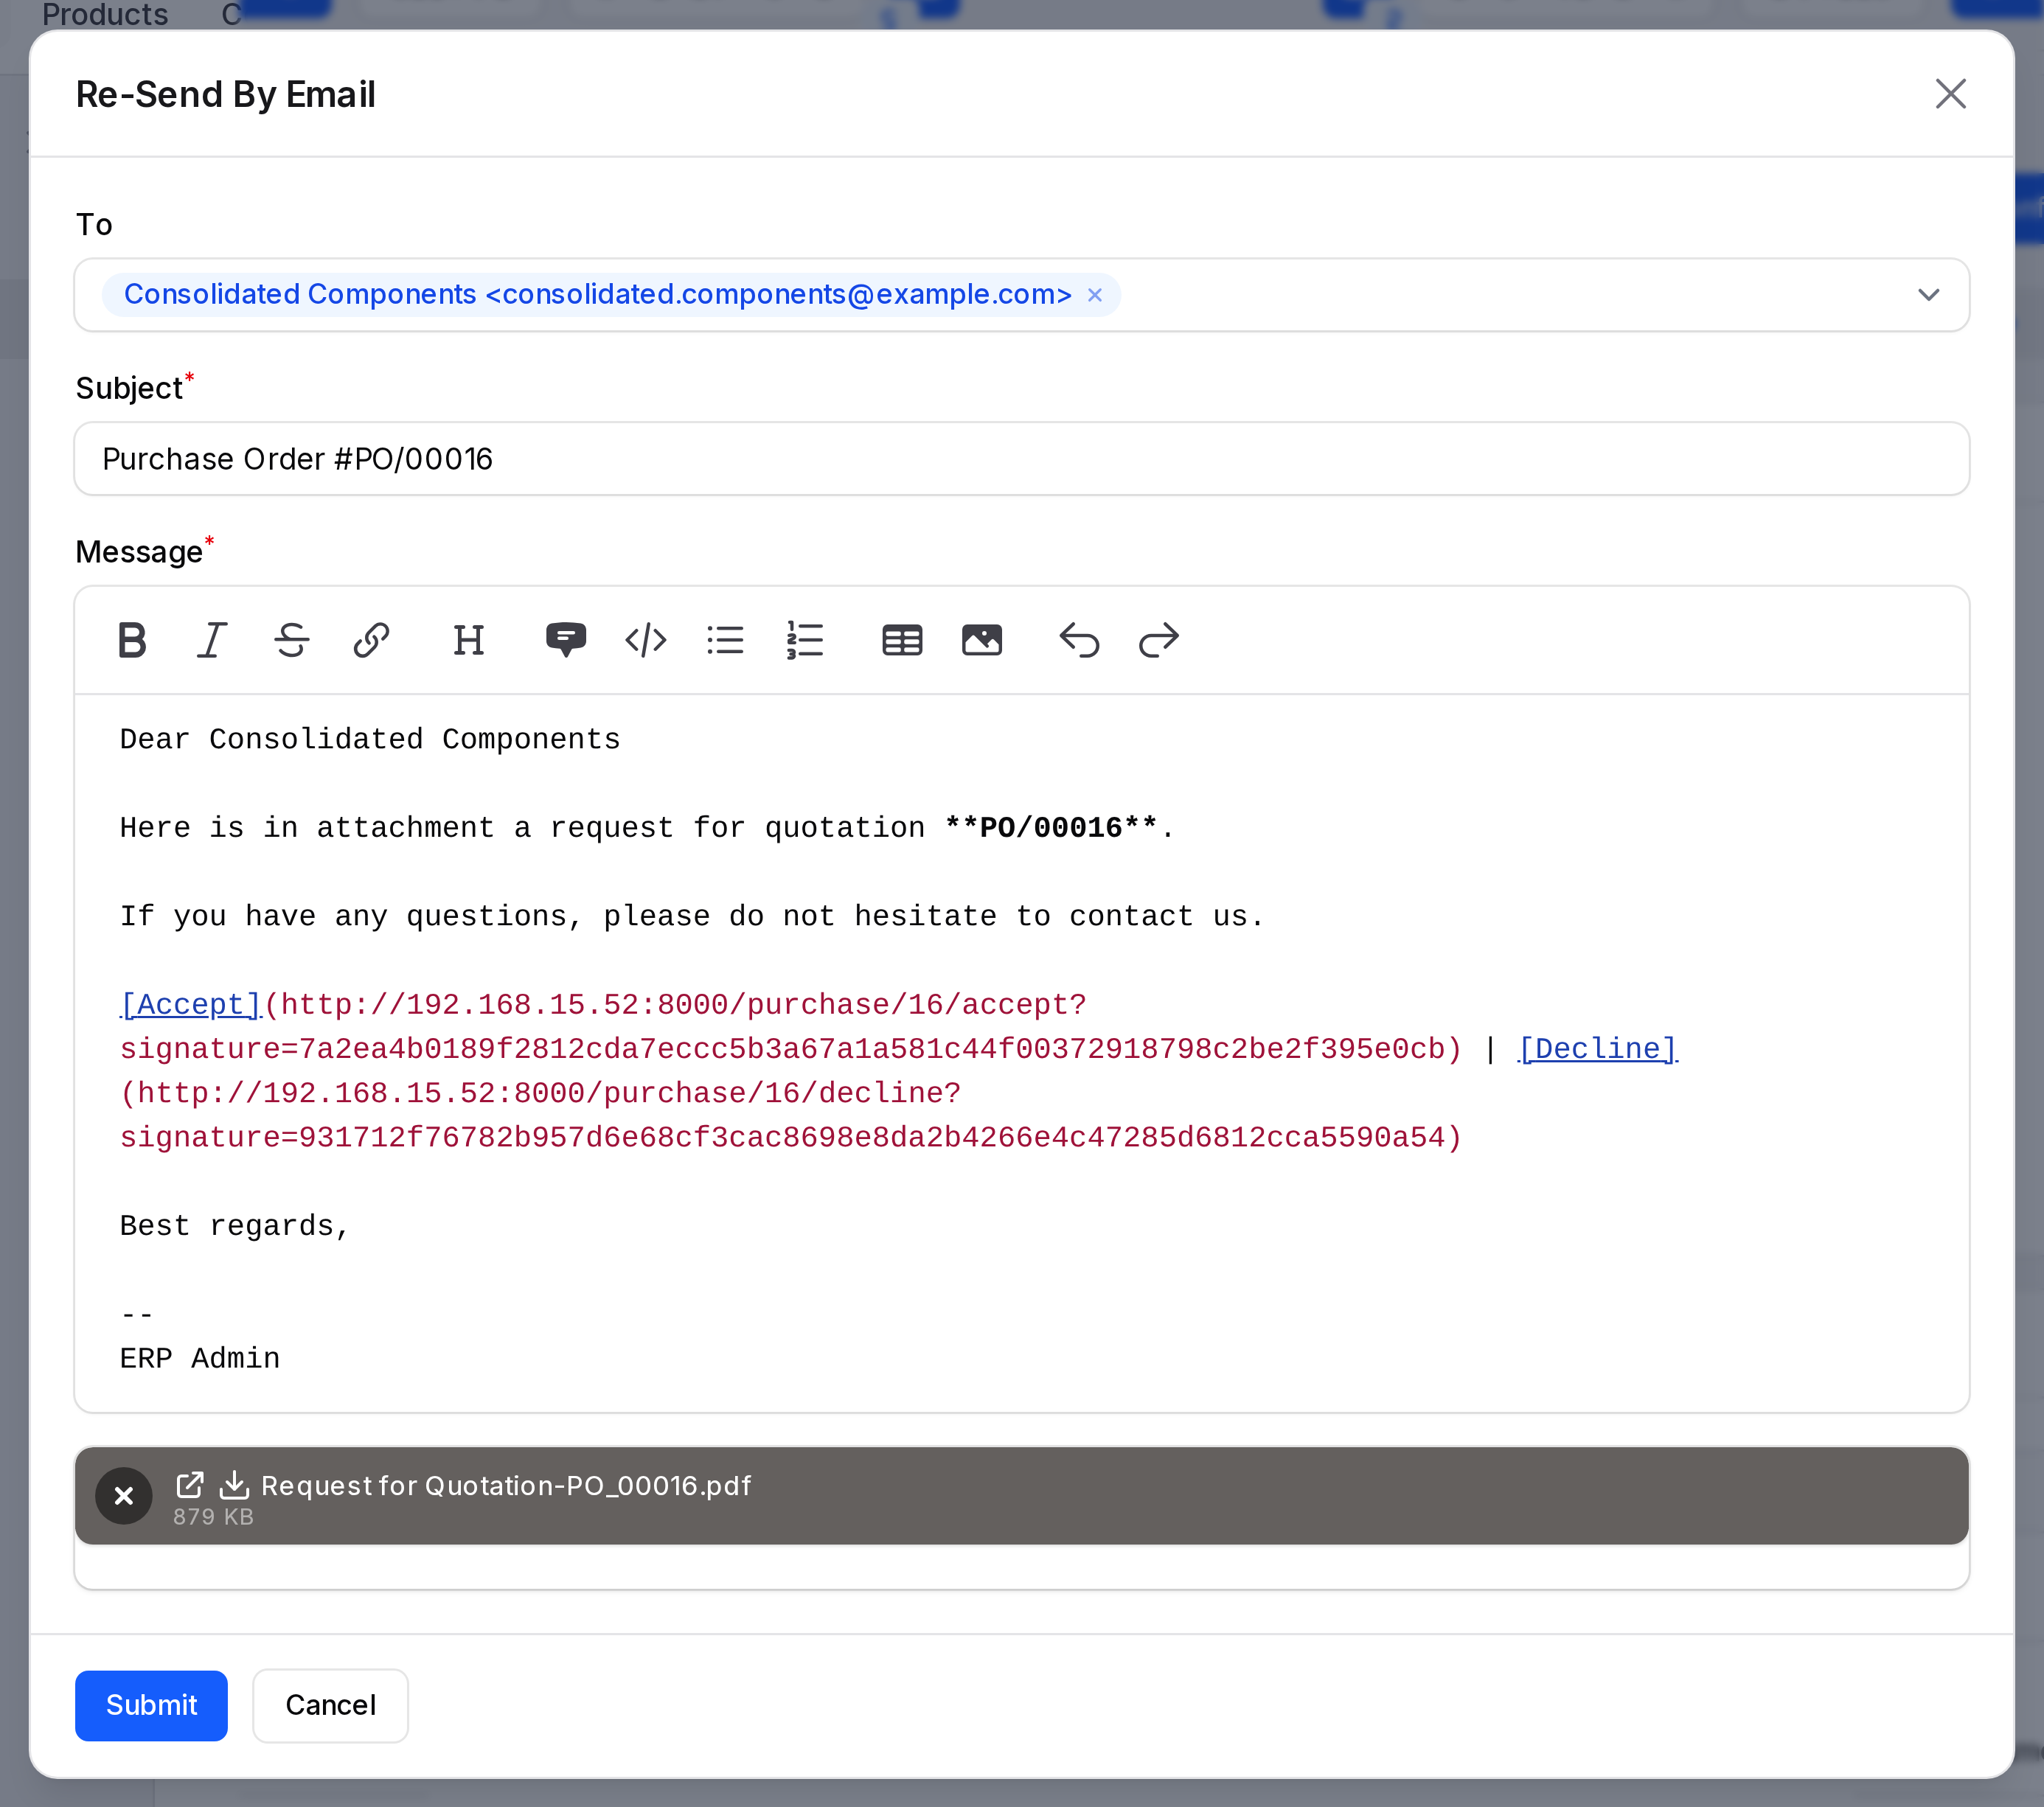
- To: The vendors. They need an email address.
- Subject: The default is Purchase Order #name.
- Message: The email text. It includes Accept and Decline links.
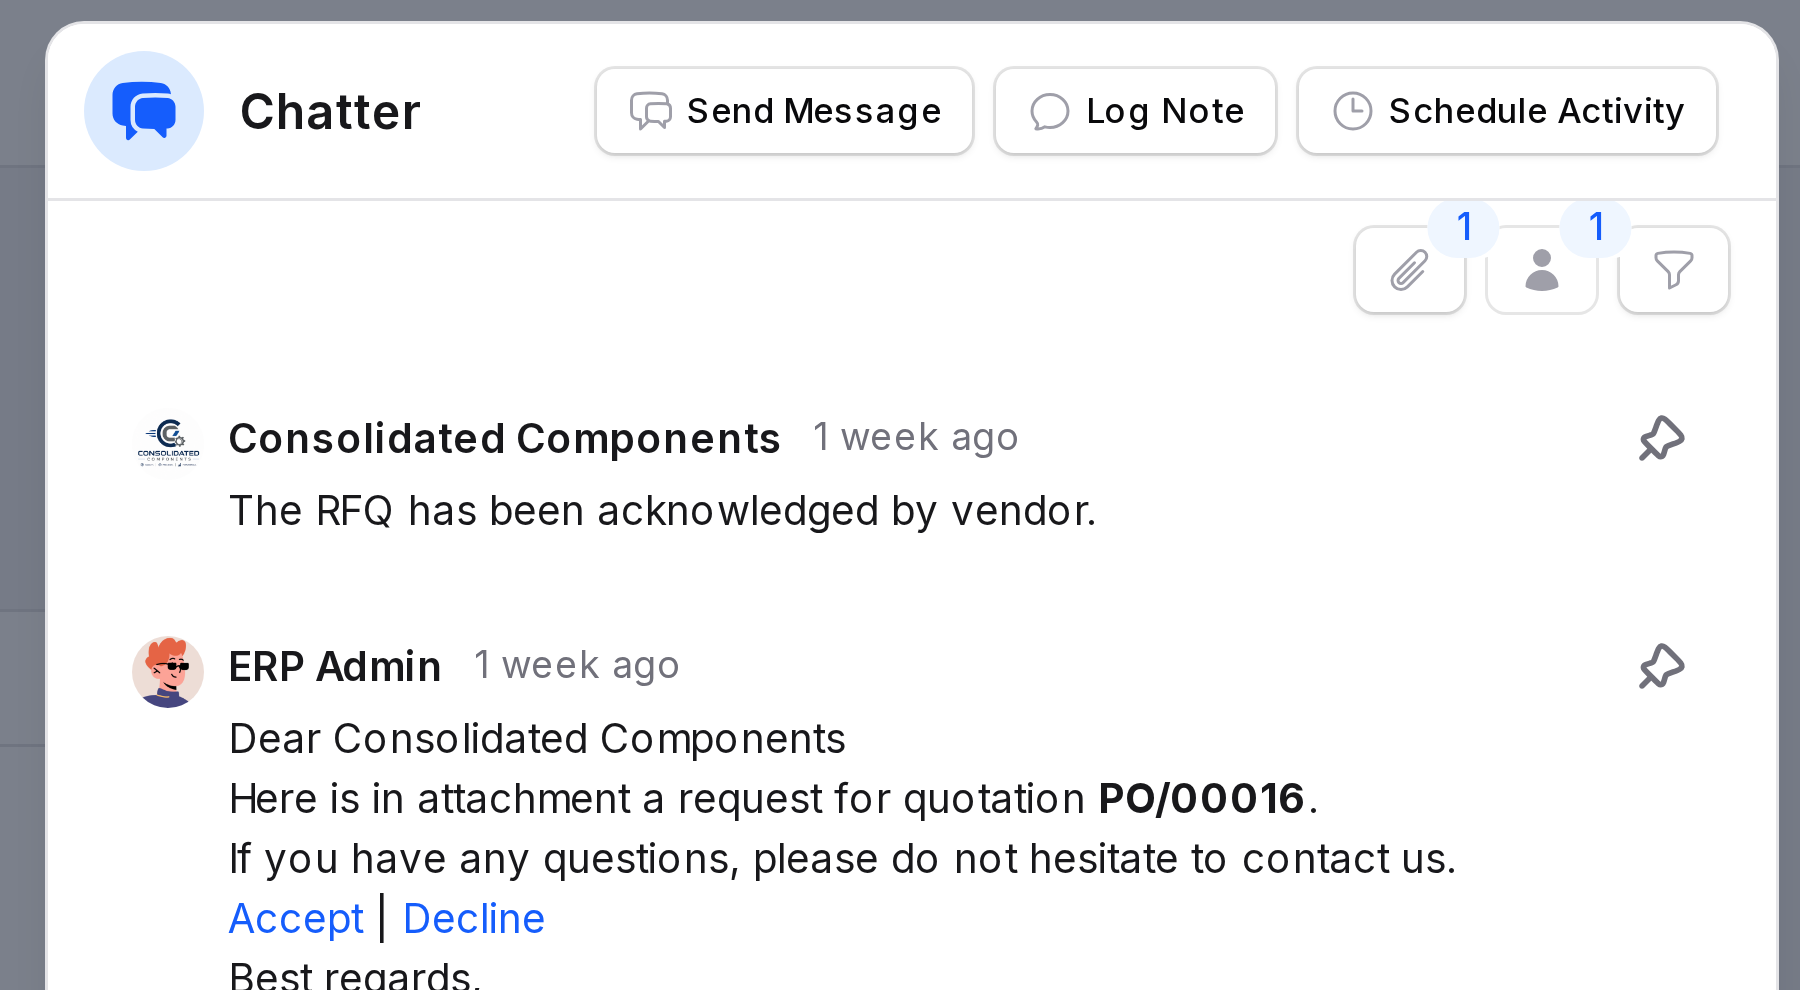
- Click send. The PDF is attached, the status becomes RFQ Sent and the email is saved in the chatter.
The button now reads Re-Send By Email. Use it to send again.
To give the vendor a paper copy, click Print RFQ. It downloads a PDF and also sets the status to RFQ Sent.
Vendor answers
The vendor can answer in two ways.
- Email link: The vendor clicks Accept or Decline in the email. A page shows Quotation Accepted or Quotation Declined.
- Vendor portal: The vendor signs in, opens the RFQ and clicks Accept or Decline. A message confirms the answer.
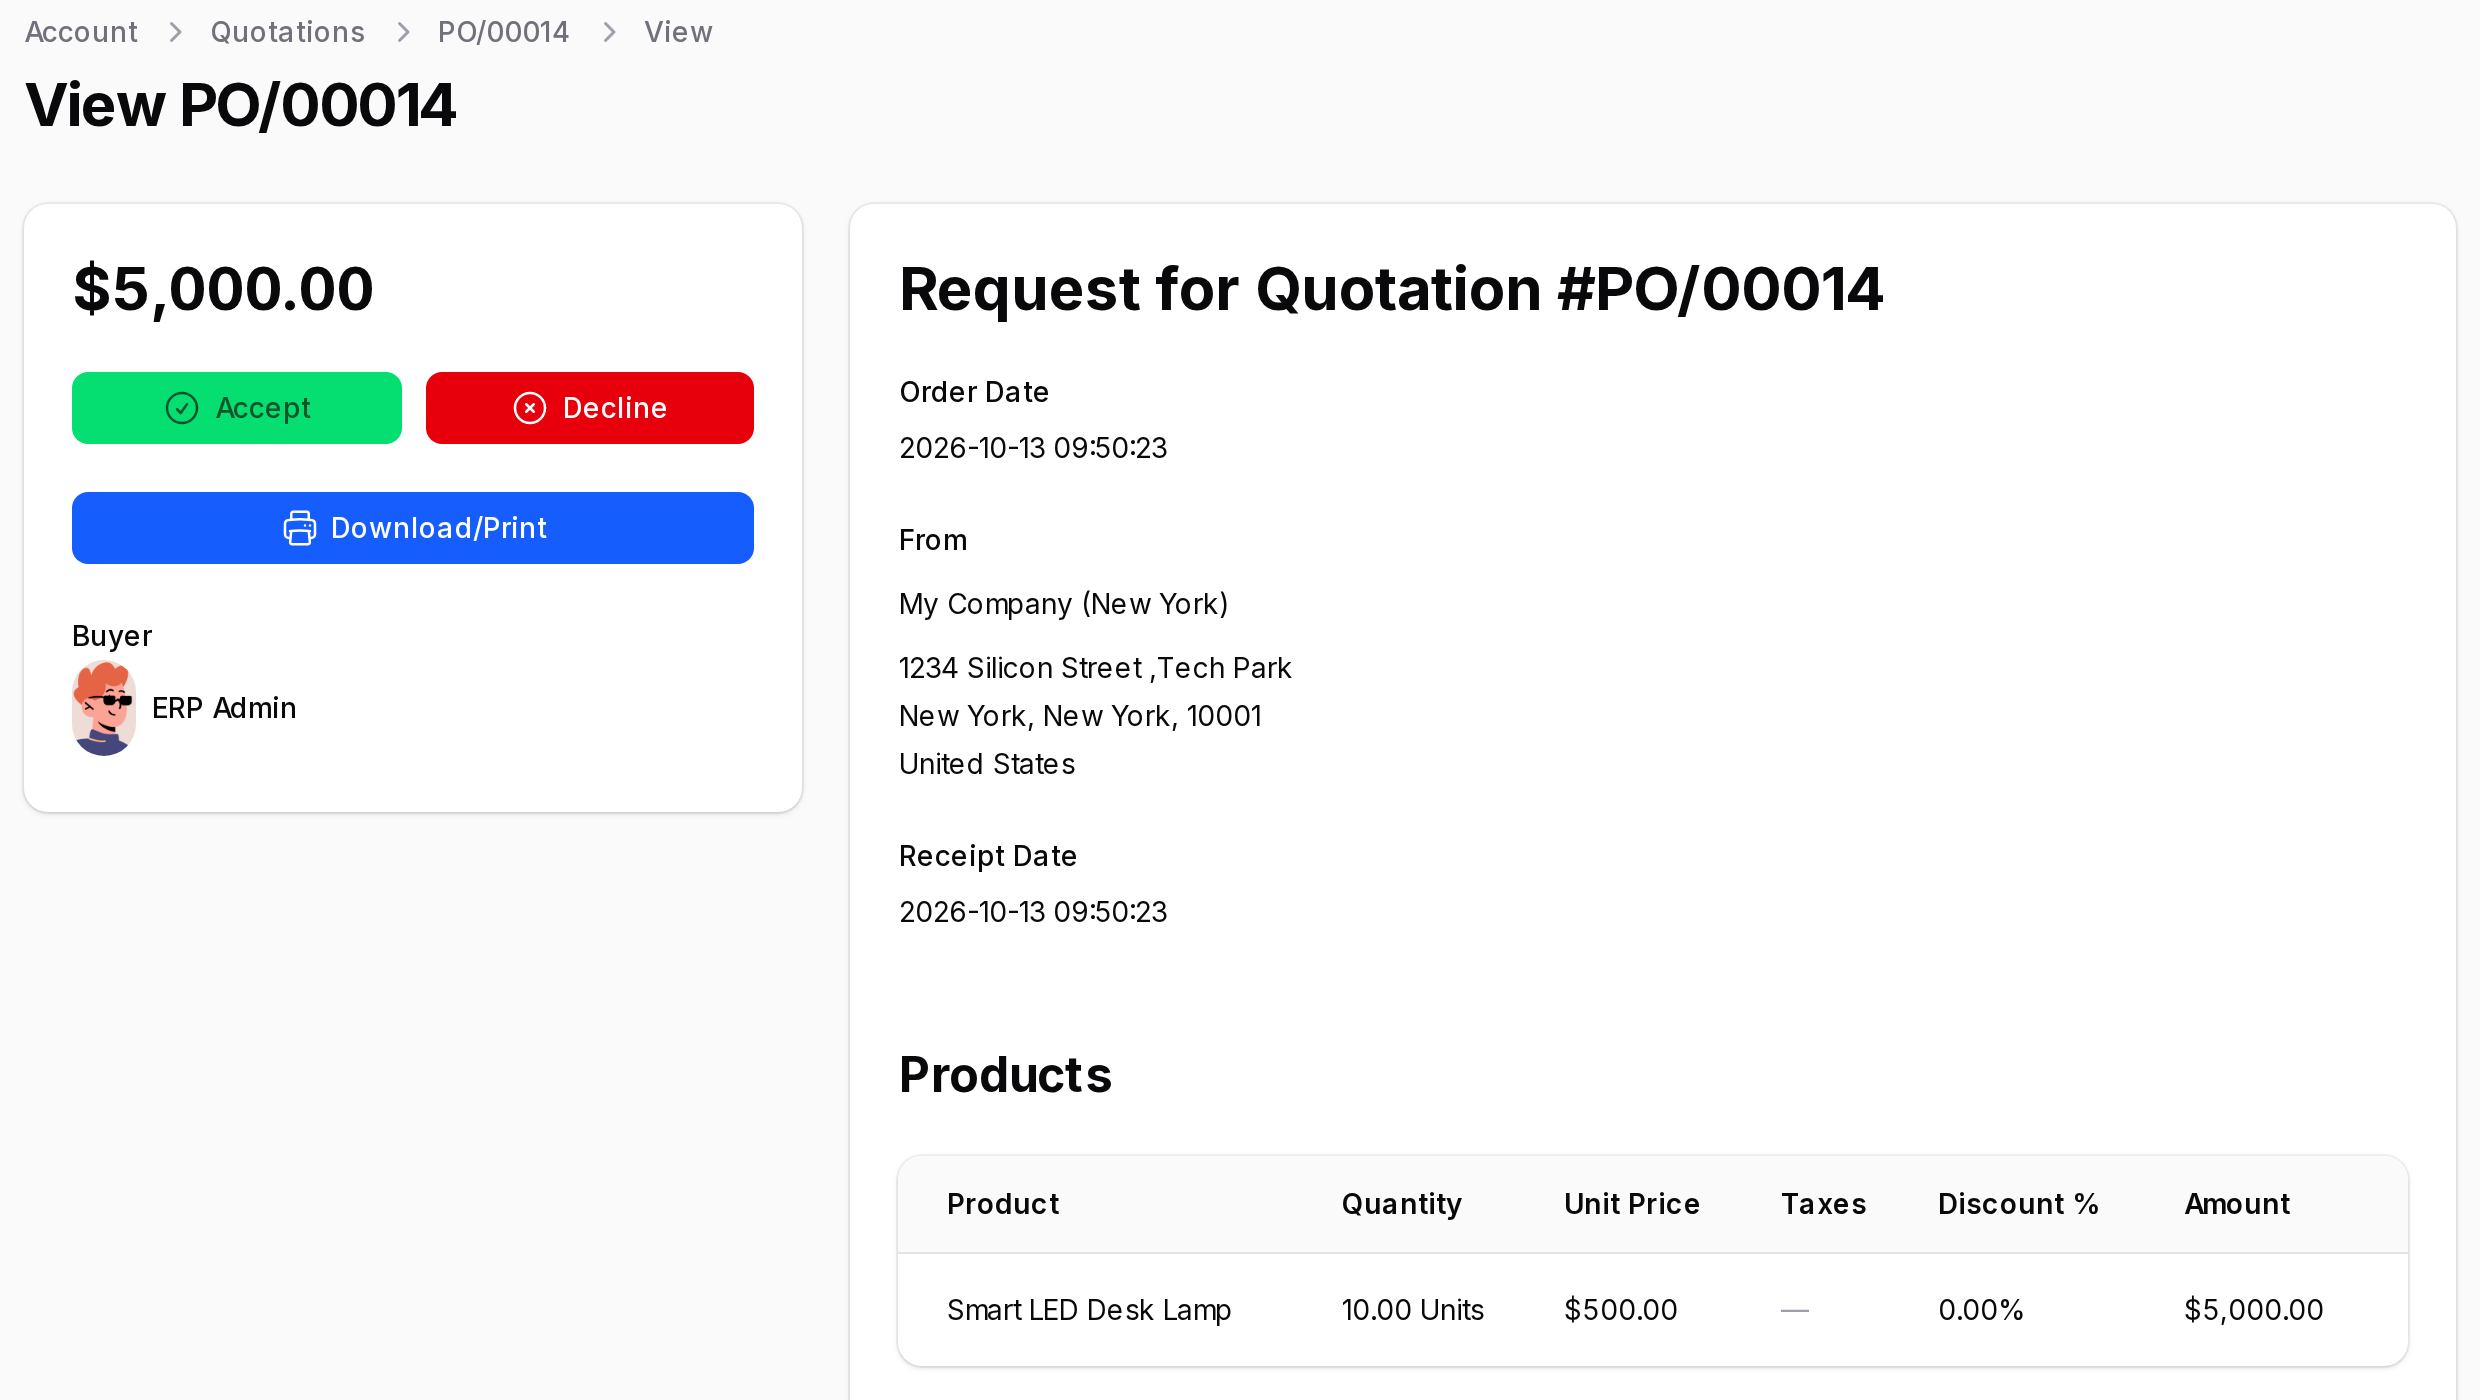
Either way, Aureus adds a comment to the order chatter, such as The RFQ has been acknowledged by vendor. The status does not change on its own.
INFO
The answer only records what the vendor said. You still click Confirm Order to buy. For portal setup and screens, see Vendor portal.
Confirm the order
Click Confirm Order. The RFQ becomes a purchase order, or To Approve when approval applies. See Purchase orders.

Actions and statuses
| Button | Shown in | Result |
|---|---|---|
| Send By Email | RFQ | Emails the vendor. Status becomes RFQ Sent. |
| Re-Send By Email | RFQ Sent | Sends the email again. |
| Print RFQ | RFQ, RFQ Sent | Downloads the PDF. Status becomes RFQ Sent. |
| Confirm Order | RFQ, RFQ Sent | Makes it a purchase order. |
| Cancel | RFQ, RFQ Sent | Status becomes Canceled. |
| Delete | RFQ, RFQ Sent | Removes the order. |