

Locations
A location is a named place where stock can be: a shelf, a zone, a dock, or even a virtual place such as "Customers". Locations sit inside each other, like folders. Every stock move goes from one location to another, so the tree you build here shapes all your documents.
In simple words: Locations are the shelves and zones of your warehouse. Each one has a type that tells the system what kind of place it is.
Open Inventory → Configurations → Warehouse Management → Locations.
Settings
The Locations menu appears only when Locations is on.
- Go to
Inventory → Settings → Manage Warehouses. - Turn on Locations ("Track product location in your warehouse").
- Click Save changes.
Overview
The list shows the Location (full path), Type, Storage Category and Company. The list opens on the Internal tab. Tabs above it filter by type: All (19), Internal (10), Customer (1), Production (1), Vendor (1) and Archived (2). You can group by Warehouse, Type, Created At or Updated At.
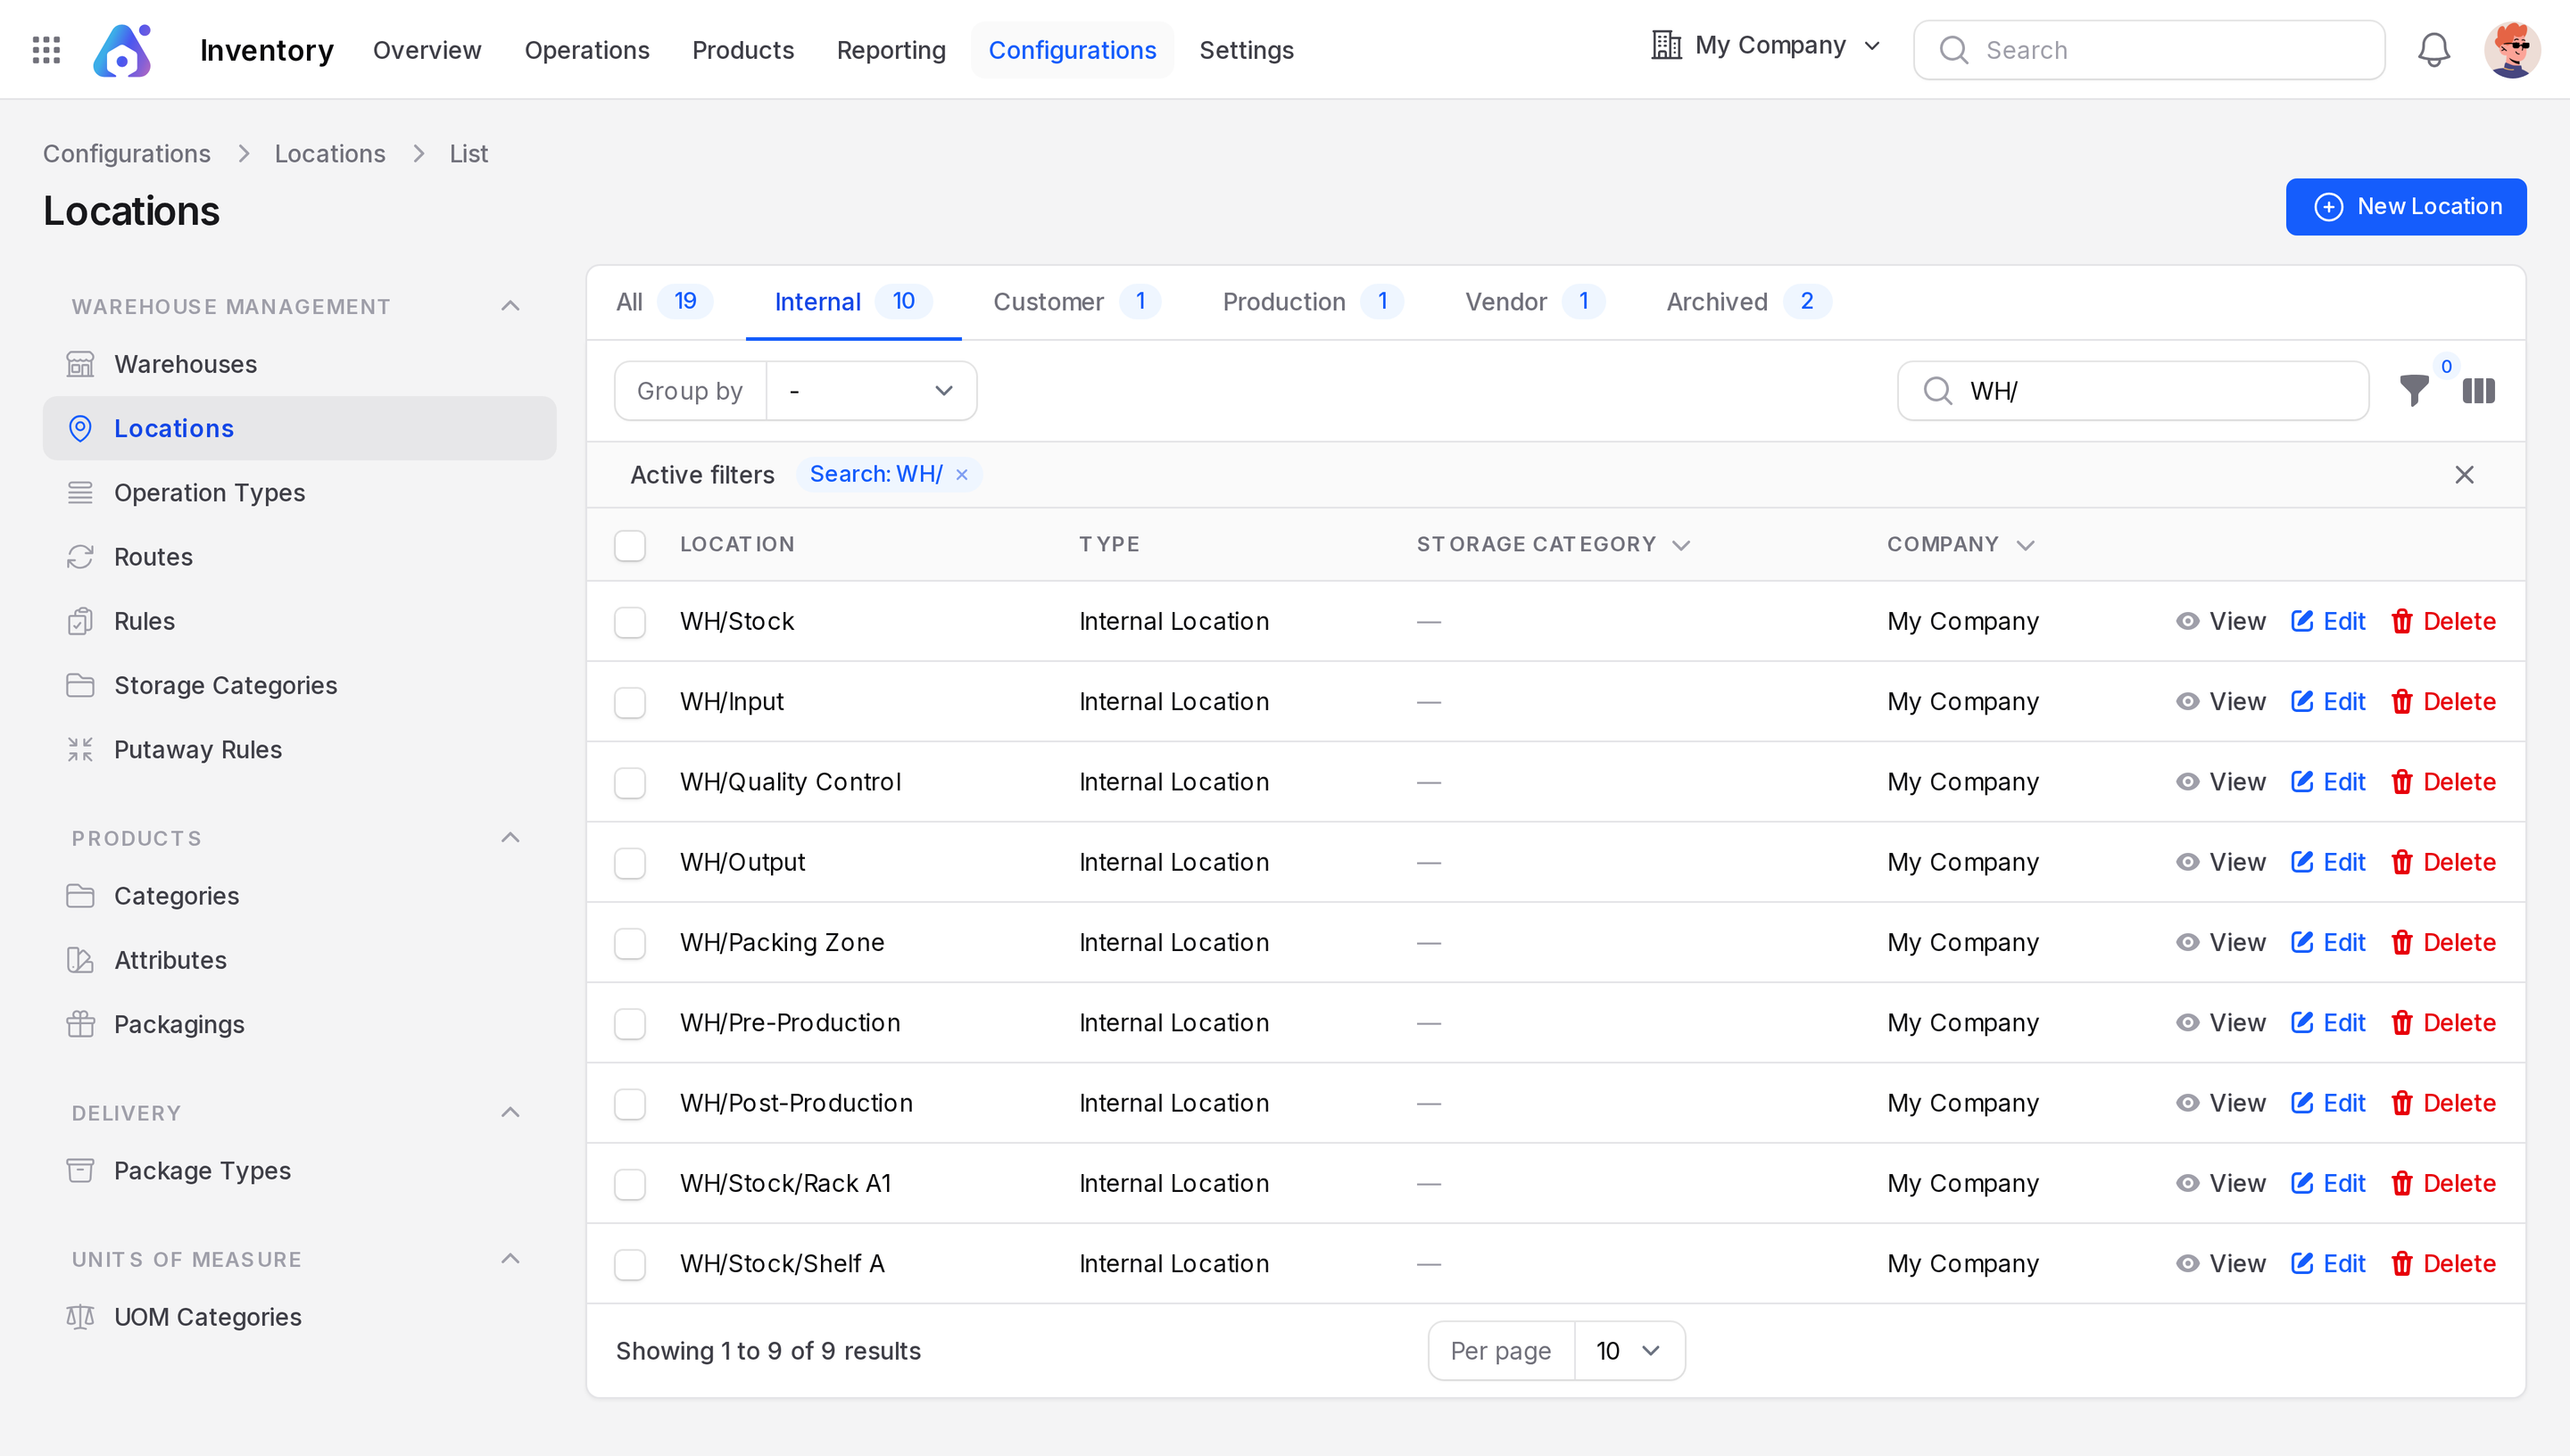
Parent and child locations
A child sits inside a parent. The full name joins the names with a slash, so Stock inside WH is WH/Stock. The dev app has this tree (it also holds sample locations such as WH/Stock/Rack A1 and WH/Stock/Shelf A):
Physical Locations
└── WH
    ├── Stock
    │   ├── Rack A1
    │   └── Shelf A
    ├── Input
    ├── Quality Control
    ├── Output
    ├── Packing Zone
    ├── Pre-Production
    └── Post-Production
Partners
├── Vendors
└── Customers
Virtual Locations
├── Inventory Adjustment
├── Production
└── Scrap
Stock in a child counts toward its parent. A location of type View is only a folder and never holds stock itself.
Location types
| Type | Meaning | Dev example |
|---|---|---|
| View | A grouping folder. It holds no stock. | WH, Partners |
| Internal Location | A real place in your warehouse where stock lives. | WH/Stock |
| Vendor Location | Stands for your suppliers. Receipts start here. | Partners/Vendors |
| Customer Location | Stands for your customers. Deliveries end here. | Partners/Customers |
| Transit Location | Goods on the way between sites. | Inter Warehouse Transit (archived) |
| Production | Where materials are used up or made in manufacturing. | Virtual Locations/Production |
| Inventory Loss | Where lost, scrapped or corrected stock goes. | Virtual Locations/Scrap |
Create a location
- Click New Location.
- Fill the two cards, General and Settings.
- Click Create.
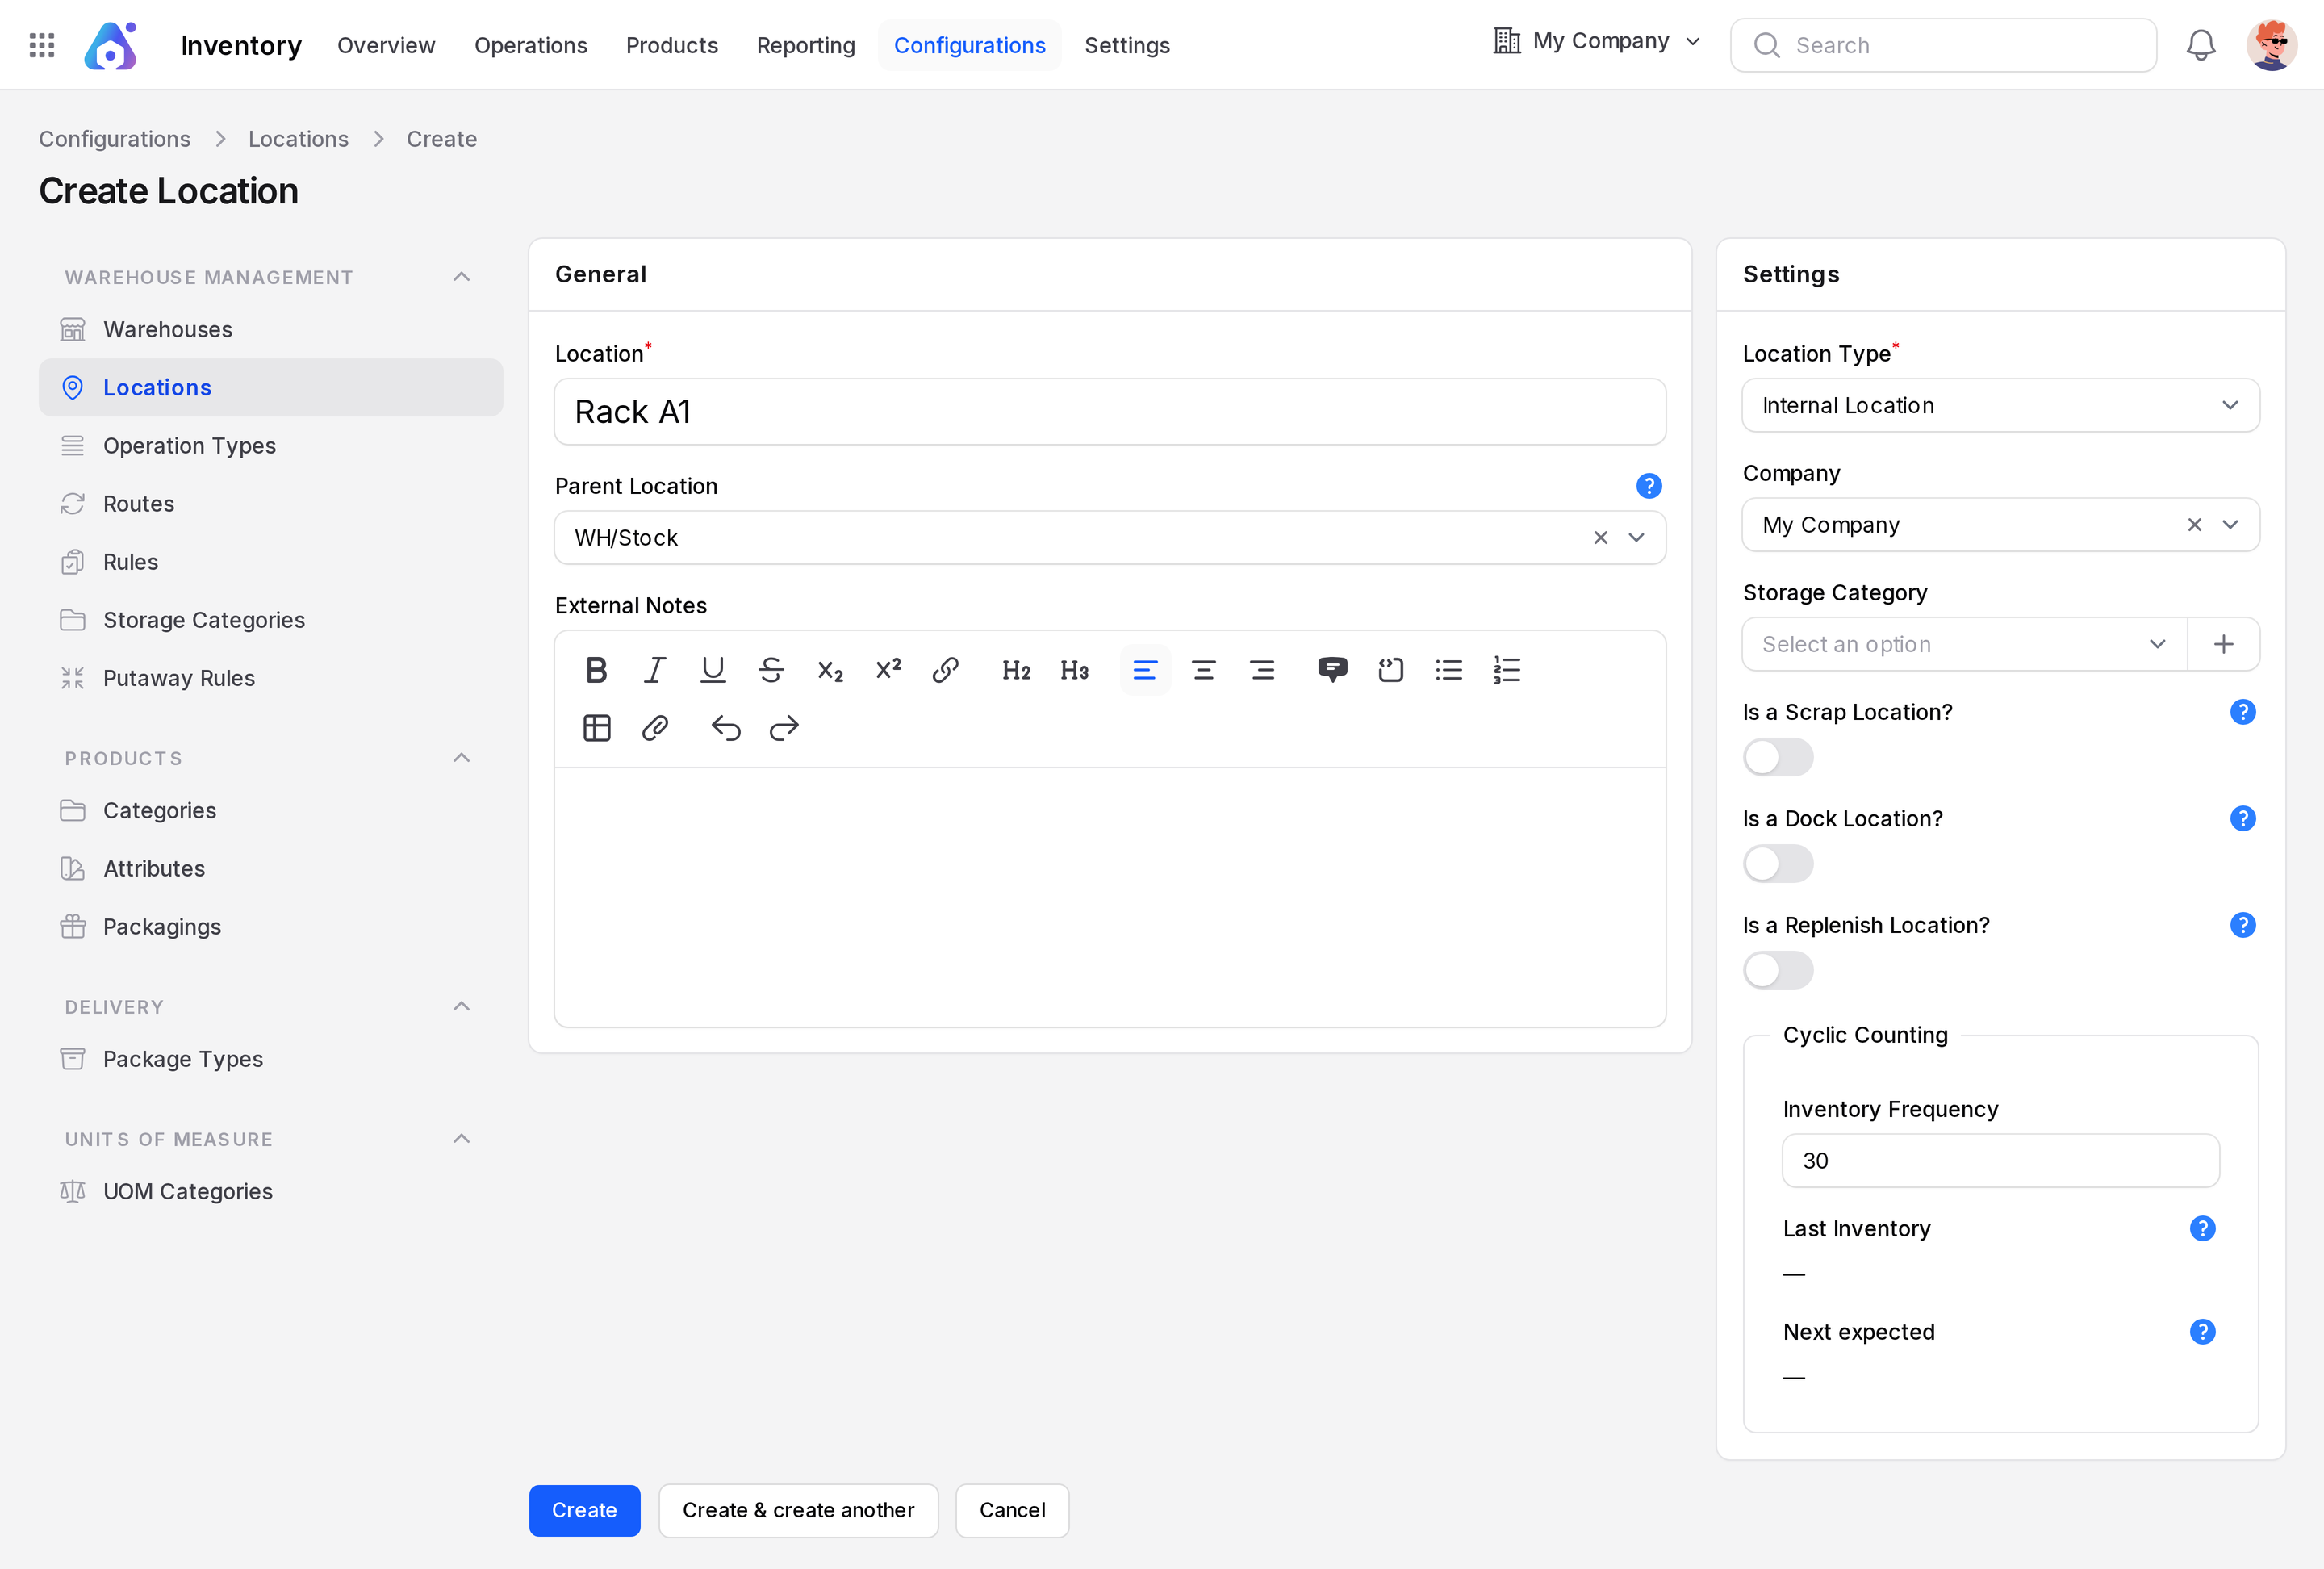
General
- Location: The short name, for example Rack A1. Required.
- Parent Location: The place that contains it, such as WH/Stock. The full name becomes WH/Stock/Rack A1.
- External Notes: Free text about the place. It is a rich text box.
Settings
- Location Type: Required. The default is Internal Location.
- Company: Your current company.
- Storage Category: Limits what the place can hold. Click + next to it to create a category on the spot. See Storage categories.
The card also has three toggles:
- Is a Scrap Location? Marks a place for scrapped or damaged goods.
- Is a Dock Location? Marks a place for goods ready to ship.
- Is a Replenish Location? Marks a place used to refill stock. WH/Stock has this on.
The fields you see depend on the type.
| Type | Fields shown |
|---|---|
| View, Vendor, Customer, Production | Company, Is a Dock Location? |
| Internal Location | Storage Category, scrap, dock, replenish, cyclic counting |
| Inventory Loss | Scrap and dock toggles |
| Transit Location | Dock toggle and cyclic counting |
Cyclic counting
Cyclic counting lets you count one location on a regular schedule instead of once a year. It shows for Internal and Transit locations.
- Inventory Frequency: The number of days between counts. 0 means no cyclic schedule.
- Last Inventory: The date of the last count. The system fills it.
- Next expected: The next planned count. The system works it out.
Print barcodes
- Tick one or more locations in the list.
- Open the bulk actions menu.
- Click Print Barcode.
The bulk actions menu also has Restore selected, Delete selected and Force delete selected.
The edit page also has a Print button for one location. Barcodes help in Scan operations.
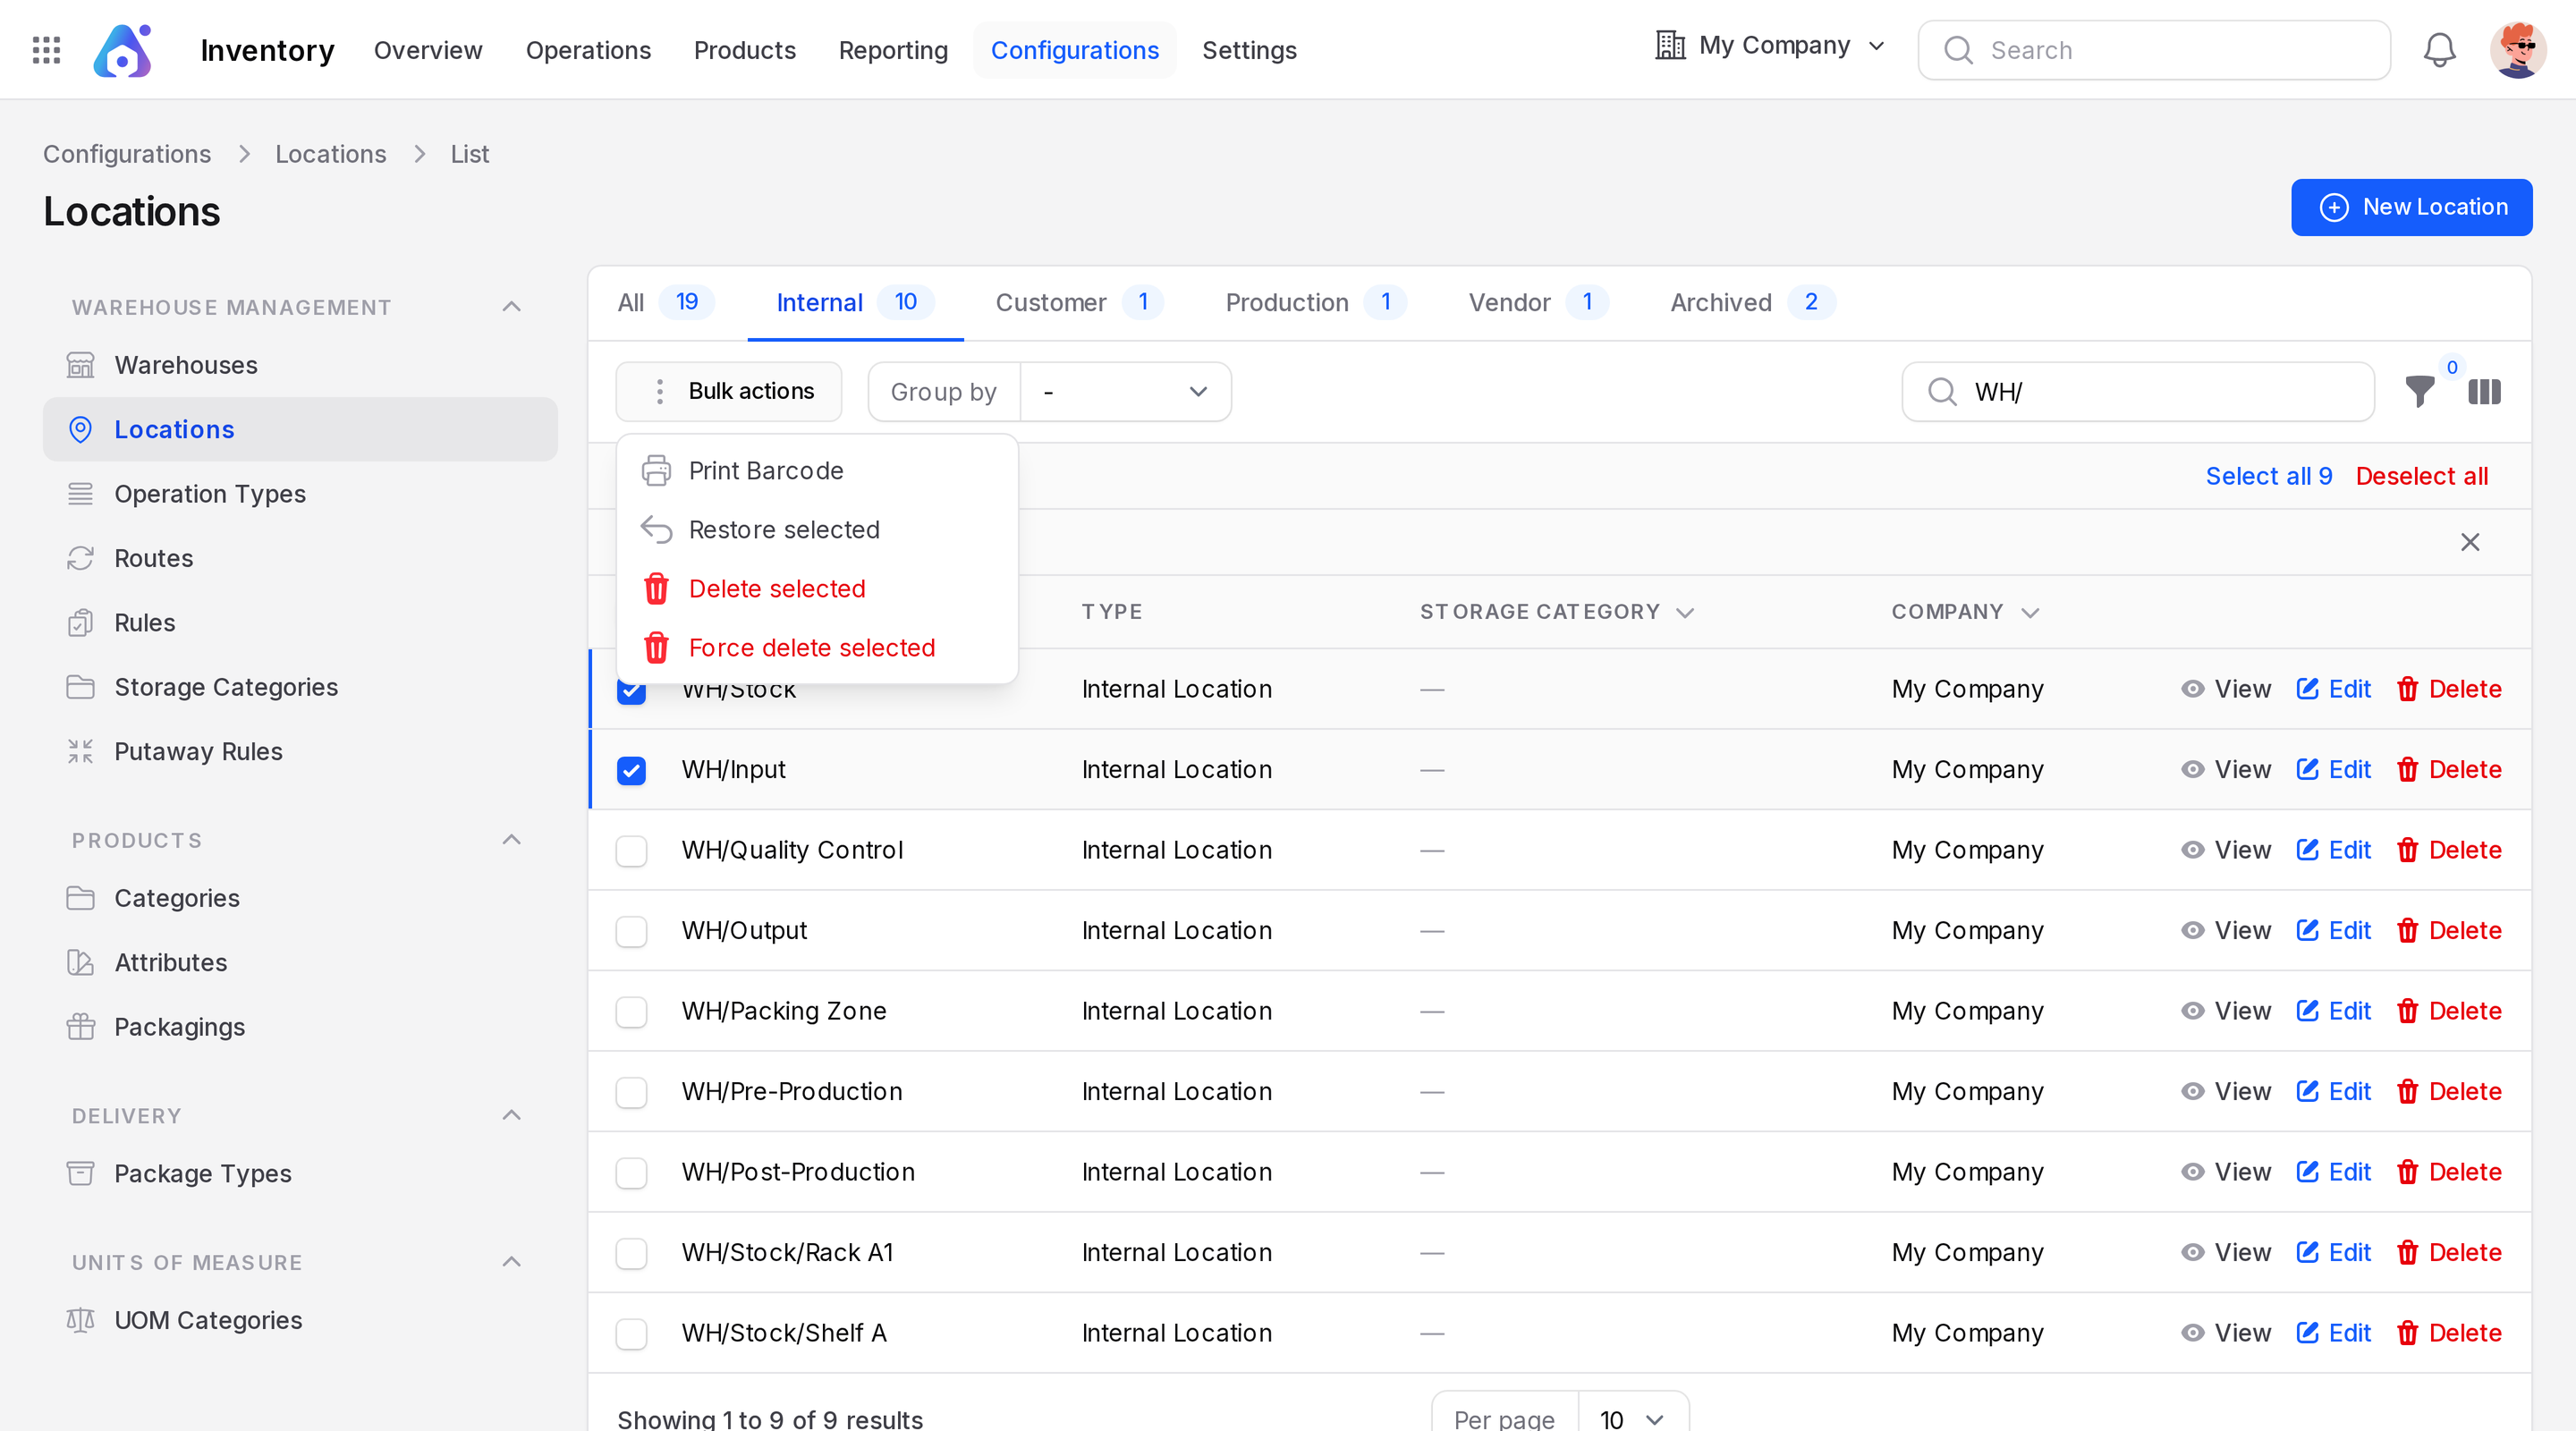
Actions and statuses
- Edit and View open the record.
- Delete archives it. A location still used by stock or documents cannot be deleted.
- Archived locations appear under Archived and can be restored.