

Manage requests
Management is where you review every time off request and decide on it. You can approve a request, refuse it, open it or change it. You can also create a request for someone else.
In simple words: Open the list, find the request, and use the three-dot menu on its row to Approve or Refuse.
Menu: Time Off → Management → Time off. The page is titled Time Offs.
Before you start
Requests must exist. See Request time off. The employee needs an approved allocation if the type requires one.
Overview
The page opens on the Waiting For Me tab. Tabs sit above the list.
- Default: all requests.
- Waiting For Me: requests that are To Approve.
- Second Approval, Approved: other saved views of the list.
Click the three-dot button next to the tabs. The Views panel opens with Favorite Views (Waiting For Me, Second Approval, Approved) and Preset Views (Currently Valid, My Team, My Department, Refused). Reset sits at the top of the panel.
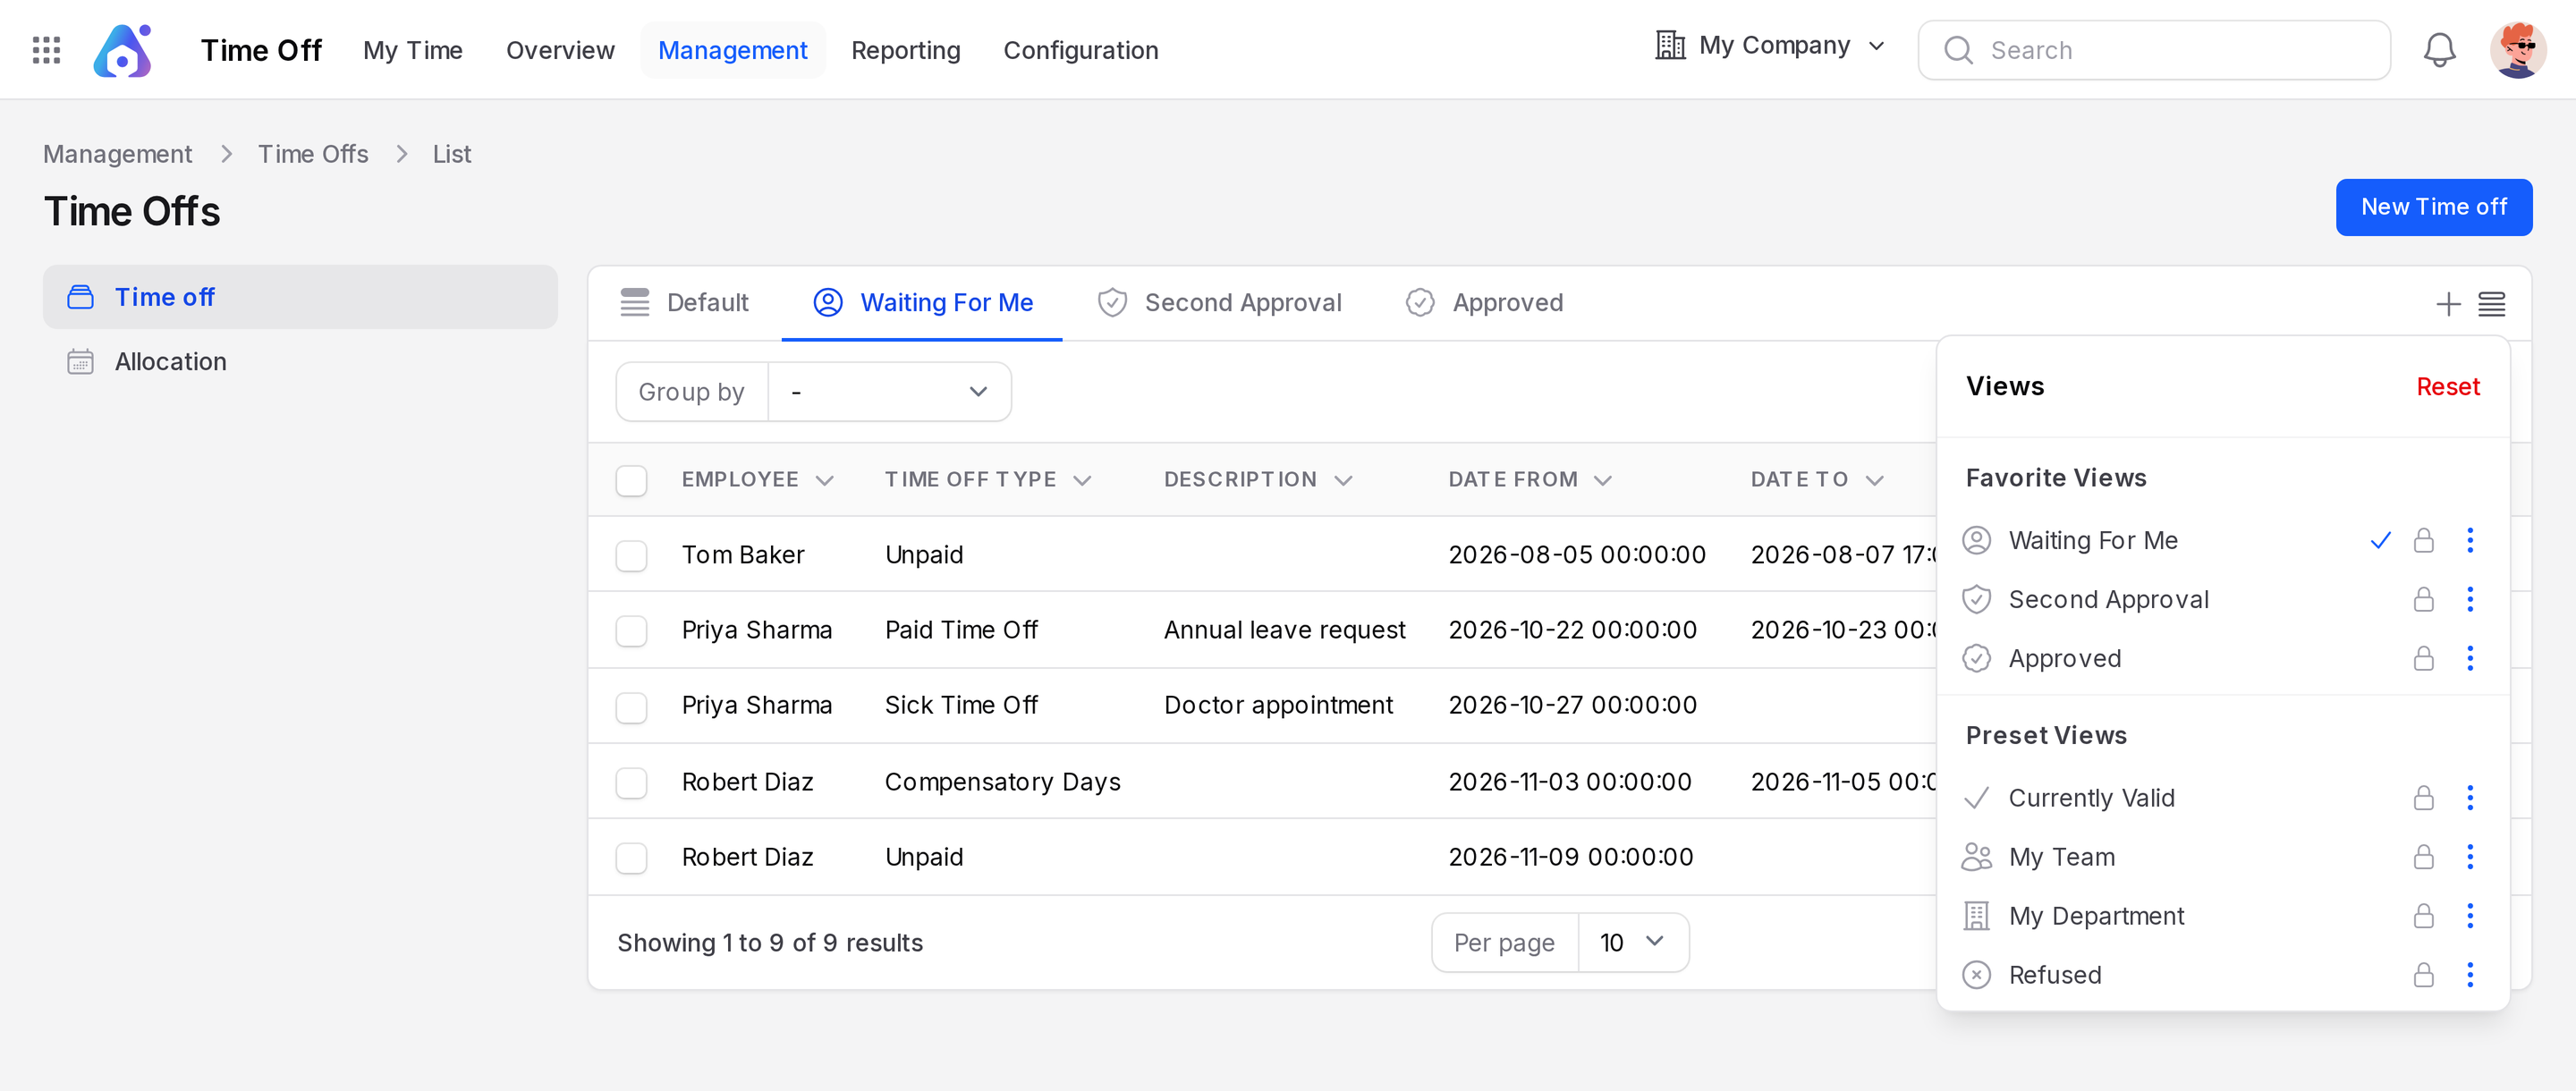
- Columns: Employee, Time Off Type, Description, Date From, Date To, Duration, Status.
- Group by: Employee, Time Off Type, Status, Start Date, End Date.
- Search, pagination (5, 10, 25 or 50 rows) and Delete selected.
Approve a request
Sarah Mitchell's Paid Time Off request for 3 days is To Approve.
- Open
Time Off → Management → Time off. Click Waiting For Me. - Find Sarah's row. Click the three-dot icon at the end of the row. The clock icon beside it schedules an activity.
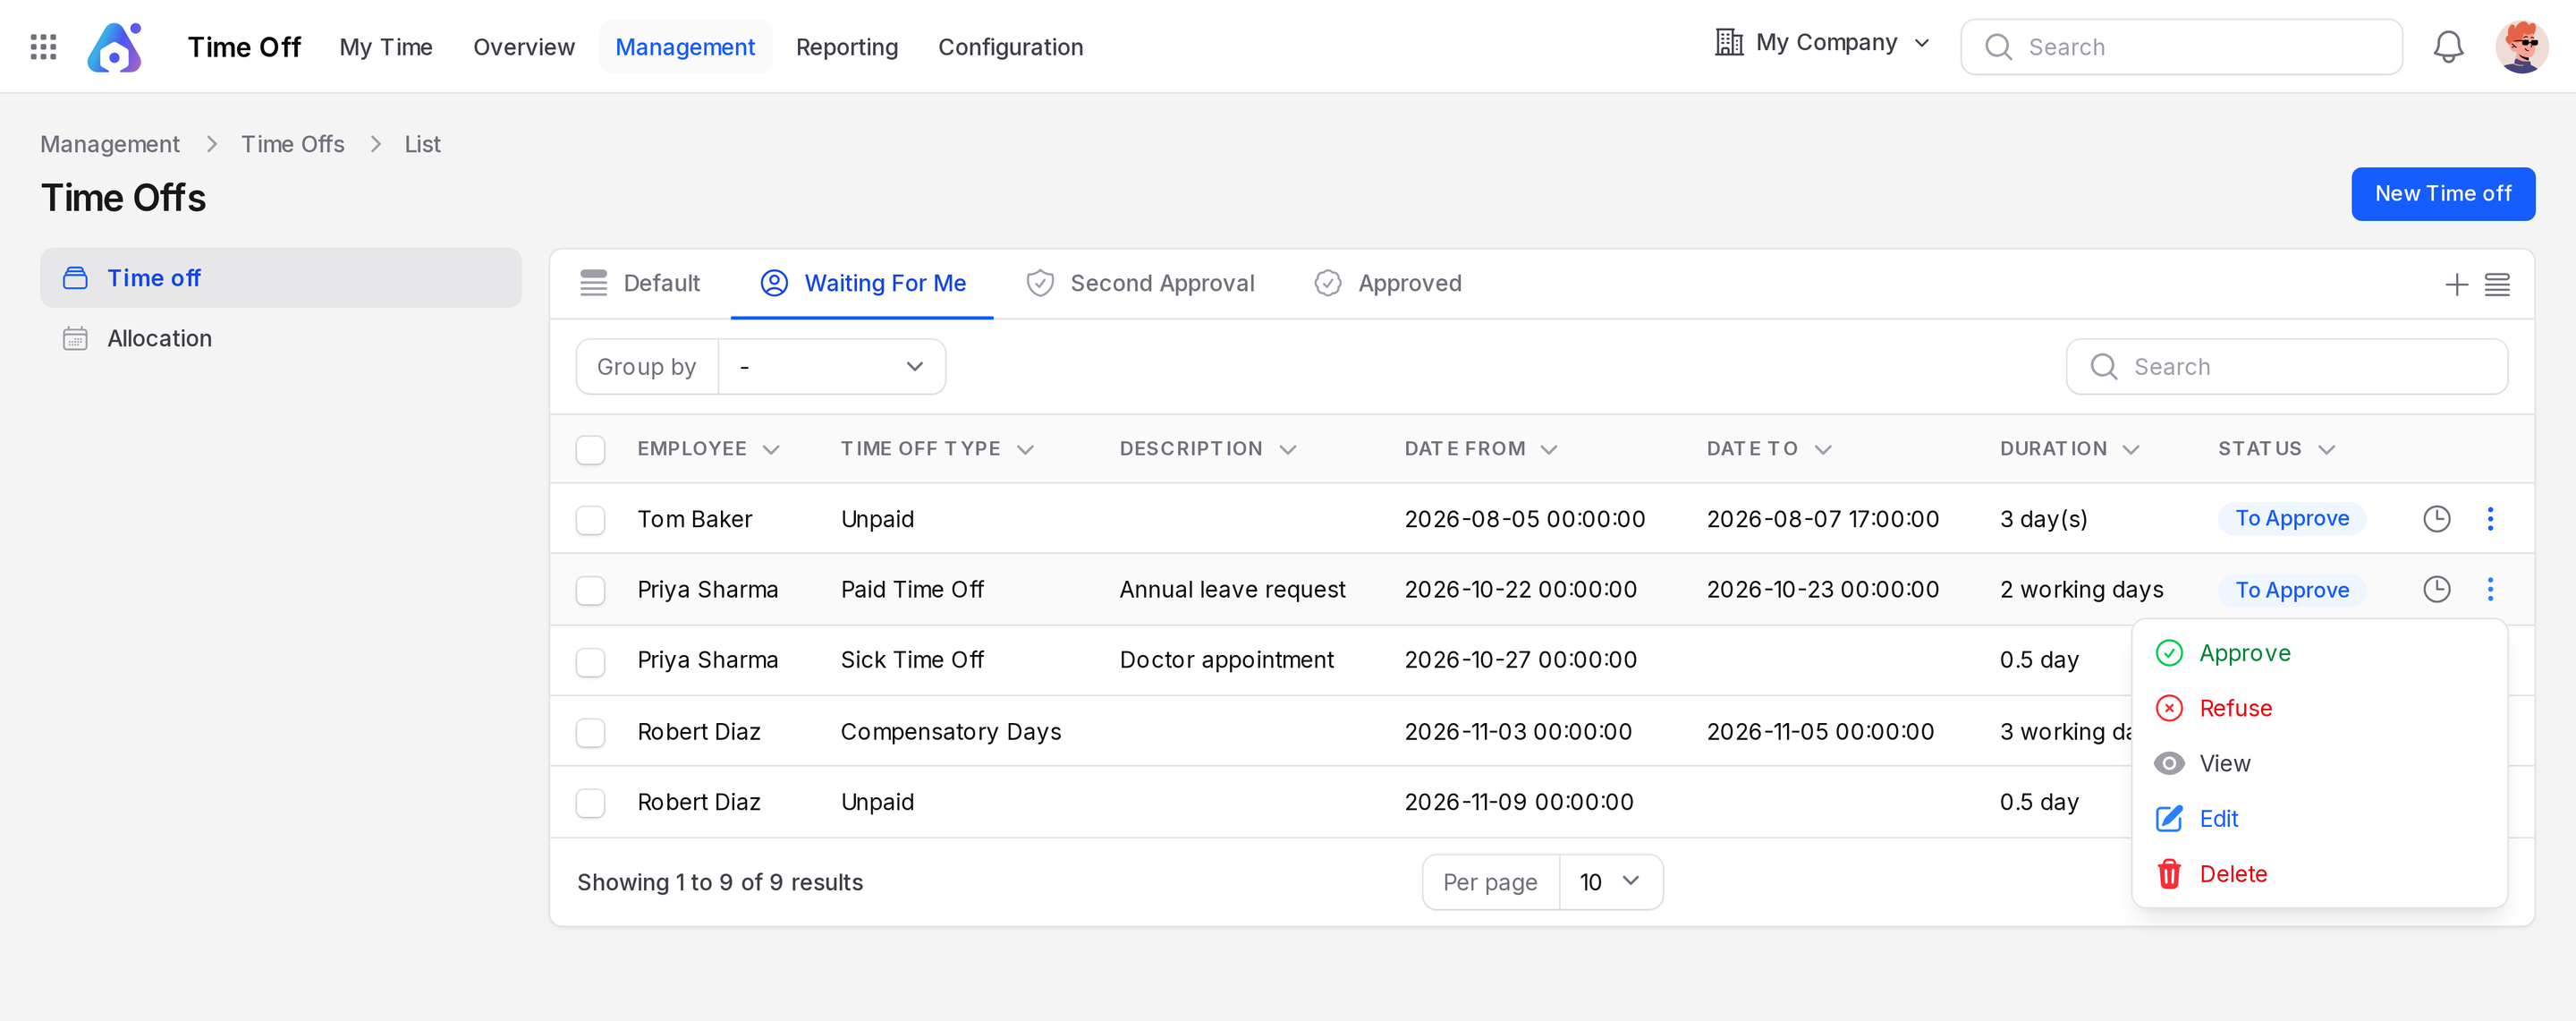
- Click Approve.
- A Time Off approved message appears and the Status badge changes to Approved. No confirmation window opens.
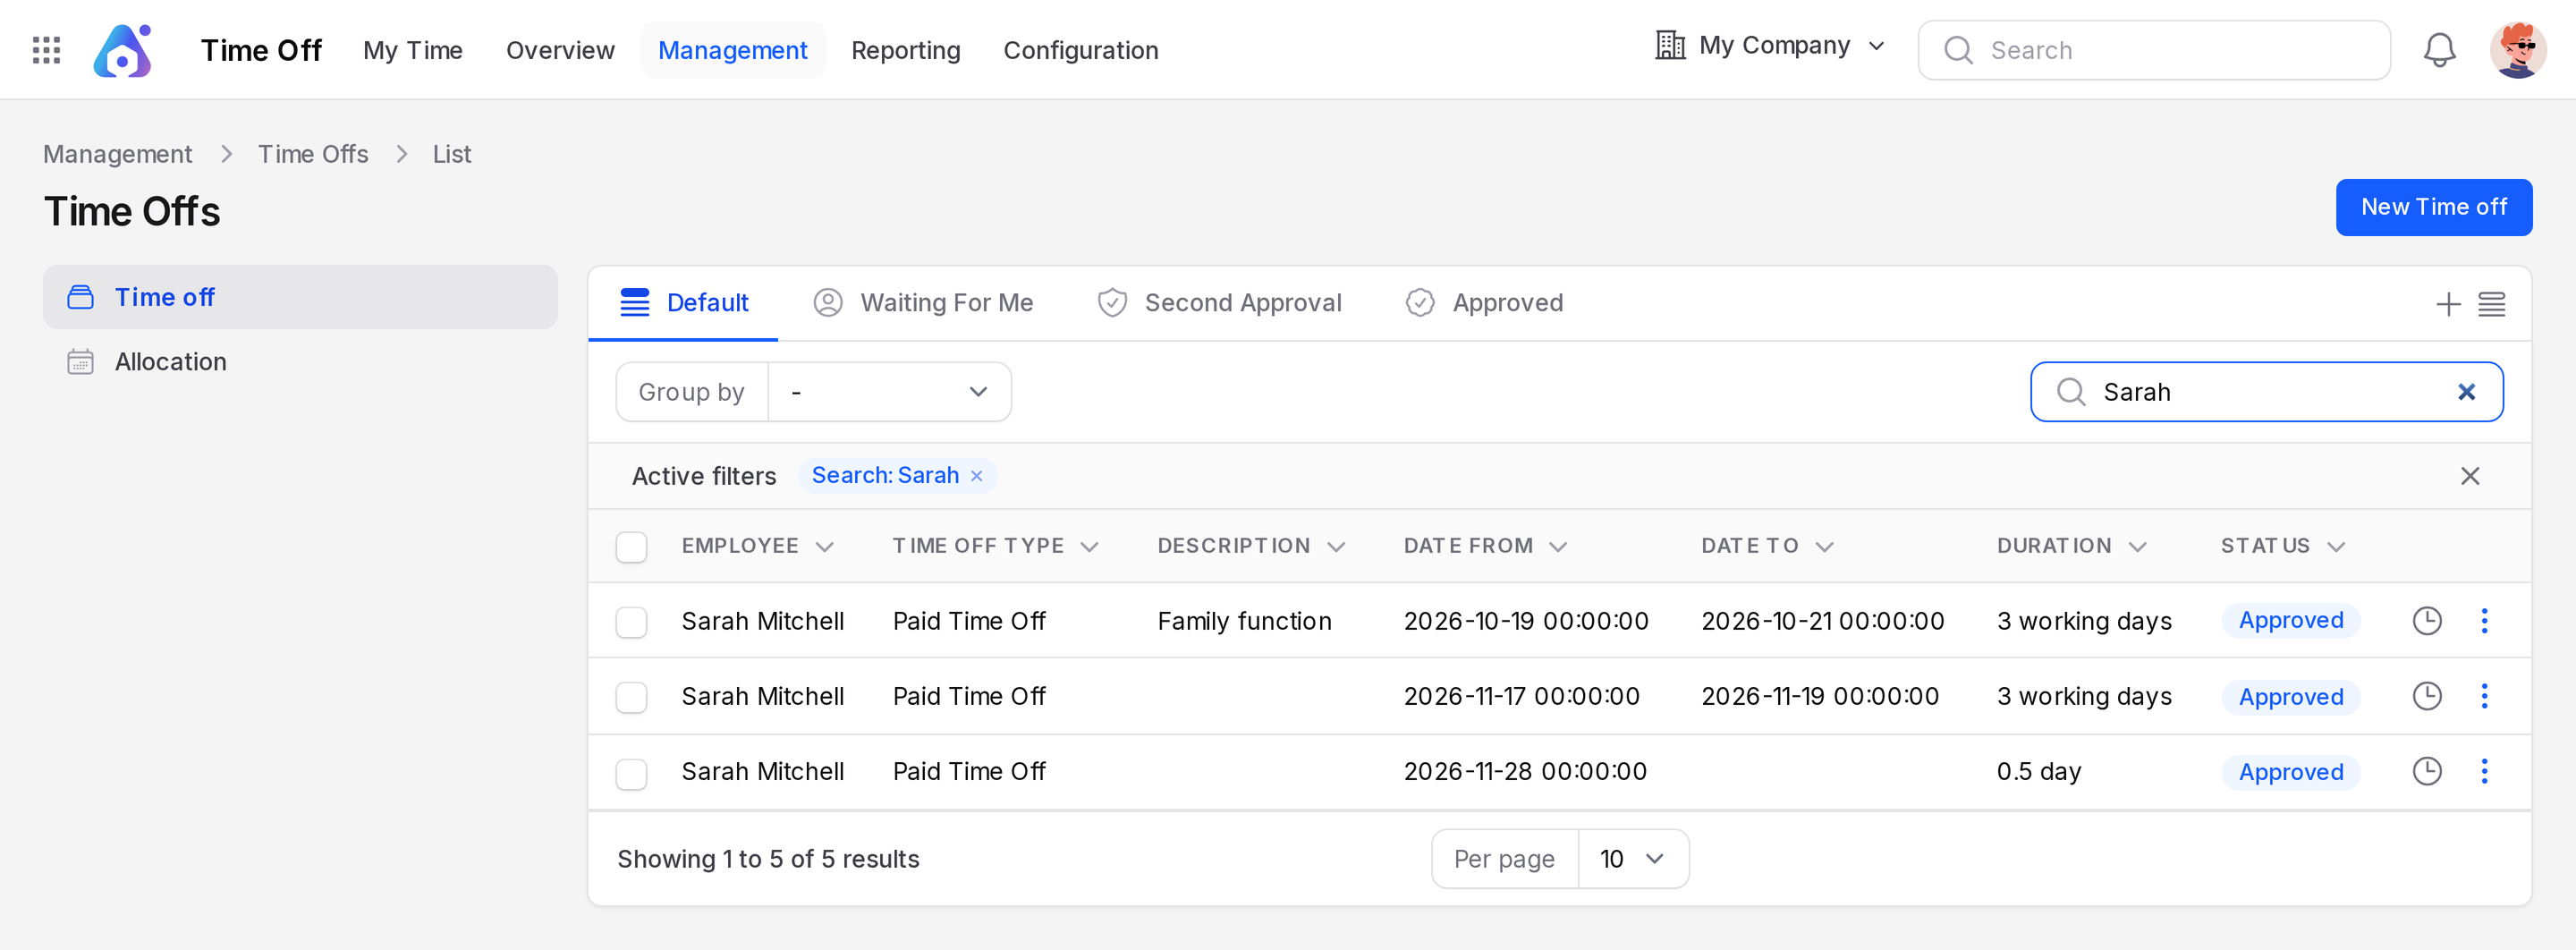
Sarah's Paid Time Off card on My Time shows 17.0. It already showed 17.0 while the request was To Approve.
Refuse a request
Priya Sharma asked for 1 day of Sick Time Off on 26 October.
- Click the three-dot icon on Priya's row.
- Click Refuse.
- A Time Off refused message appears and the Status badge shows Refused.
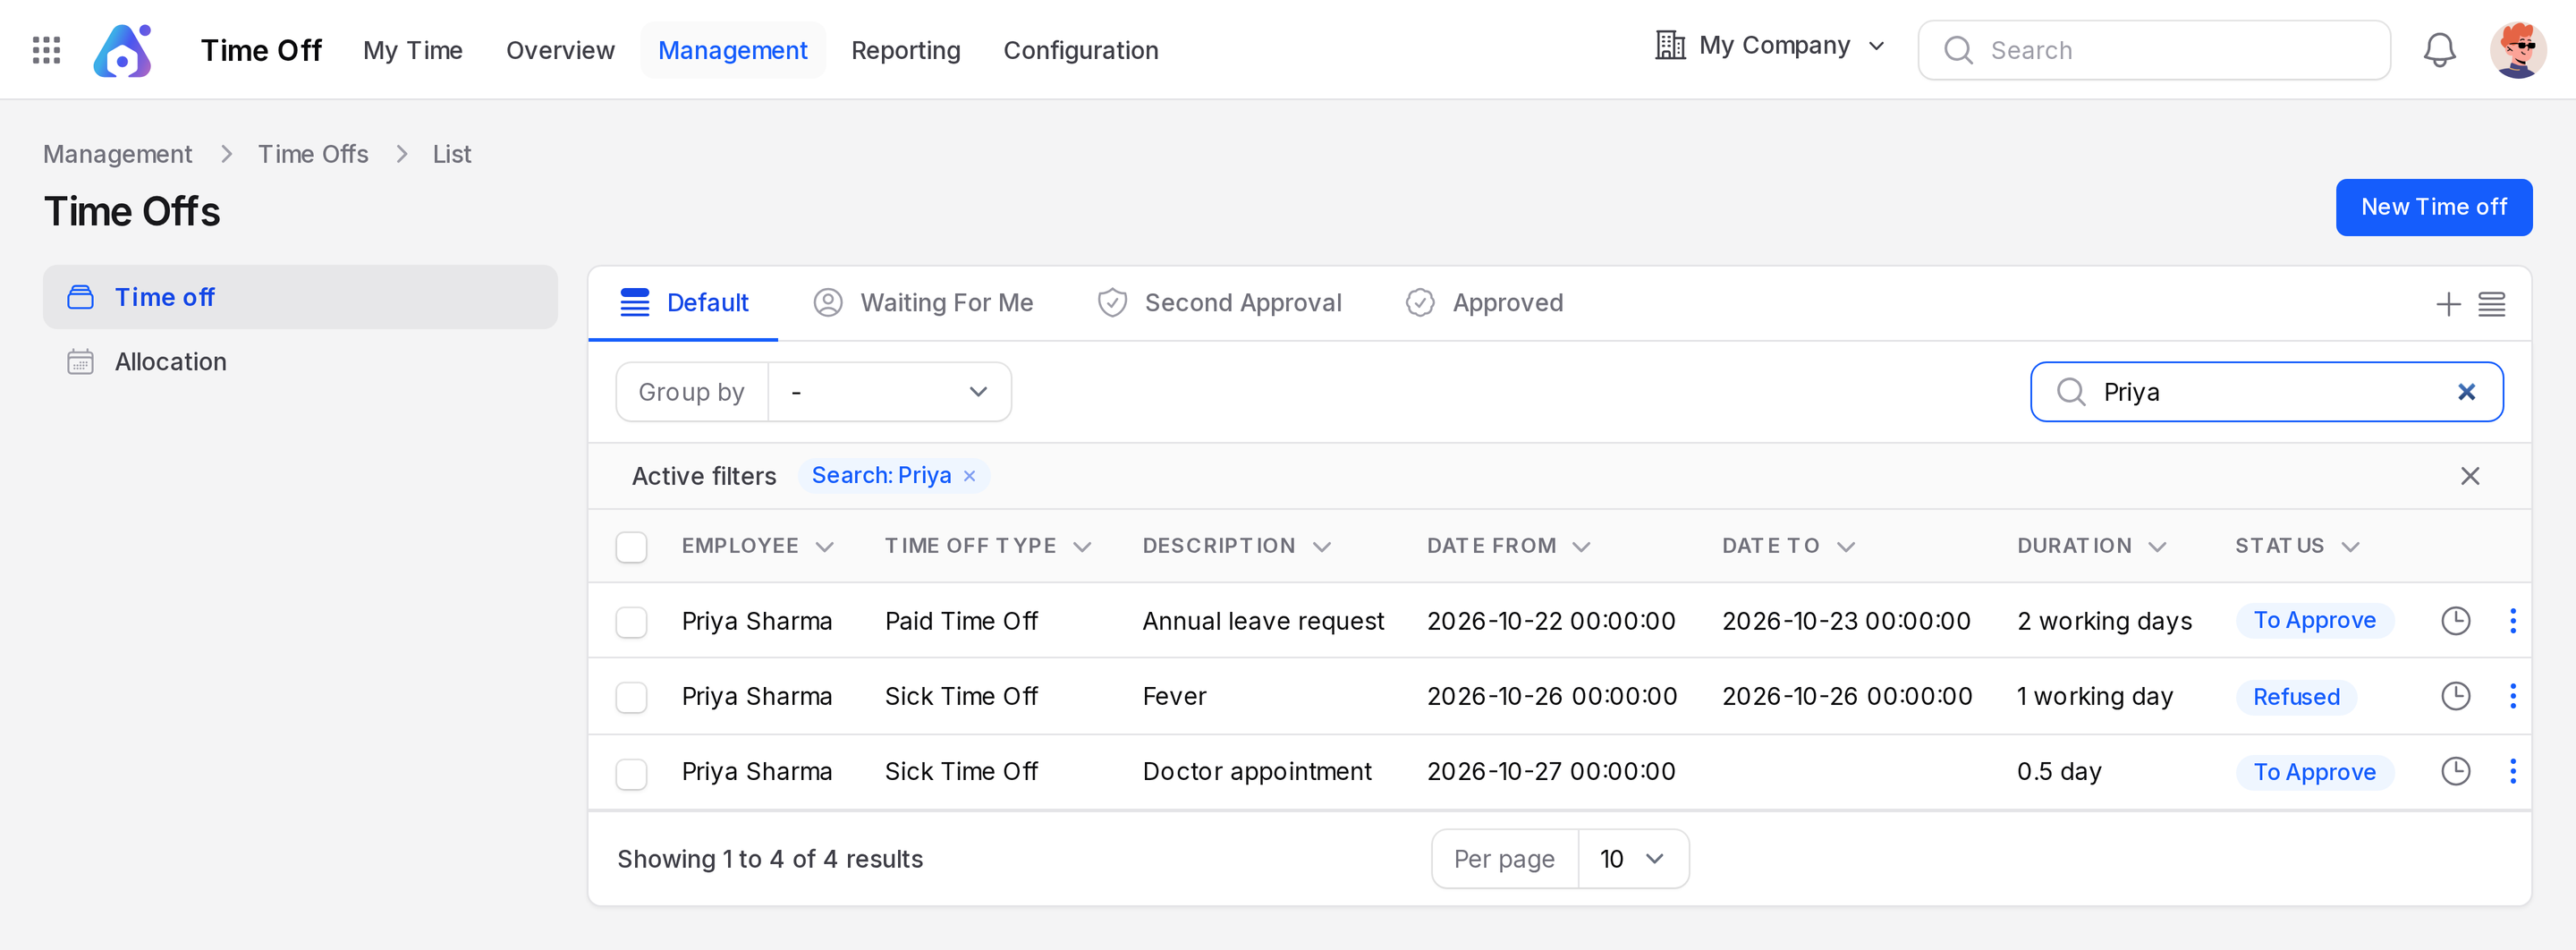
A refused request does not use any balance. Refuse does not ask for a reason. To explain the decision, open the request View page and write in Chatter.
Row actions
Open the three-dot menu on a row to use these.
- Approve: hidden when the request is already Approved. It reads Validate when the status is Second Approval.
- Refuse: hidden when the request is already Refused.
- View: opens the read only page.
- Edit: opens the form.
- Delete: removes the request. Its days no longer count against the balance.
Clicking a row also opens View. The View and Edit pages have no Approve or Refuse button, so use the list.
Create or edit as a manager
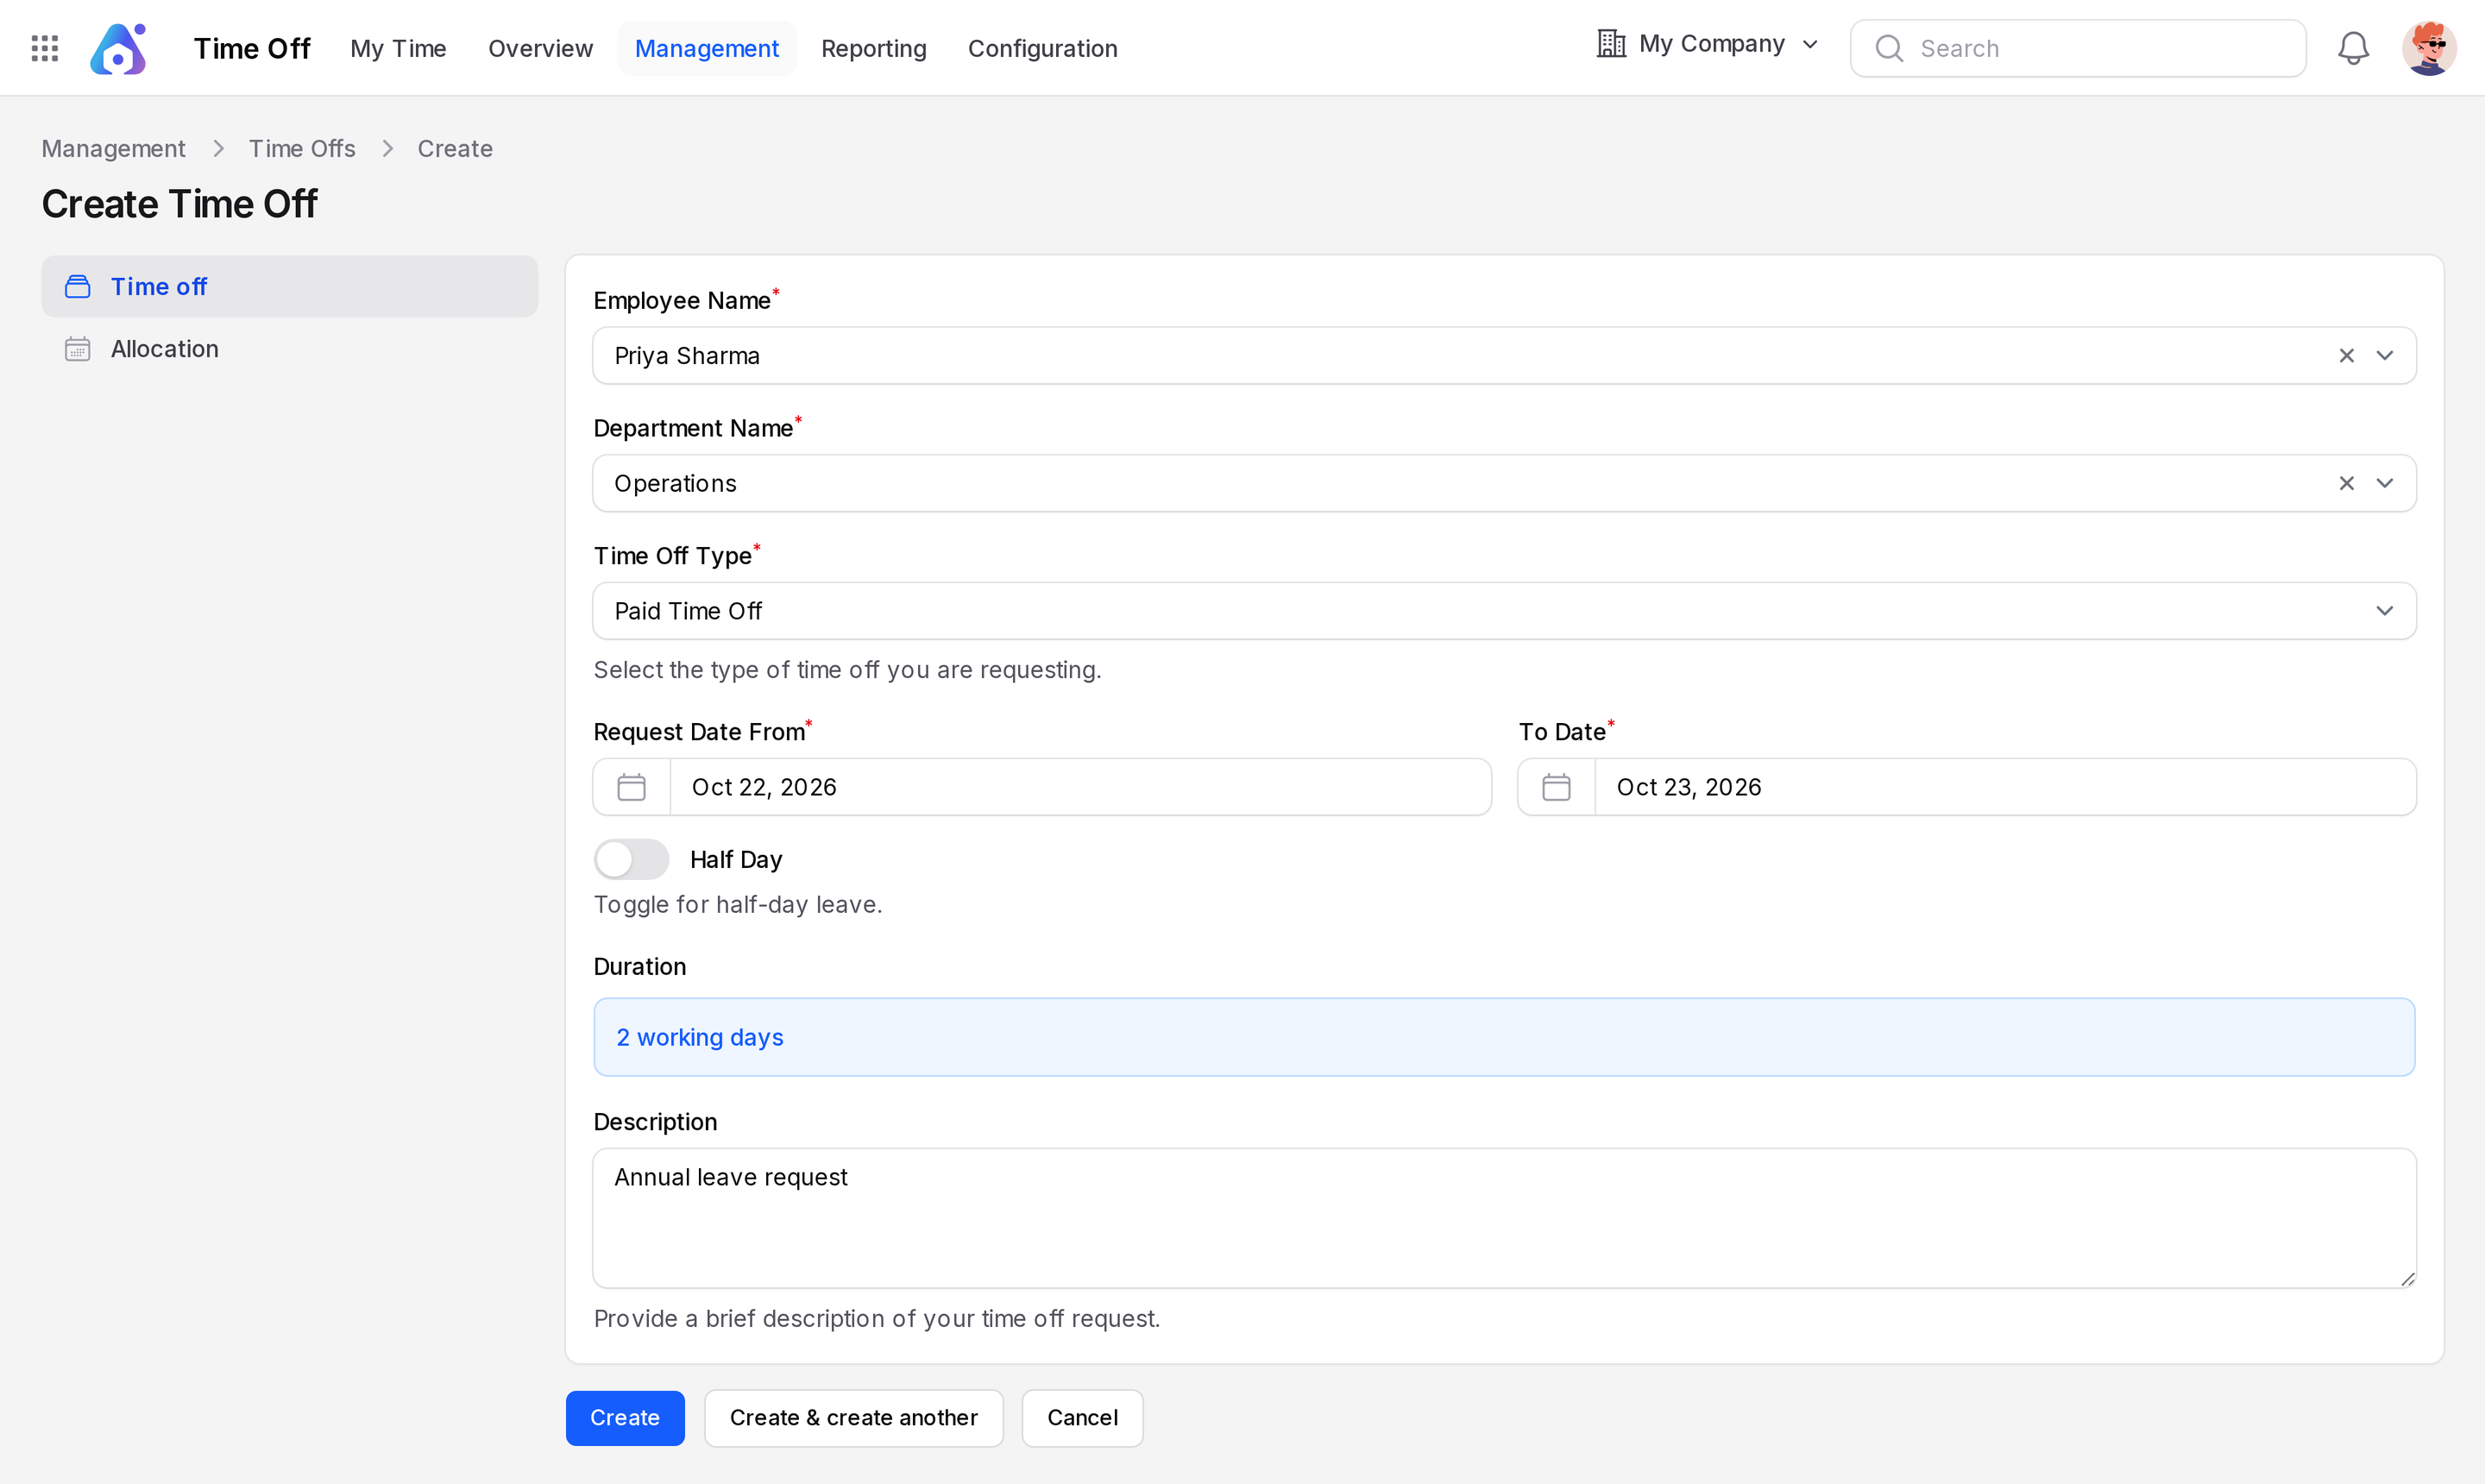
Click New Time off. The form is the same as in Request time off, plus Employee Name and Department Name, both required. Department Name fills in when you choose the employee. Use it to enter leave on behalf of someone. The page is titled Create Time Off. After you click Create, a Time Off created message appears and the app opens the request View page.
Where the status shows
The Status badge appears in the Management list, the My Time off list and the event View window.
TIP
Use Group by → Status to see requests grouped as To Approve, Approved and Refused.