

Routes and rules
Routes and rules are the engine behind every flow in Aureus. A rule describes one step: where goods come from, where they go and which document is created. A route groups several rules under one name. Most users never edit them, but understanding them helps you fix unusual flows.
In simple words: A rule is one step. A route is a named list of steps.
Open them from Inventory → Configurations → Warehouse Management → Routes and → Rules.
Gate
These menus appear only when Inventory → Settings → Manage Warehouses → Multi Steps Routes is on. Locations must be on too.
Careful with standard rules
Aureus creates standard routes and rules for each warehouse. Do not edit or delete them. Change the step options on the warehouse form instead. Test any new rule on a sample order first.
Routes
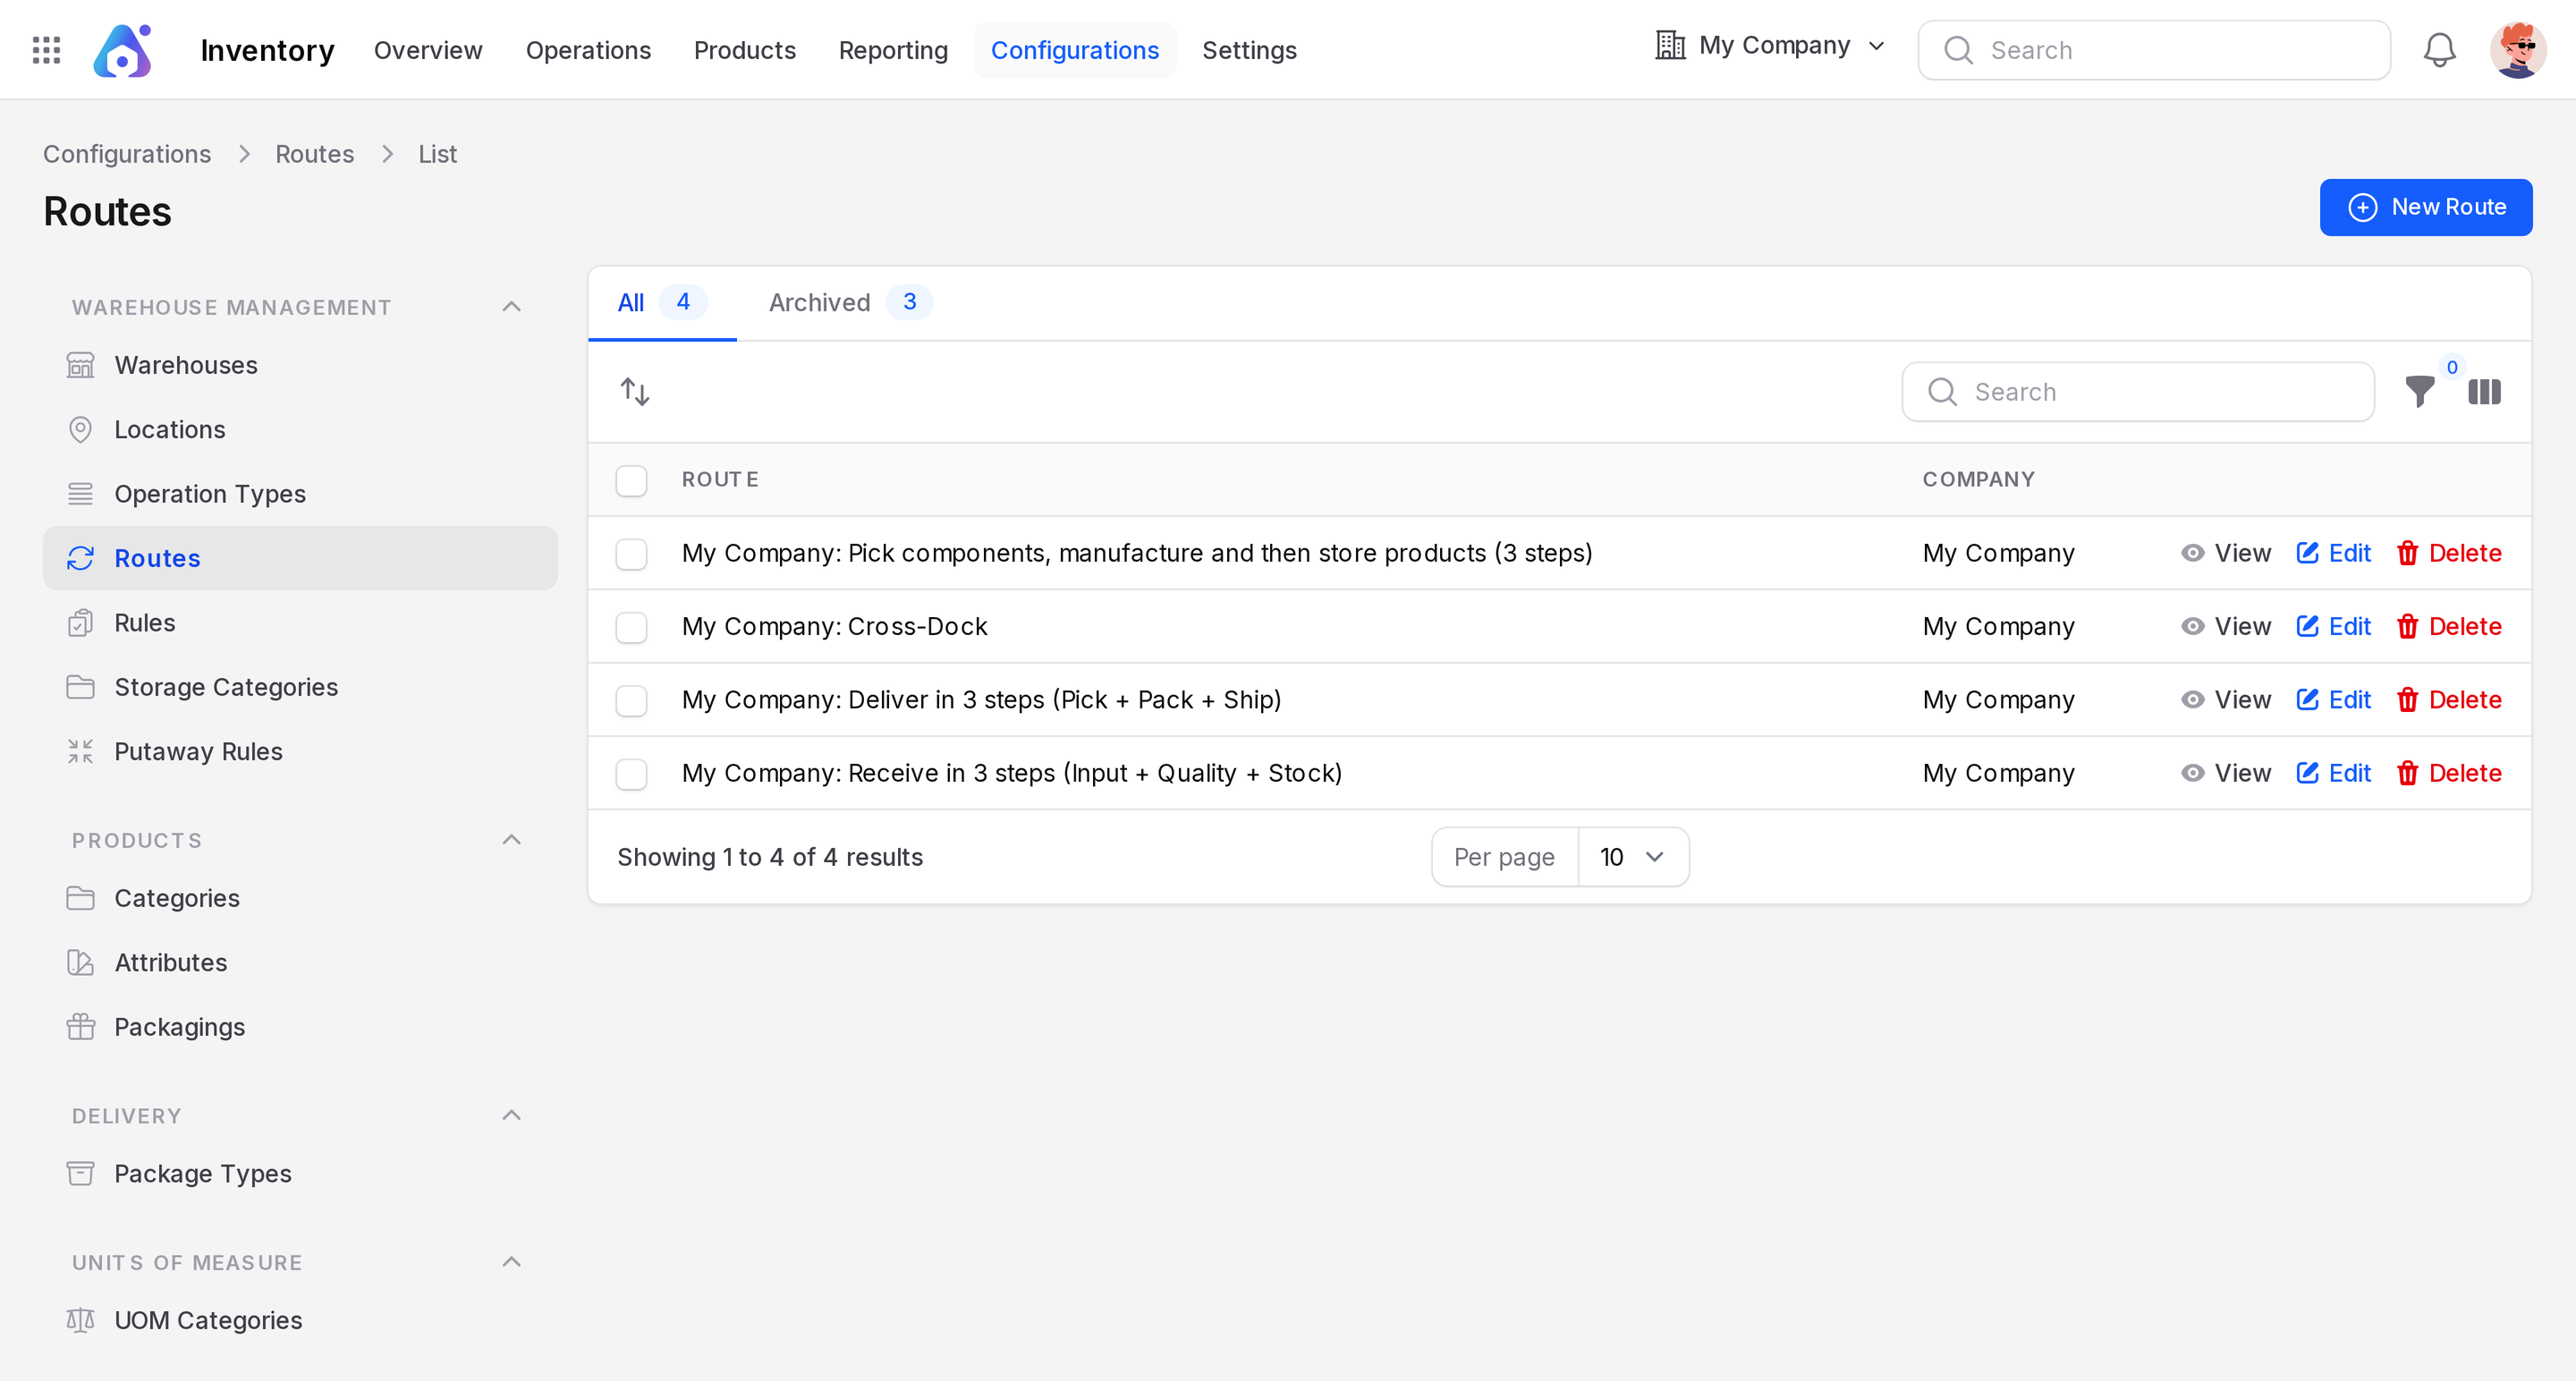
The Routes list shows Route and Company, with tabs All and Archived. There are 4 active routes, and the Archived tab holds 3. Click New Route.
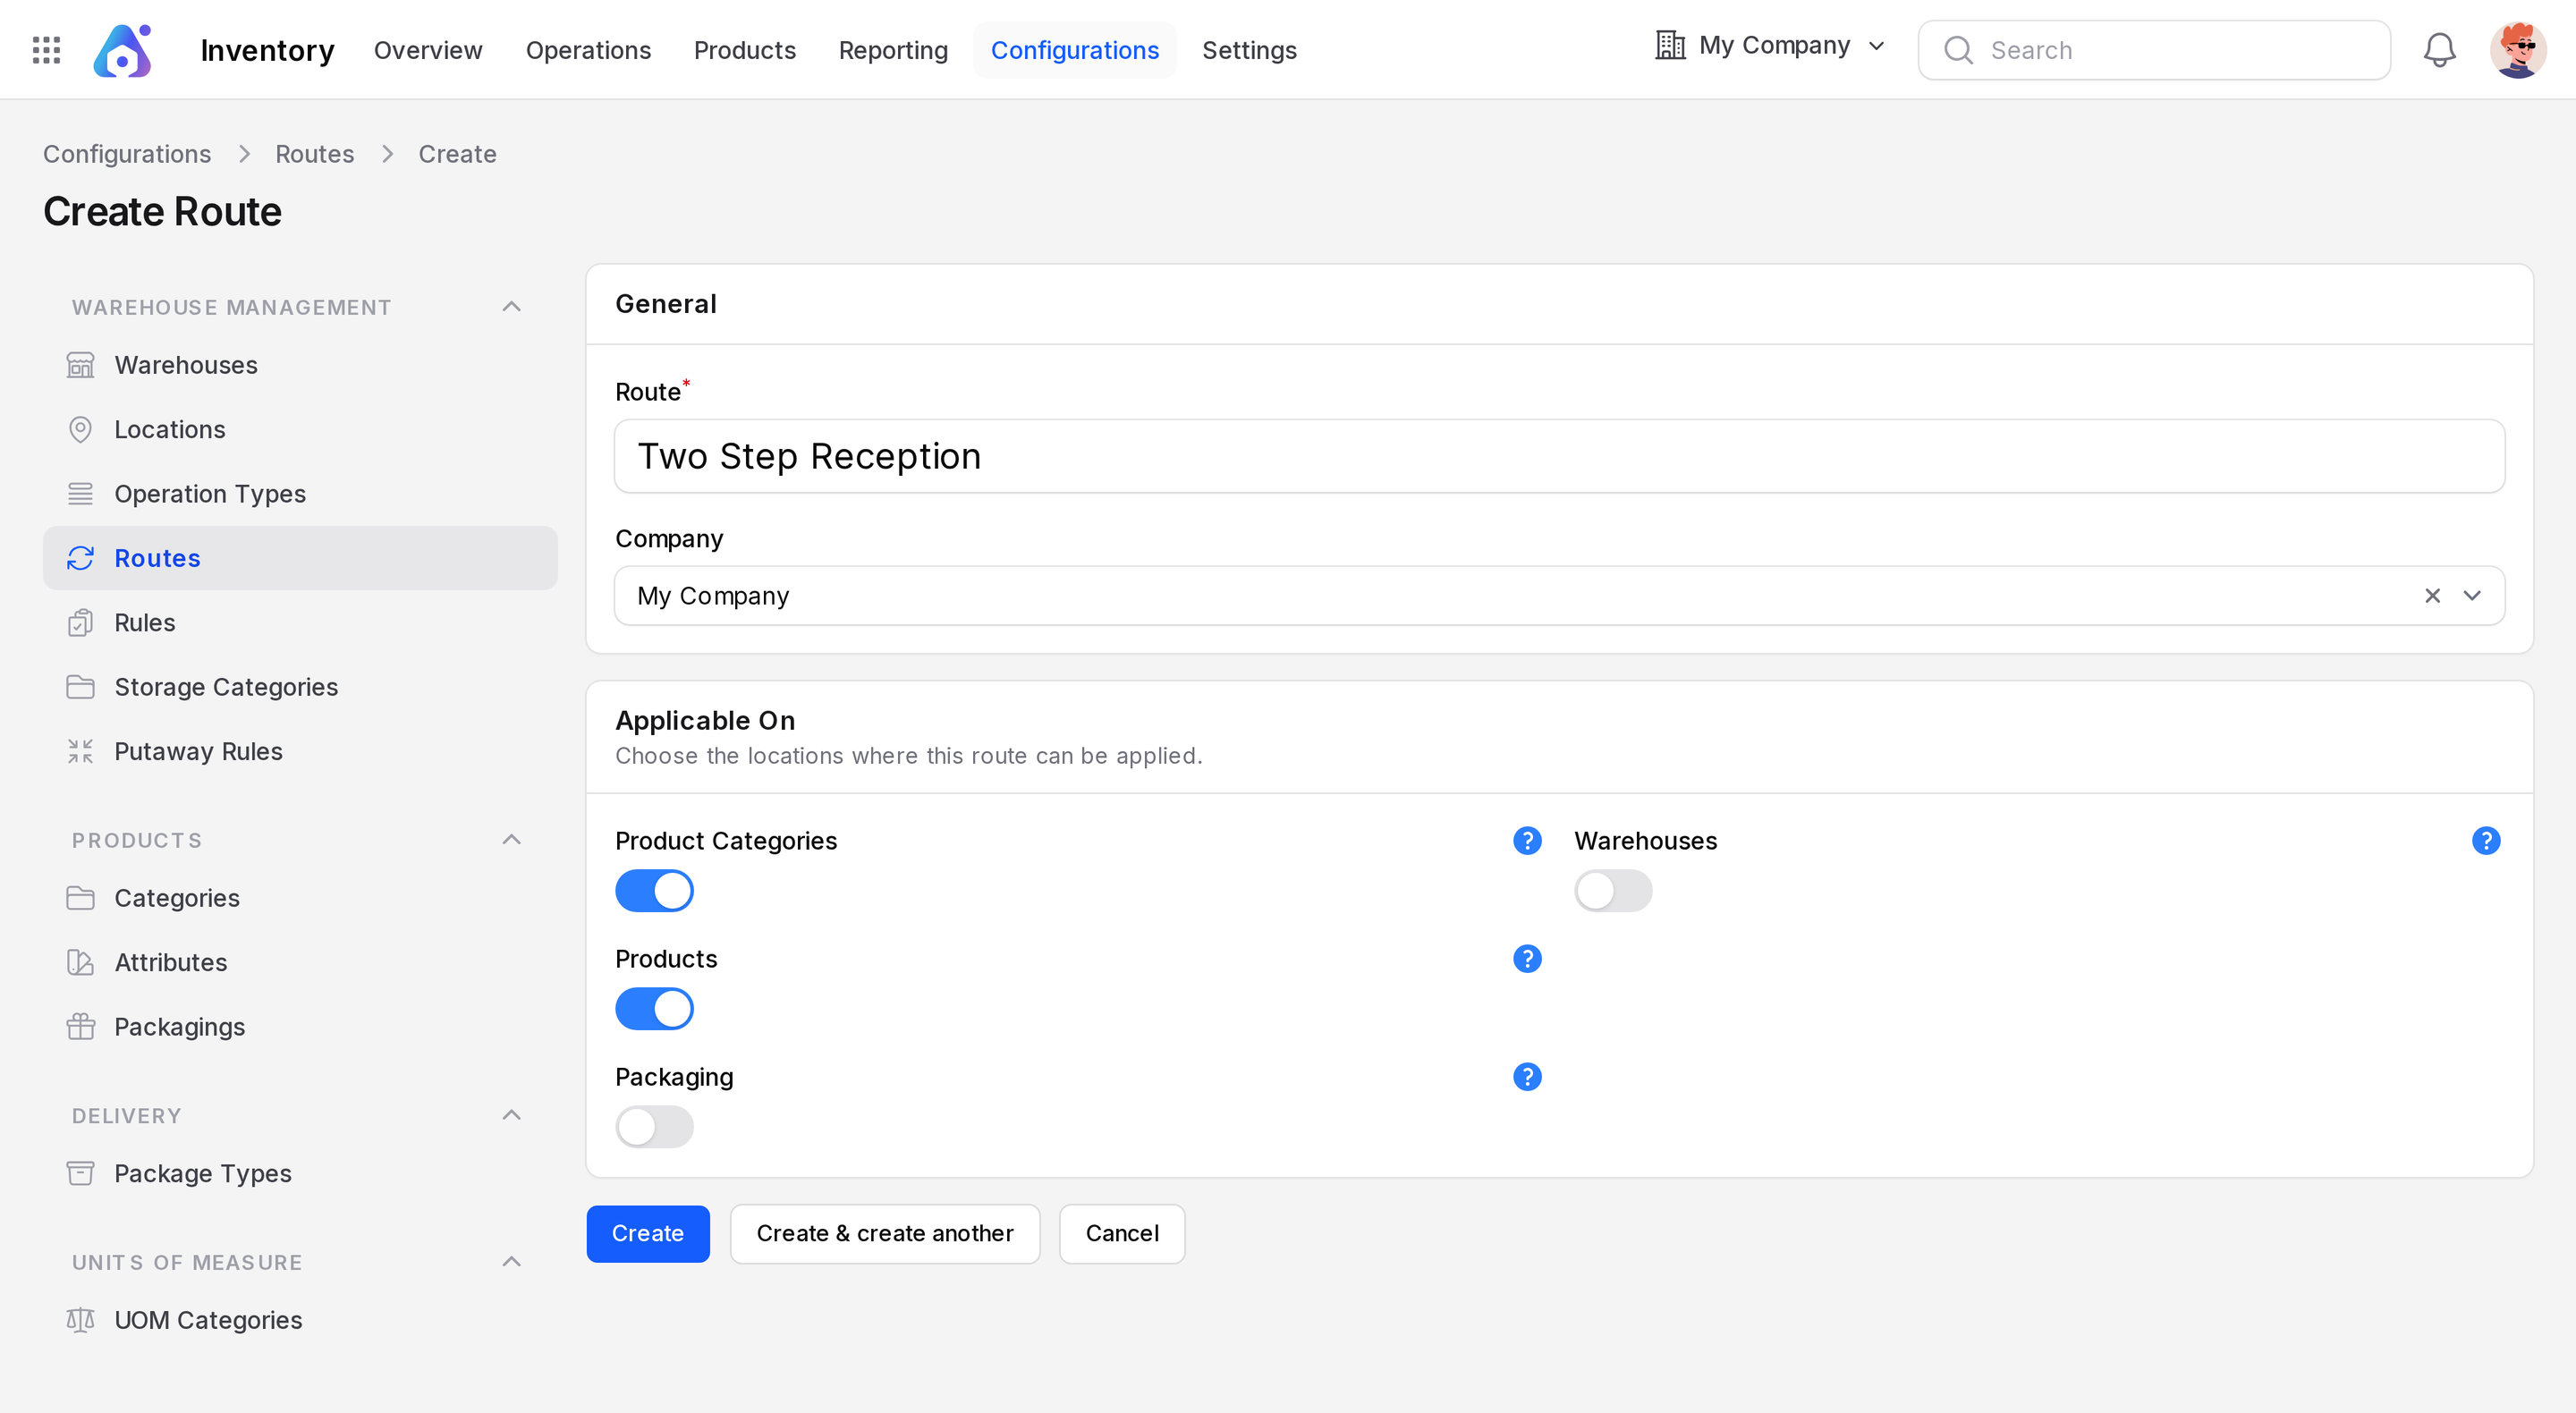
General
- Route: required. A clear name, for example Two Step Reception.
- Company: defaults to your company.
Applicable On
Choose where people can pick this route. The toggles are Product Categories, Products and Packaging, with Warehouses in a second column.
- Product Categories: the route can be set on a product category.
- Products: the route can be set on a product.
- Packaging: the route can be set on a packaging. The toggle always shows.
- Warehouses: the route becomes a default for a warehouse. A Warehouses list then appears. This toggle sits in the second column.
The route page also has a Rules table. Click Add Rule to attach a step.
Rules
The Rules list shows Action, Source Location, Destination Location, Route and Name. Click New Rule.
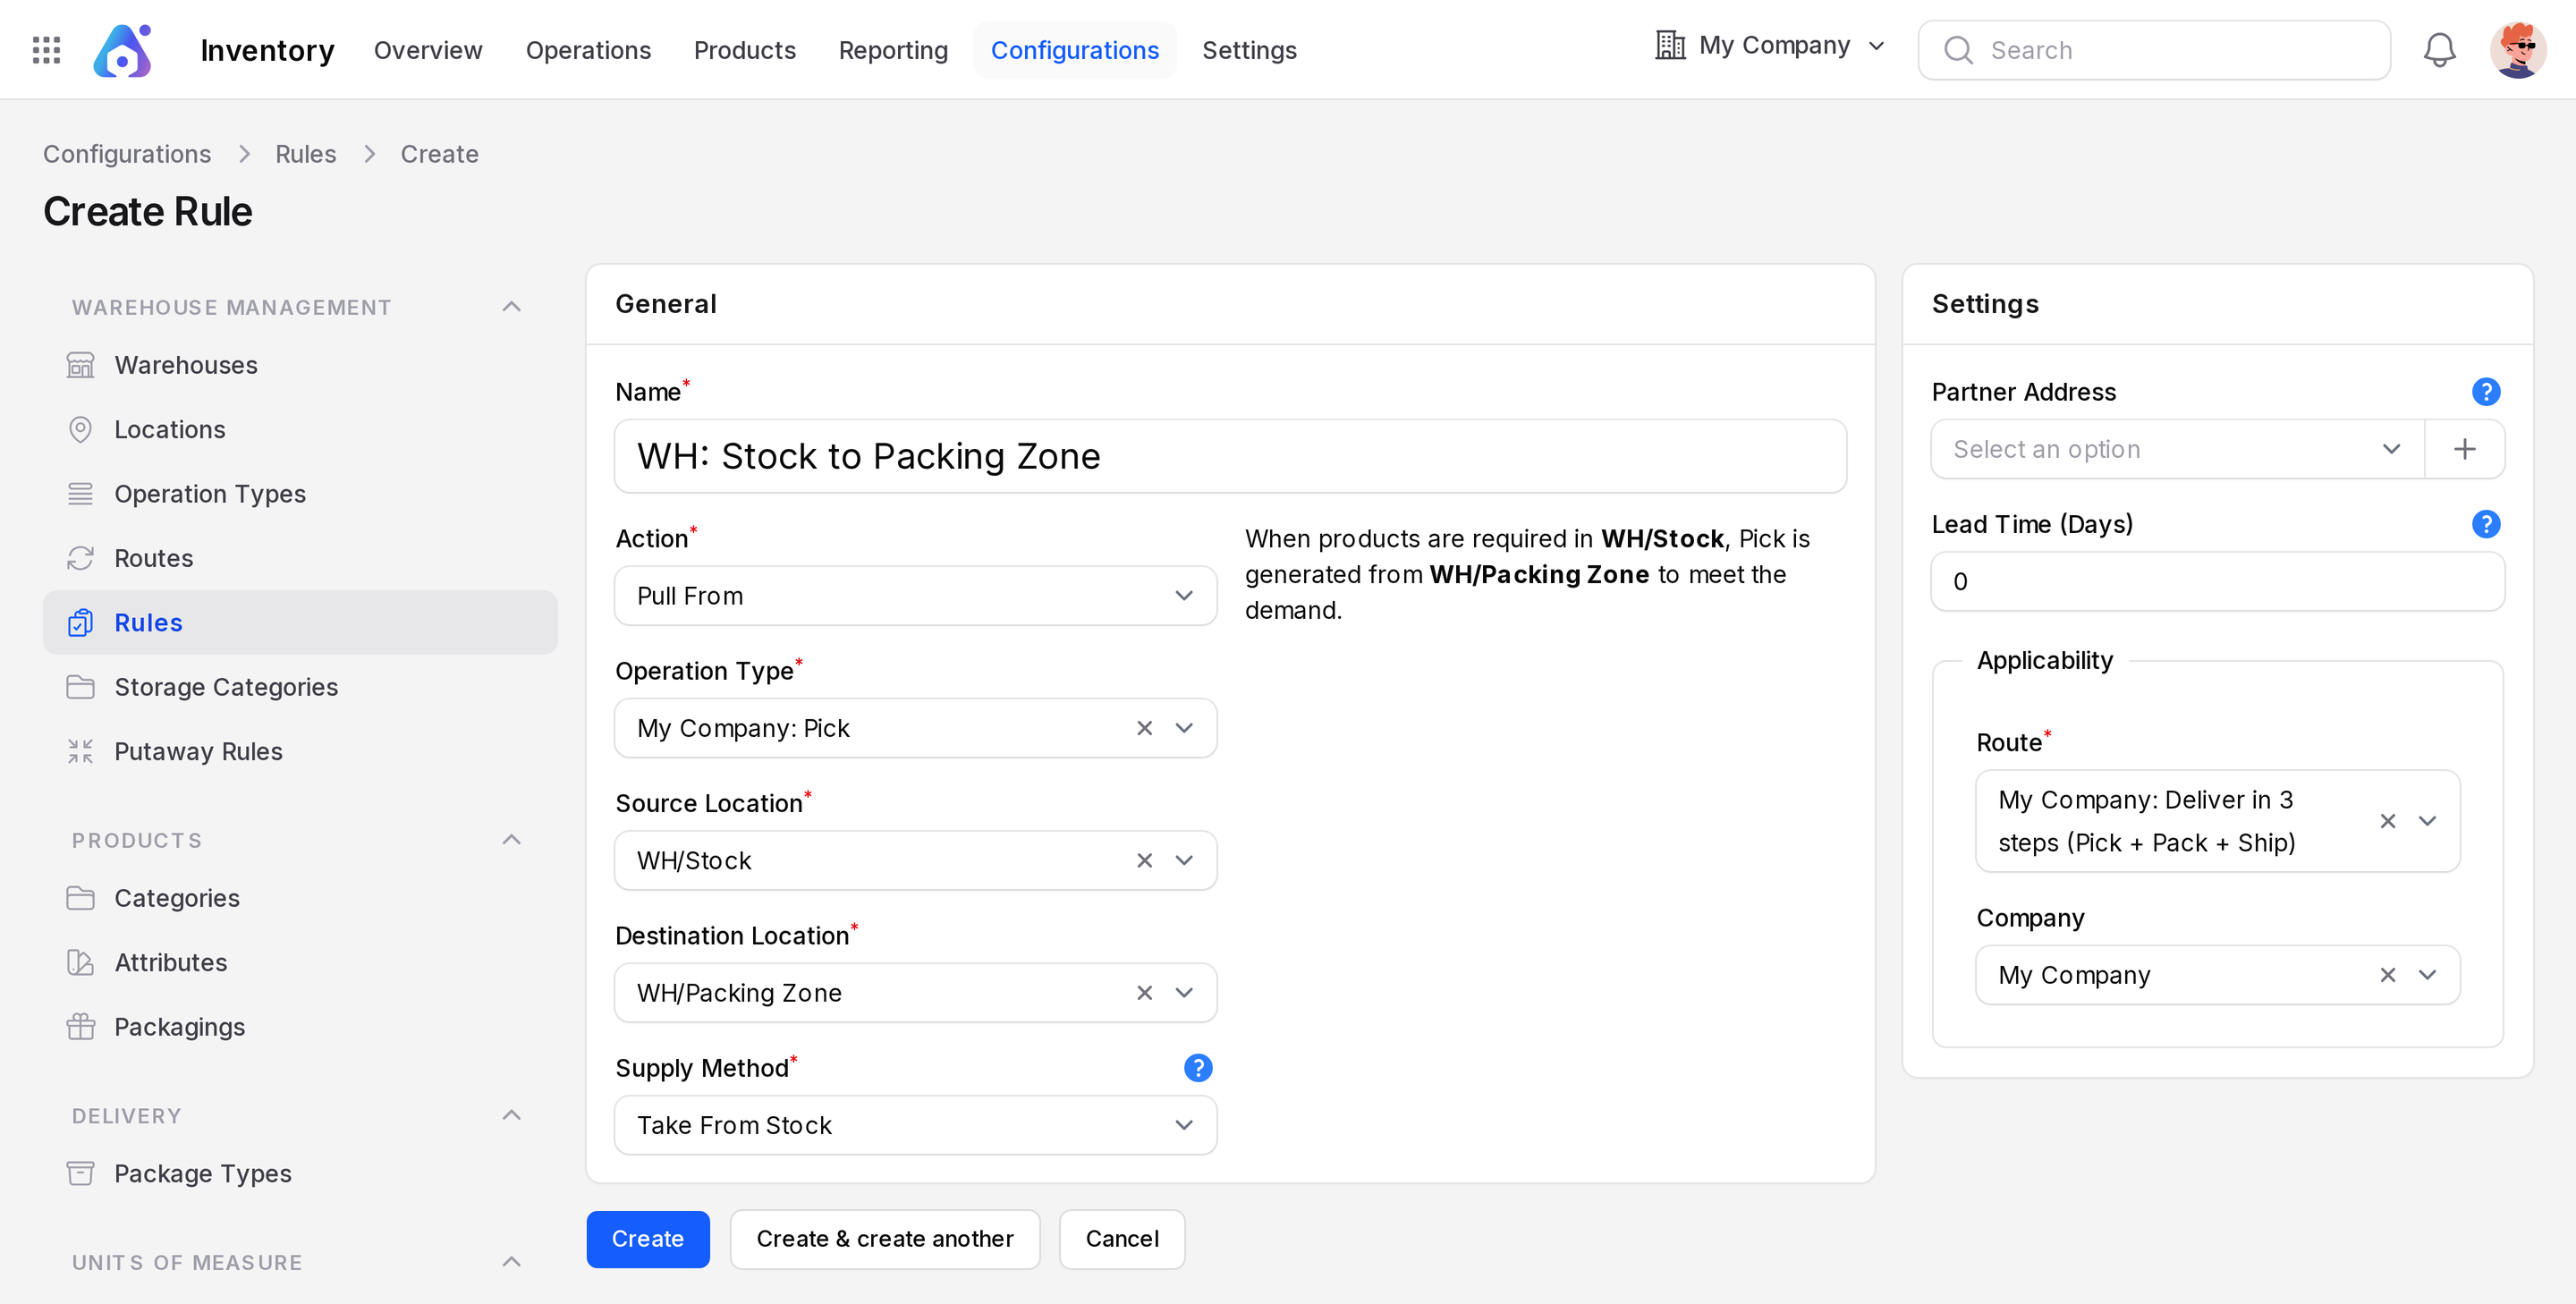
General
- Name: required.
- Action: required. See the table below.
- Operation Type: required. The document the step creates. Options are named with the warehouse first, for example My Company: Pick.
- Source Location and Destination Location: required. Where goods leave and arrive.
- Supply Method: how a pull gets goods. Hidden for Push To.
- Automatic Move: how a push behaves. Hidden for Pull From.
A live sentence beside Action explains the rule in plain words, for example "When products are required in X, Y is generated from Z...". These labels sit on the left of the form. The Settings card sits on the right.
Actions
| Action | Meaning |
|---|---|
| Pull From | Goods are requested from the source when needed |
| Push To | Goods that reach the source are sent on to the destination |
| Pull & Push | Both behaviours |
| Buy | A request for quotation is created for the need |
| Manufacture | A manufacturing order is created for the need |
Supply Method
- Take From Stock: use goods already in the source location.
- Trigger Another Rule: ignore stock and find another rule to bring goods in.
- Take From Stock, if unavailable, Trigger Another Rule: use stock first, then fall back.
Automatic Move
- Manual Operation: creates a separate move after the current one.
- Automatic No Step Added: changes the location of the original move. No extra document.
Settings
The Settings card on the right holds these fields.
- Partner Address: delivery address, optional. Shown for pulls.
- Lead Time (Days): used to calculate the expected date of the transfer.
- Applicability: a box inside the card with two fields.
- Route: required. The route this rule belongs to.
- Company: defaults to your company.
Two worked rules
Push rule: Input → Quality Control. Action Push To, operation type Quality Control, source WH/Input, destination WH/Quality Control. When a receipt lands in WH/Input, a WH/QC document is created.
Pull rule: Stock → Customers. Action Pull From, operation type Pick, supply method Take From Stock. When a customer order asks for goods, a WH/PICK document is created.
Apply a route
- Open a product, a product category or a packaging.
- Find the Routes field in its Inventory section.
- Pick the route and save.
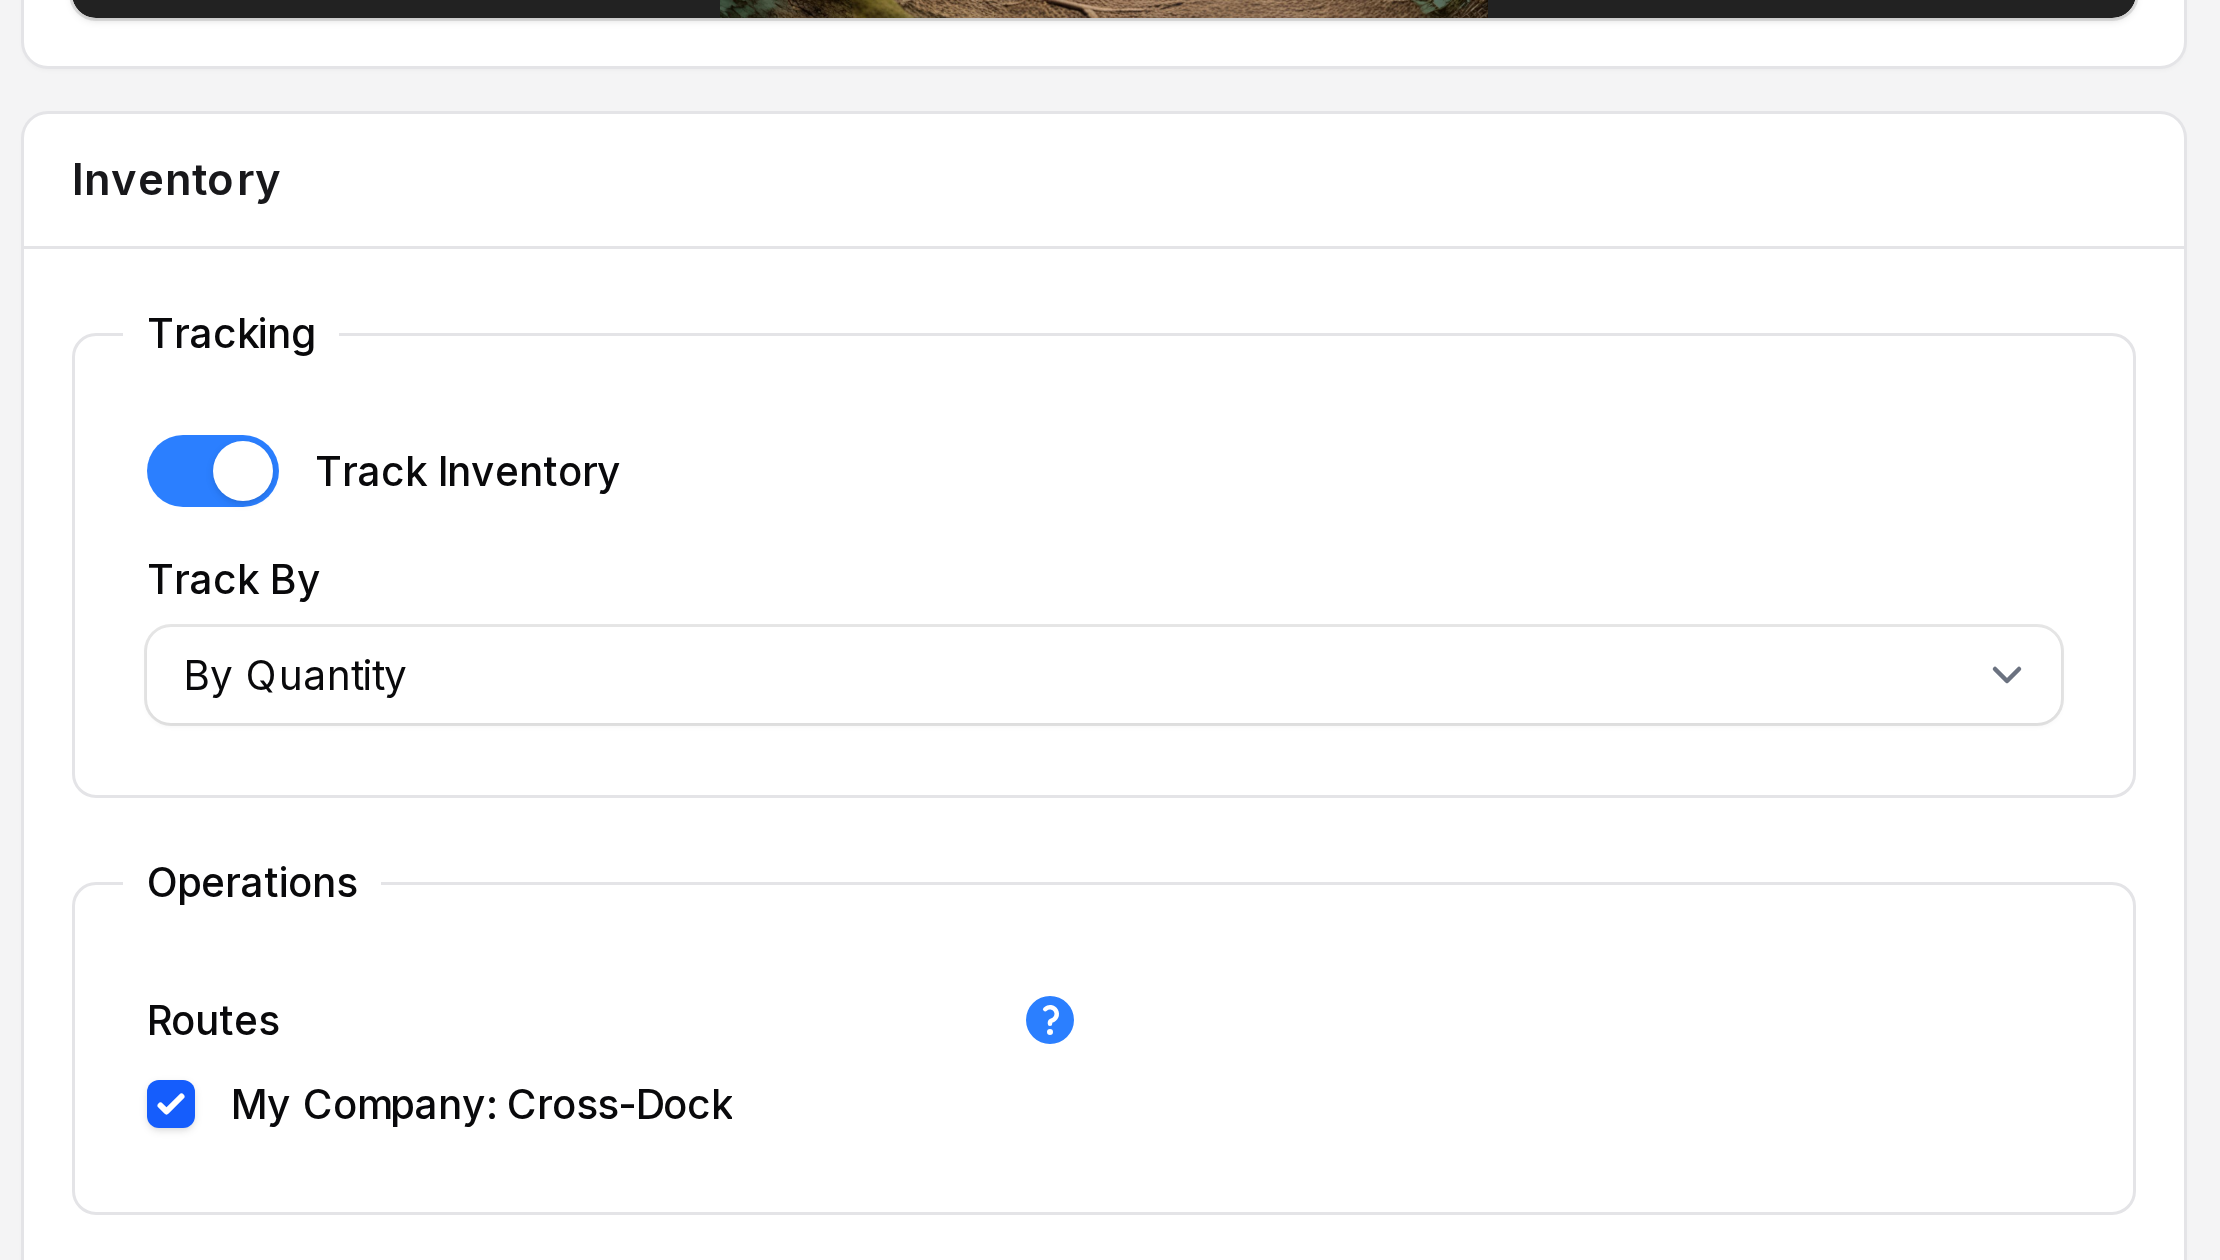
The route only appears in the list if its Applicable On toggle matches. See Product categories and Configure a product.
Warehouse Routes page
The warehouse record has a Routes tab. It opens a page titled Manage My Company Routes. The page lists 3 routes: Pick components, manufacture and then store products (3 steps), Deliver in 3 steps and Receive in 3 steps. Cross-Dock is not on it. The page has an Add Route button.