

Manage allocations
Management lists the allocations of all employees. Here a manager creates allocations for others, approves or refuses requests for days, and edits existing ones. Use it at the start of each year to give every employee their days.
In simple words: Create the allocation for the employee, then approve it. The days then count in their balance.
Open Time Off → Management → Allocation.
Before you start
- The employee exists. See Employees.
- The leave type exists. See Leave types.
Overview
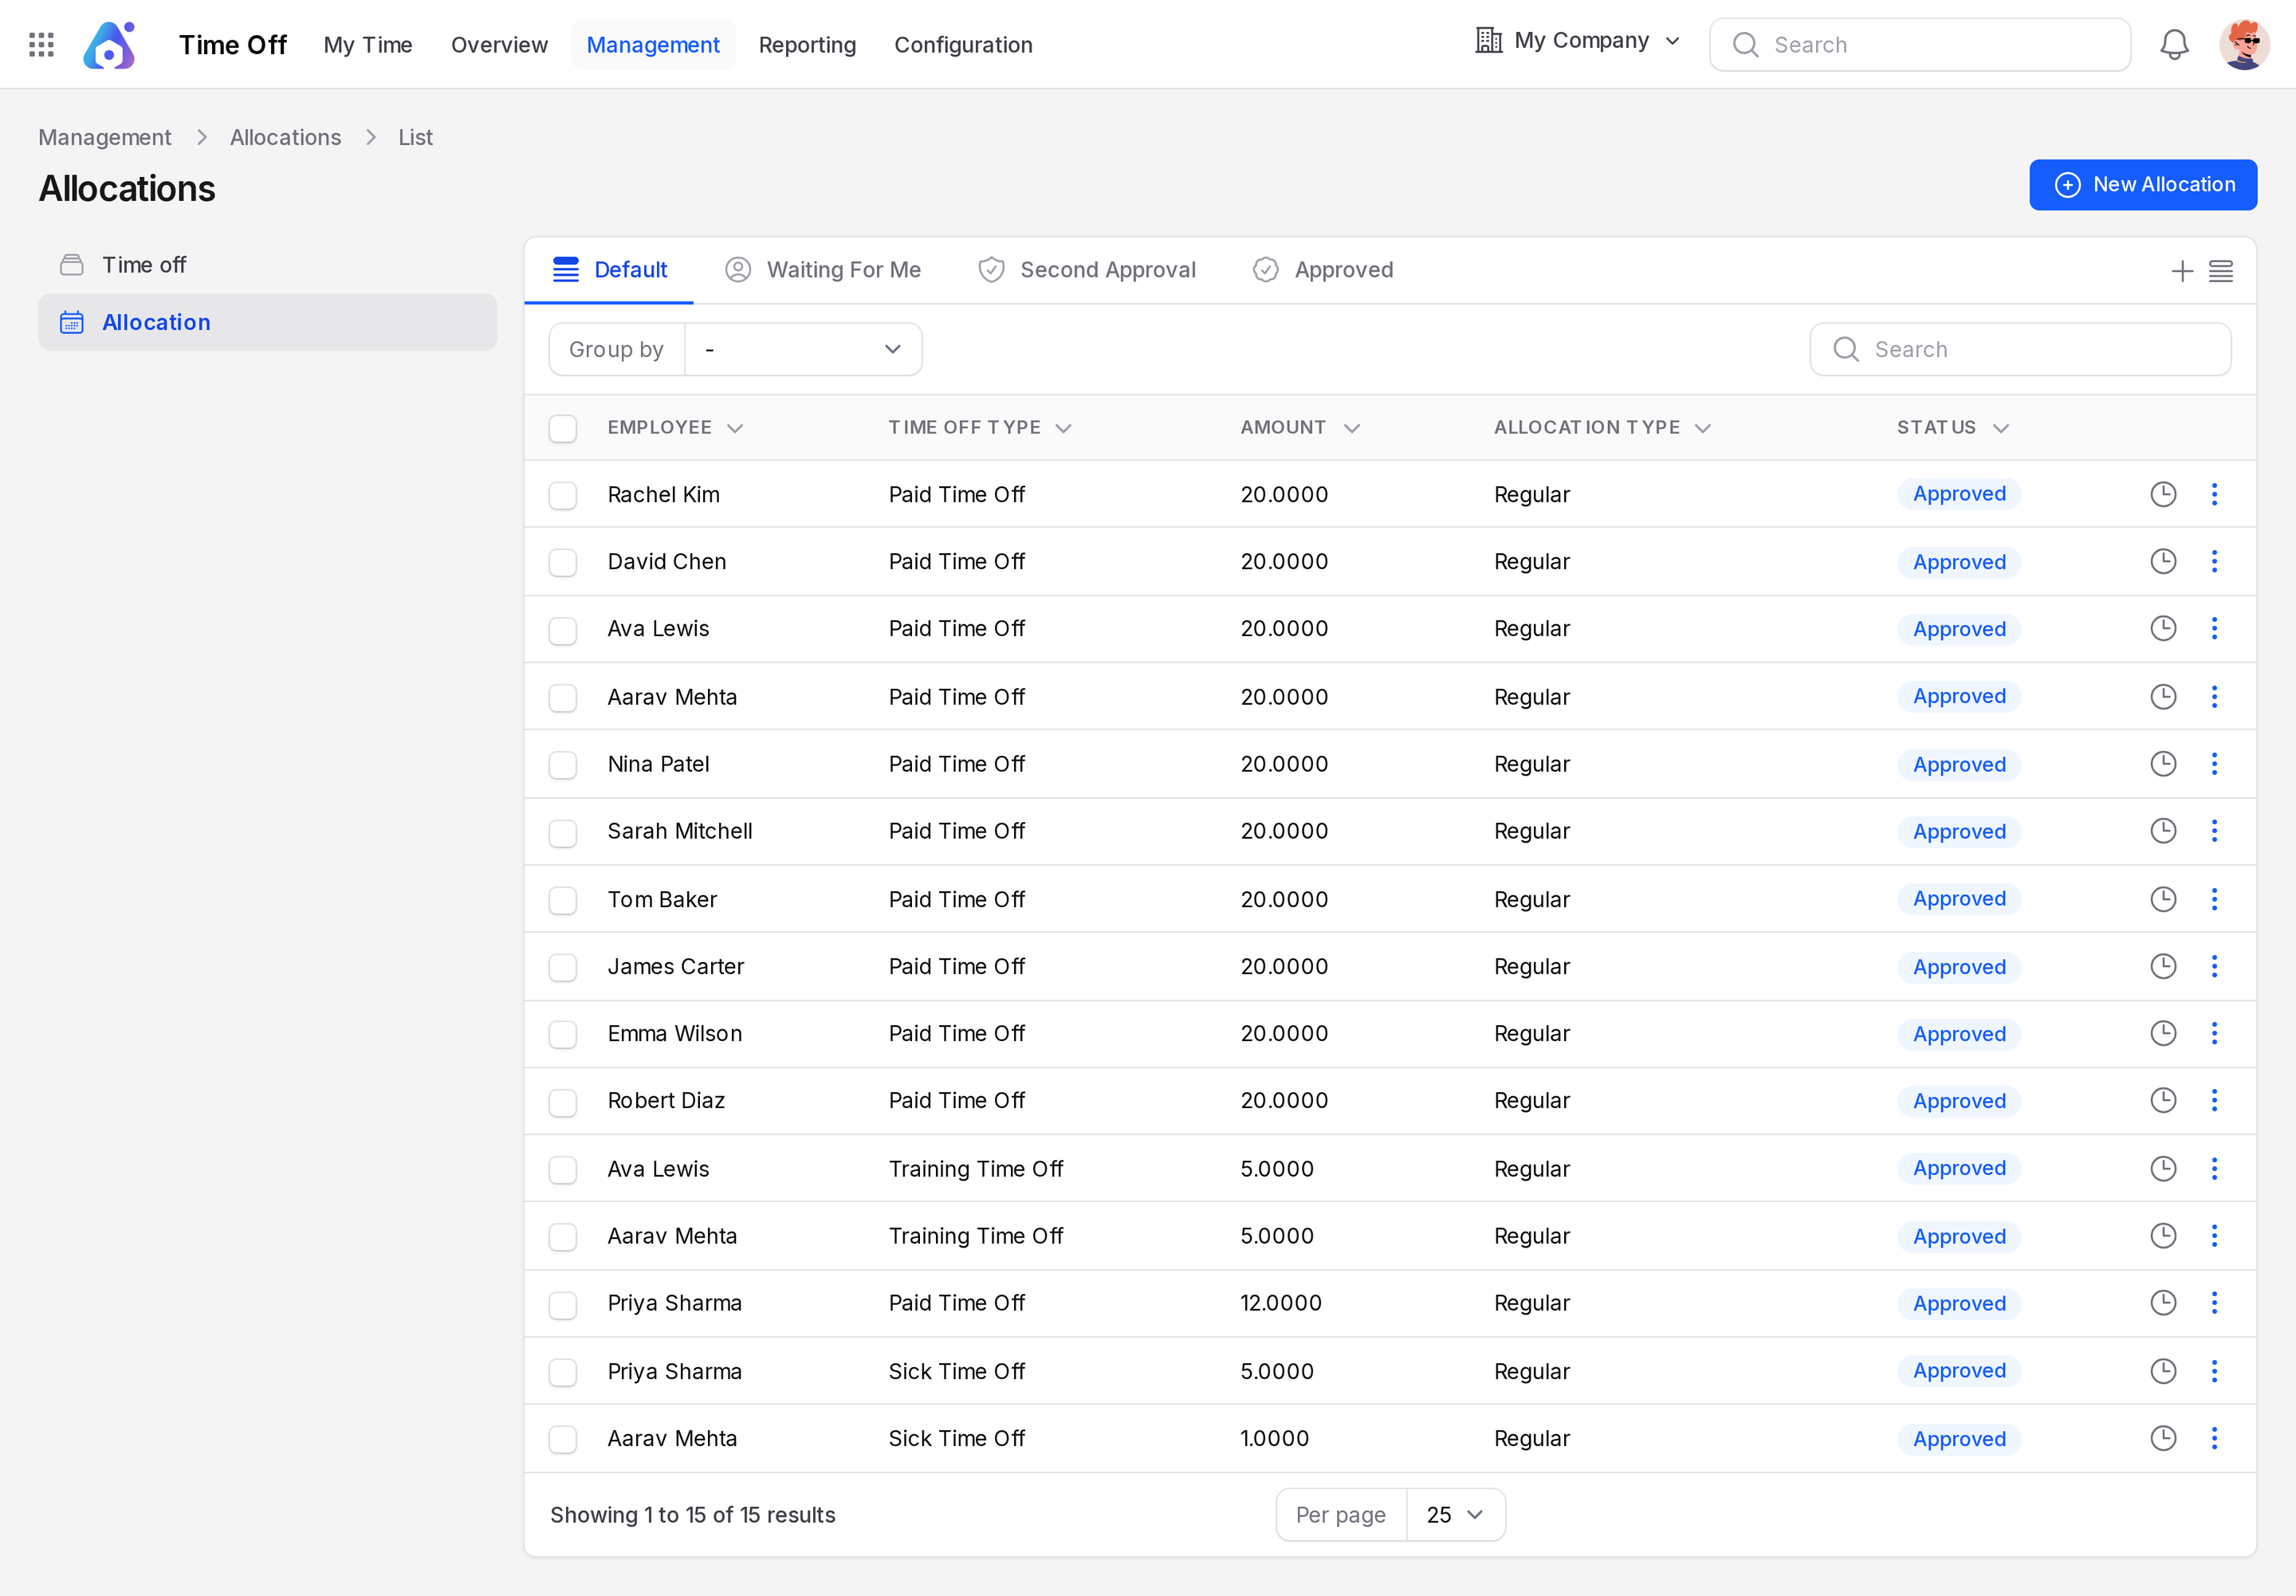
The page is titled Allocations. It opens on the Waiting For Me tab.
- Tabs: Default, Waiting For Me, Second Approval and Approved.
- Three-dot menu next to the tabs: preset views Currently Valid, My Team, My Department and Refused.
- Columns: Employee, Time Off Type, Amount, Allocation Type, Status.
- Group by: Employee Name, Time Off Type, Allocation Type, Status, Start Date.
Click Default to see every allocation. A row opens the View page.
Create an allocation
Priya Sharma has no days yet. Give her 12 days of Paid Time Off.
- Open
Time Off → Management → Allocation. Click New Allocation.
Allocation details
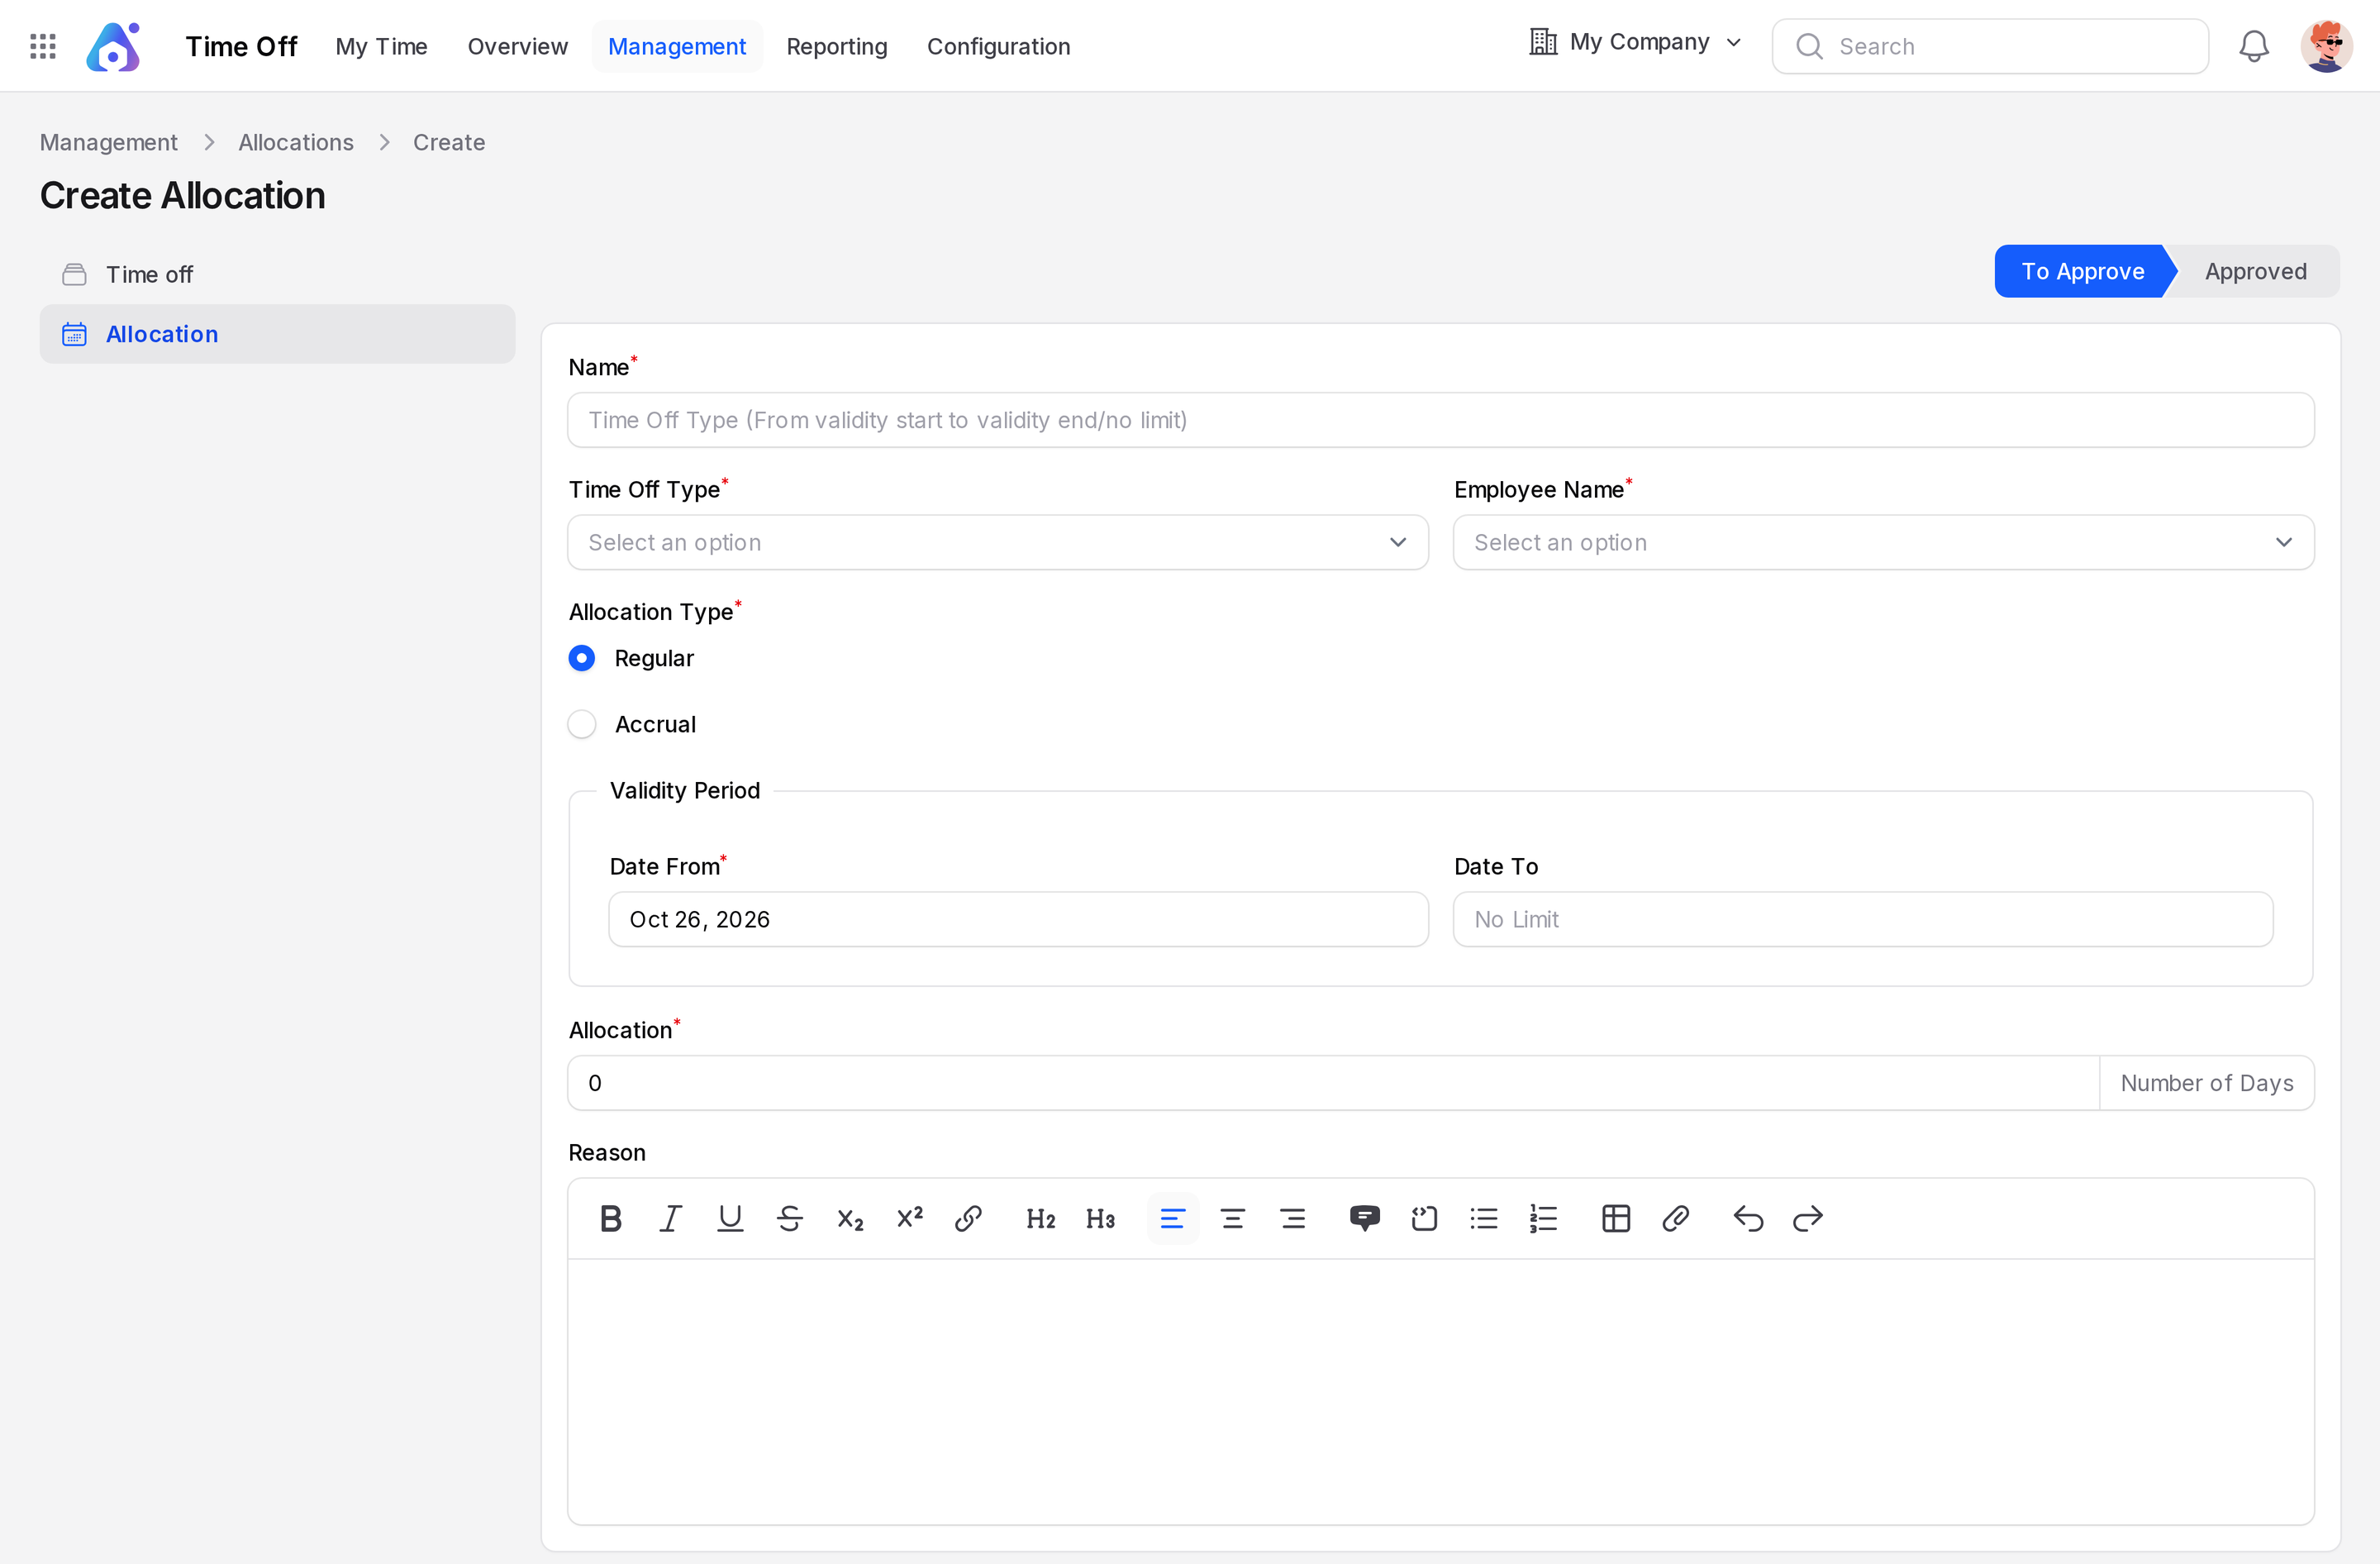
- Type Paid Time Off 2026 in Name. Aureus does not fill it in.
- Choose Paid Time Off in Time Off Type.
- Choose Priya Sharma in Employee Name.
- Keep Allocation Type on Regular.
- Name: Required. A label for the allocation.
- Time Off Type: Required. The leave type that receives the days.
- Employee Name: Required. The person who receives the days.
- Allocation Type: Required. Keep Regular.
Validity period
- Set Date From to Oct 1, 2026. It starts on today's date.
- Leave Date To empty. It shows No Limit, so the allocation is open ended.
Days and reason
- Type 12 in Allocation. The field shows Number of Days.
- Type Annual leave 2026 in Reason.
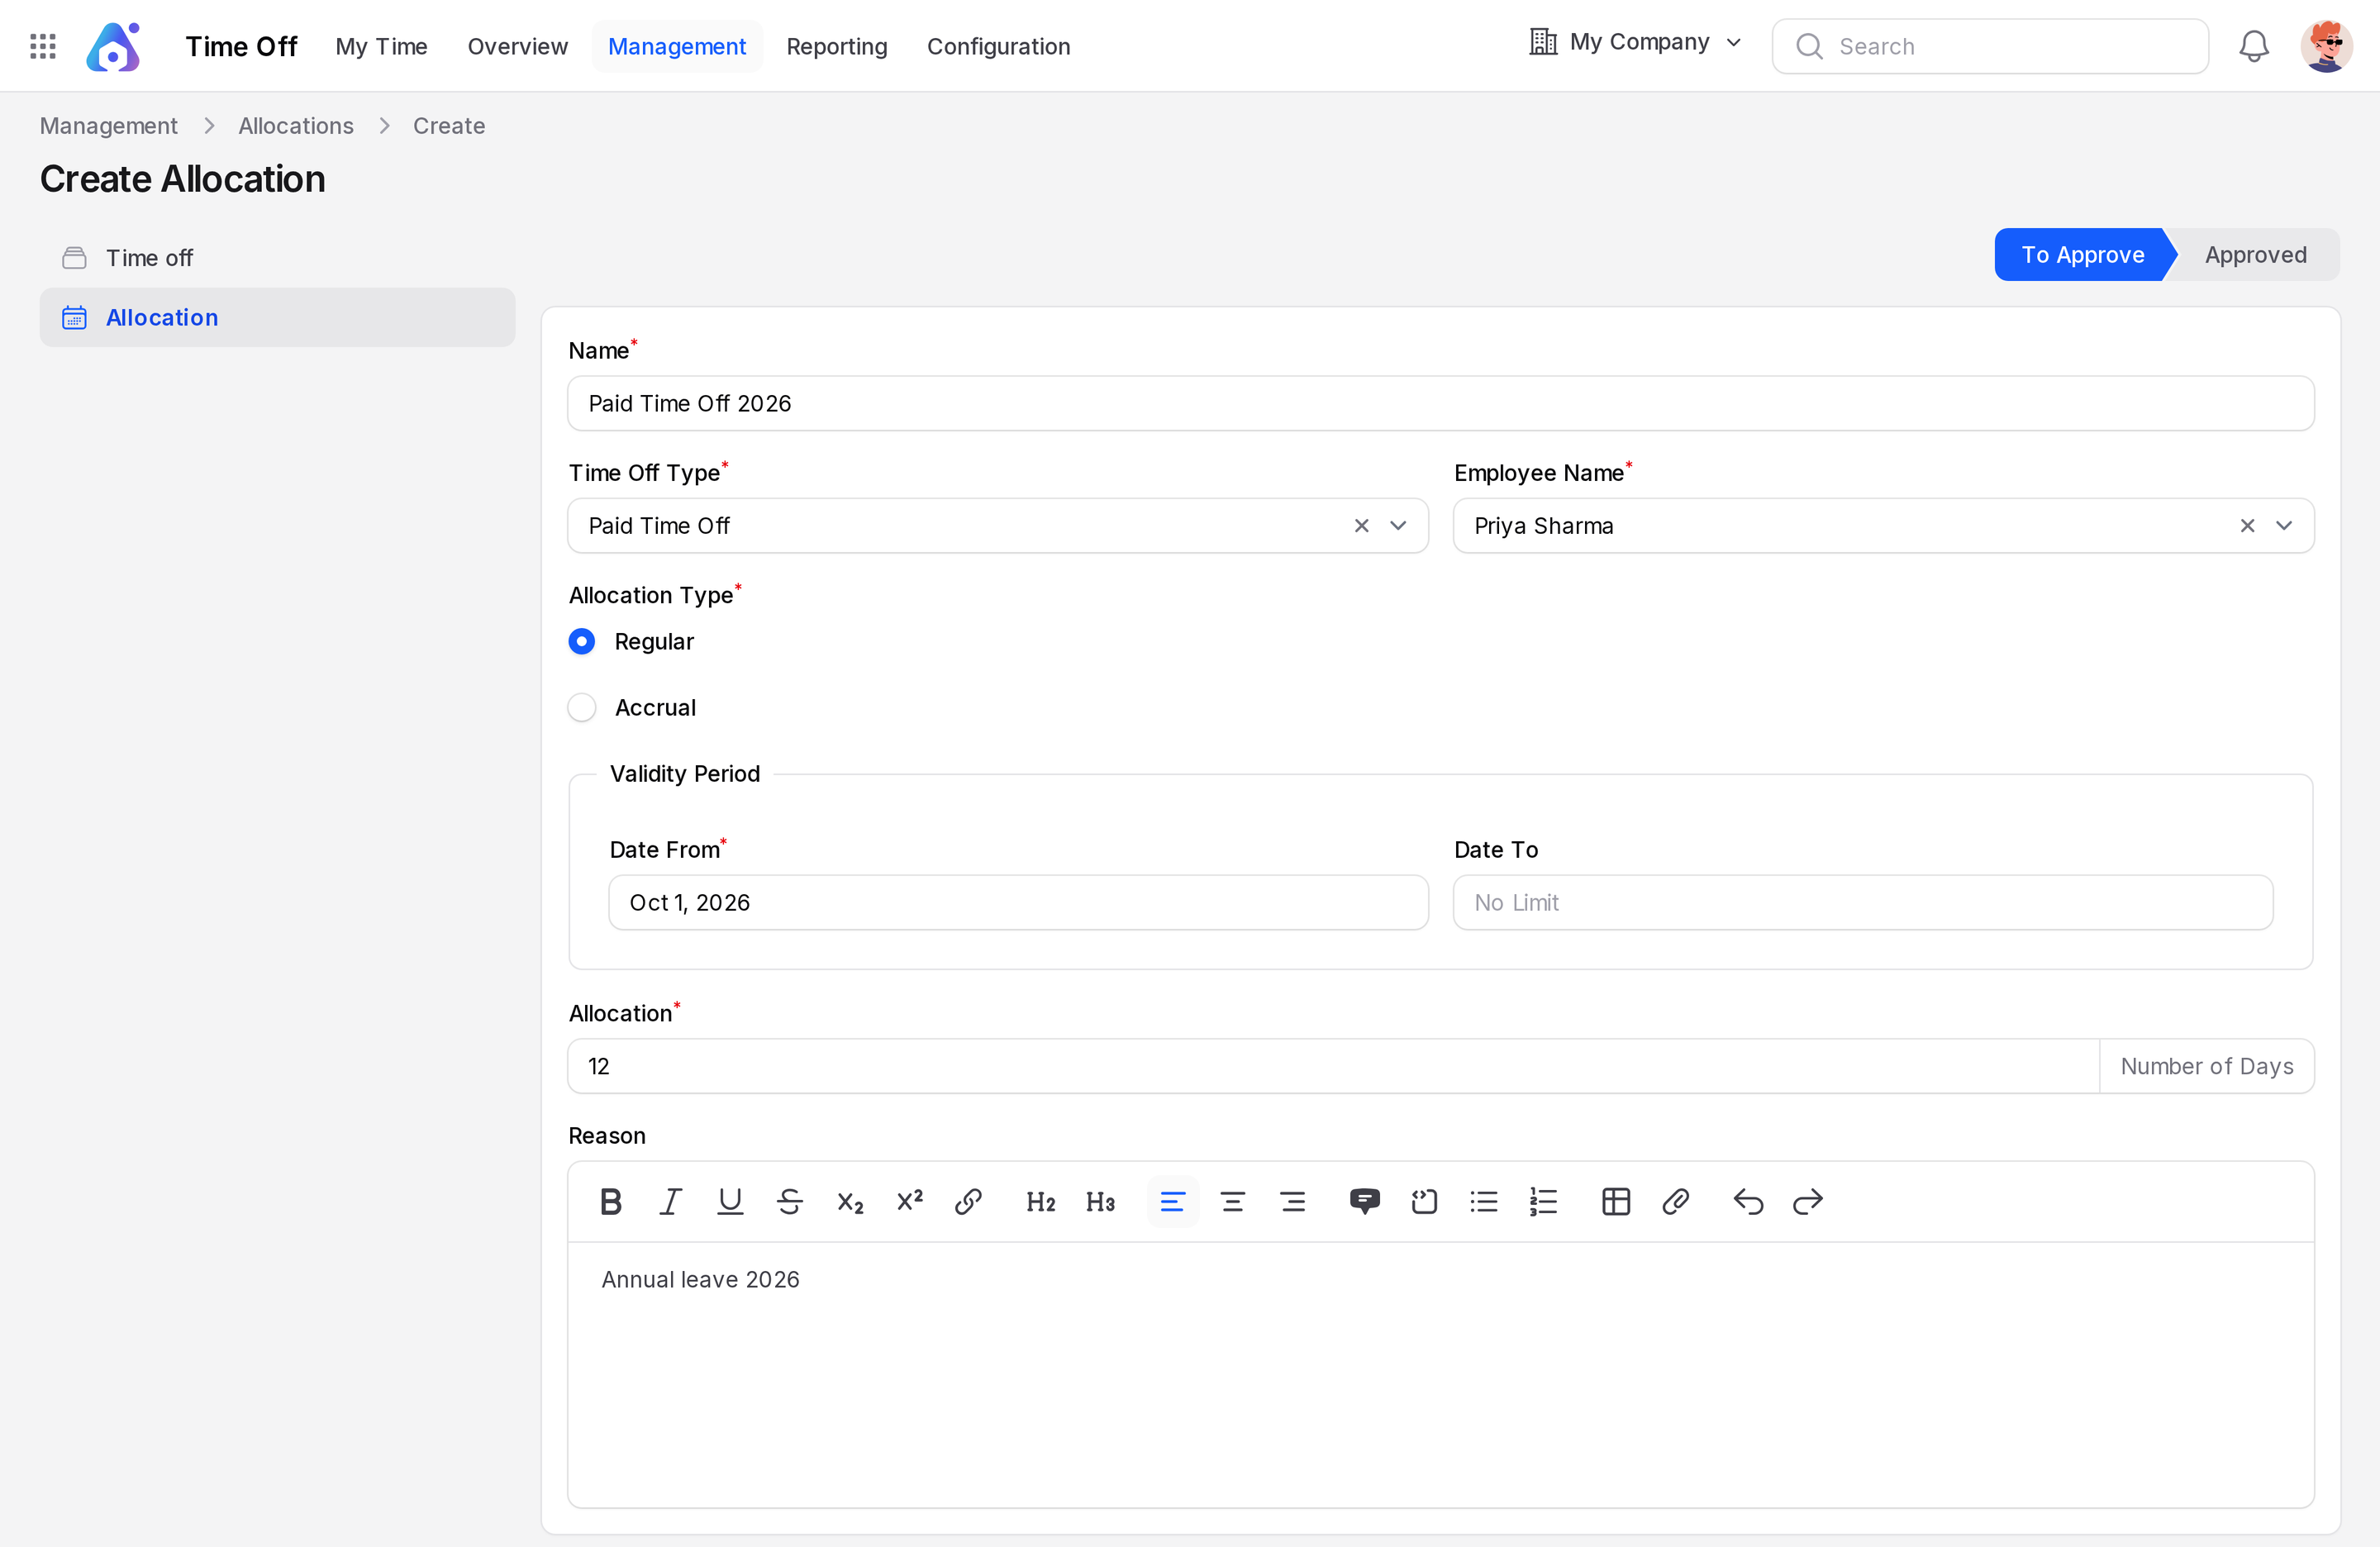
- Click Create. A Time Off created message appears. The app opens the allocation View page. The allocation starts as To Approve.
Approve the allocation
New allocations start as To Approve. Approve the allocation so the days count.
- Open
Time Off → Management → Allocation. Click the Default tab. - Click the three-dot icon on the row of Priya Sharma. Click Approve.
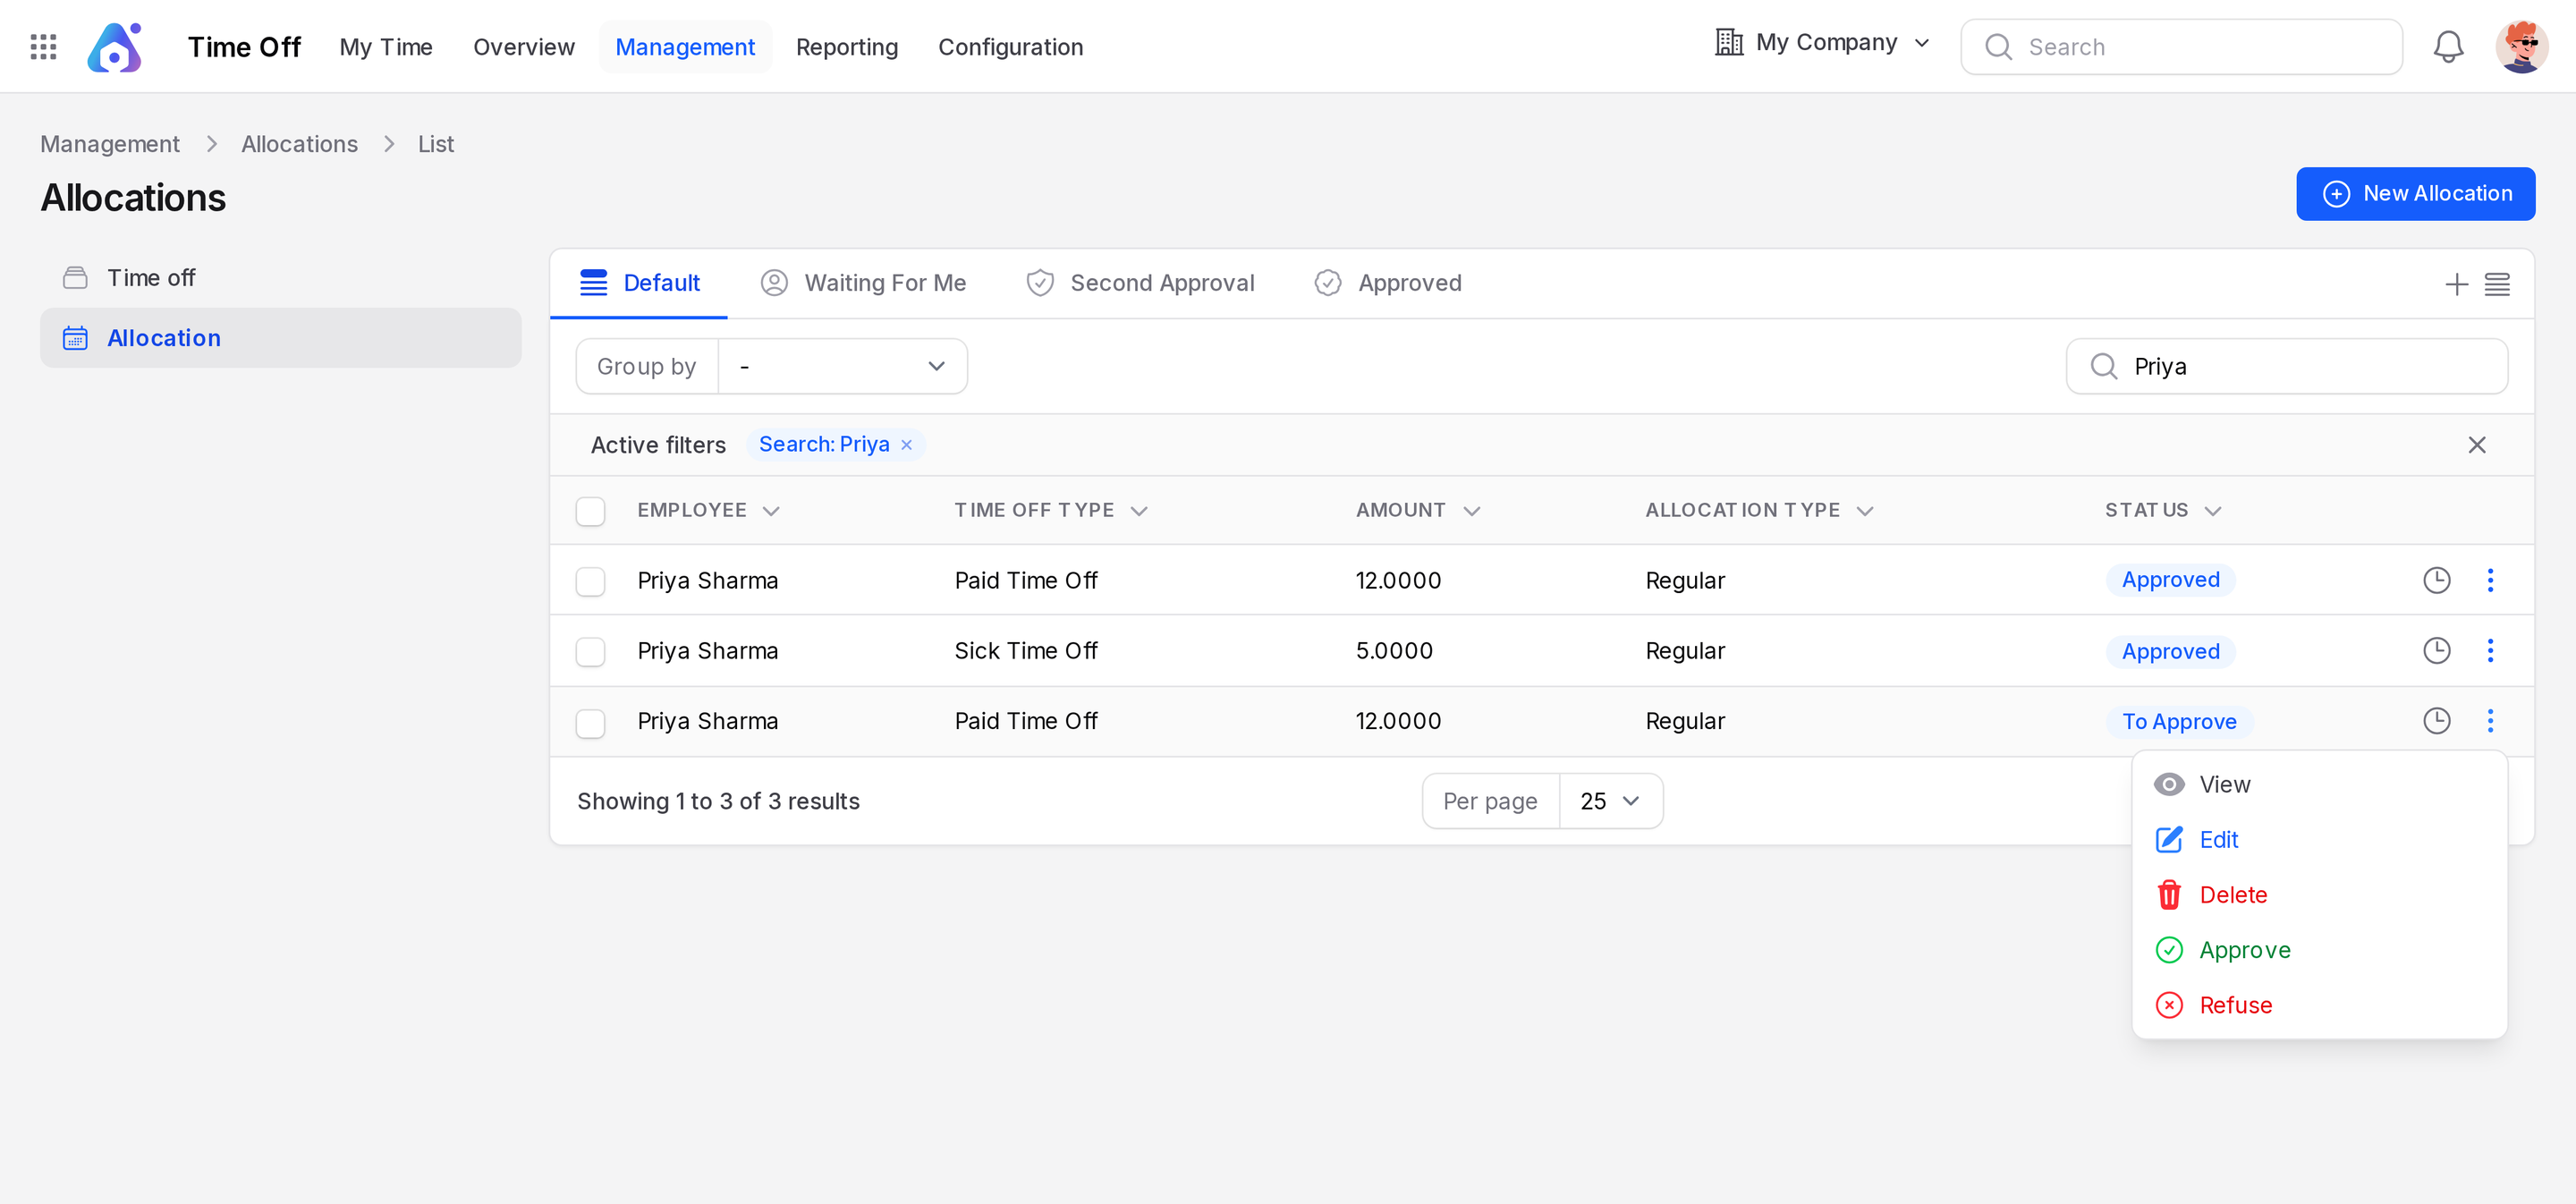
- Check that the Status column shows Approved.
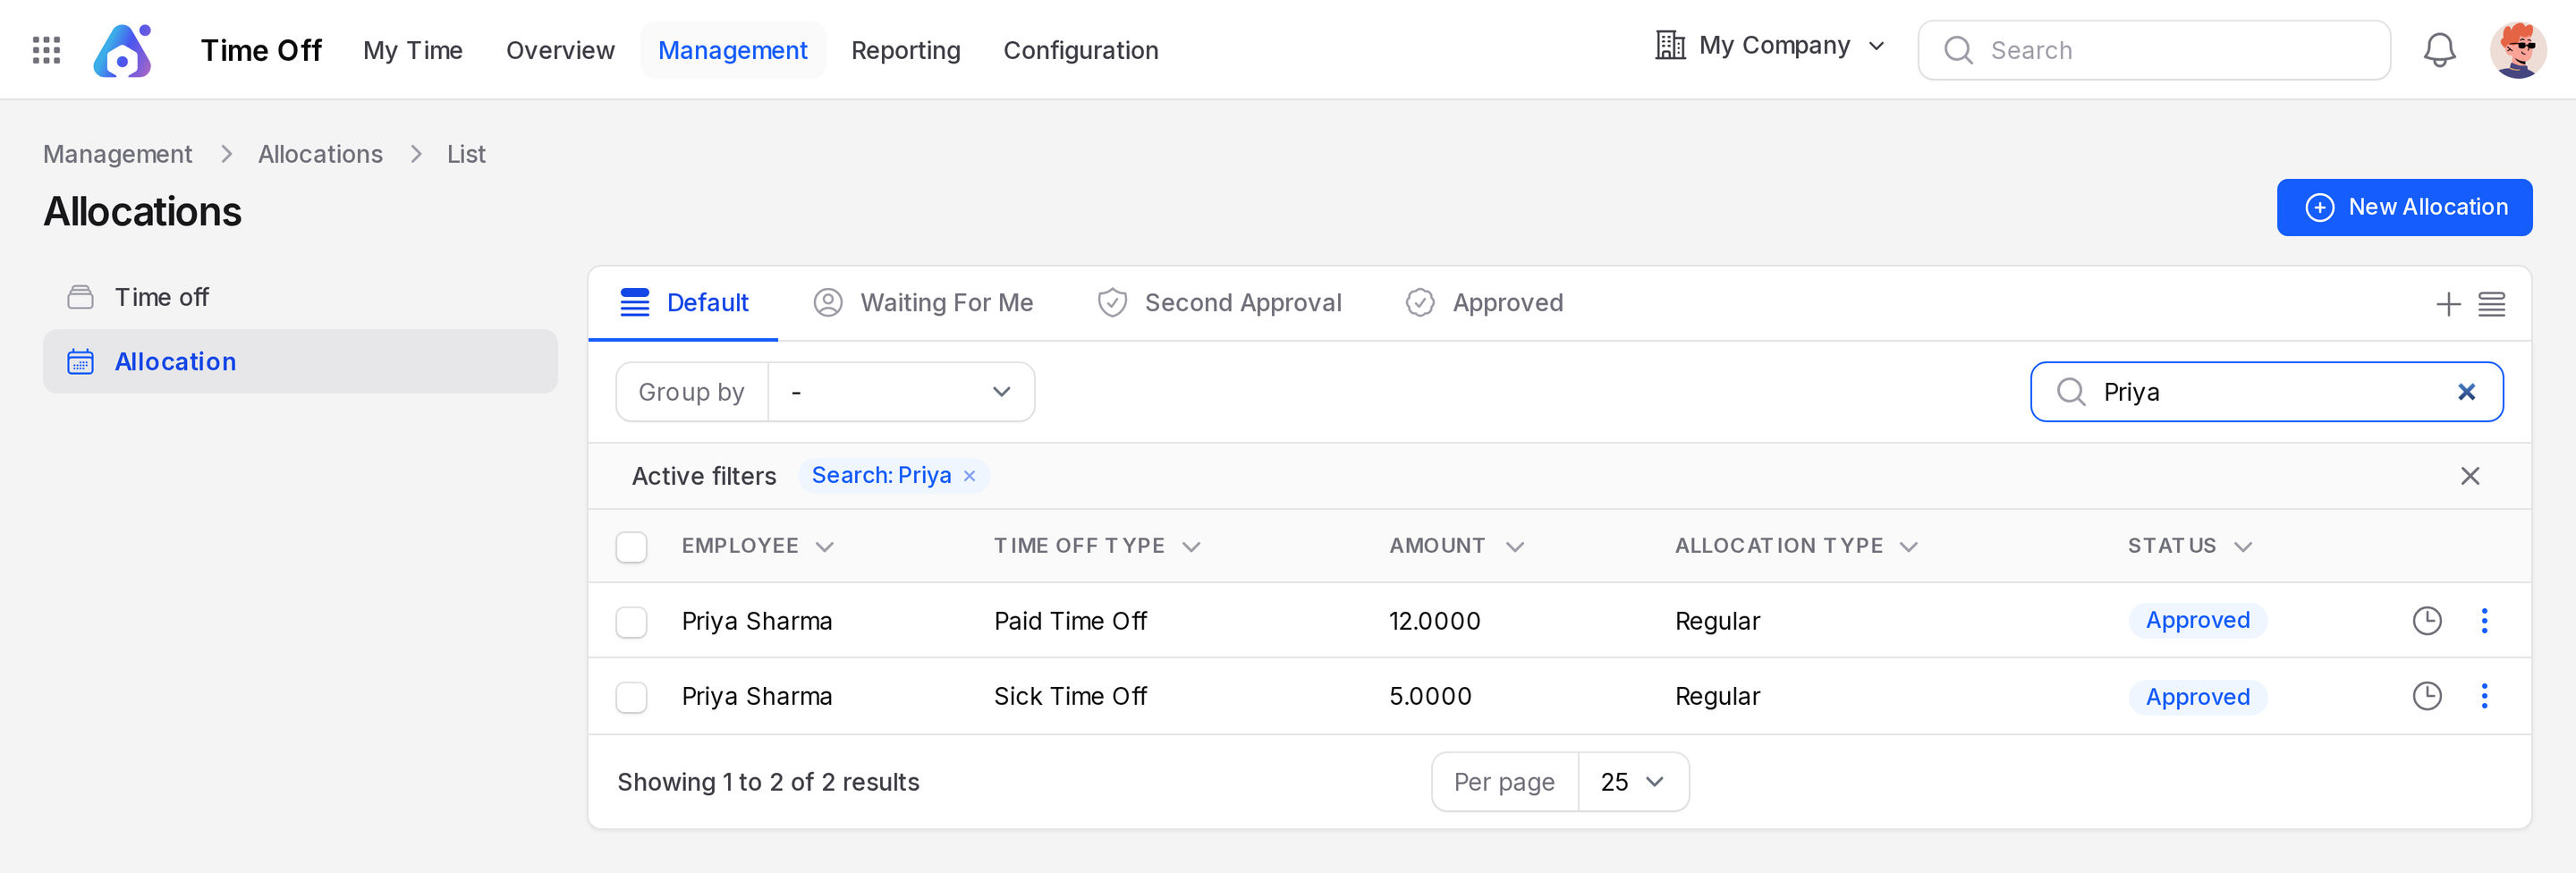
The days now count. Priya can request leave of this type. The My Time cards show the balance of the logged in employee. When Priya signs in, her Paid Time Off card shows 12.0.
Actions and statuses
- Approve (row menu): sets the status to Approved. The row menu hides it when the allocation is already approved.
- Refuse (row menu): sets the status to Refused. The days never count.
- View, Edit, Delete: open, change or remove the allocation.
The row menu lists them in this order: View, Edit, Delete, Approve, Refuse.
The View and Edit pages show a State bar with To Approve and Approved. The edit page header can show Approved, Refuse and Mark as Ready to Confirm. Use the row menu for the quickest approval. Mark as Ready to Confirm returns a refused allocation to To Approve. Refuse is hidden once an allocation is refused.
WARNING
Only approved allocations add to the balance. Refuse an allocation if it was entered by mistake, or delete it.