

First steps with Employees
This tutorial takes you through the whole Employees flow with one example. You create a department, a job position and an employee. Then you add private details, a skill and two resume lines. At the end you find the employee on the list.
In simple words: You will add a new warehouse supervisor, Priya Sharma, from nothing to a full profile.
Each step ends with a short note on what Aureus does for you. Links point to the pages that explain each screen in depth.
Prerequisite
The manager and coach must already be employees. The Time Off approver must be a user. The sample data includes the employees Sarah Mitchell and Rachel Kim and the user HR Admin. The tags Operations and Senior and the work location Building 1, Second Floor are also included.
Step 1: Create the department Operations
A department groups employees and gives them a manager. Create it first so the job position and the employee can use it.
- Open
Employees → Departments. - Click New Department. A full page opens.
- Fill in the form.
- Name: Required. Type
Operations. - Parent Department: Leave empty. Use it only for a sub-team.
- Manager: Choose Sarah Mitchell.
- Company: Fills with My Company.
- Color: Optional. Pick a colour, for example orange
#f97316. A colour only marks the department in its organization tree.
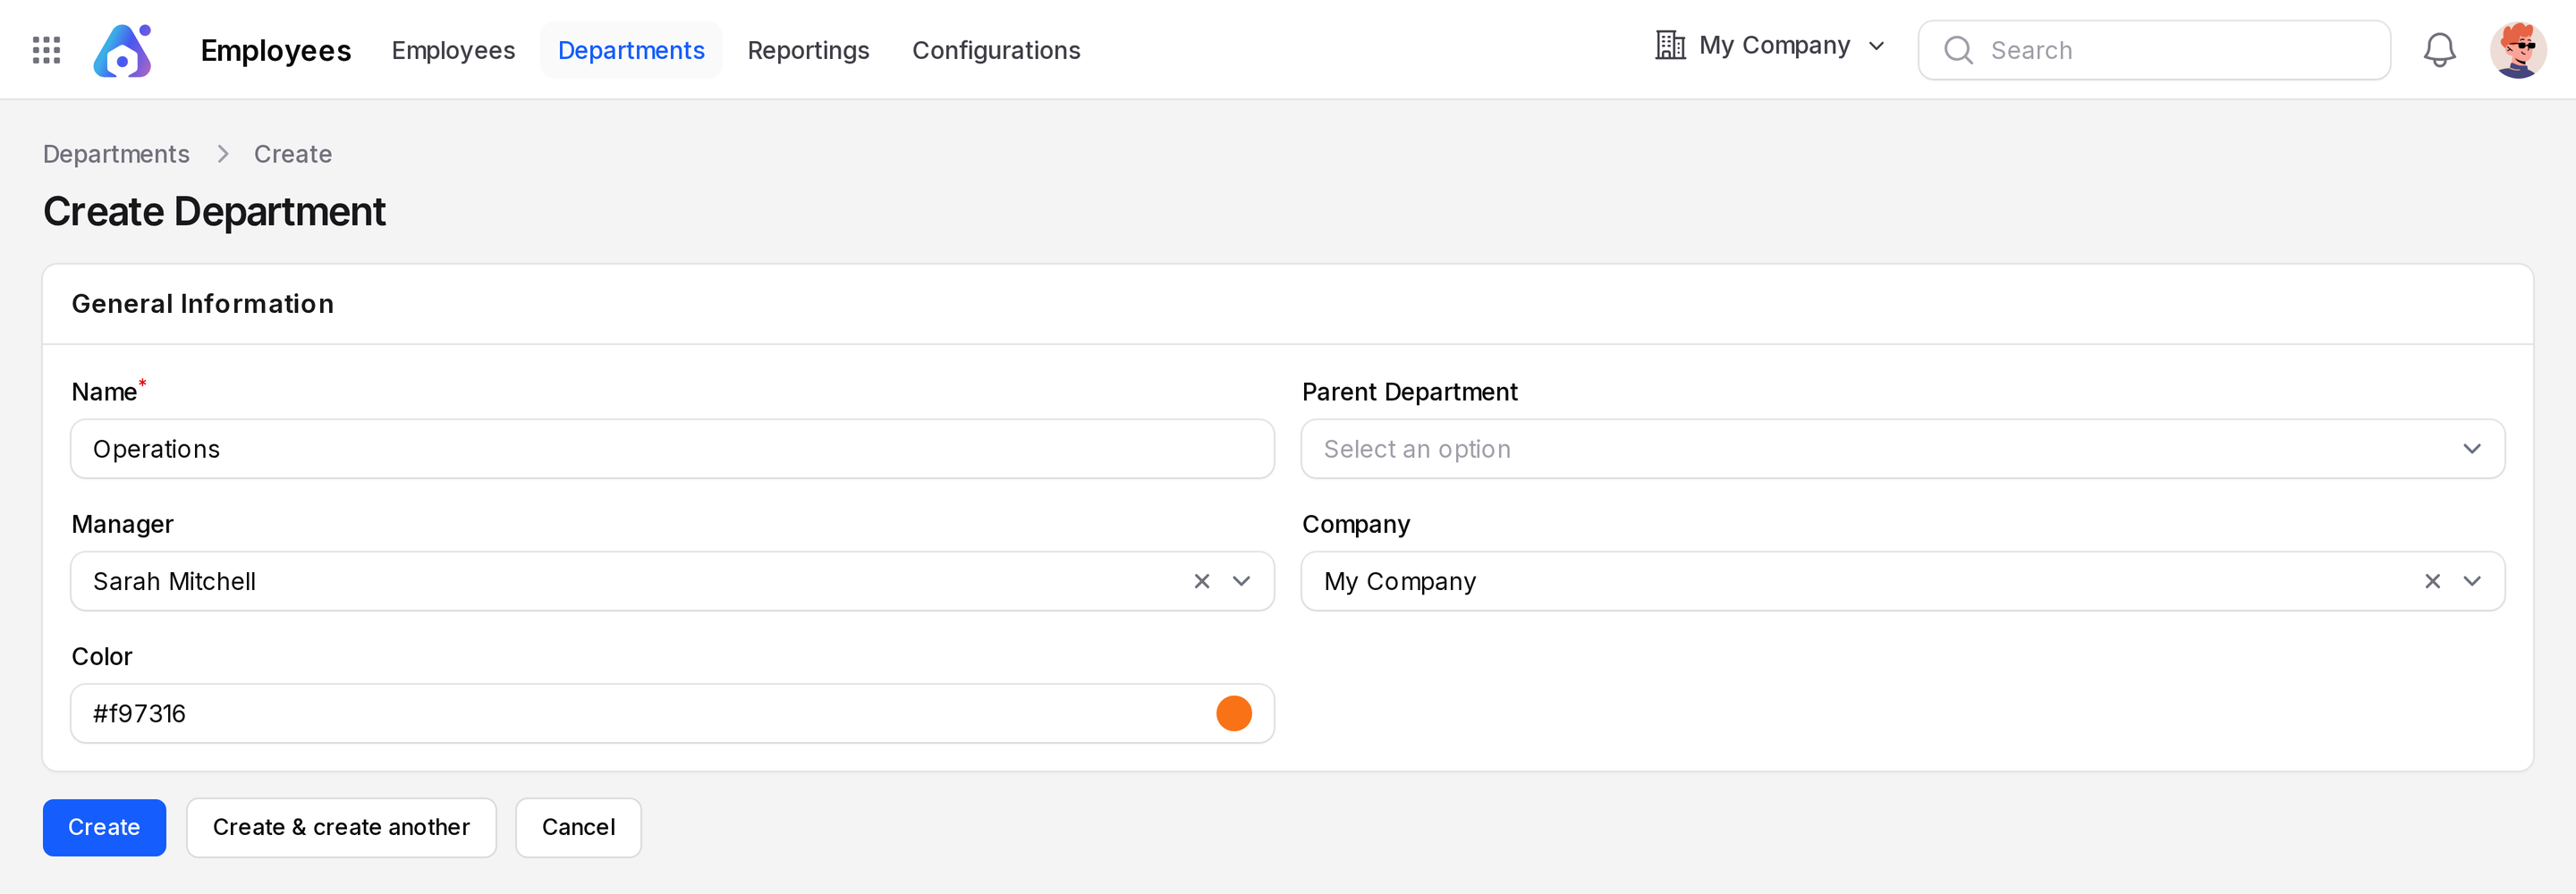
- Click Create. A Department created notification says The department has been created successfully. Aureus opens the department. Open
Employees → Departmentsto see its card.
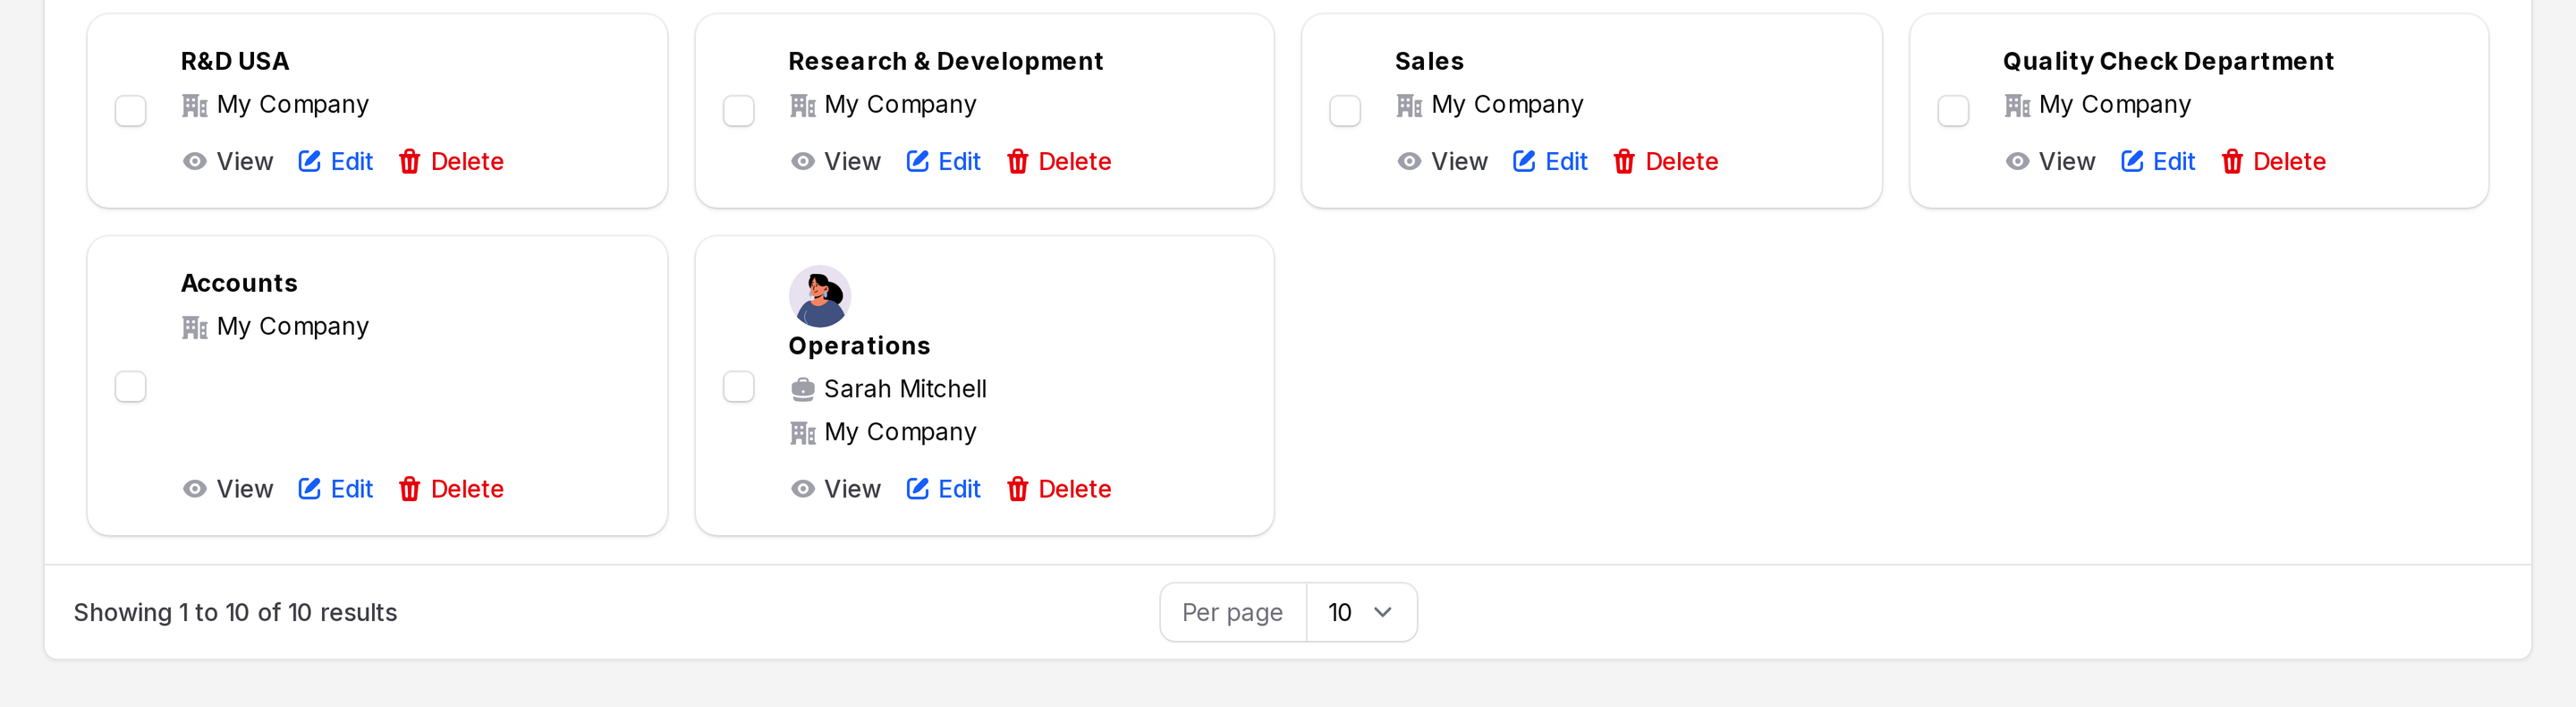
Behind the scenes: The list of managers only shows employees of the company you chose. If you change the company, the manager clears. See Departments.
Step 2: Create the job position Warehouse Supervisor
A job position is a role that exists in your company, such as an open or filled post. The employee form lets you pick it.
- Open
Employees → Configurations → Job Positions. - Click Job Position. A full page opens.
- Fill in the form.
- Job Position Title: Required. Type
Warehouse Supervisor. - Department: Choose Operations.
- Company: Fills with My Company.
- Job Description: Type
Leads the warehouse team and keeps stock records accurate. - Recruitment Target: Type
2. It is how many people you plan to hire for this role. Recruitment uses it. - Employment Type: Choose Full-Time.
- Status: Turn it on.
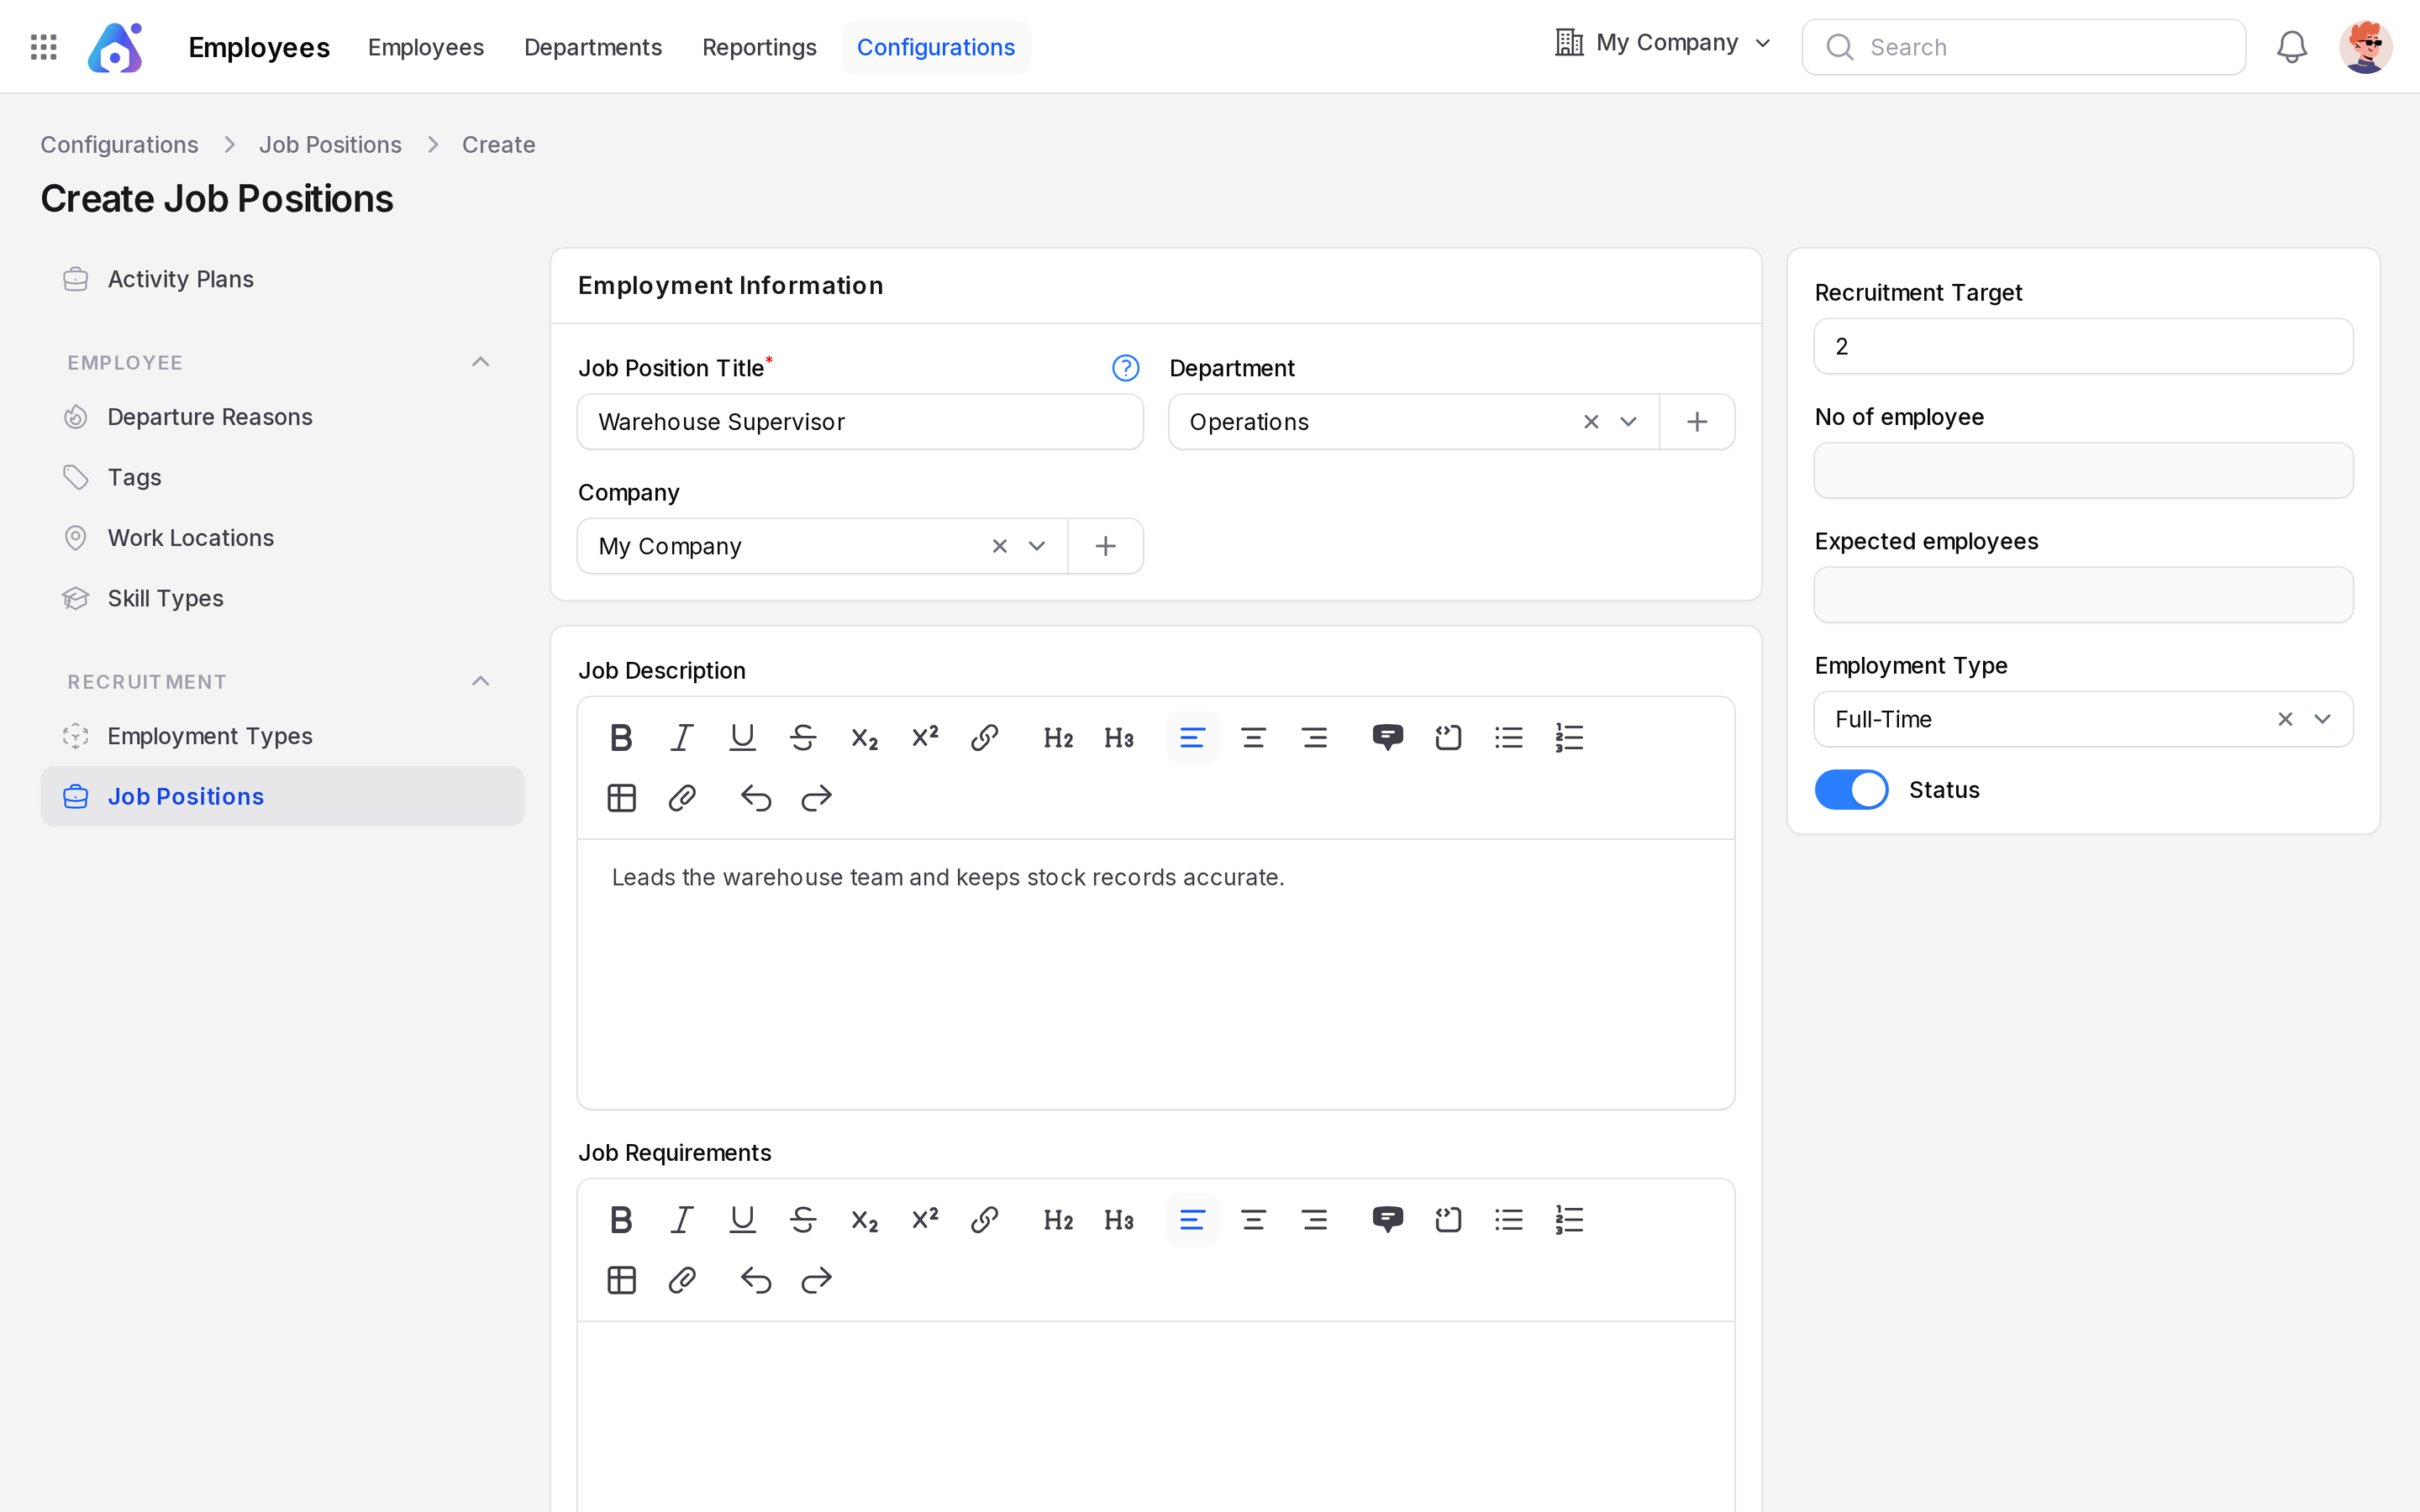
- Click Create.
The form also shows read-only No of employee and Expected employees in the right-hand panel. Aureus calculates them. You do not fill them in.
See Job positions for every field. This tutorial lists only the fields that matter. Other pages give the full field lists.
Step 3: Add the employee
- Open
Employees → Employees. - Click New Employee. The form opens with a top block and three tabs.
Top block
- Name: Required. Type
Priya Sharma. - Job Title: Type
Warehouse Supervisor. - Work Email: Type
priya.sharma@mycompany.com. - Department: Choose Operations.
- Job Position: Choose Warehouse Supervisor.
- Work Mobile: Type
9876543210. - Work Phone: Type
0221234567. - Manager: Choose Sarah Mitchell.
- Coach: Choose Rachel Kim.
- Employee Tags: Choose Operations and Senior.
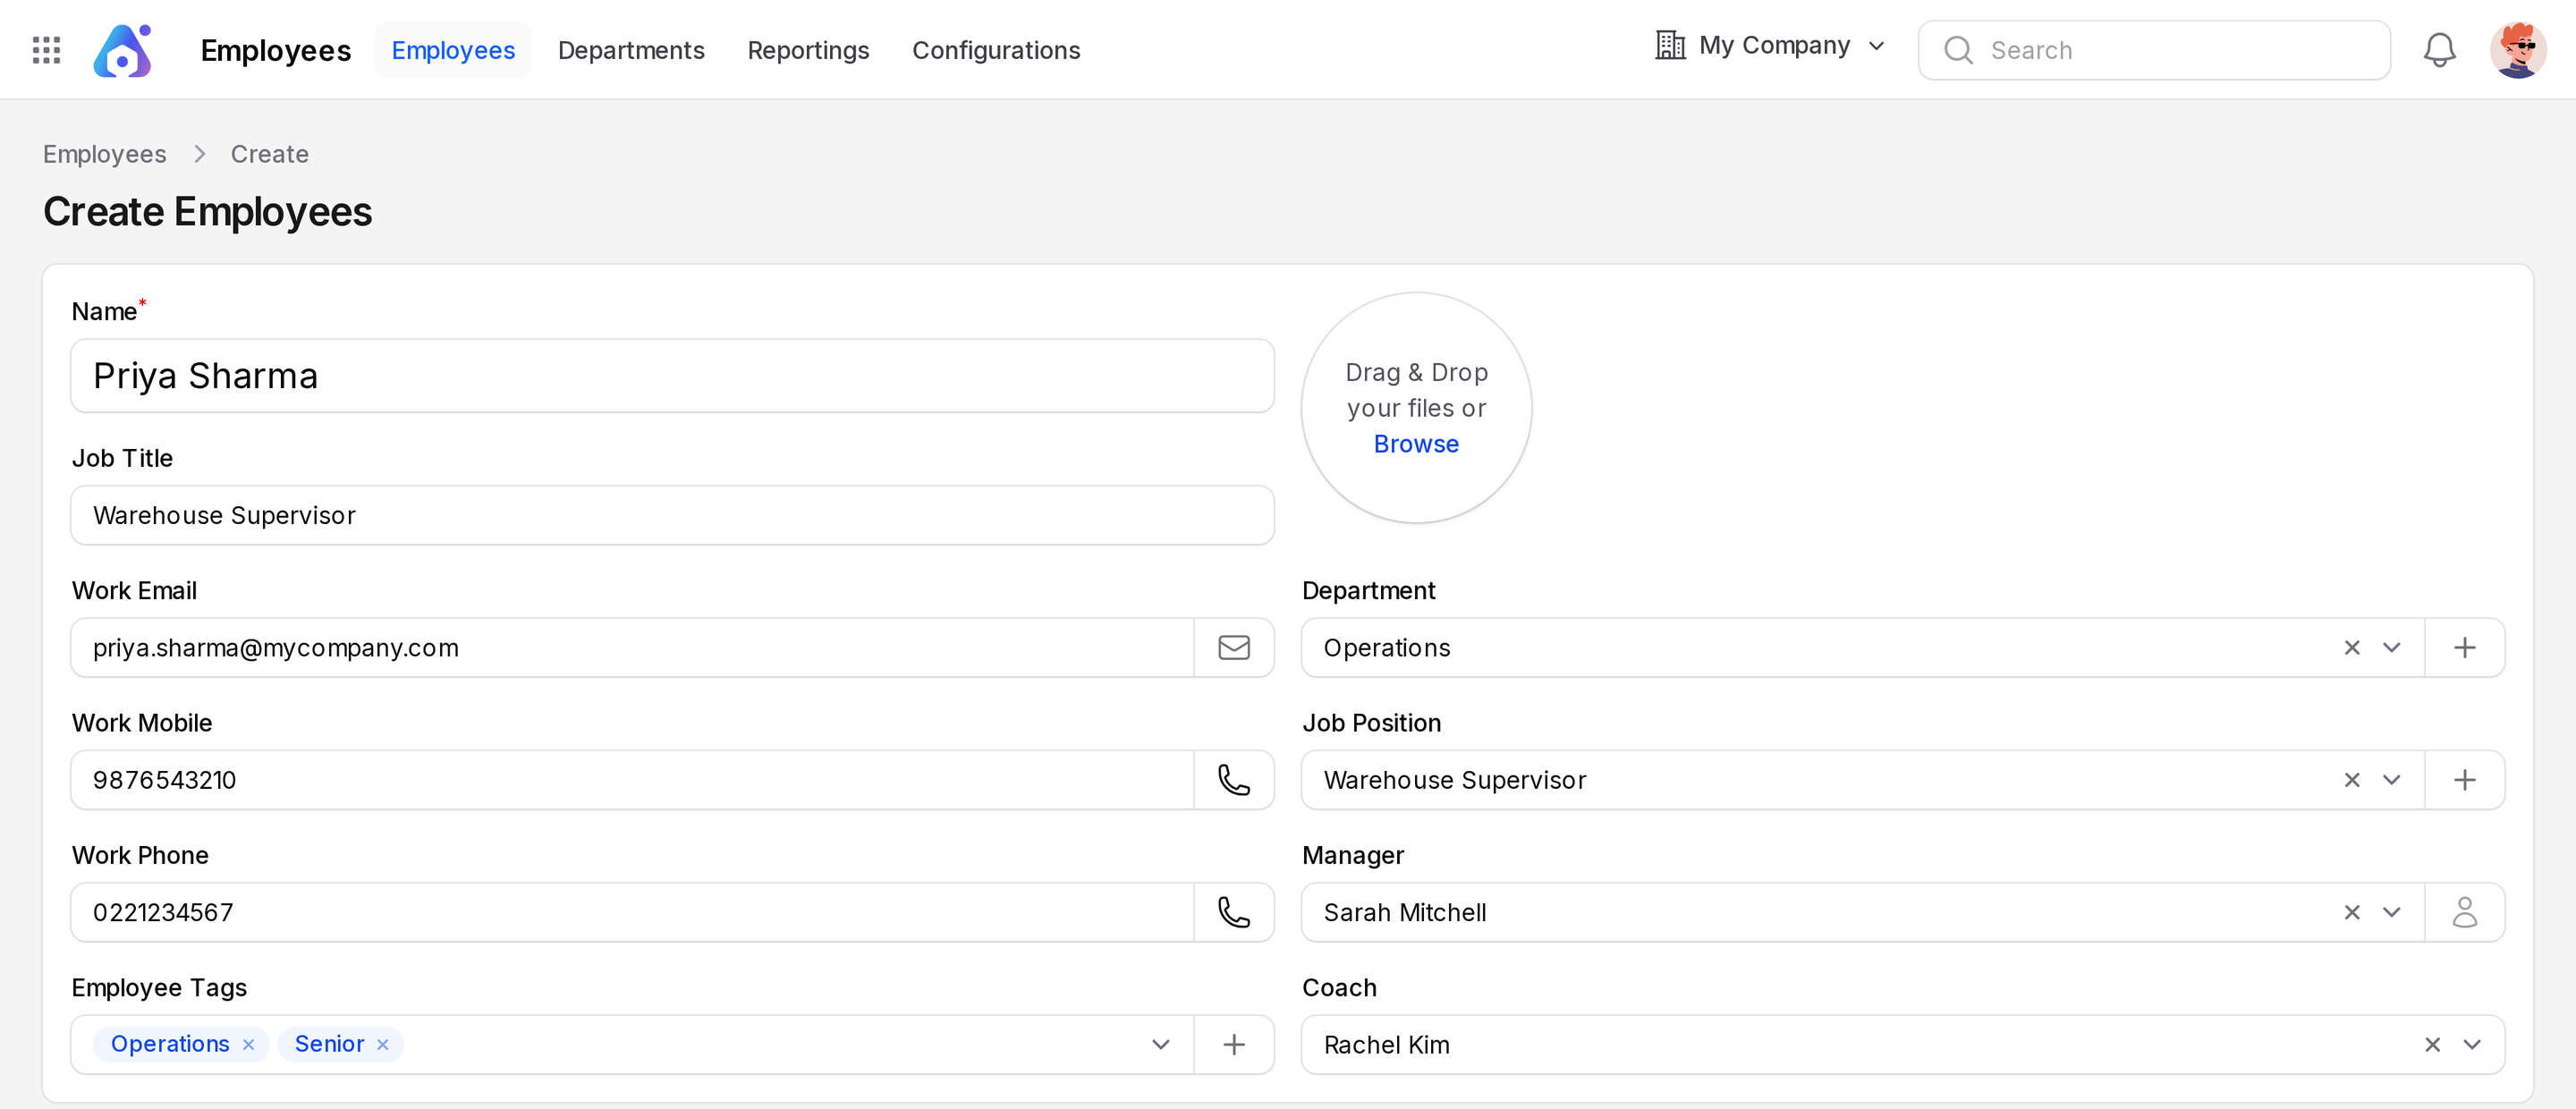
TIP
Choosing a department does not fill the manager or job position. Pick each one yourself.
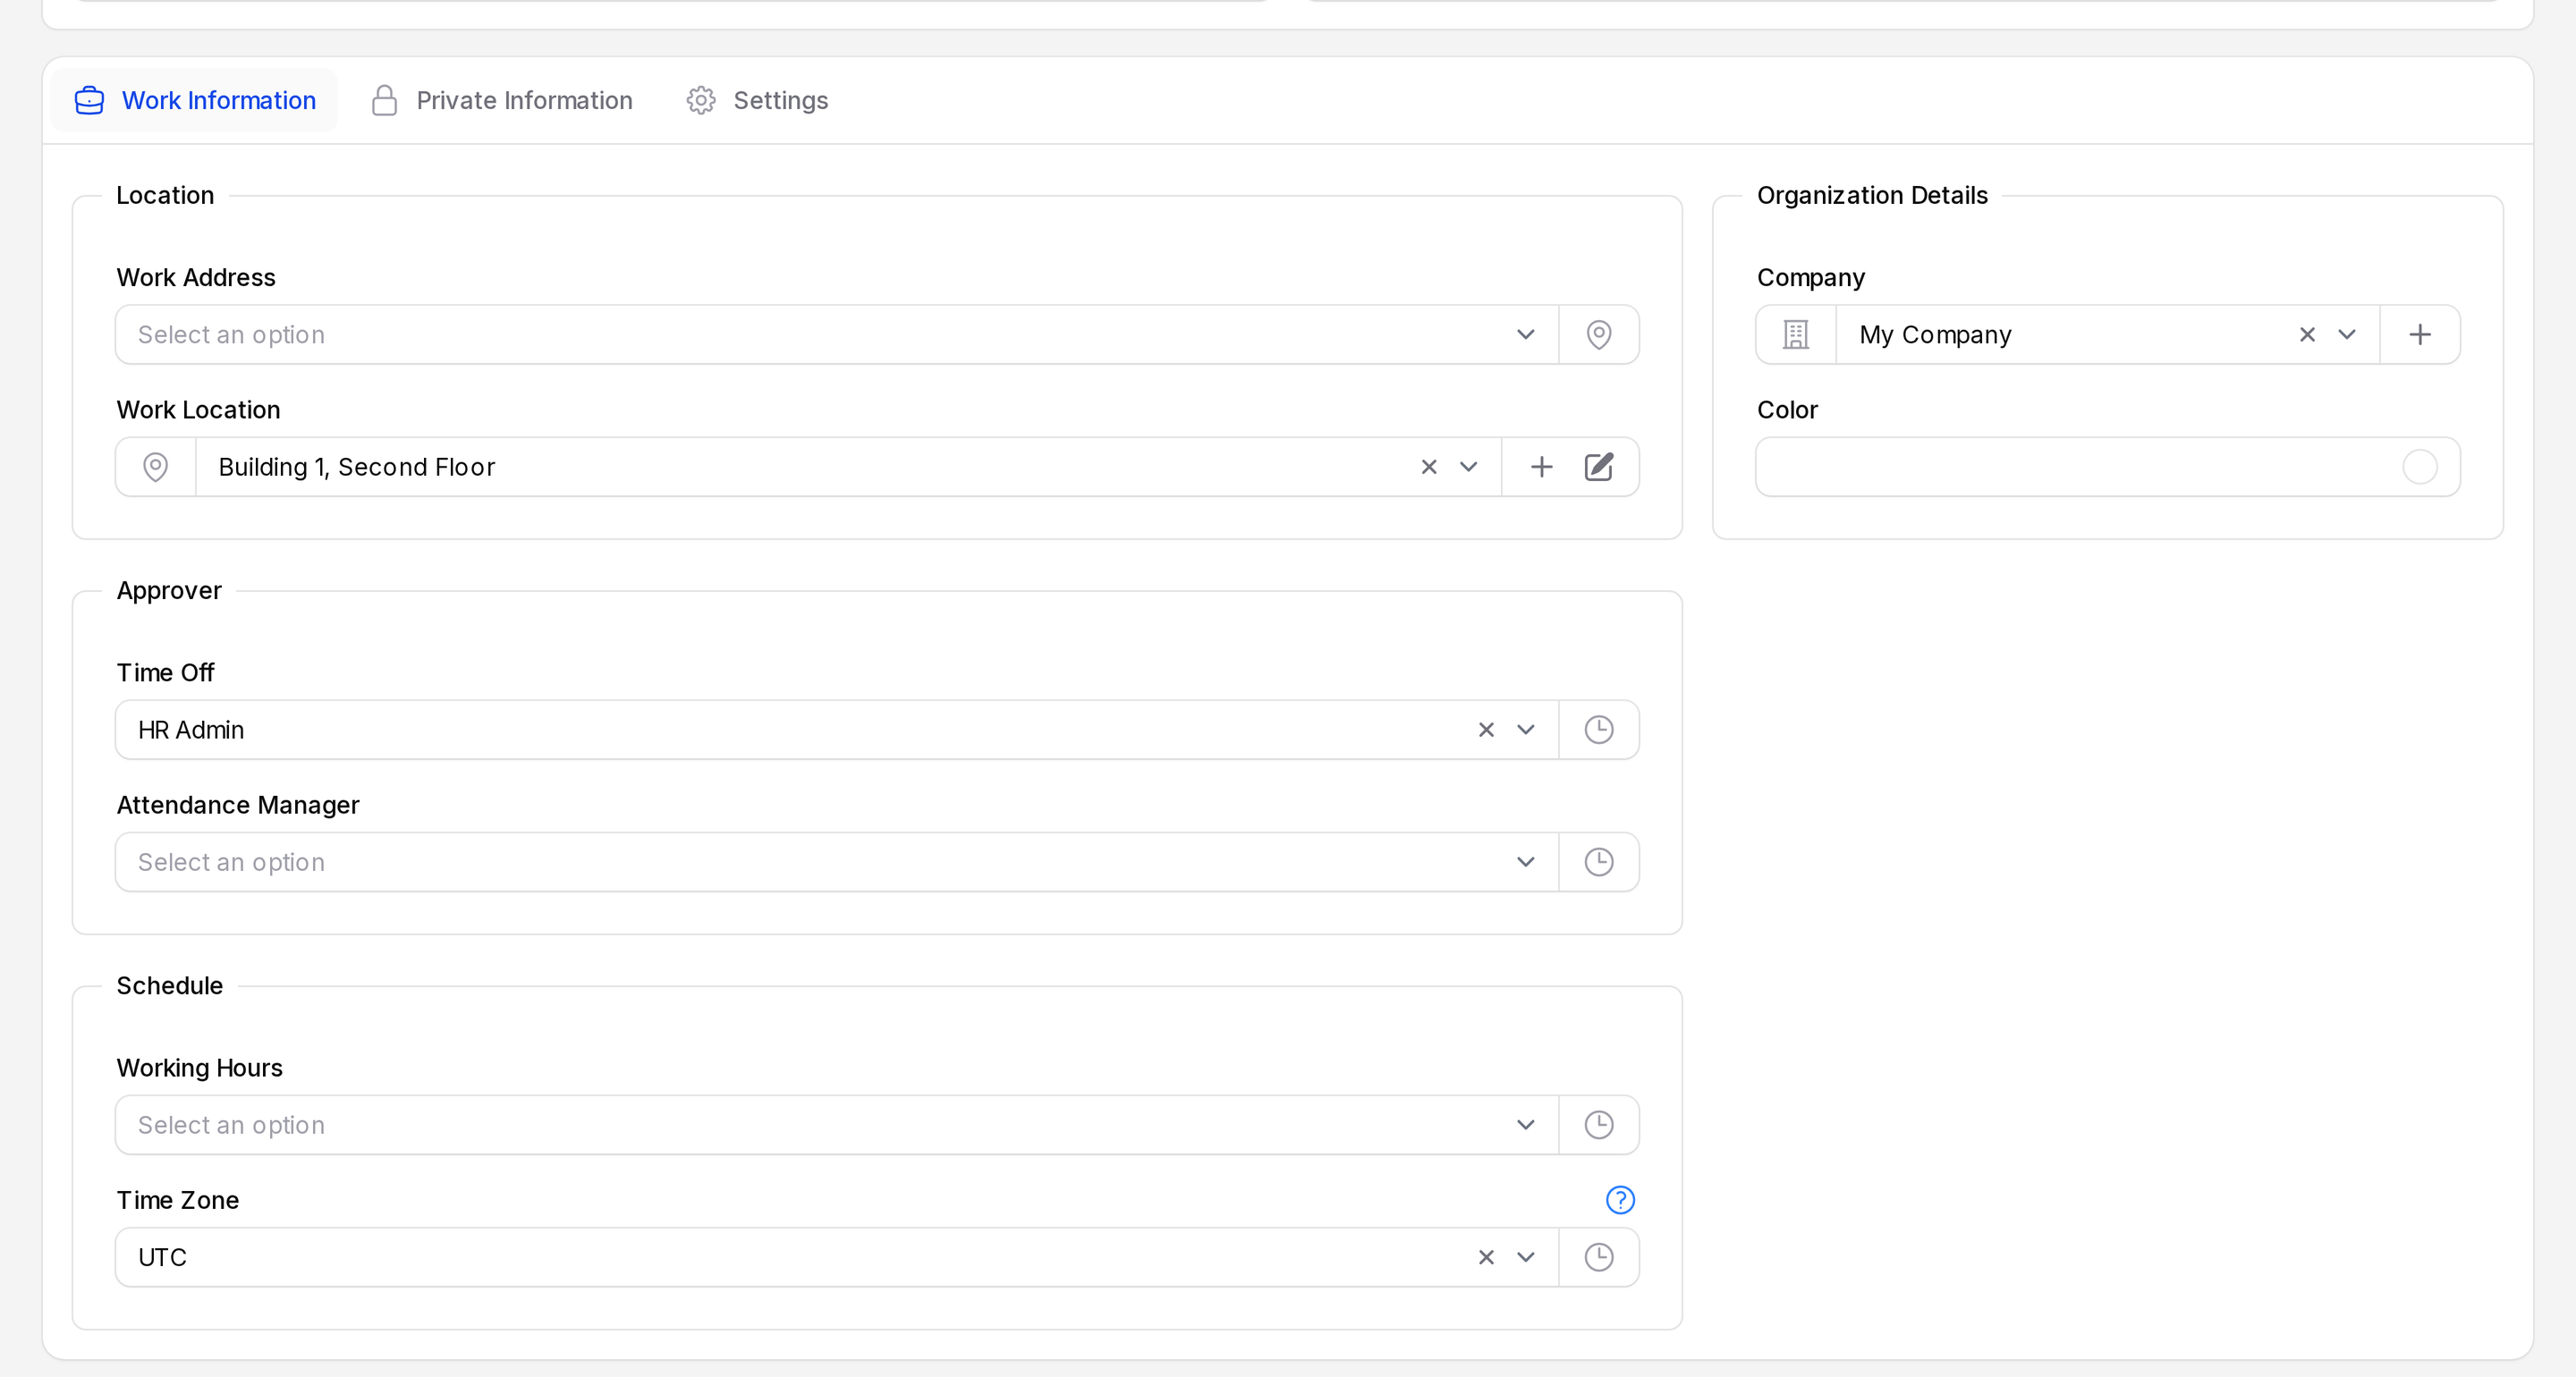
Work Information tab
This tab opens first.
- Work Location: Choose Building 1, Second Floor.
- Time Off: Under Approver, choose the user HR Admin. This user approves Priya's leave. The list shows users, not employees.
- Working Hours: Leave it empty.
- Time Zone: Keep UTC.
- Company: Keeps My Company.
Private Information tab
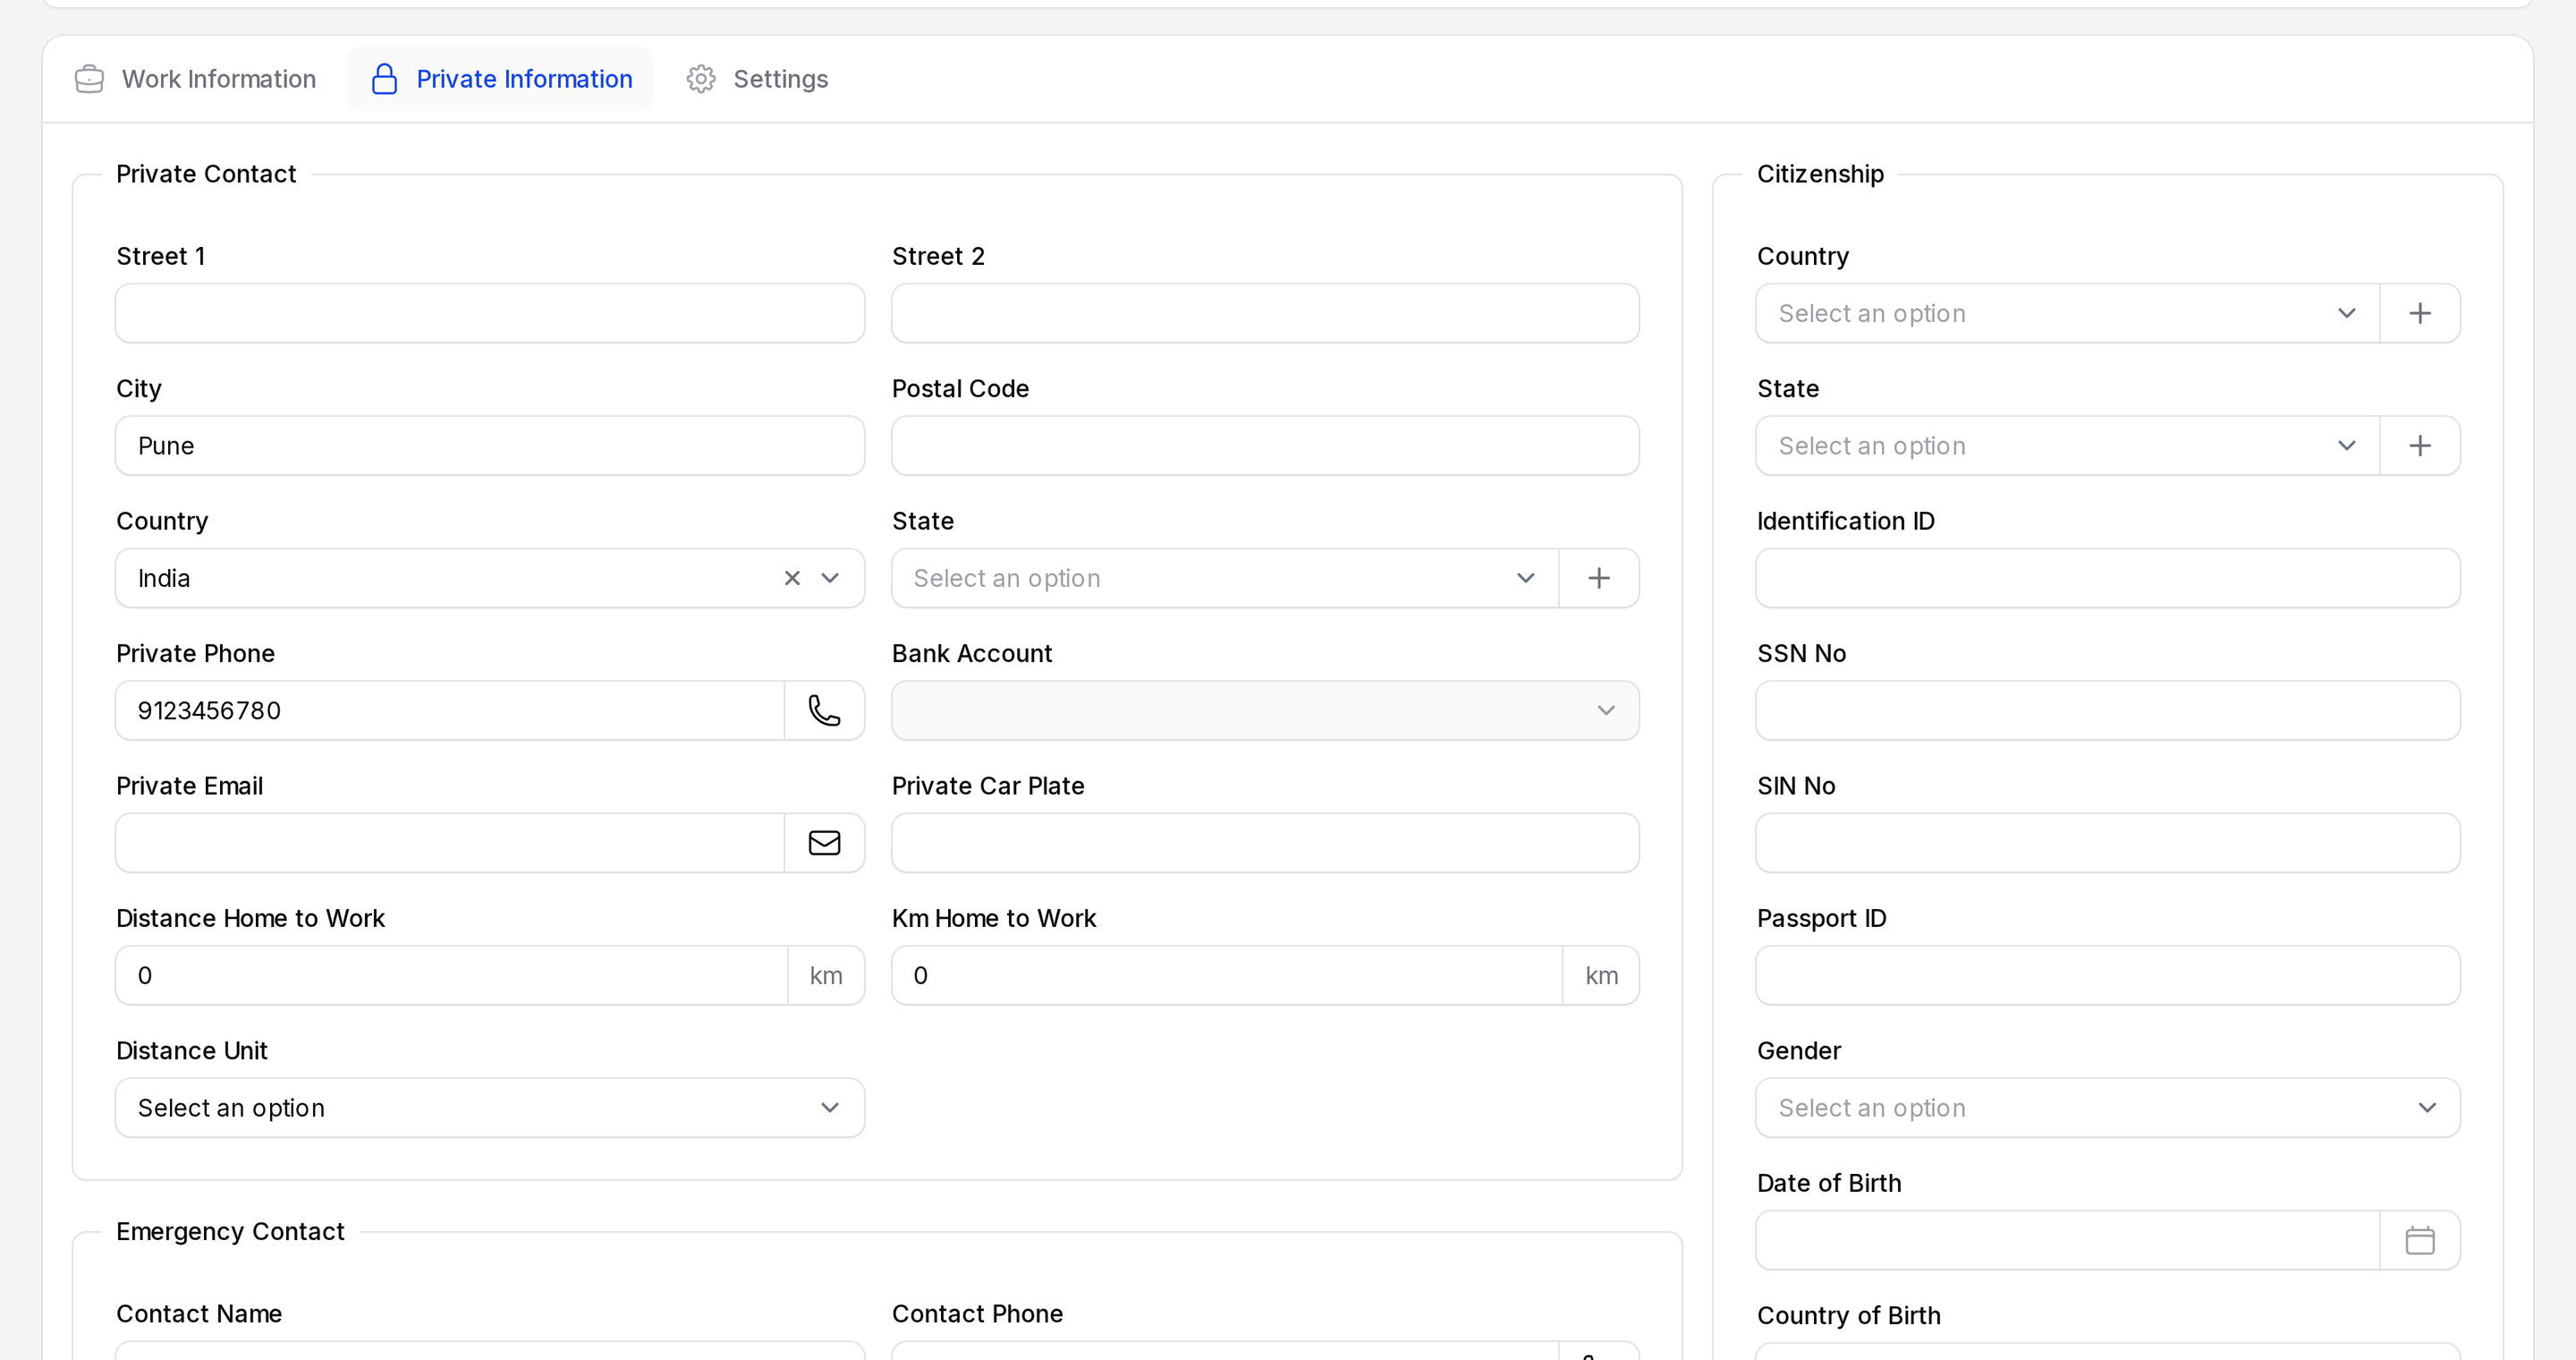
Open the Private Information tab. Fill a few fields to see how it works.
- City: Type
Pune. - Country: Choose India.
- Private Phone: Type
9123456780. - Contact Name: Under Emergency Contact, type
Anil Sharma. - Contact Phone: Type
9988776655. - Marital Status: Keep Single.
- Certificate Level: Choose Bachelor.
- Field of Study: Type
Logistics.
- Click Create. An Employee created notification says The employee has been created successfully. Aureus opens the employee on the View page with the Resume tab open. It is empty at first.
Behind the scenes: The Settings tab keeps Active Employee on, so Priya counts as a current employee. See Add an employee for all three tabs.
Step 4: Add a skill
Skills sit on a separate page of the employee.
- On Priya's page, click Manage Skills.
- Click Add Skill. A window opens.
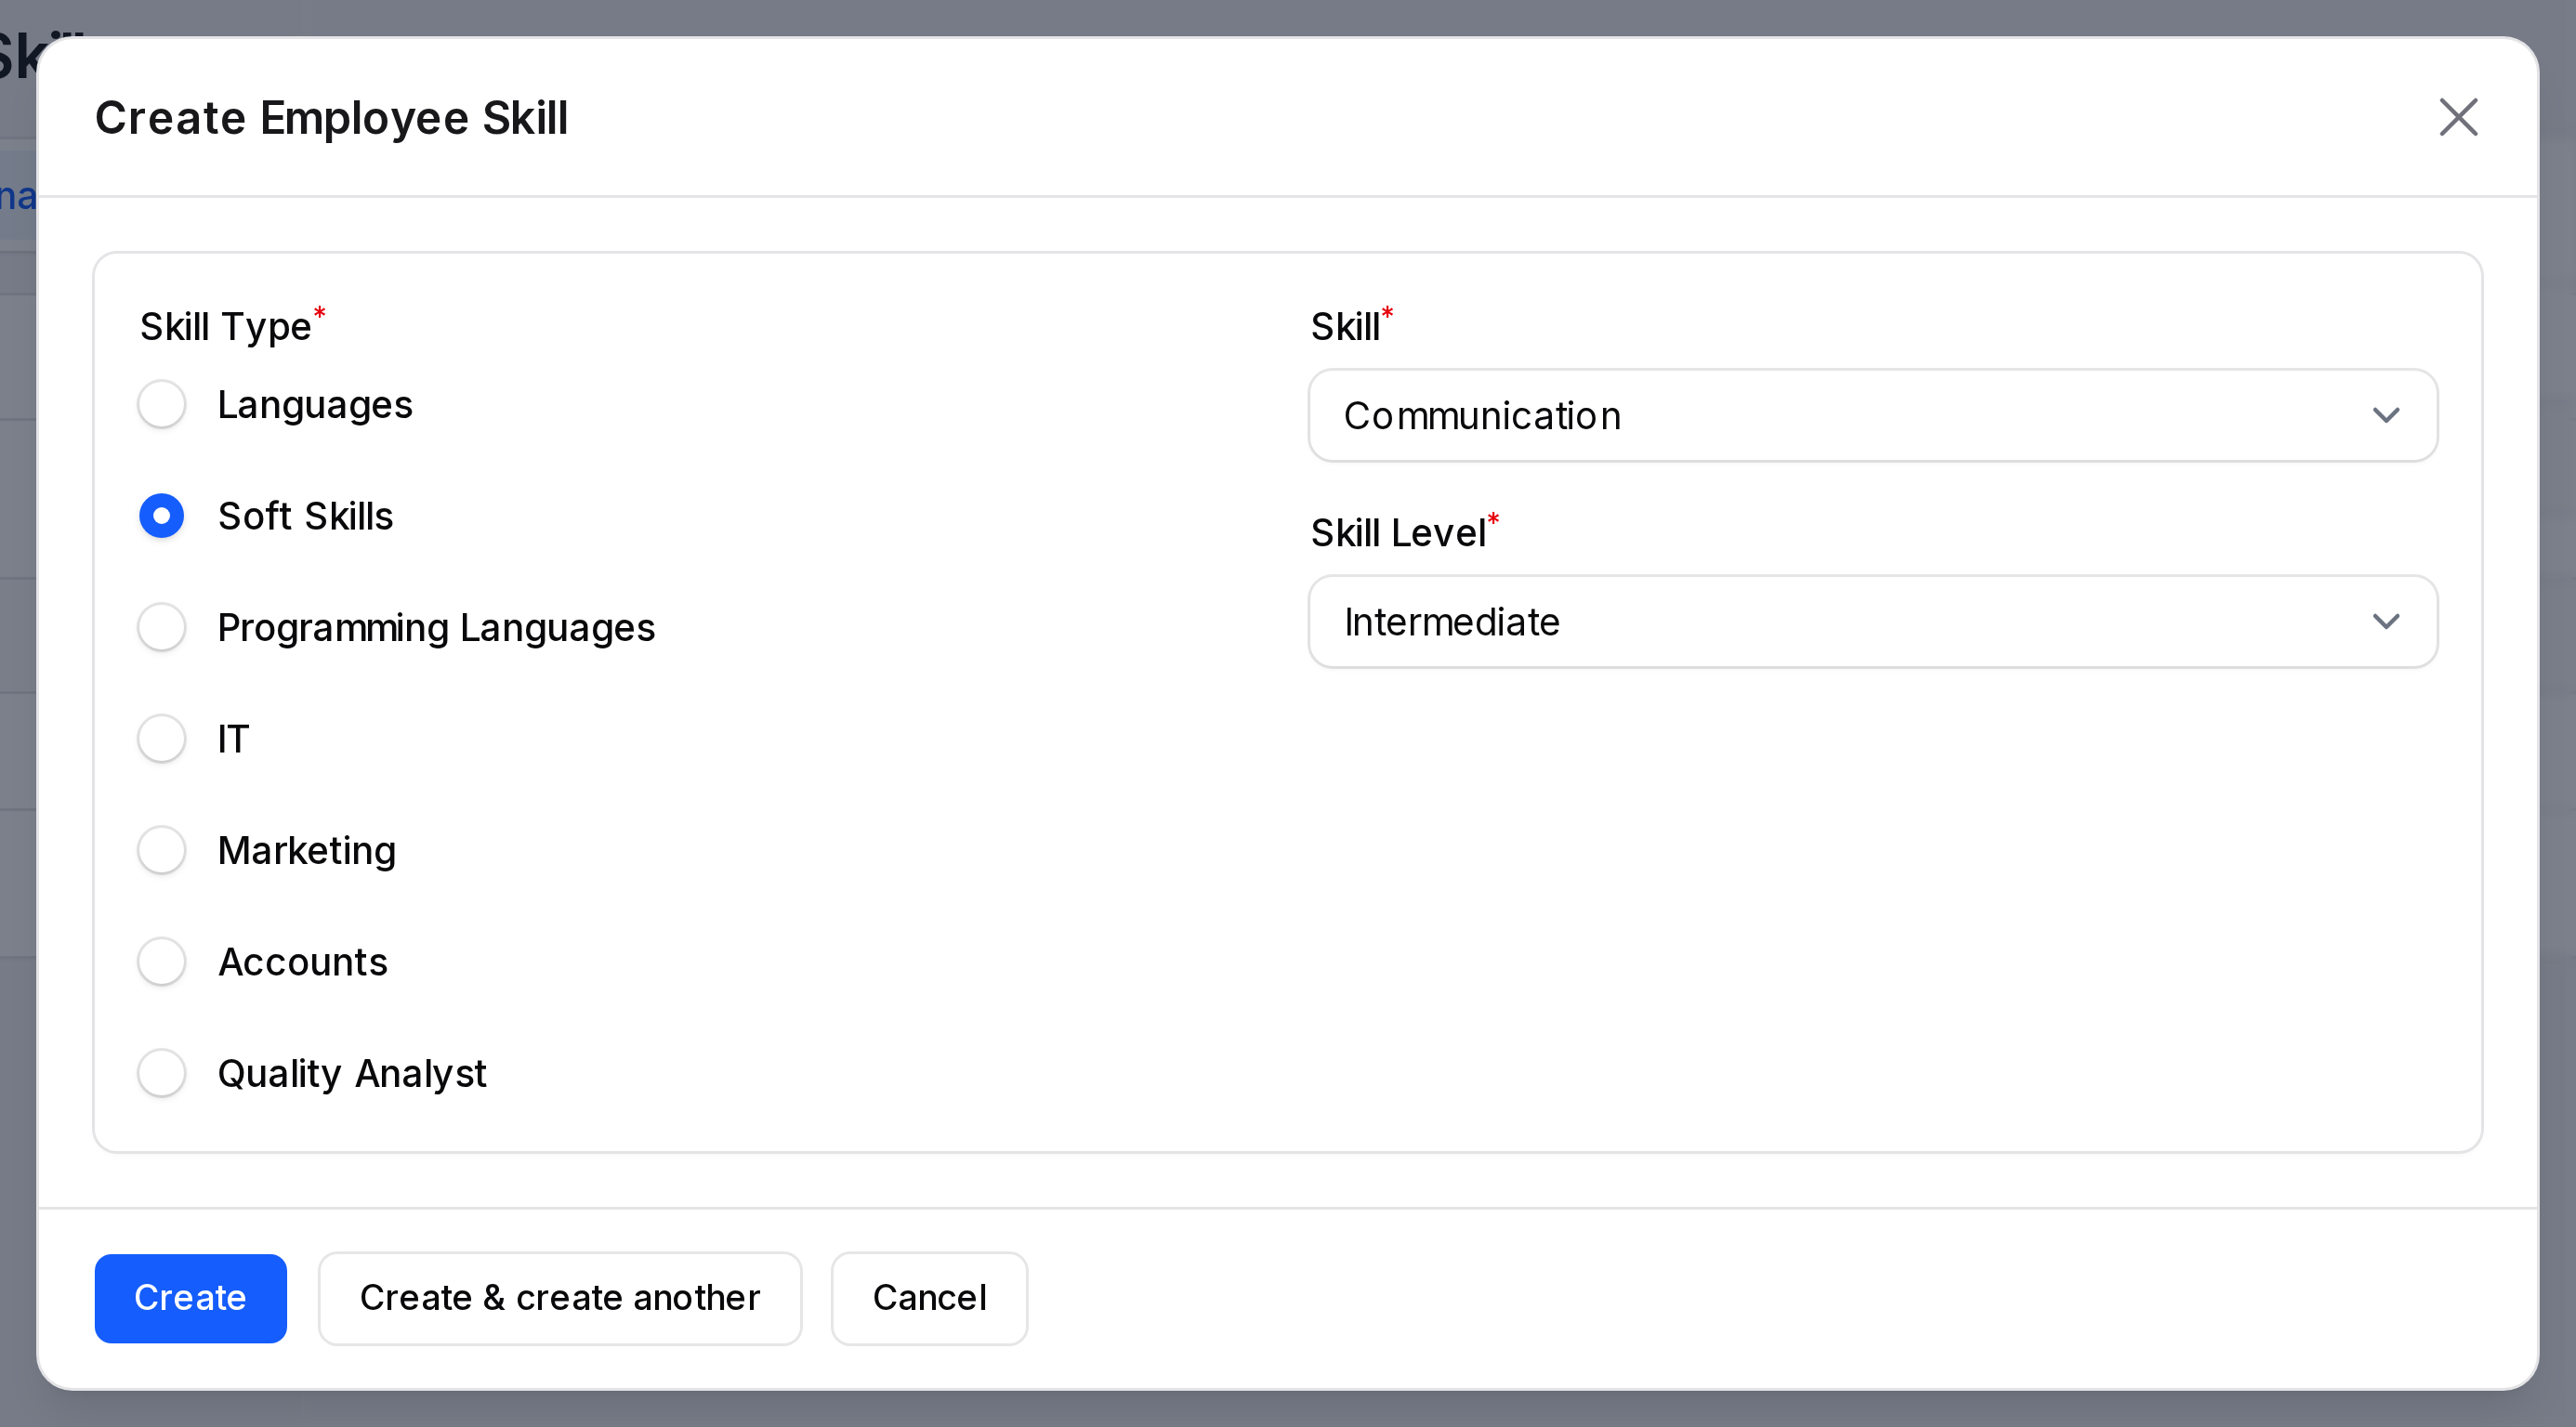
- Choose the values.
- Skill Type: Required. Choose Soft Skills.
- Skill: Required. Choose Communication.
- Skill Level: Required. Choose Intermediate.
- Click Create. A Skill created notification says The skill has been created successfully.
Behind the scenes: The skill and level lists change when you change the skill type. The level carries a percentage, shown on the profile as a bar. See Skills and resume.
Step 5: Add two resume lines
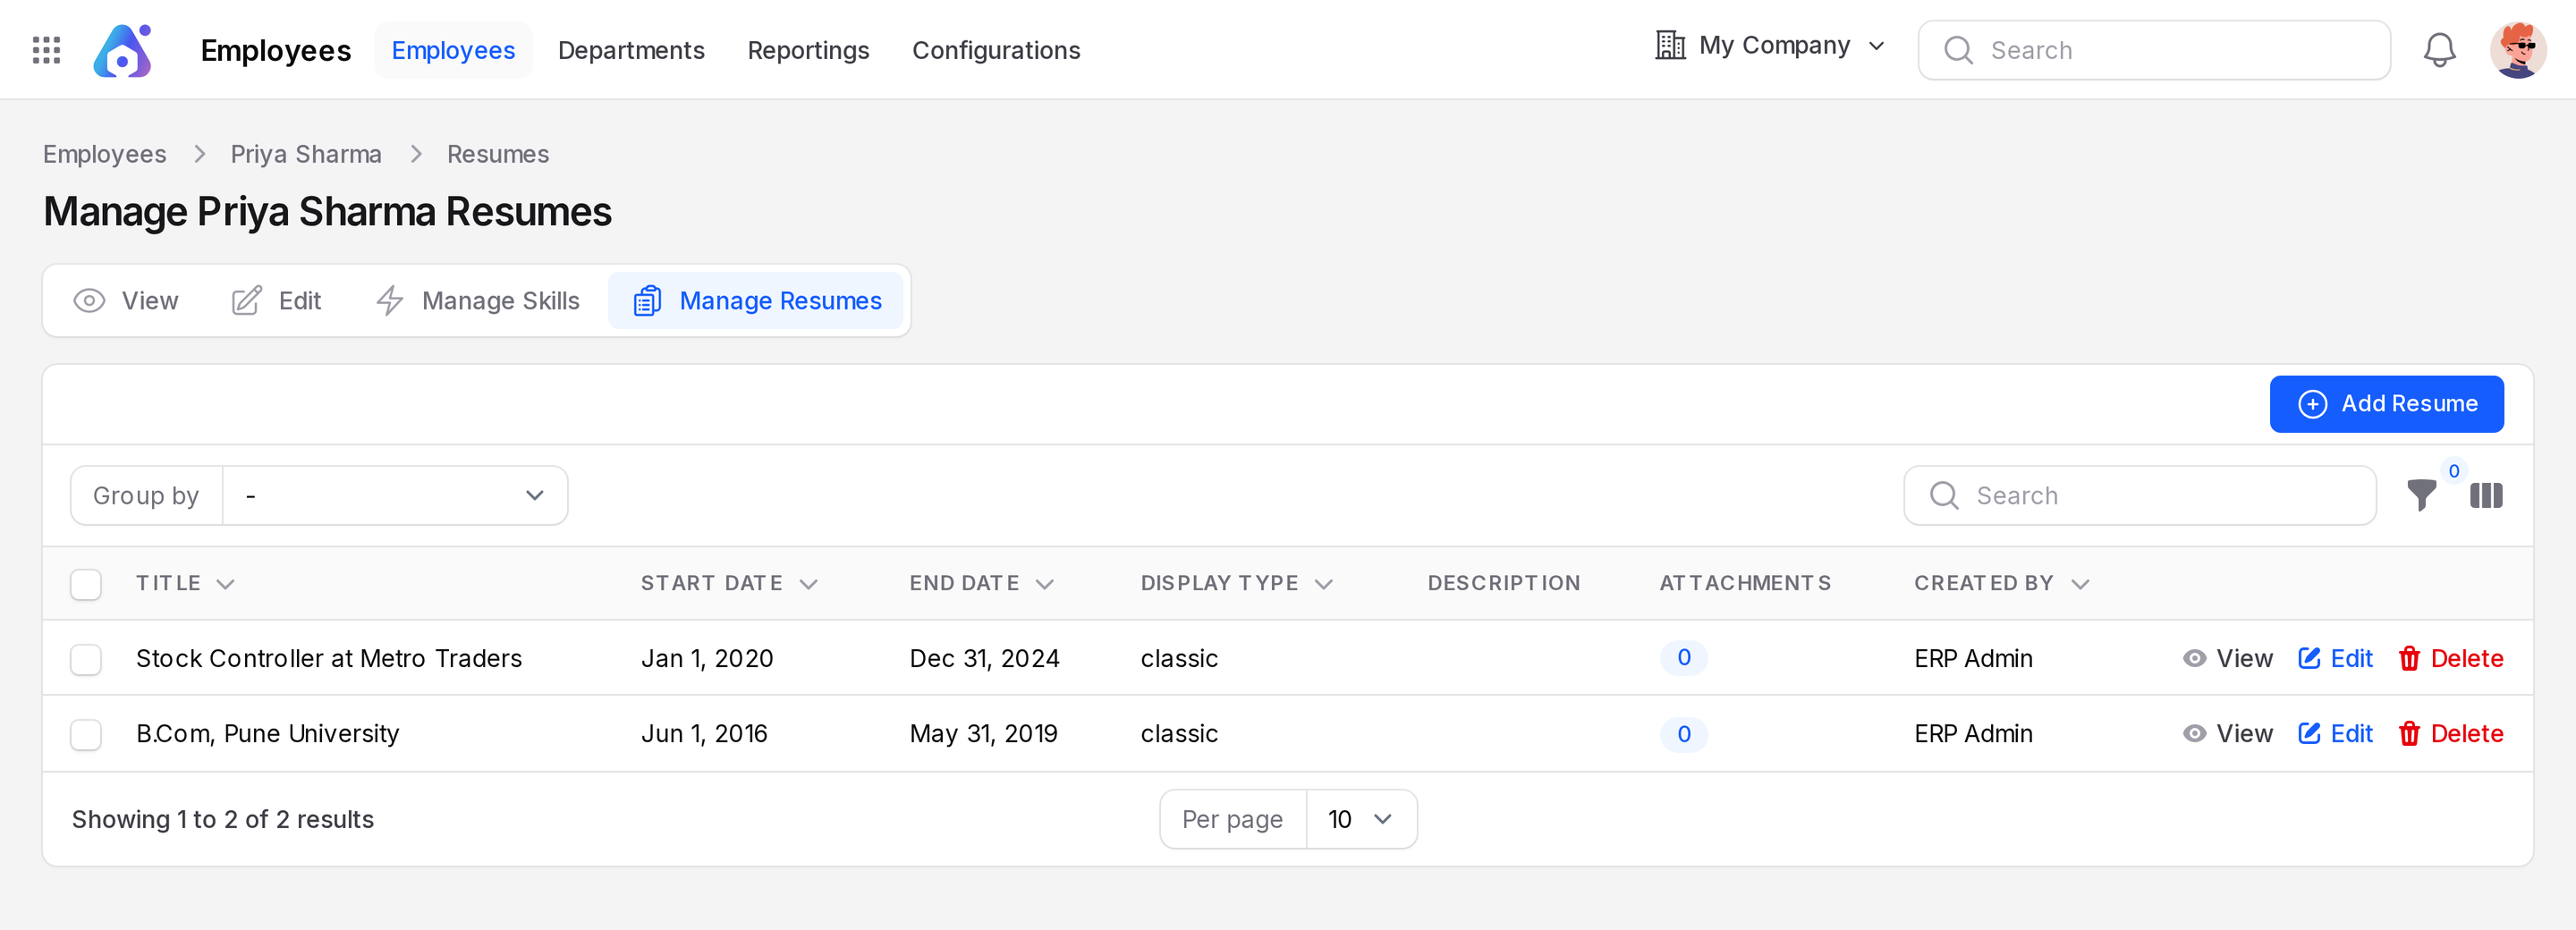
- Click Manage Resumes, then Add Resume.
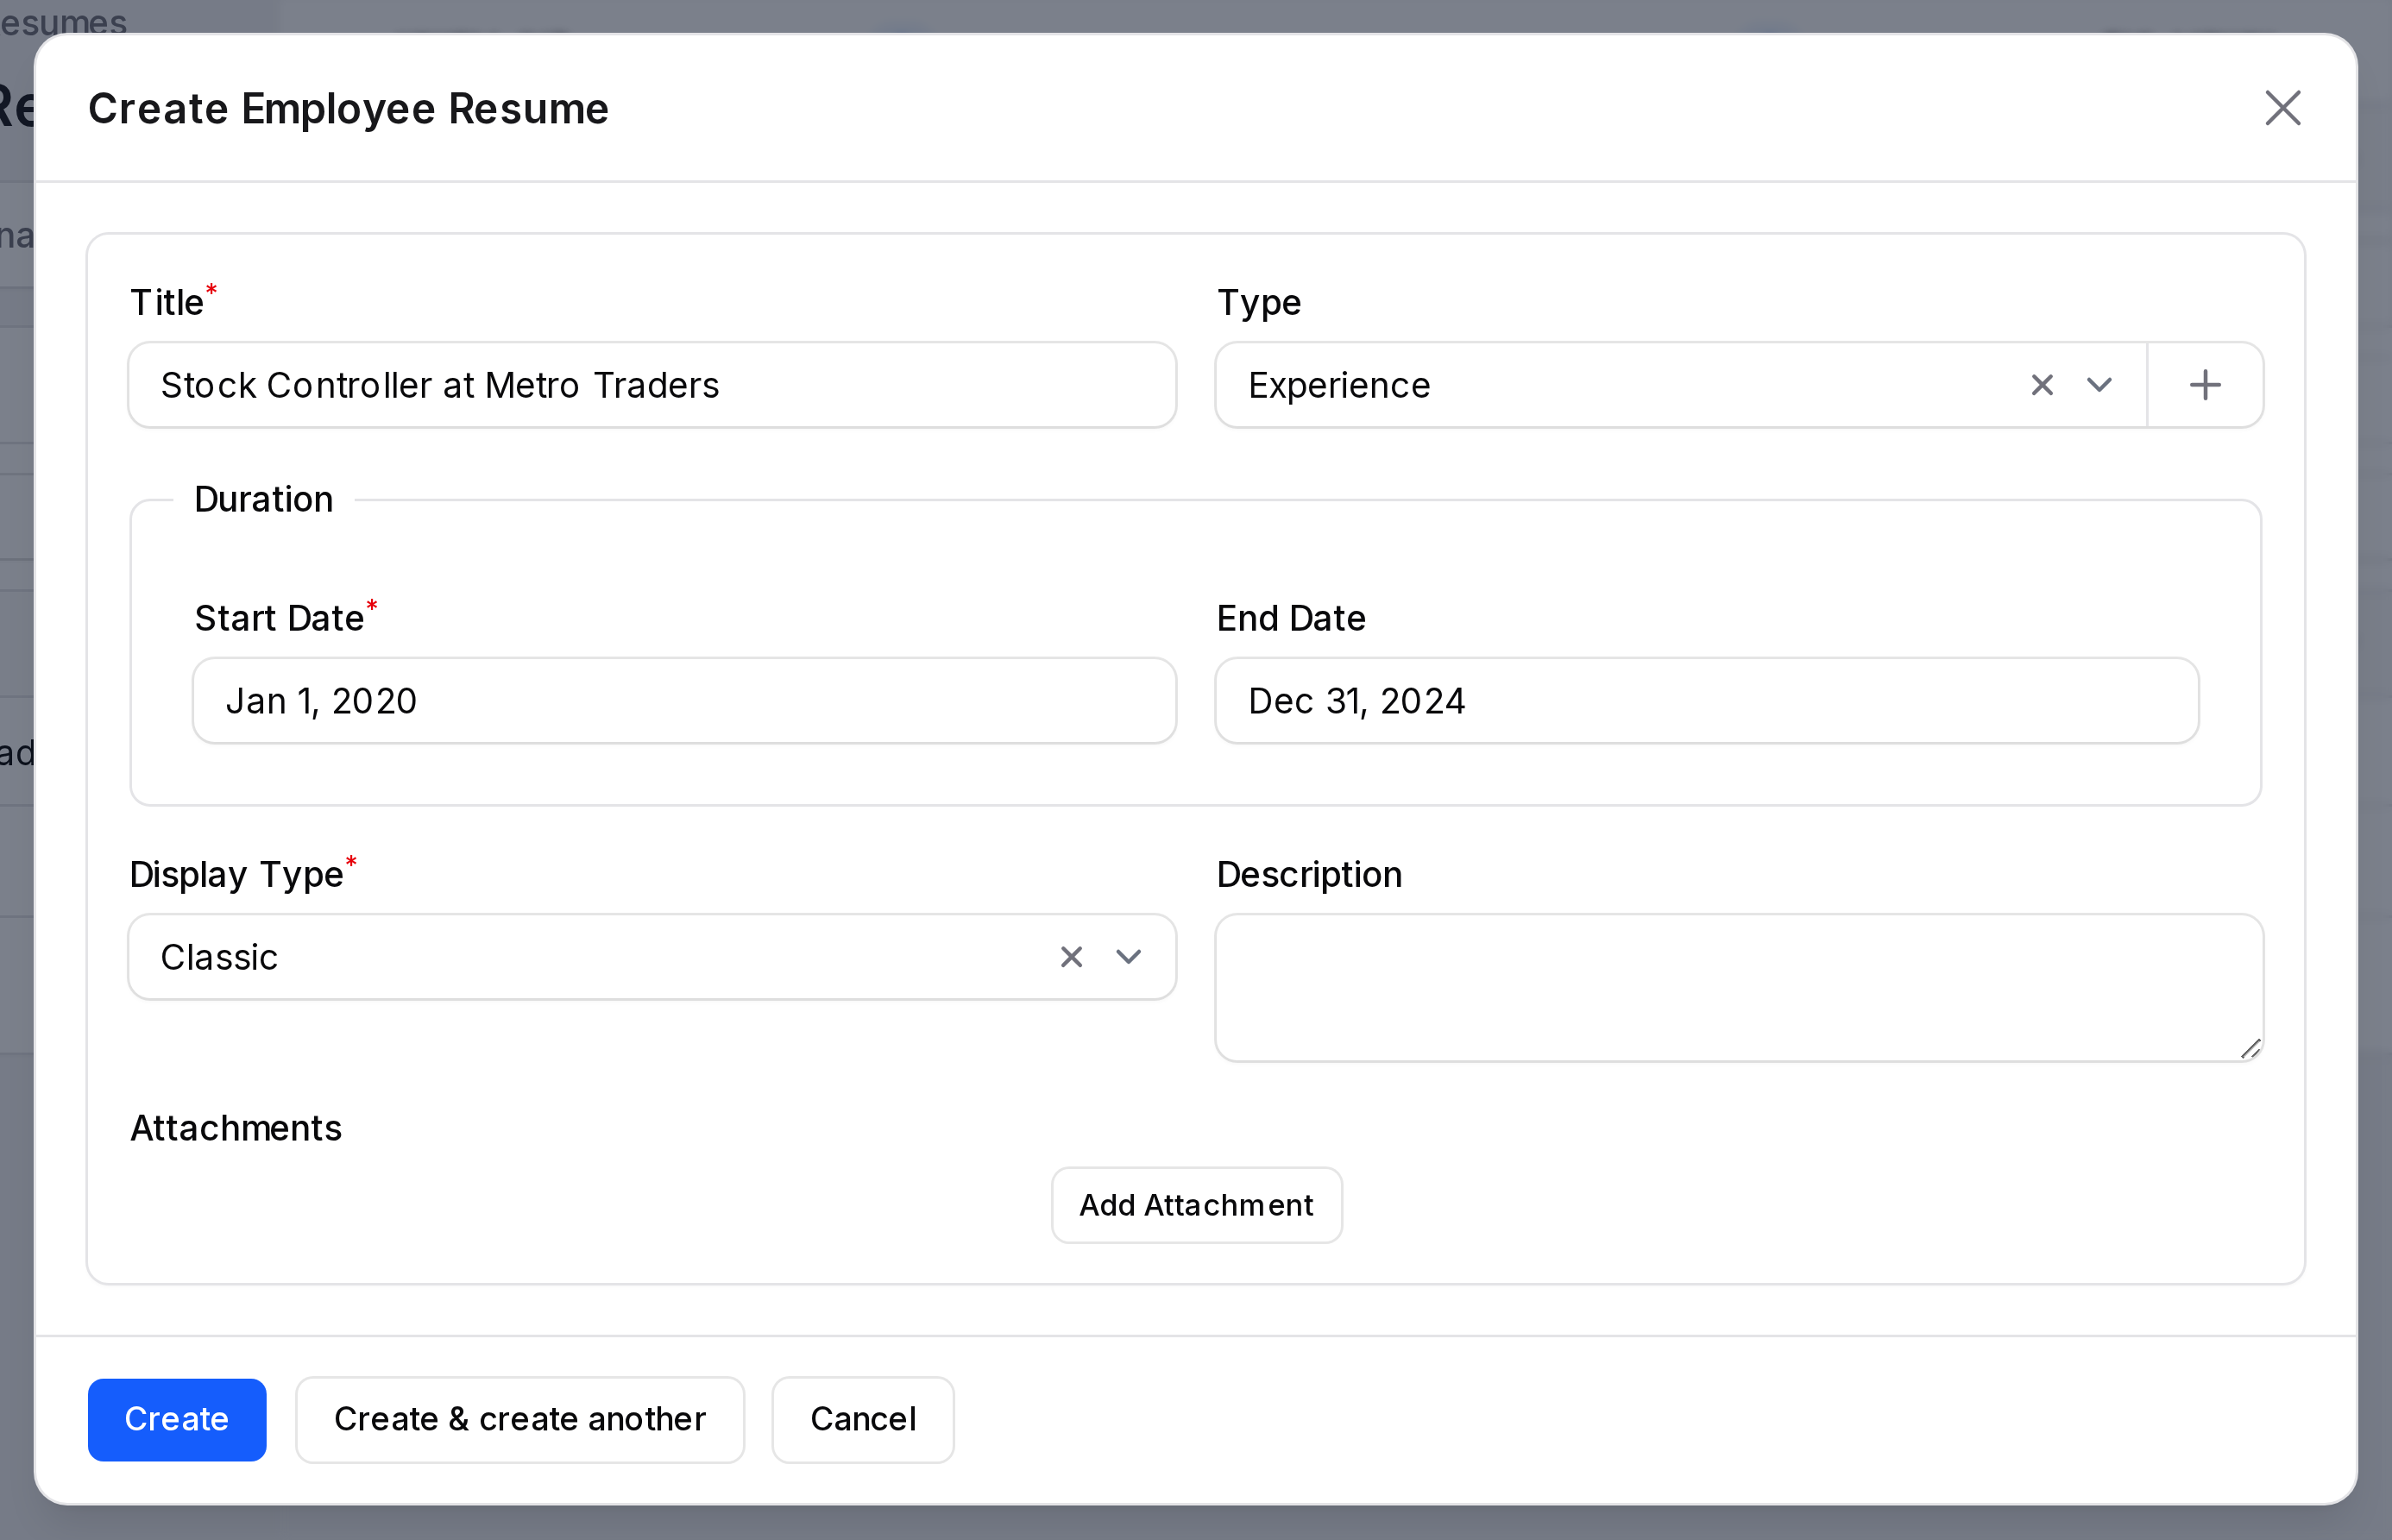
- Fill in the first line.
- Title: Required. Type
Stock Controller at Metro Traders. - Type: Choose Experience.
- Start Date: Required. Pick 1 January 2020 in the date picker. You cannot type the date.
- End Date: Pick 31 December 2024.
- Display Type: Required. Keep Classic. It only sets how the line looks on the profile.
- Click Create & create another.
- Add the second line: Title
B.Com, Pune University, Type Education, 2016 to 2019. - Click Create. A Resume created notification says The resume has been created successfully.
The Manage Resumes table shows the columns Title, Start Date, End Date, Display Type, Description, Attachments and Created By. Dates look like Jan 1, 2020.
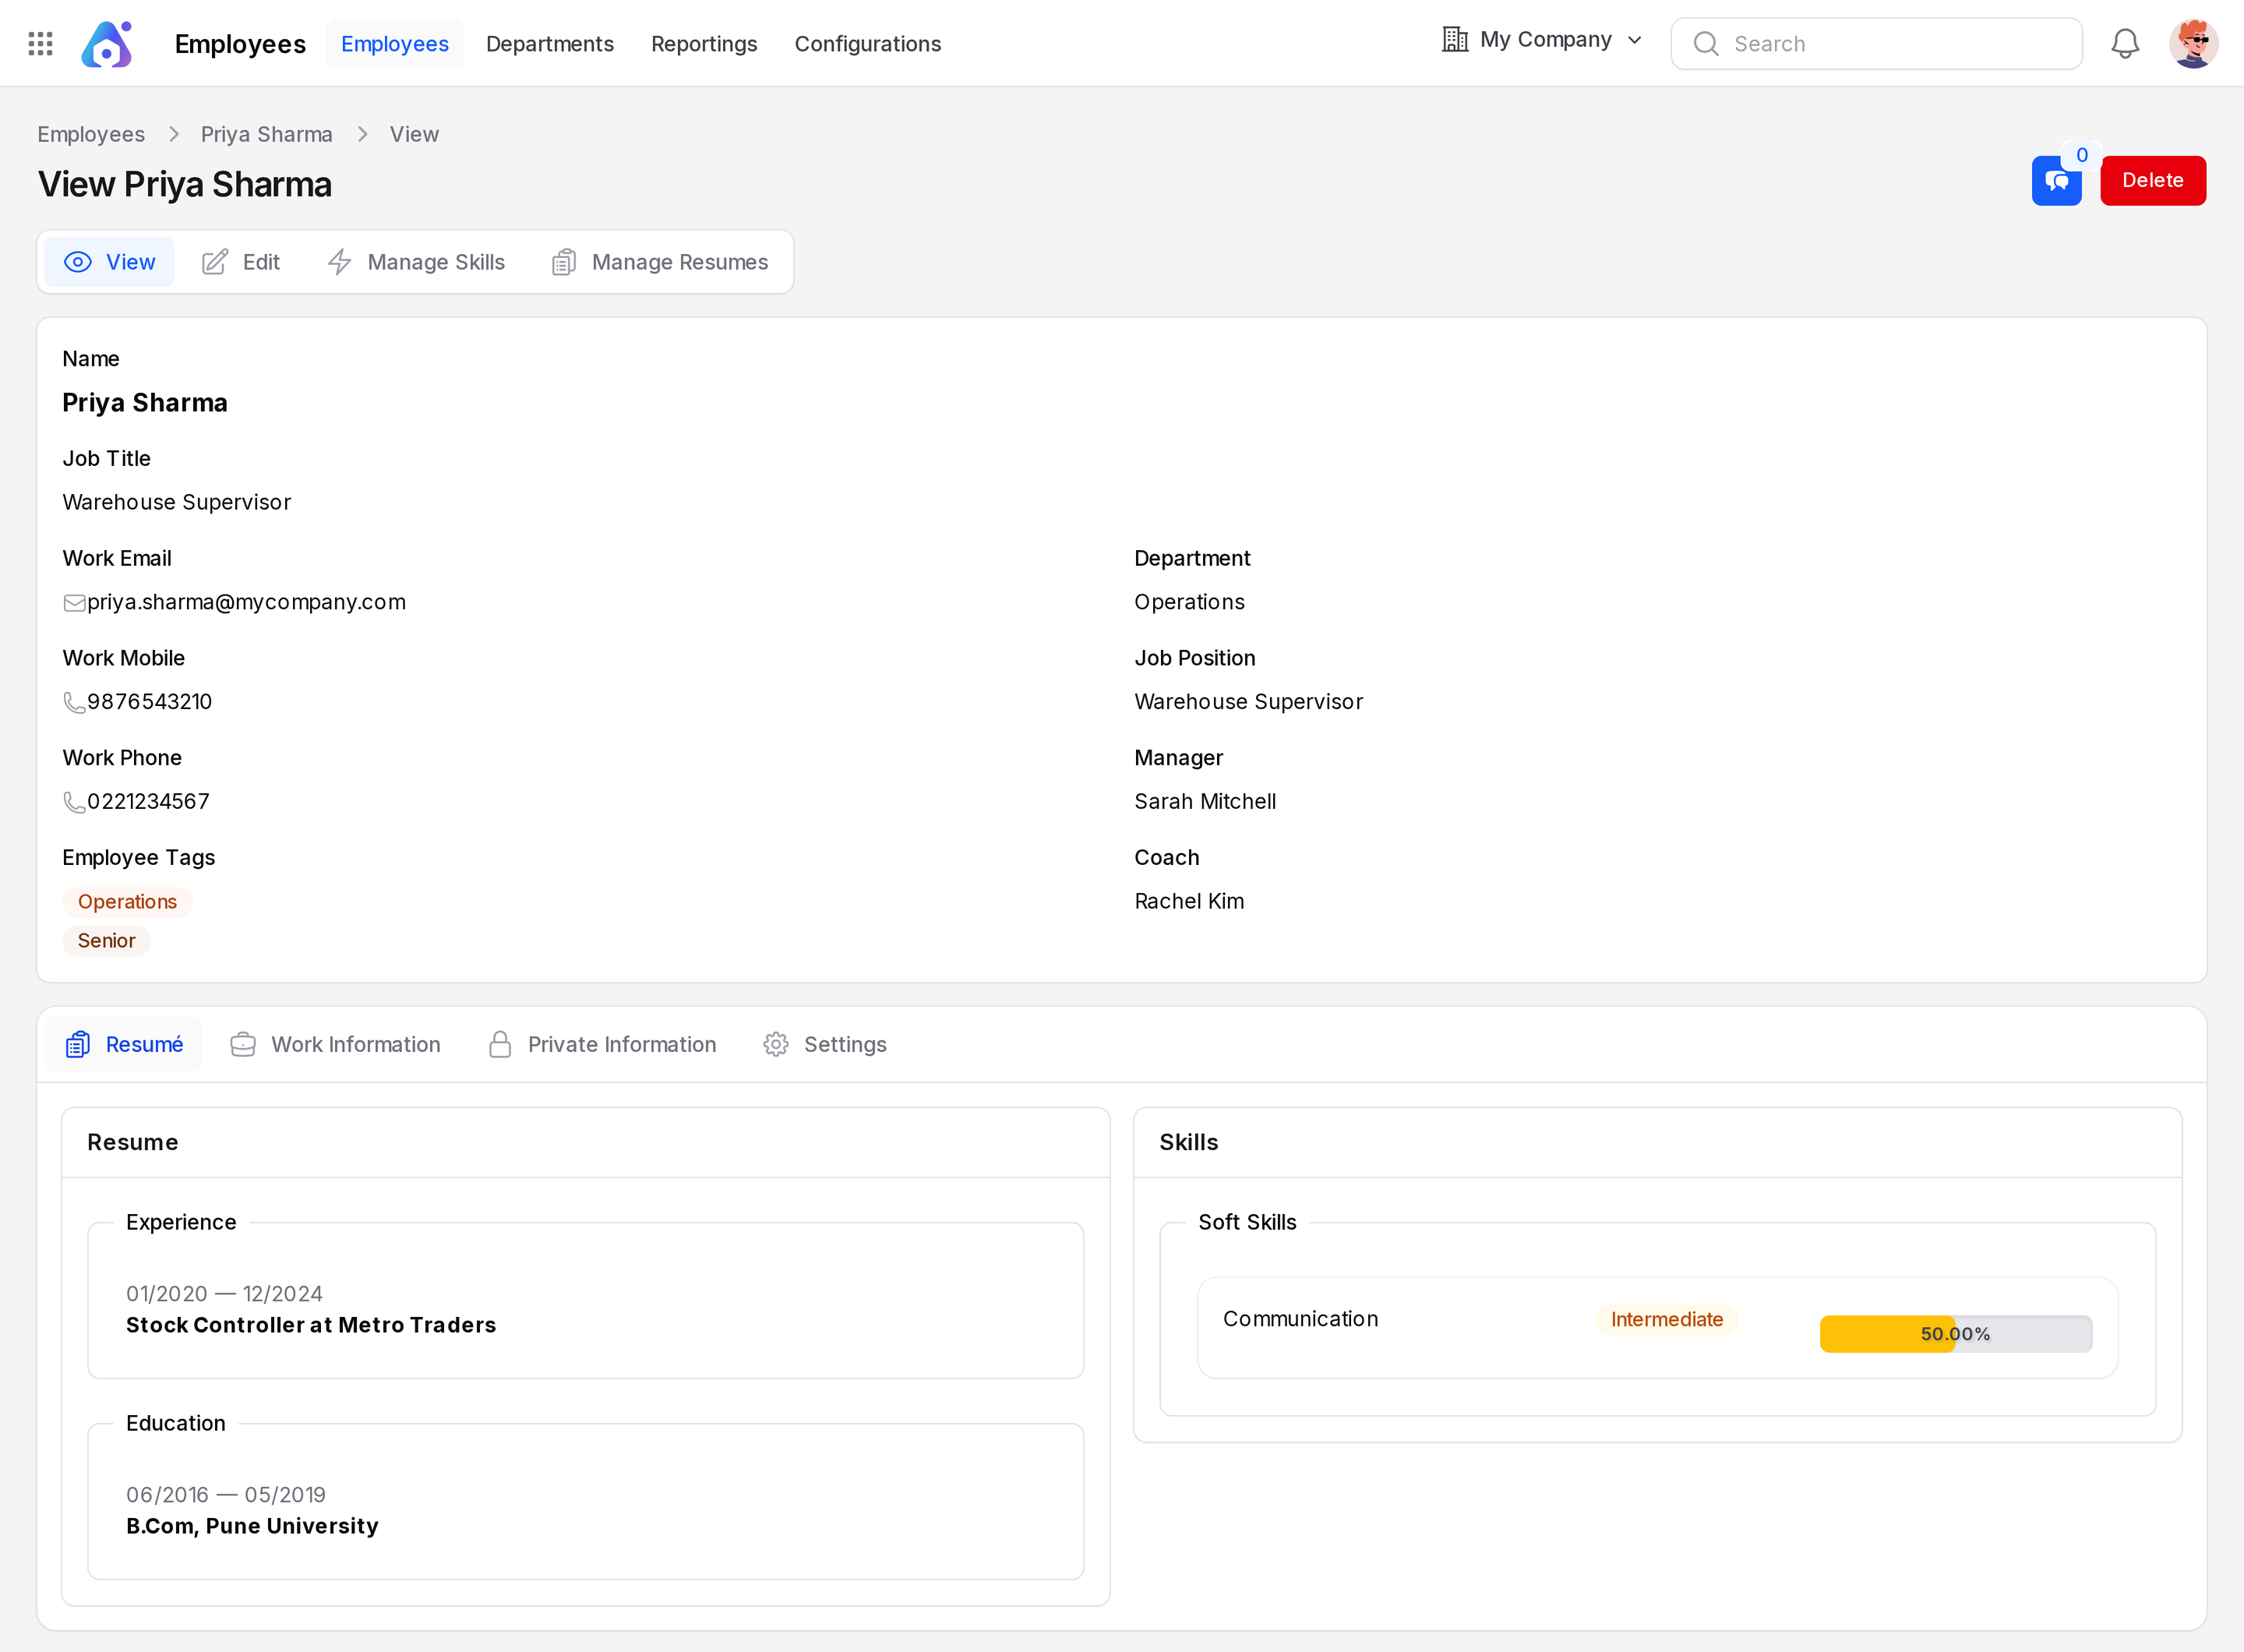
Open the View page and its Resume tab. The resume lines and the skill now show side by side. The tab shows dates as 01/2020 - 12/2024.
Step 6: Find Priya on the list
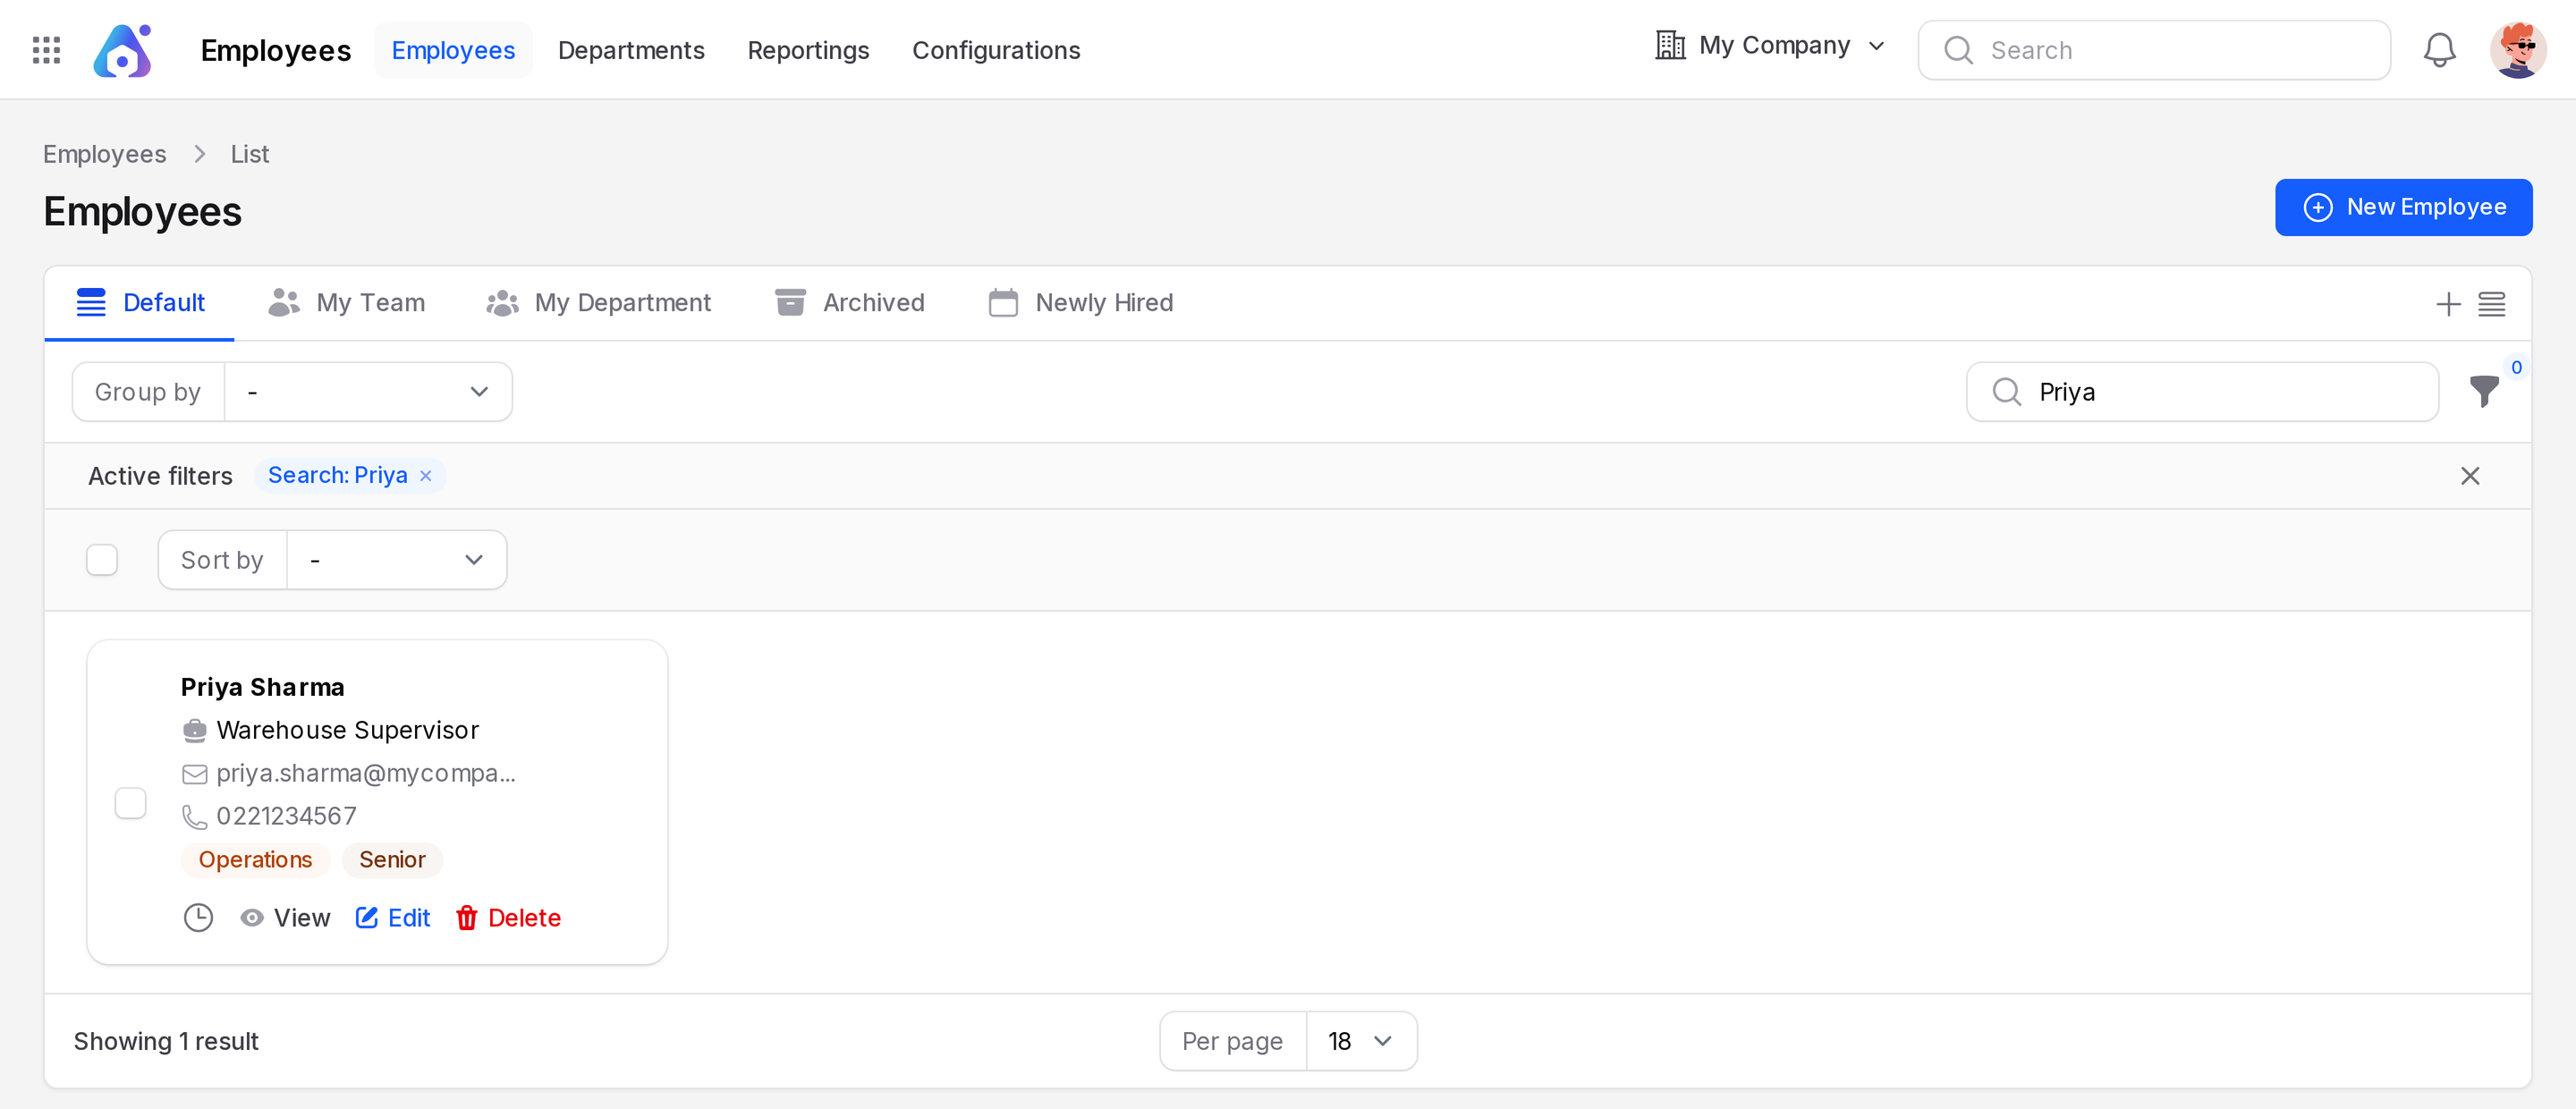
- Open
Employees → Employees. - Type
Priyain the search box. The list narrows as you type.
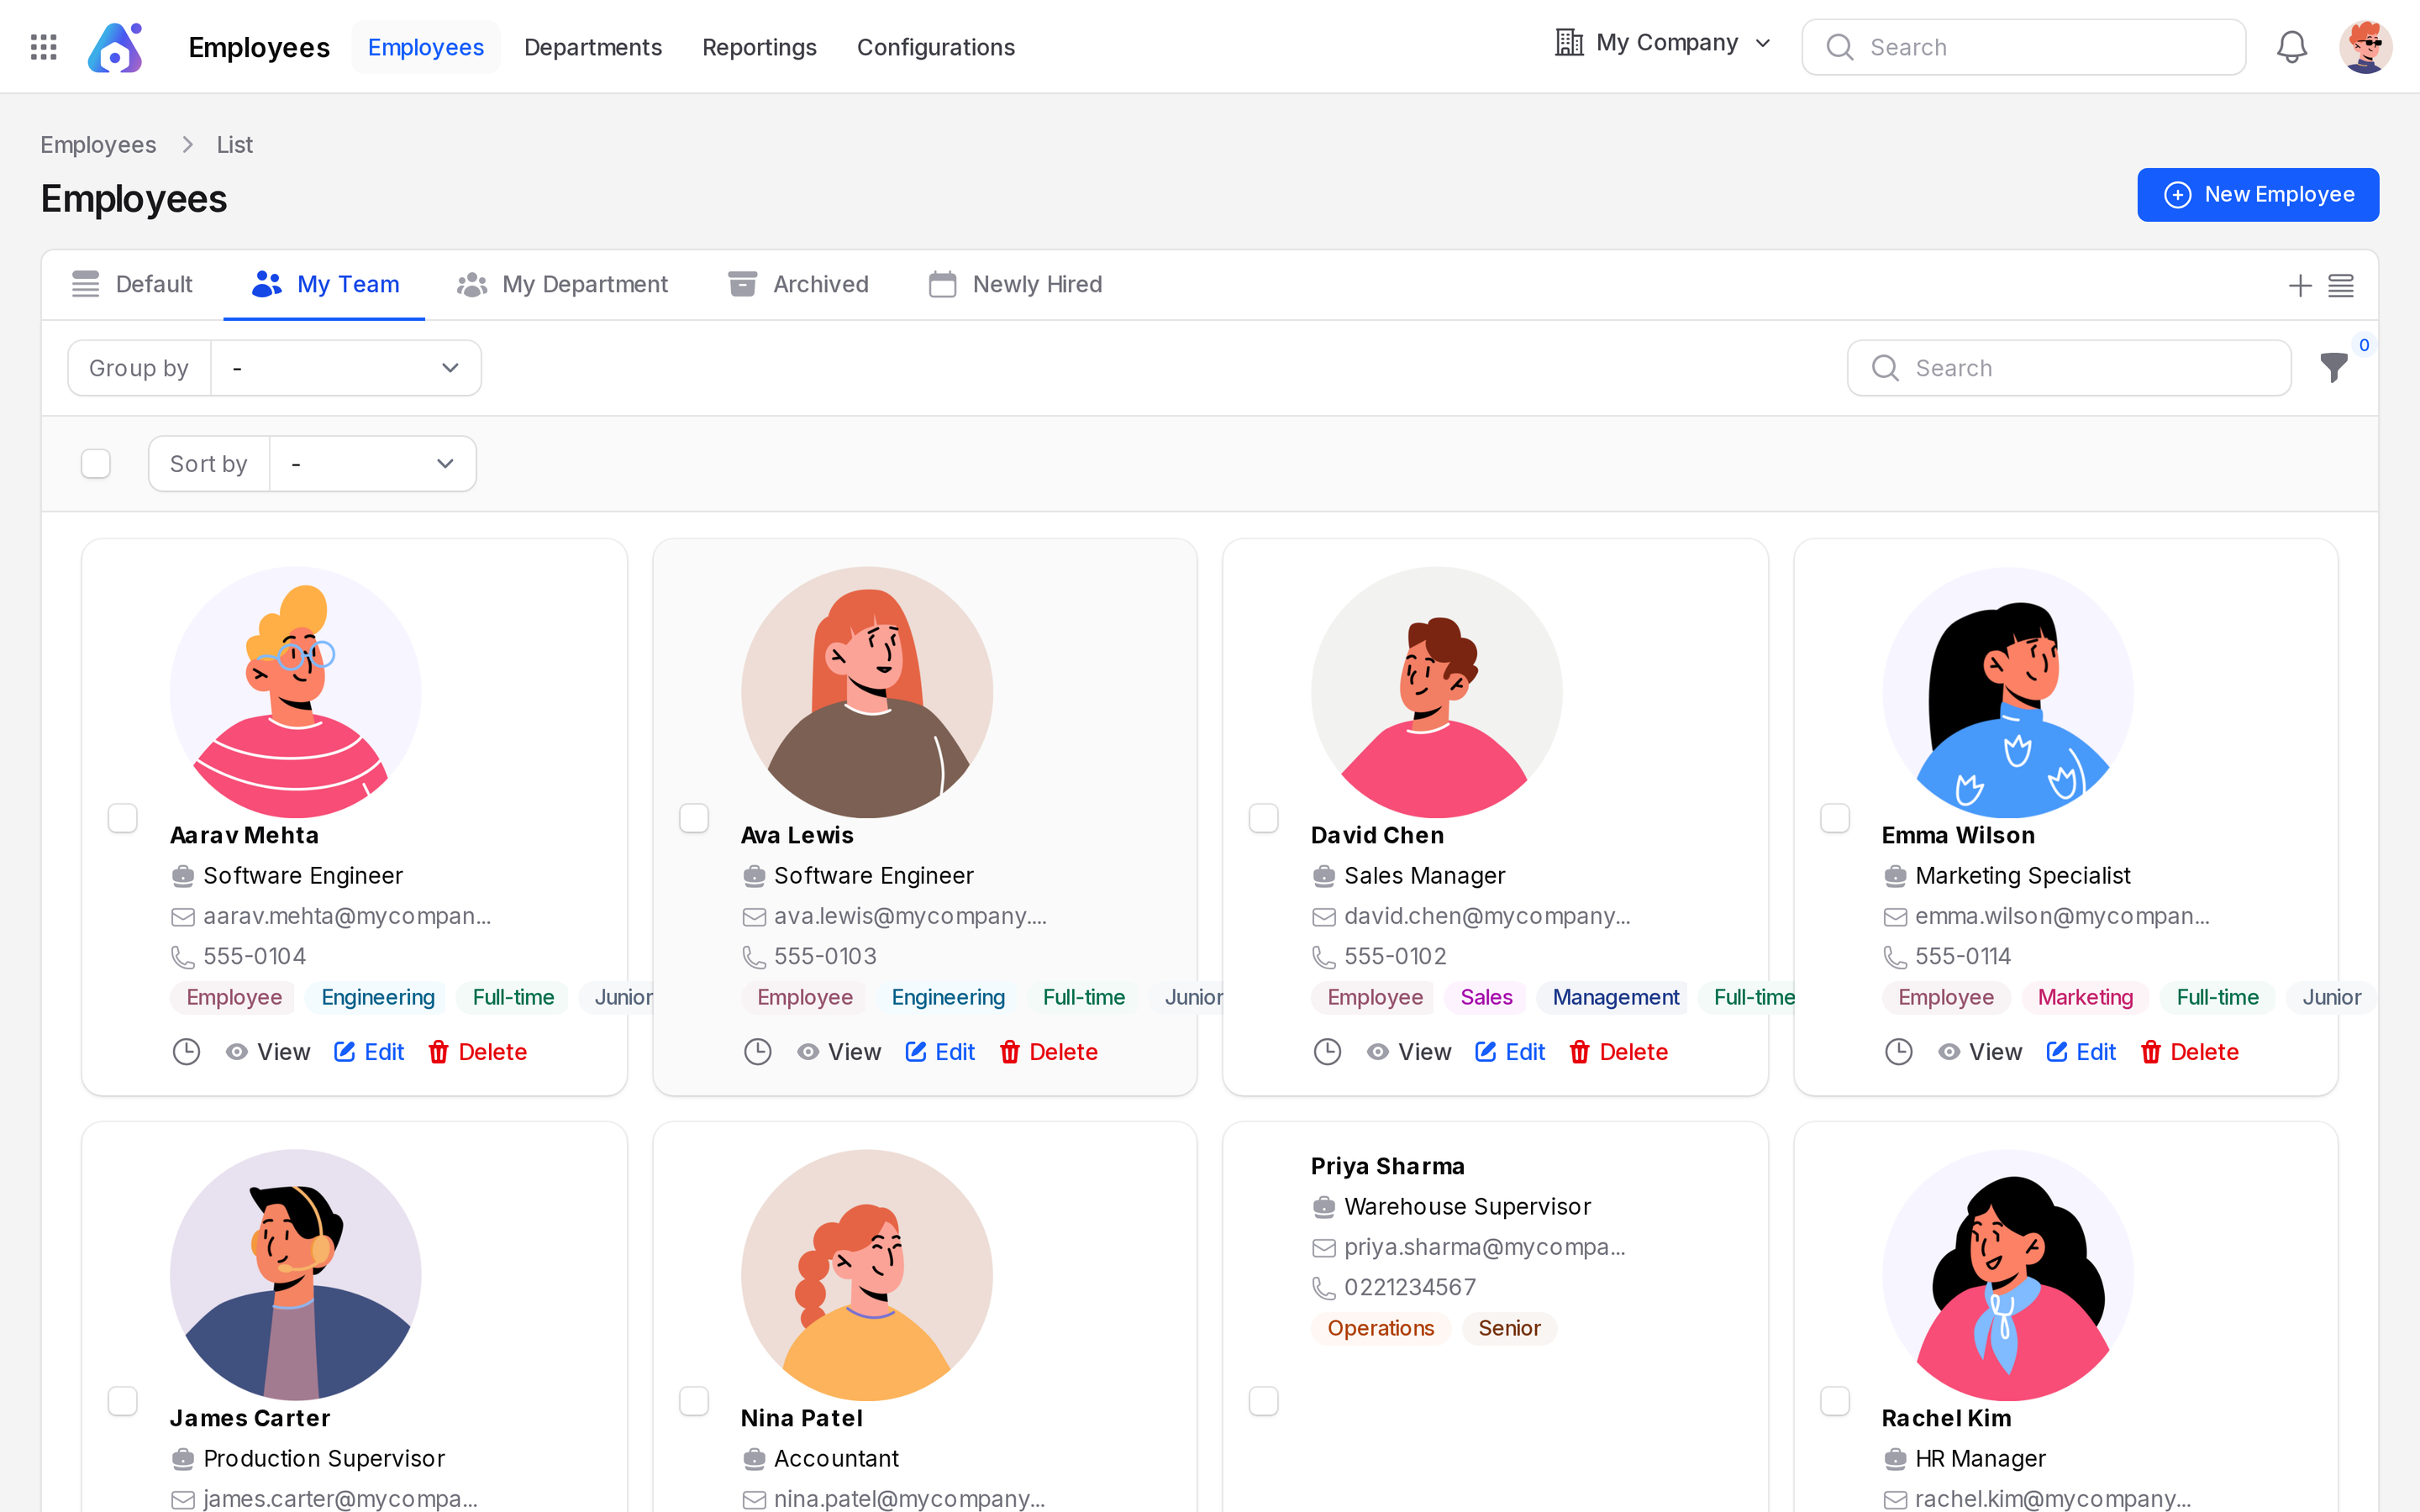
- Clear the search and click the My Team tab. It shows the people whose manager is you. If you are signed in as the user linked to Sarah Mitchell, Priya is on it. If the tab is empty, your user is not linked to an employee. See Related User in Add an employee.
INFO
Search checks name, job title, work email and work phone. It does not check the department.
See Employee list for tabs, filters and groups.
What you built
| Record | Value |
|---|---|
| Department | Operations |
| Job position | Warehouse Supervisor |
| Employee | Priya Sharma |
| Skill | Soft Skills, Communication, Intermediate |
| Resume | Experience and Education lines |