

Configure a product for inventory
A product form has a section named Inventory. It decides whether the product has stock, how it is tracked and how it moves. This page covers that section and the stock tabs of a product. The base fields (name, price, taxes) are in the Sales guide.
In simple words: Switch on Track Inventory and Aureus starts counting this product.
Open a product with Inventory → Products → Products, then New Product or Edit.
Settings
The Inventory section shows only when Type is Goods. A service has no stock. Track By needs Inventory → Settings → Manage Traceability → Lots & Serial Numbers to be on. See Inventory settings.
Overview
The product list has the tabs Default, Goods, Services, Favorites, Archived, Inventory Management, Components and POS.
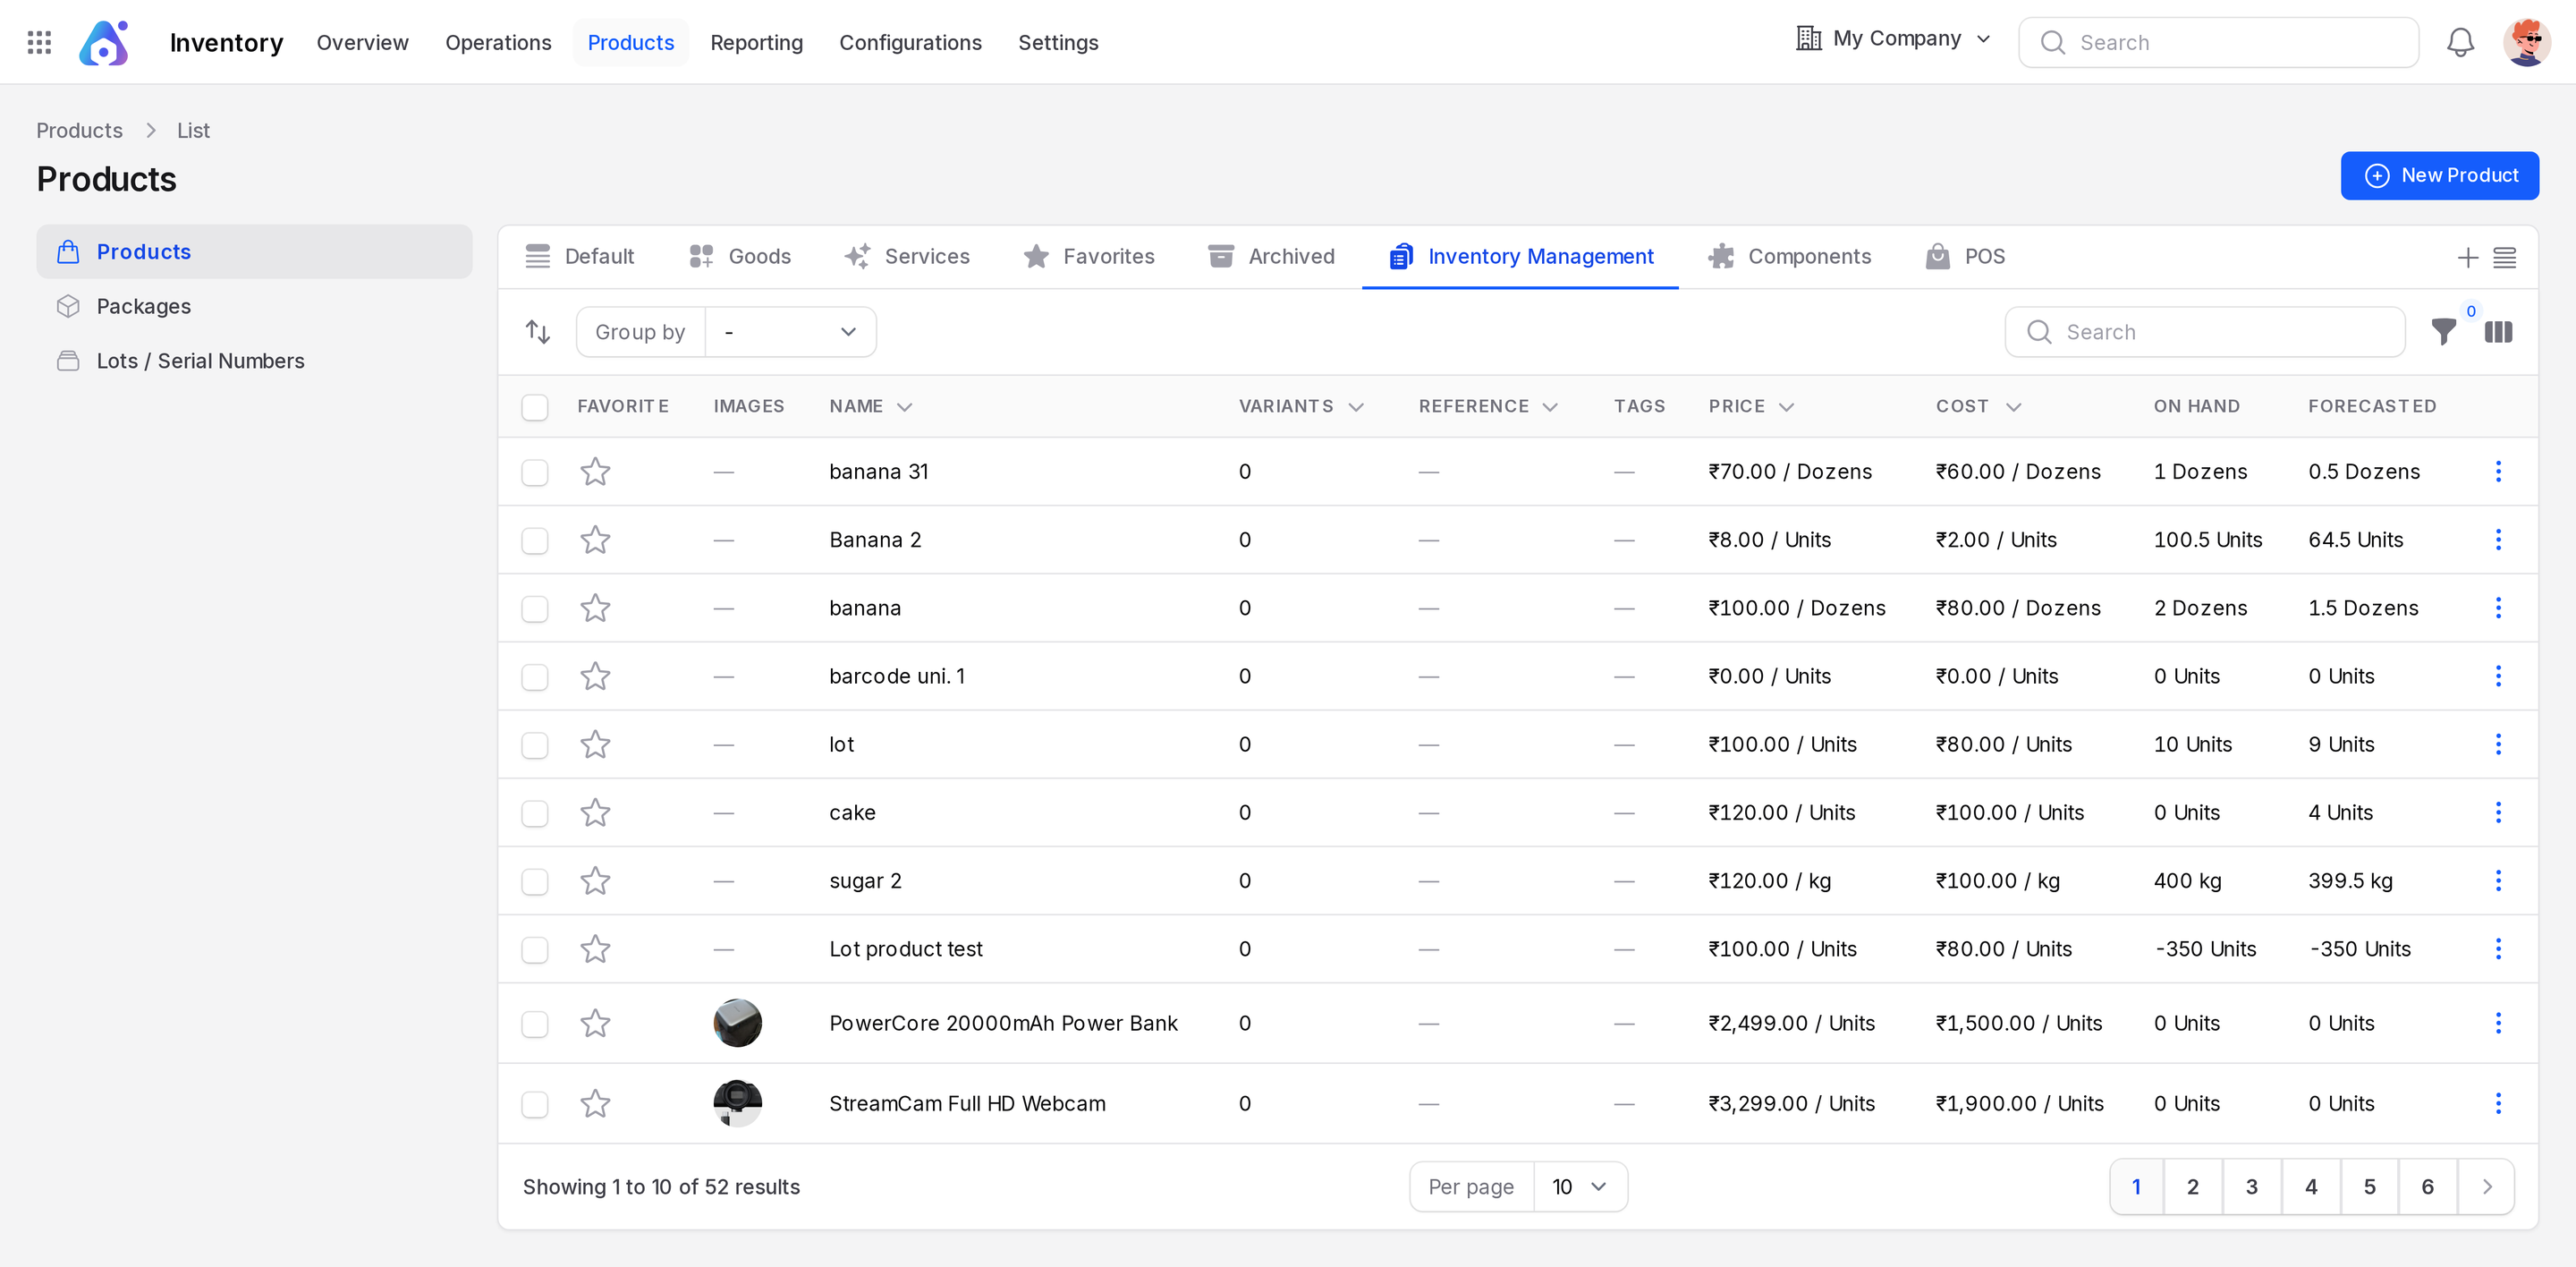
- On Hand: Quantity sitting in your internal locations now.
- Forecasted: What you expect to hold after incoming and outgoing orders.
Both columns show a dash for products that do not track inventory.
Set up the Inventory section
- Go to
Inventory → Products → Productsand open a product in Edit. - Scroll to the Inventory section.
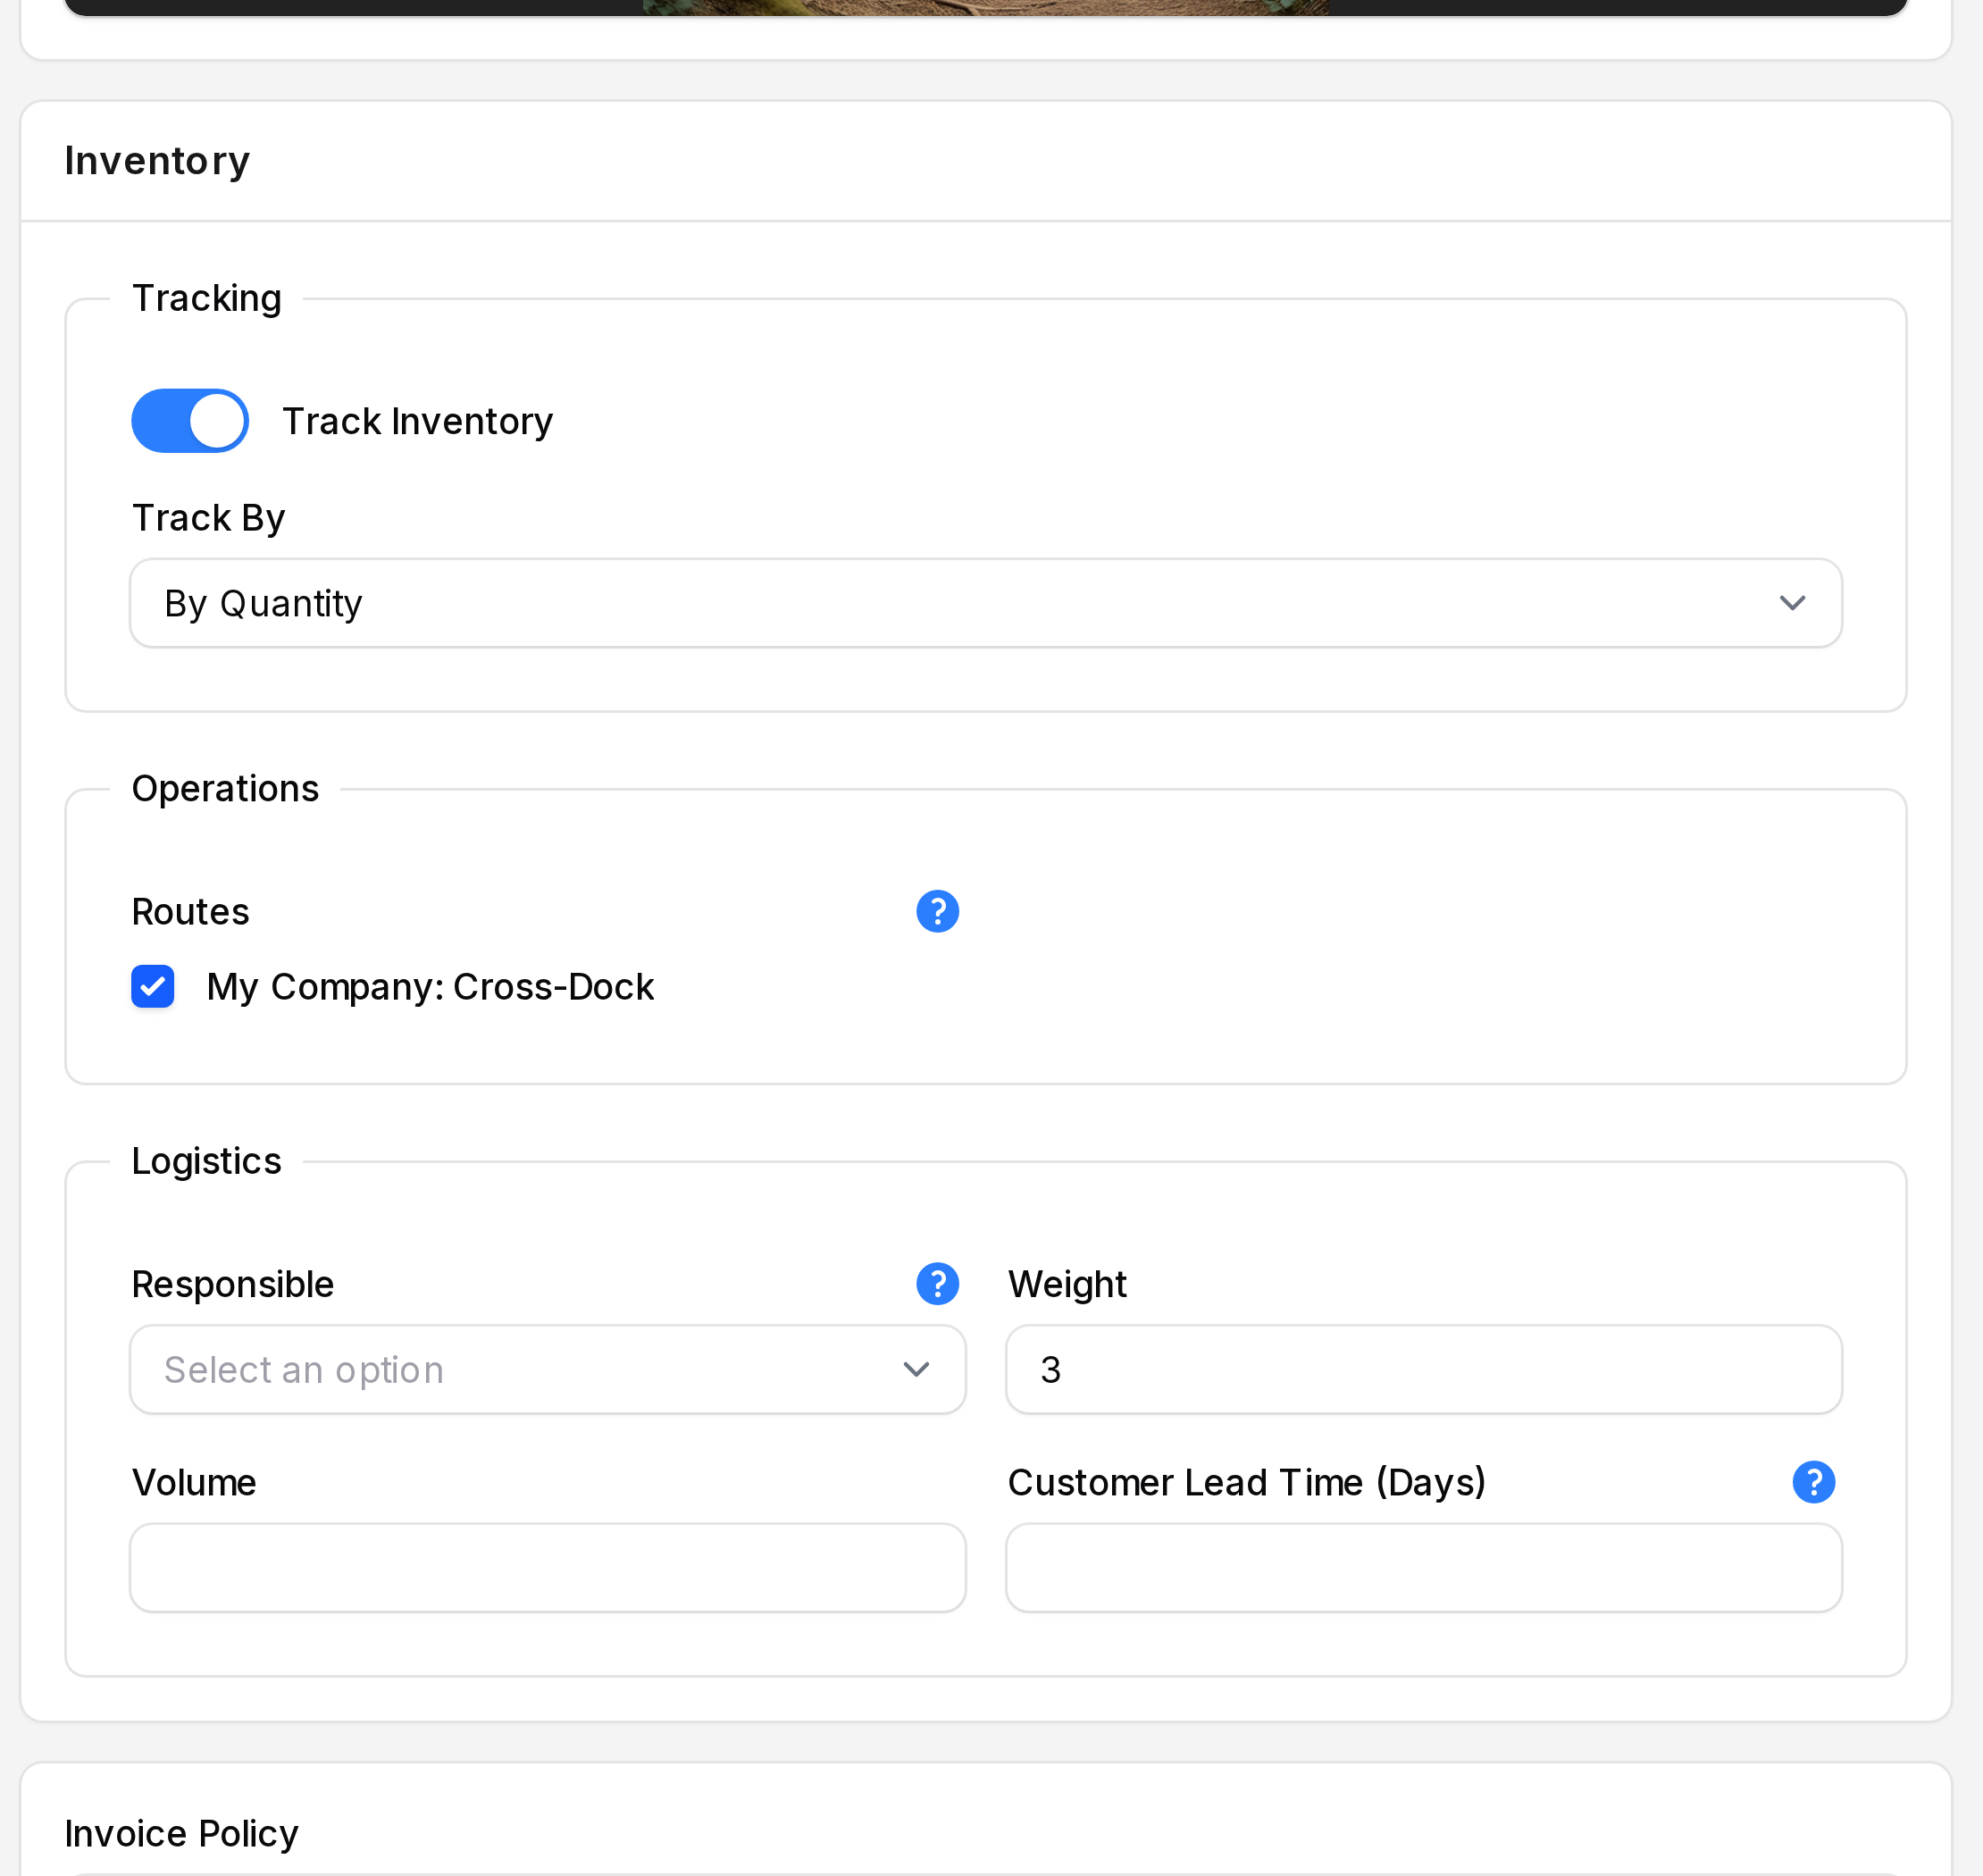
Tracking
- Track Inventory: Turn on to manage stock for this product. A storable product is one that needs inventory management.
- Track By: Choose how you identify stock. Shows when Track Inventory and the lots setting are on.
- By Quantity: Stock is counted in numbers only.
- By Lots: Units share a batch number.
- By Unique Serial Number: Each unit has its own number.
WARNING
Choose Track By before the first stock arrives. Changing it later while stock exists can leave old quantities without a lot or serial number. See Lots and serial numbers.
Operations
- Routes: Tick the routes this product follows, such as Cross-Dock. Routes appear based on your installed apps and settings.
Logistics
- Responsible: The user in charge of this product's stock.
- Weight: Weight of one unit.
- Volume: Volume of one unit.
- Customer Lead Time (Days): The promised time between confirming a sales order and delivery.
- Click Save changes.
Update the quantity
The Update Quantity button sits in the header of a storable product. It sets how much you hold.

- With Locations or Packages on, the button opens the Quantities tab. Click Add Quantity, then fill Location (default WH/Stock), Package and On Hand Quantity. Click Create.
- Without those settings, it opens a window titled Update Product Quantity with On Hand Quantity. Click Update.
- With tracked lots and Track By not set to By Quantity, the button also opens Quantities.
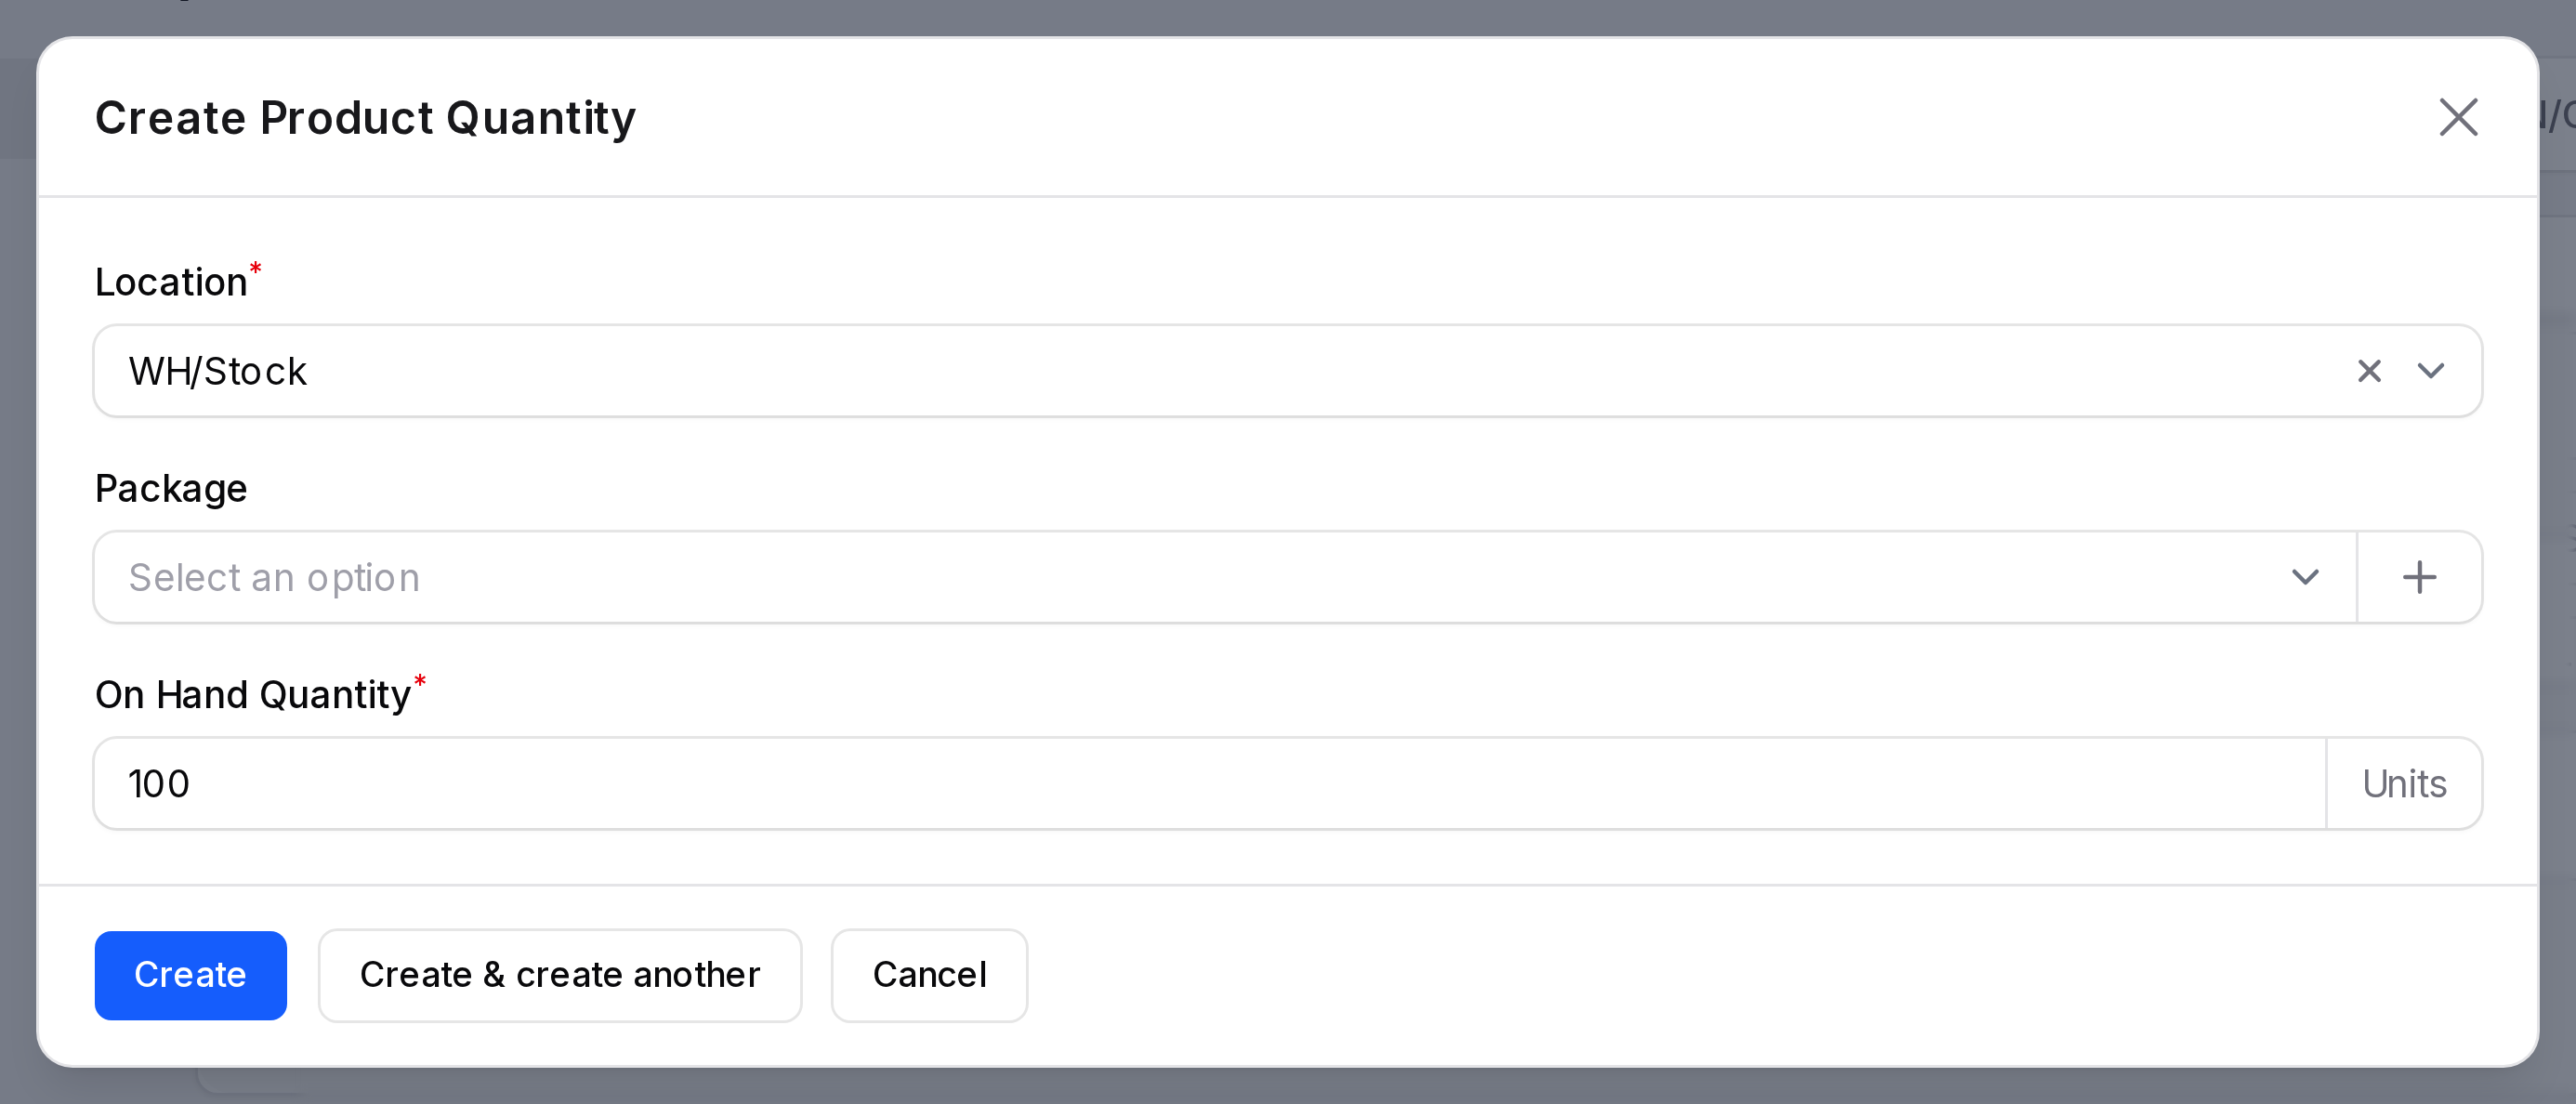
If a quantity already exists for the same place, you get a warning. Edit the existing line instead.
TIP
Use Update Quantity only to load opening stock. For counts, use Inventory adjustments.
Product tabs
A product record has sub tabs next to View and Edit.
| Tab | What it shows |
|---|---|
| Attributes | Attributes that create variants. Click Add Attribute. |
| Variants | Each variant with price, On Hand and Forecasted |
| Bills of Materials | Recipes that use this product. Needs Manufacturing. |
| Vendors | Supplier prices. Click Add Vendor. Needs Purchase. |
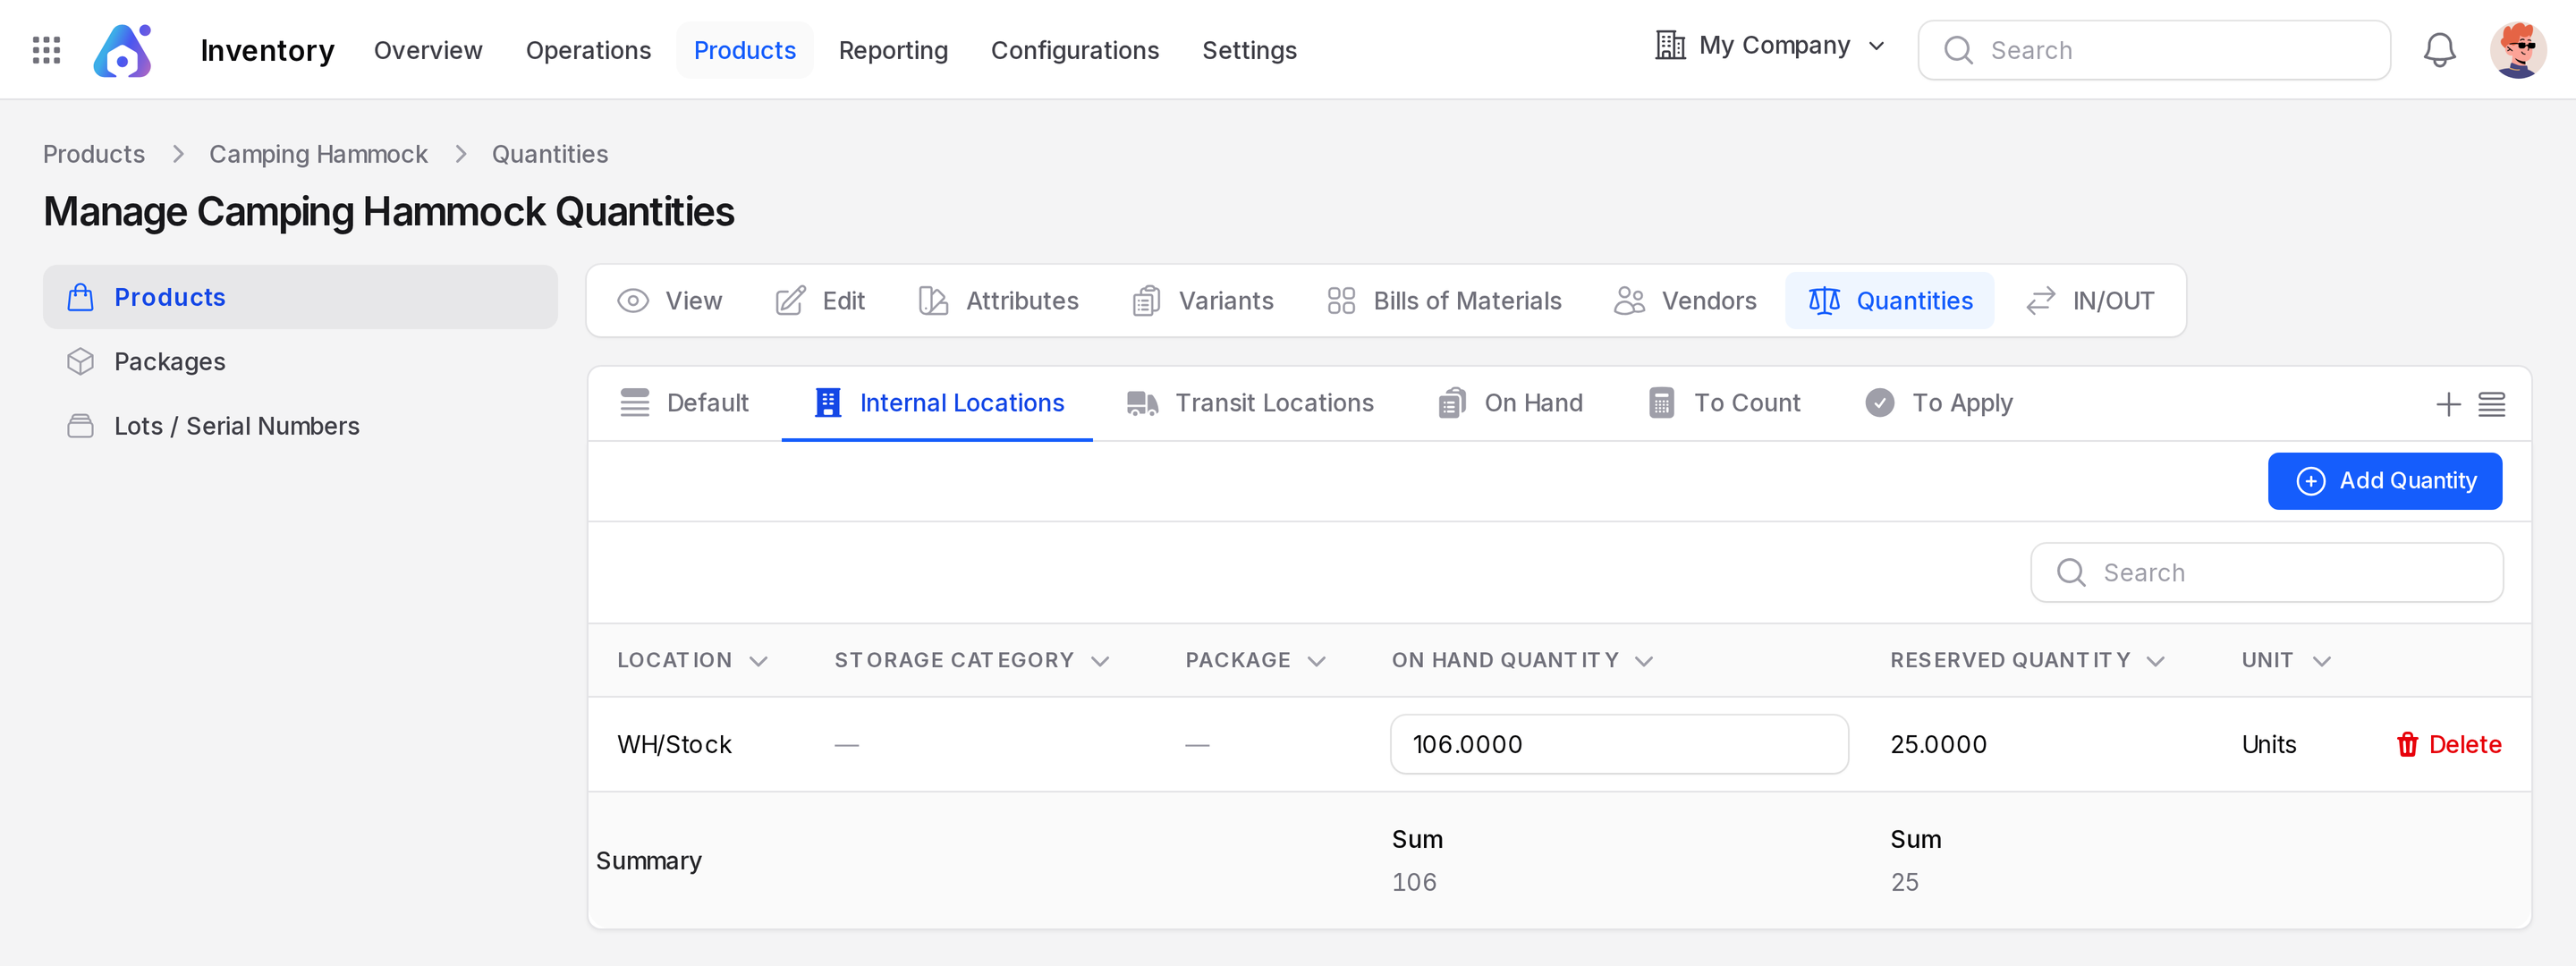
| Quantities | Stock per location, package and reserved quantity |
| IN/OUT | Every move of this product |
The Quantities tab has the tabs Internal Locations, Transit Locations, On Hand, To Count and To Apply. The IN/OUT tab has To Do, Done, Incoming, Outgoing and Internal.
Print labels
Click Print Labels in the header. Enter Number of Labels and choose Format. Options are Dymo, 2x7 with price, 4x7 with price, 4x12 and 4x12 with price. Click Submit.
Behind the scenes
Stock lives as a quantity per product and location. Receipts add to it, deliveries remove from it, and counts correct it.