

Tags
A tag is a short coloured label you attach to an employee, such as Senior, Sales or Operations. An employee can carry many tags. Tags help you spot groups of people at a glance on the employee cards.
In simple words: A tag is a sticker you put on an employee.
Open Employees → Configurations → Tags.
Prerequisite
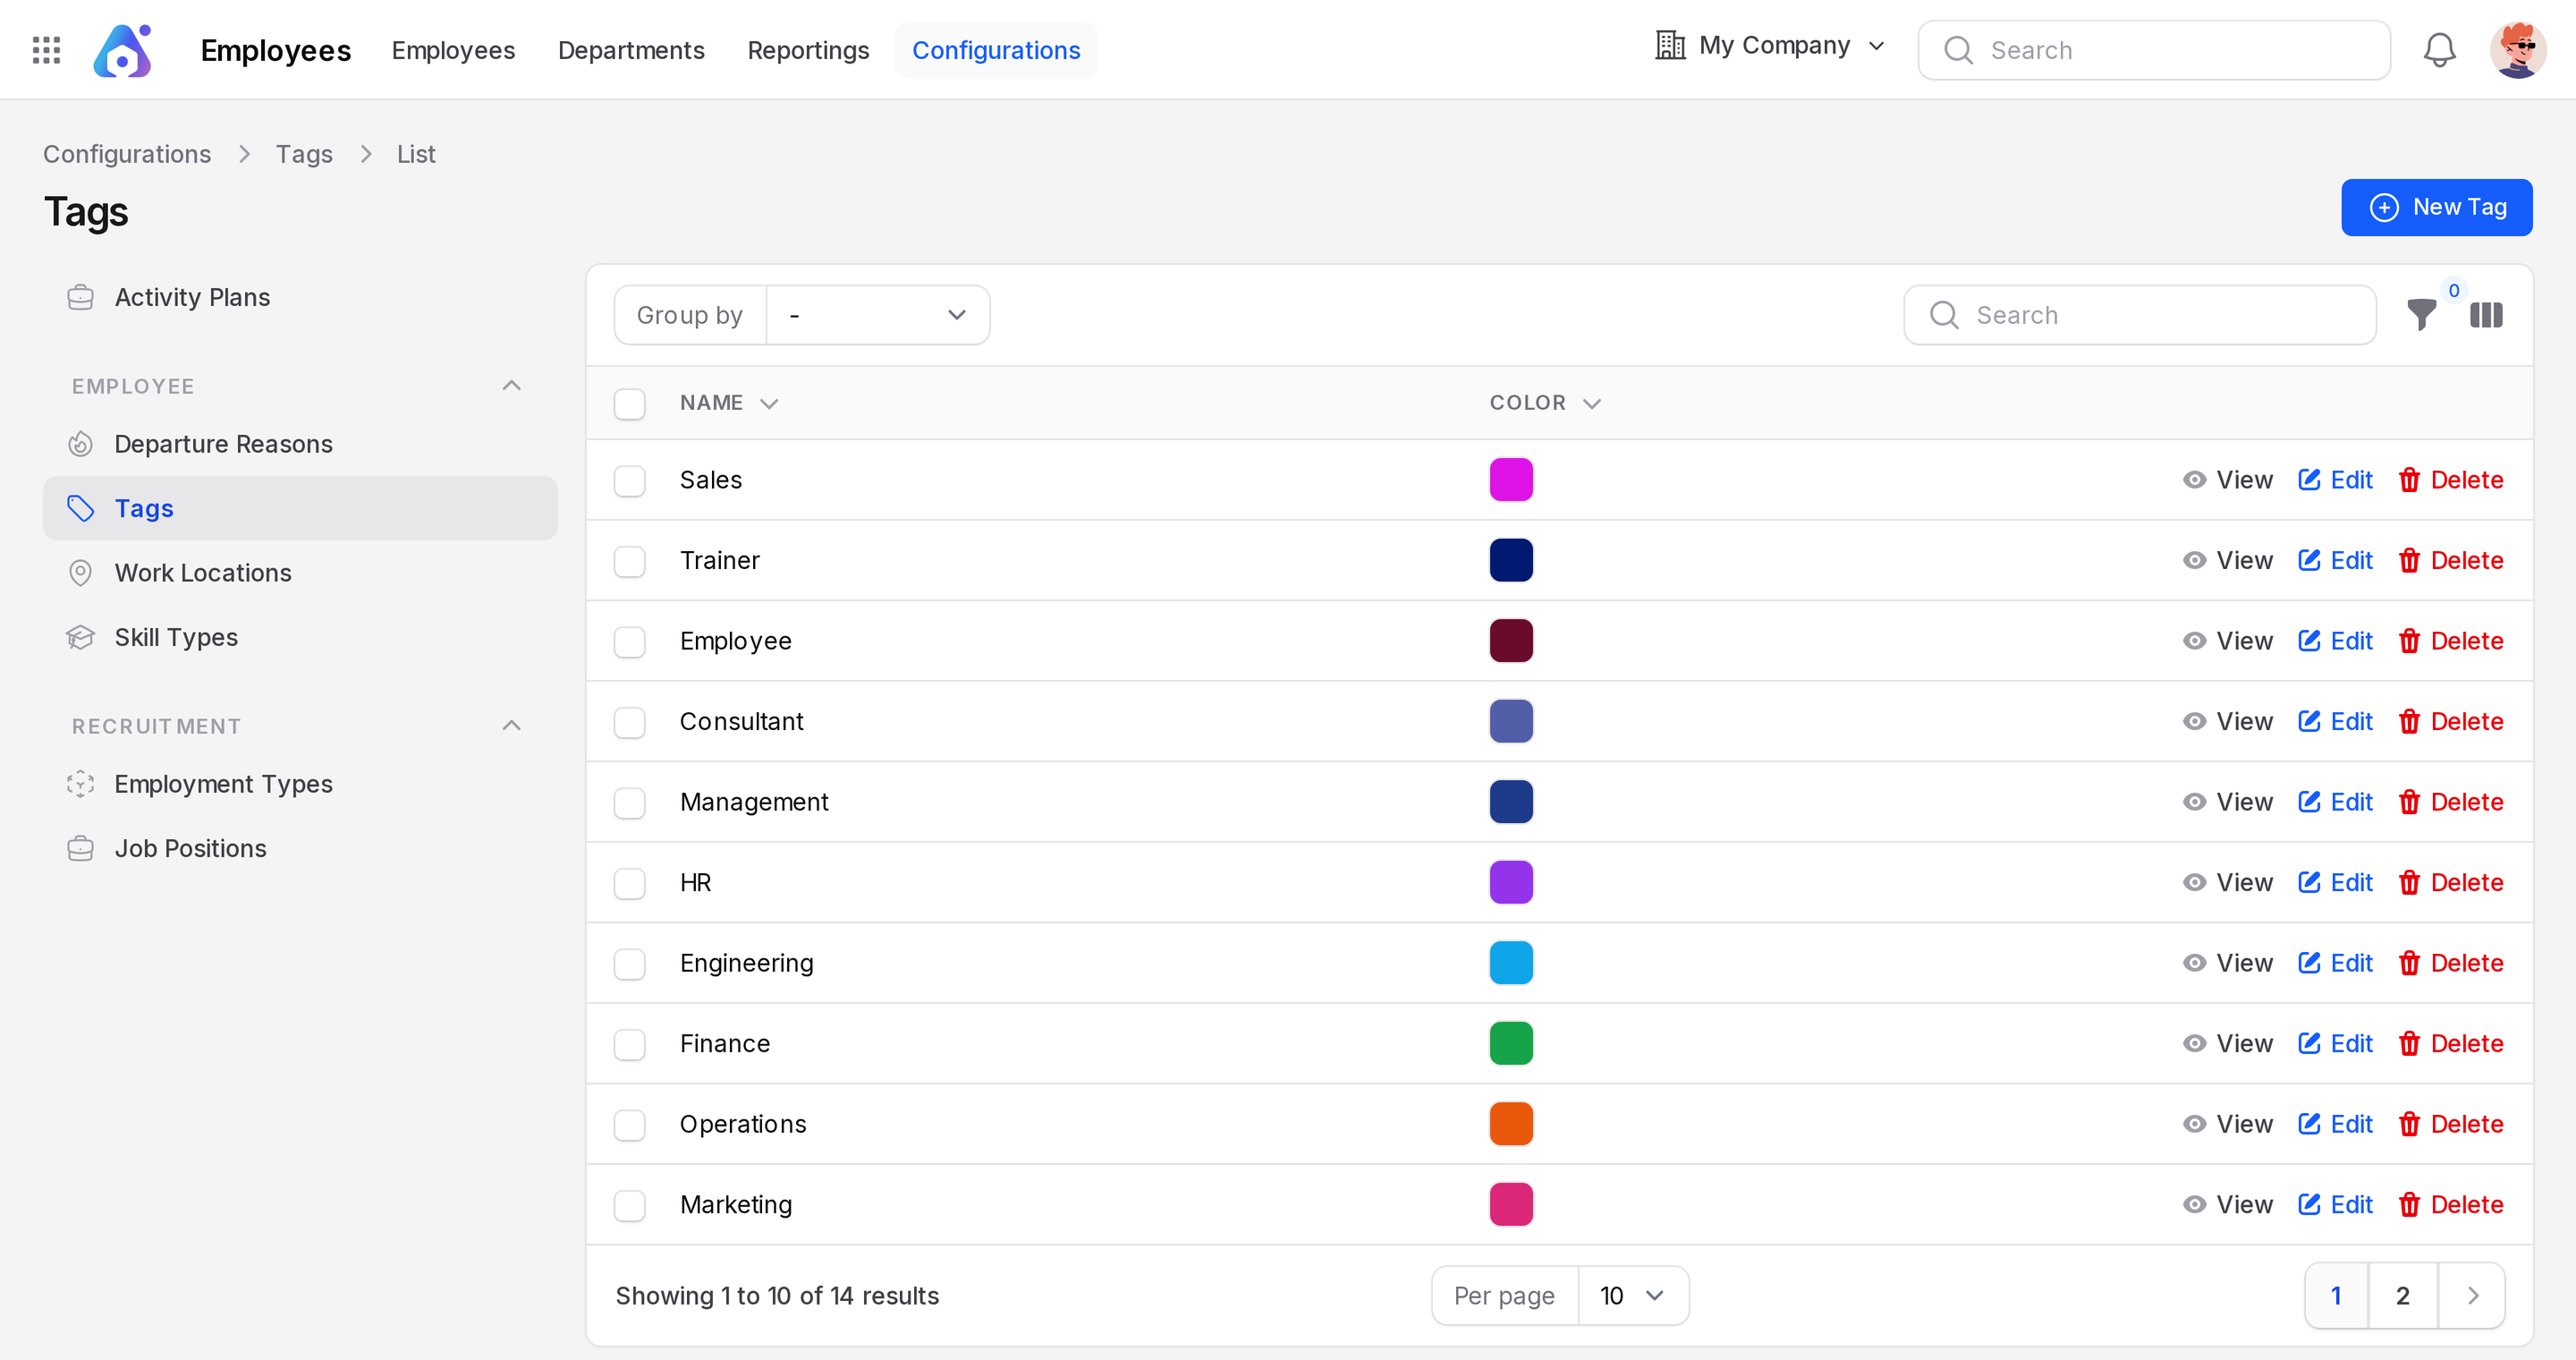
None. The sample data has 14 tags: Sales, Trainer, Employee, Consultant, Management, HR, Engineering, Finance, Operations, Marketing, Support, Senior, Junior and Full-time.
Overview
The list has no tabs. Columns are Name and Color. The colour shows as a small swatch. Use the search box to find a tag.
Create a tag
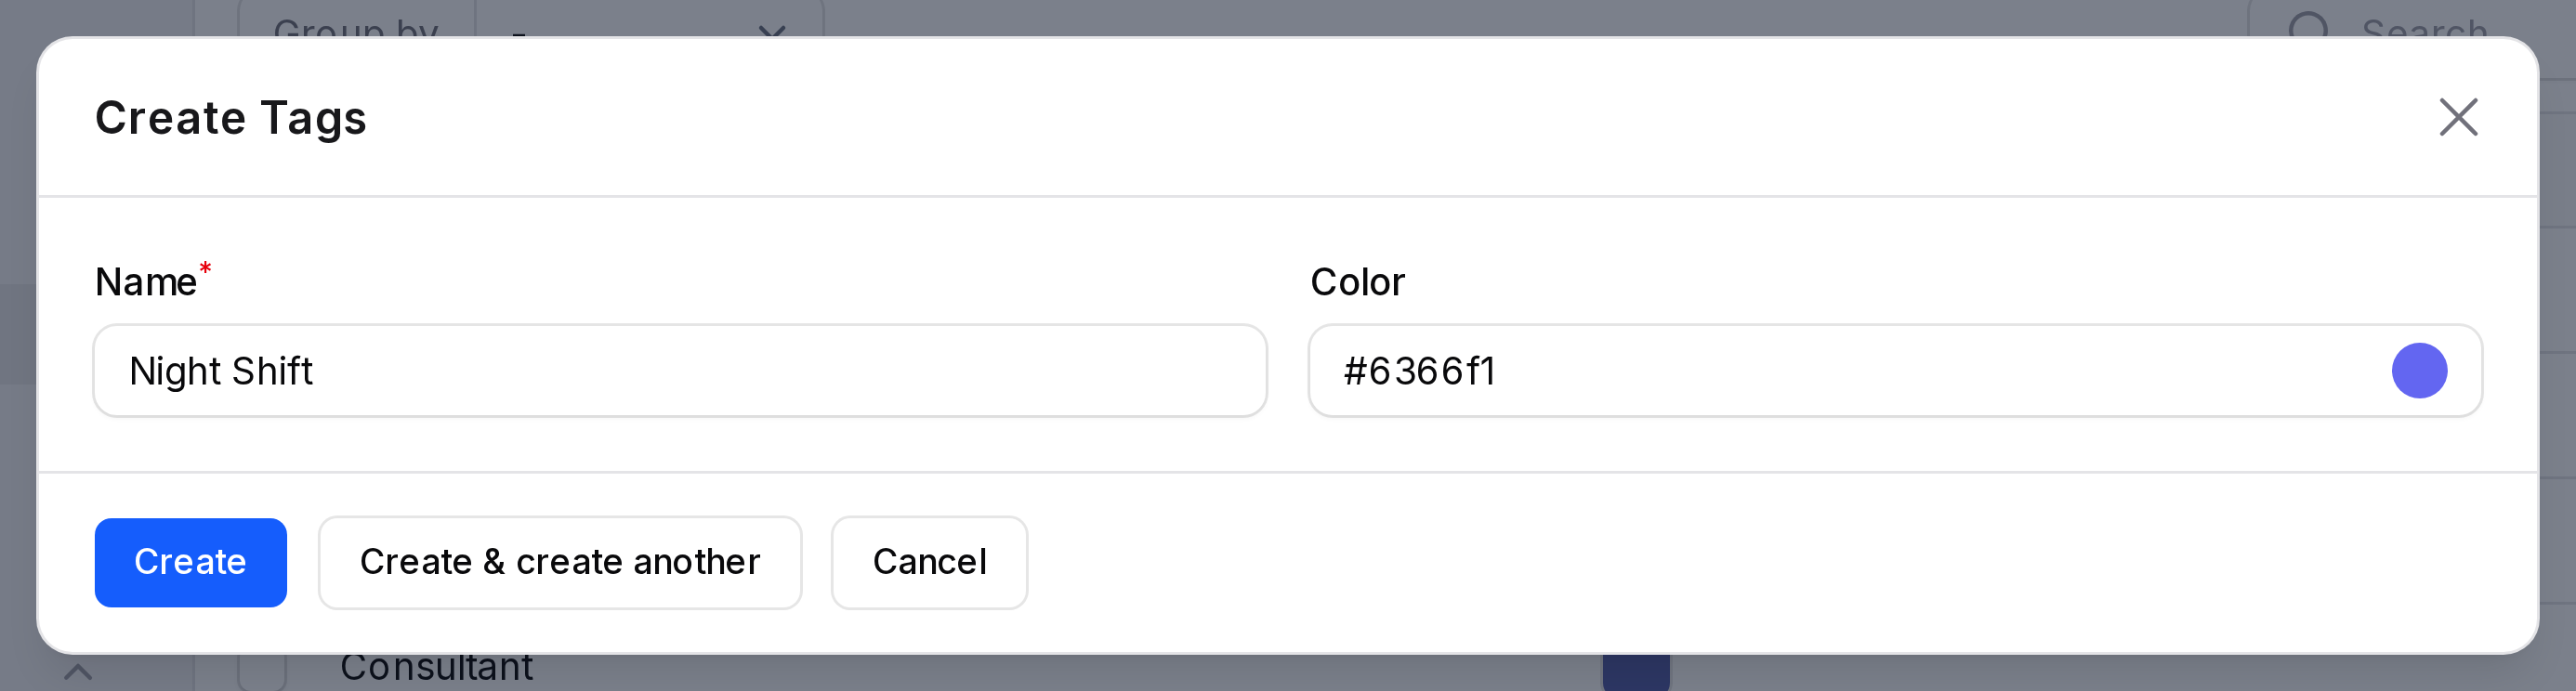
This example adds Night Shift.
- Open
Employees → Configurations → Tags. - Click New Tag. A window opens.
- Fill in the form.
- Name: Required. Type
Night Shift. - Color: Optional. Type a hex code such as
#6366f1, or pick a colour with the picker.
- Click Create.
TIP
You can also create a tag from the employee form. Click the plus button next to Employee Tags.
Where tags are used
- The Employee Tags field on the employee form takes one or more tags.
- Tags show as coloured badges on the employee card in the list.
- You can group the employee list by Tags.
- On the department Employees page, the cards show the same badges.
Edit or delete
Click Edit on a row to rename a tag or change its colour. Click Delete to remove it.