

Search, filter and group records
Most pages in Aureus show records in a list. When the list grows, you need a way to find the right records fast. You can search the whole system from anywhere, and use the tools above each list to search, filter, group and choose columns. You can also save a set-up as a view so you can reuse it.
In simple words: Search finds a record, filters hide the ones you do not need, groups sort what is left into piles, and a saved view remembers your choices.
Global search
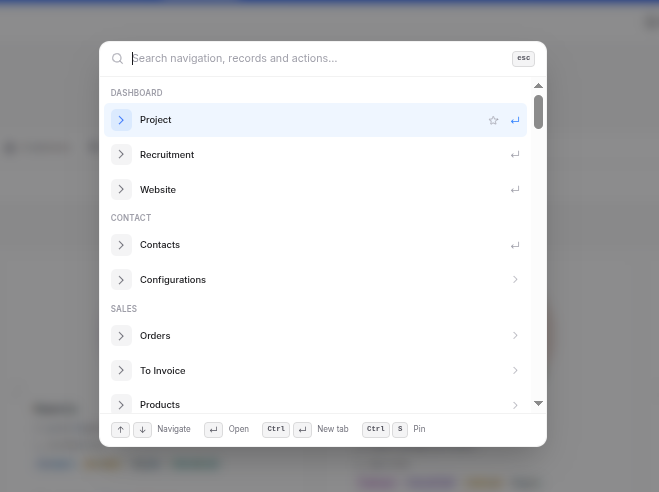
The search in the top bar looks through the whole system at once. It works as a command palette: you can find pages, records and actions, and jump to them from the keyboard. Use it when you do not know which page holds what you need.
- Click the search box in the top bar, or press Ctrl+K.
- Type a word, a name or a number. The box reads Search navigation, records and actions.
- Pick a result to open it.
Before you type, the palette lists the pages of each module, grouped under headings such as Dashboard, Contact and Sales. Use the keyboard shortcuts shown at the bottom of the window:
- Up and down arrows: Move between results.
- Enter: Open the result.
- Ctrl+Enter: Open the result in a new tab.
- Ctrl+S: Pin the result so it stays easy to reach. You can also click the star next to it.
- Esc: Close the palette.
The list toolbar
Every list page has the same tools. They sit above the table:
- Tabs: Switch between views, for example Default, My Quotations, Quotations, Sales Orders and Archived. The three dots at the end of the tabs open the views menu.
- Group by: Groups the records. The second drop-down sets the order.
- Search: Searches inside this list only.
- Filters: The funnel icon. The small number on it shows how many filters are on.
- Columns: The column manager. Choose and arrange the columns.

Search in a list
- Click the Search box above the list.
- Type a word, a name or a number.
The list updates and shows only the records that match. This search looks in the columns that the page makes searchable, such as Number or Customer. Clear the box to see all records again.
TIP
Sort the list by clicking a column title. Click it again to reverse the order.
Filters
Filters hide the records you do not need.
- Click the funnel icon. The Filters panel opens.
- Click Add rule.
- Choose a field from the list, such as Sales Person, Customer or Created At.
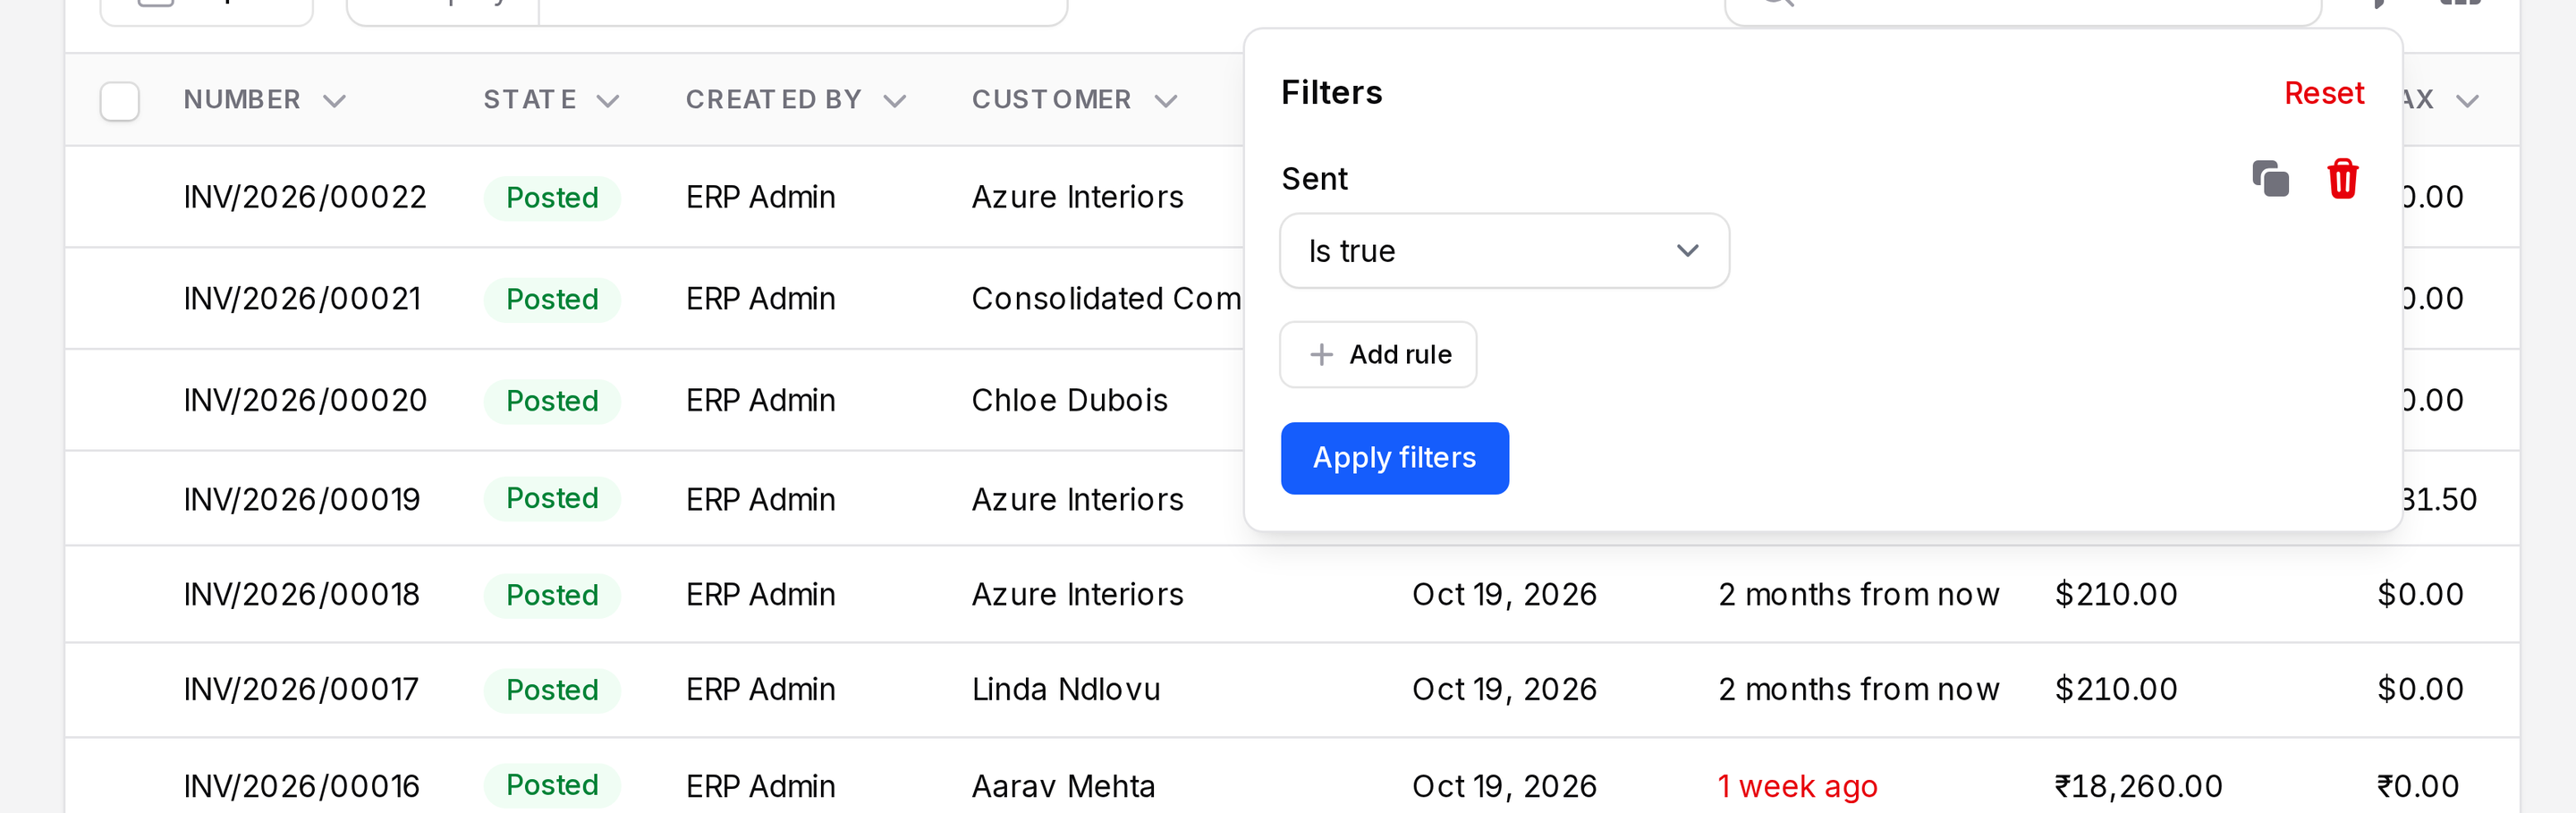
- Set the condition, for example Contains, and choose the values.
- Click Apply filters.
The number on the funnel shows how many filters are on. Click Reset in the panel to clear them all. Next to each rule, use the copy icon to duplicate it and the bin icon to delete it.
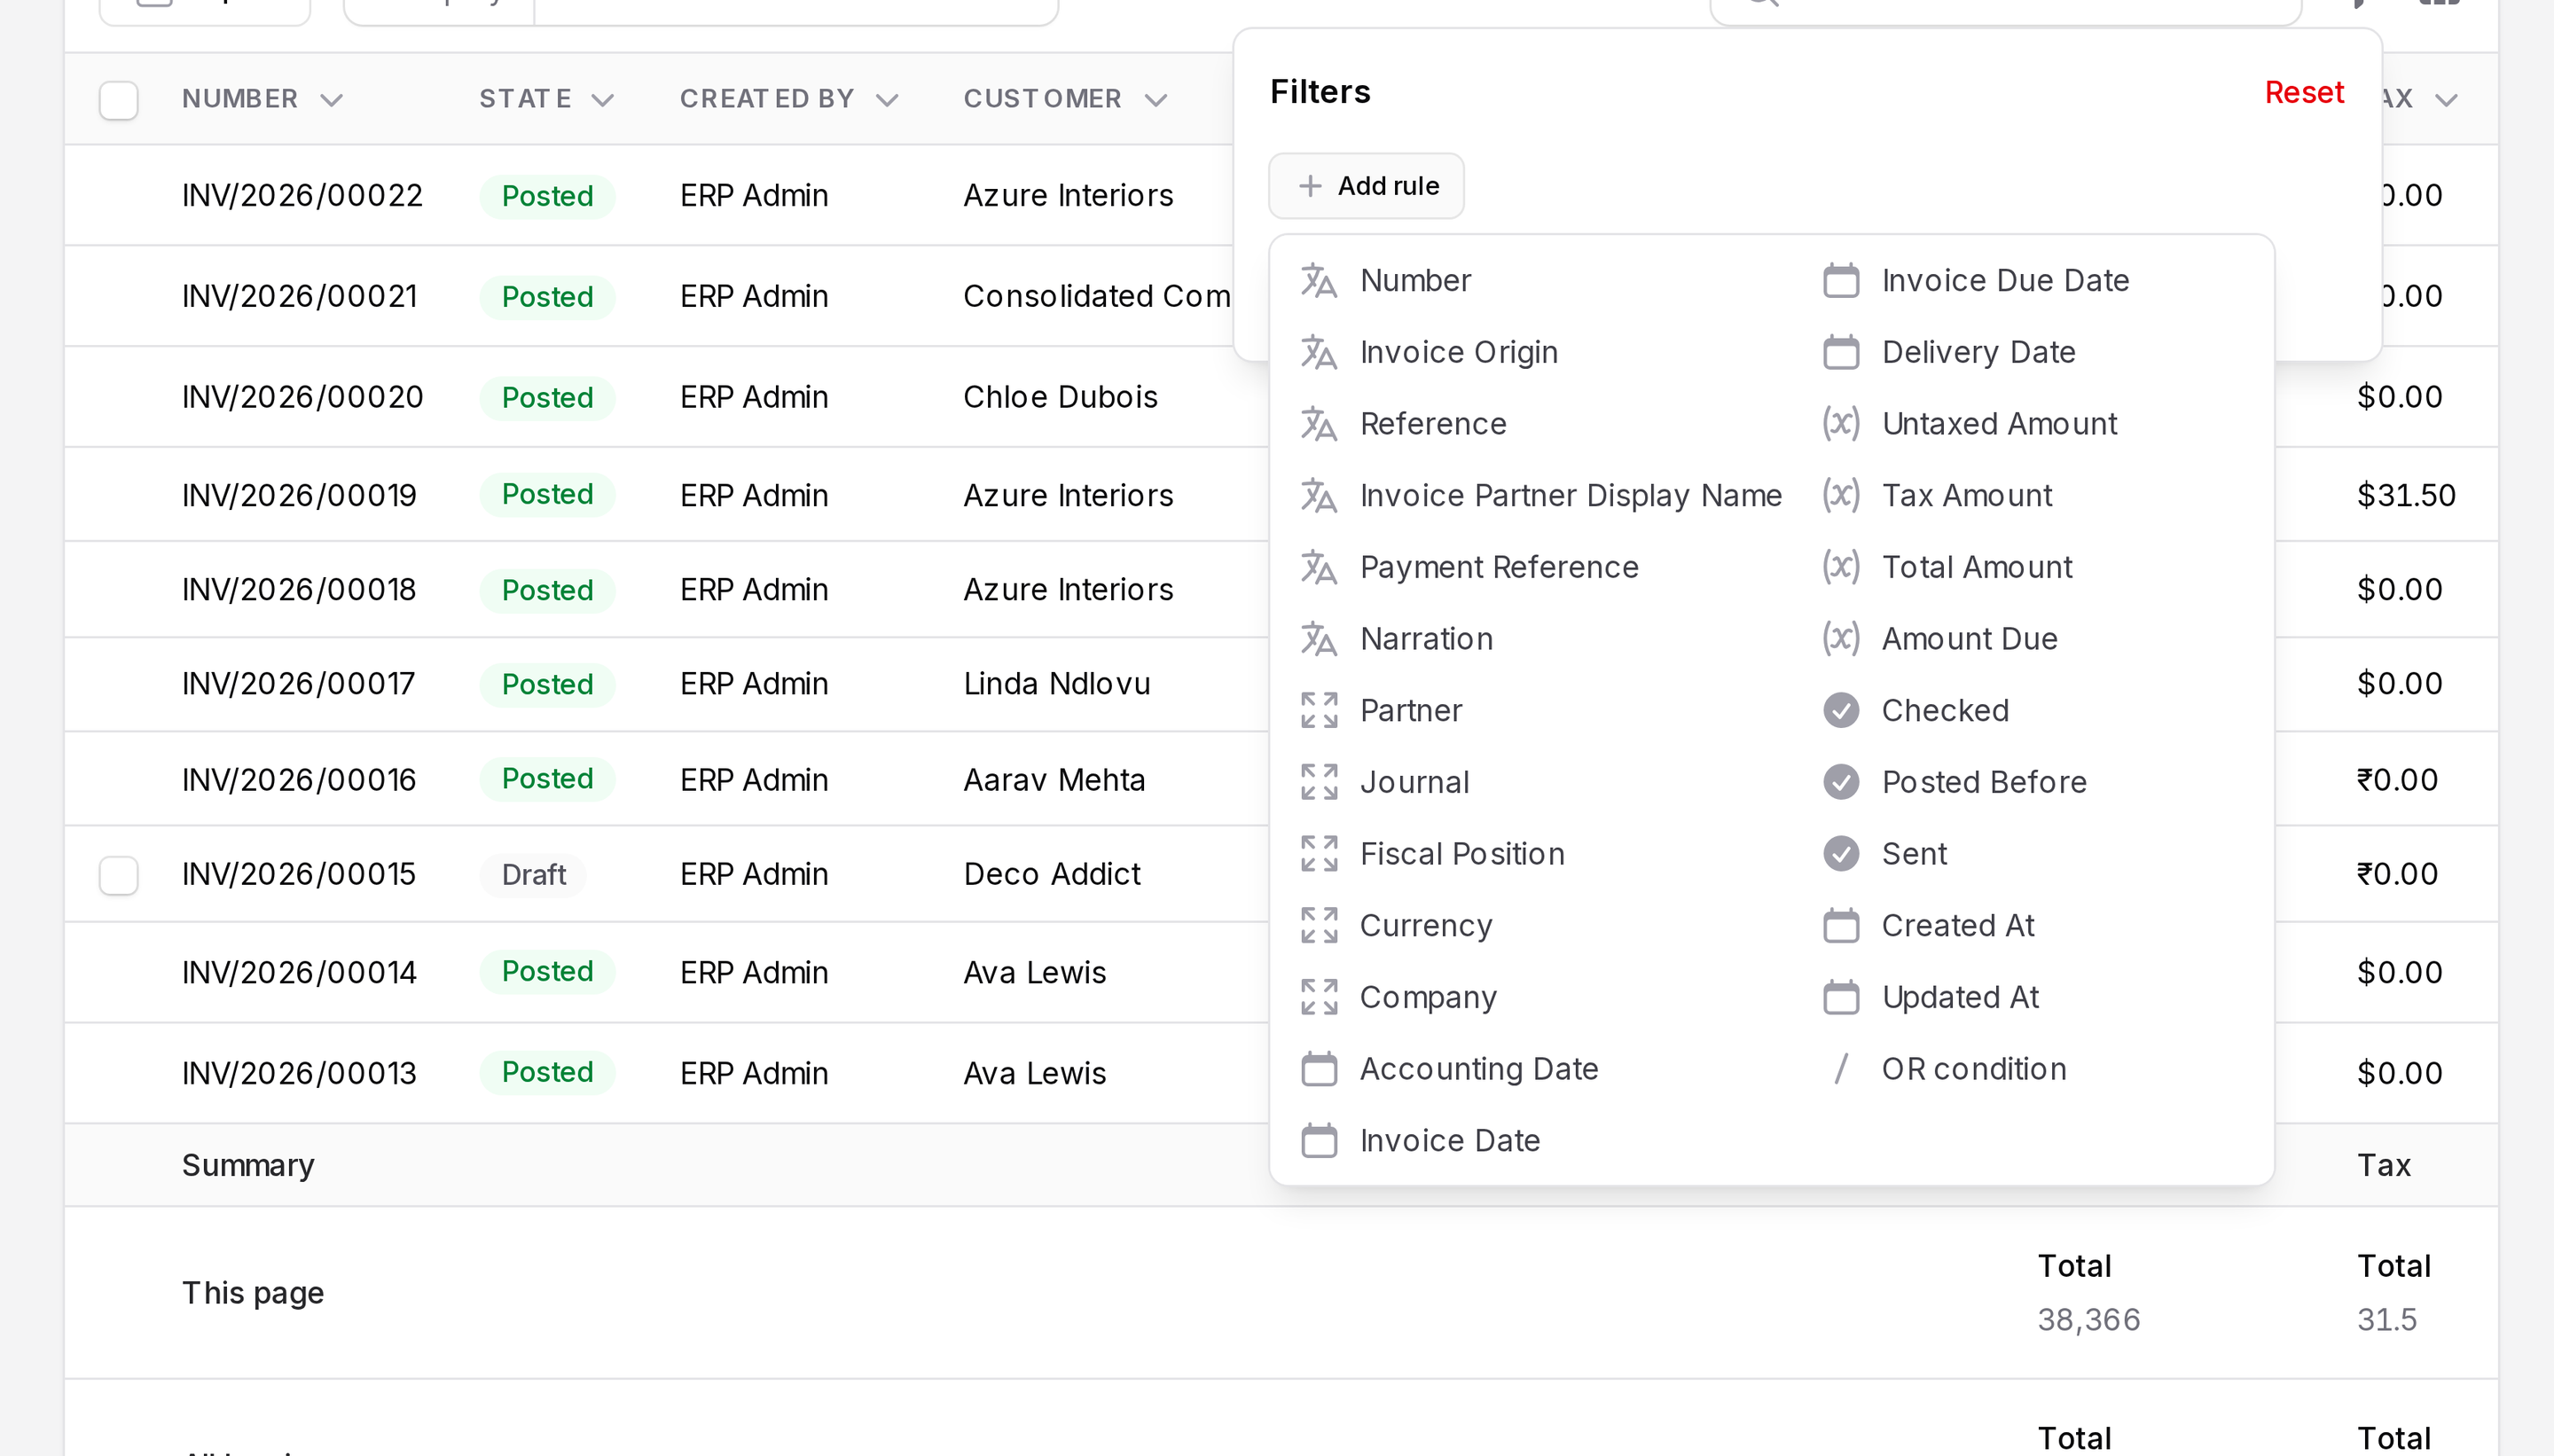
The conditions depend on the field:
- Text fields: for example contains or equals a word.
- Date fields: for example before, after or on a date.
- Related records: for example is one of the chosen customers.
Add more rules to narrow the list further. Choose OR condition to match records that meet any of the rules, instead of all of them.
Group records
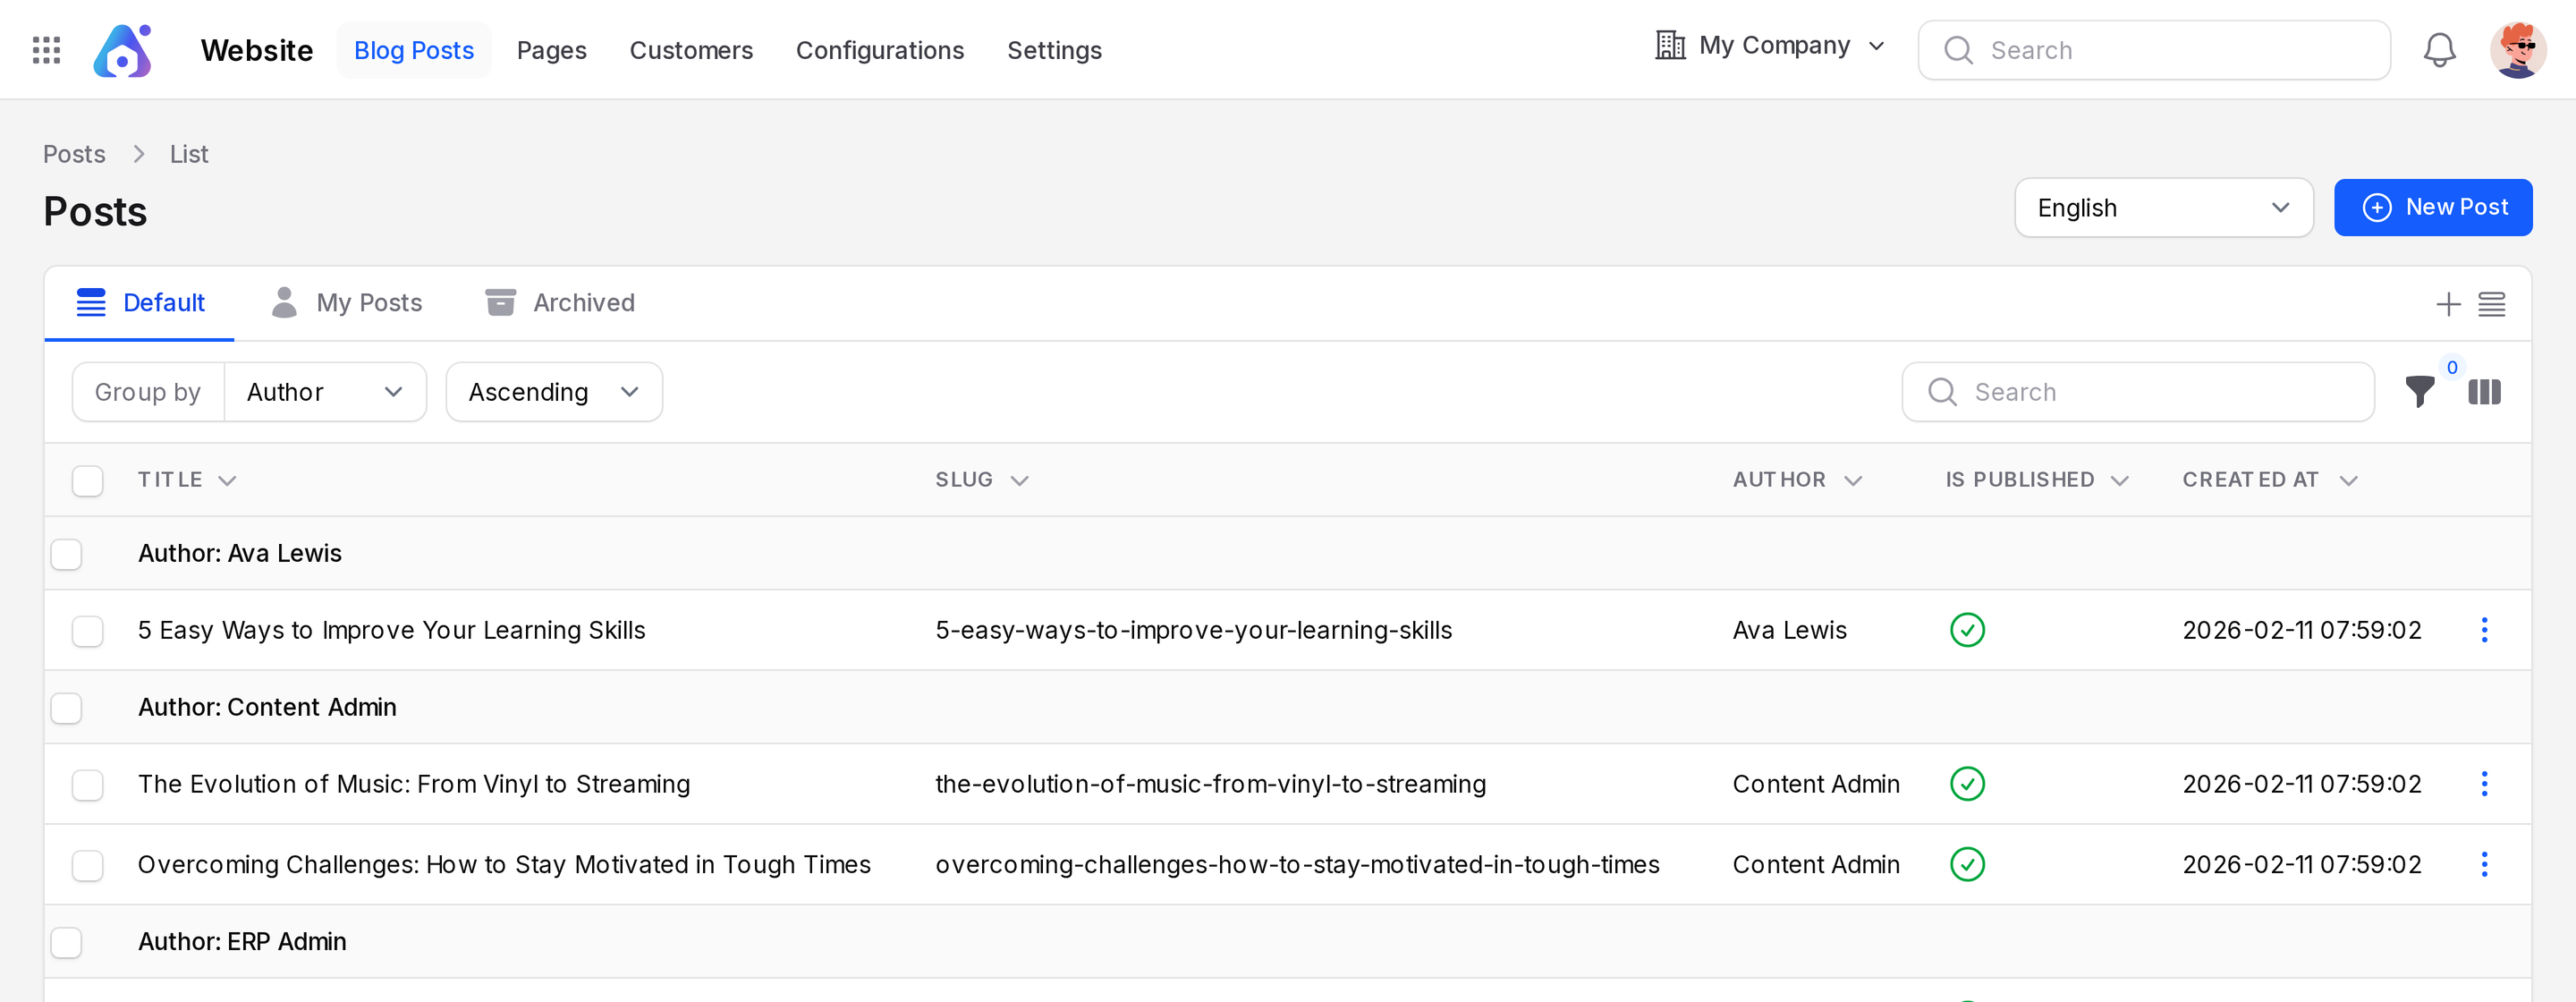
Grouping puts records with the same value under one heading, so you can see how many fall in each group.
- Click the Group by drop-down and choose a field, such as Author or Medium.
- In the second drop-down, choose Ascending or Descending to set the order of the groups.
The list now shows a heading for each value, for example Author: Ava Lewis, with the matching records under it. To remove the grouping, clear the Group by field.
Column manager
Use the column manager to choose which columns you see and in which order.
- Click the Columns icon.
- Tick a column to show it. Untick a column to hide it.
- Drag the handle at the right of a column name to move it up or down. The columns in the list follow the same order.
- Click Reset to go back to the default columns.
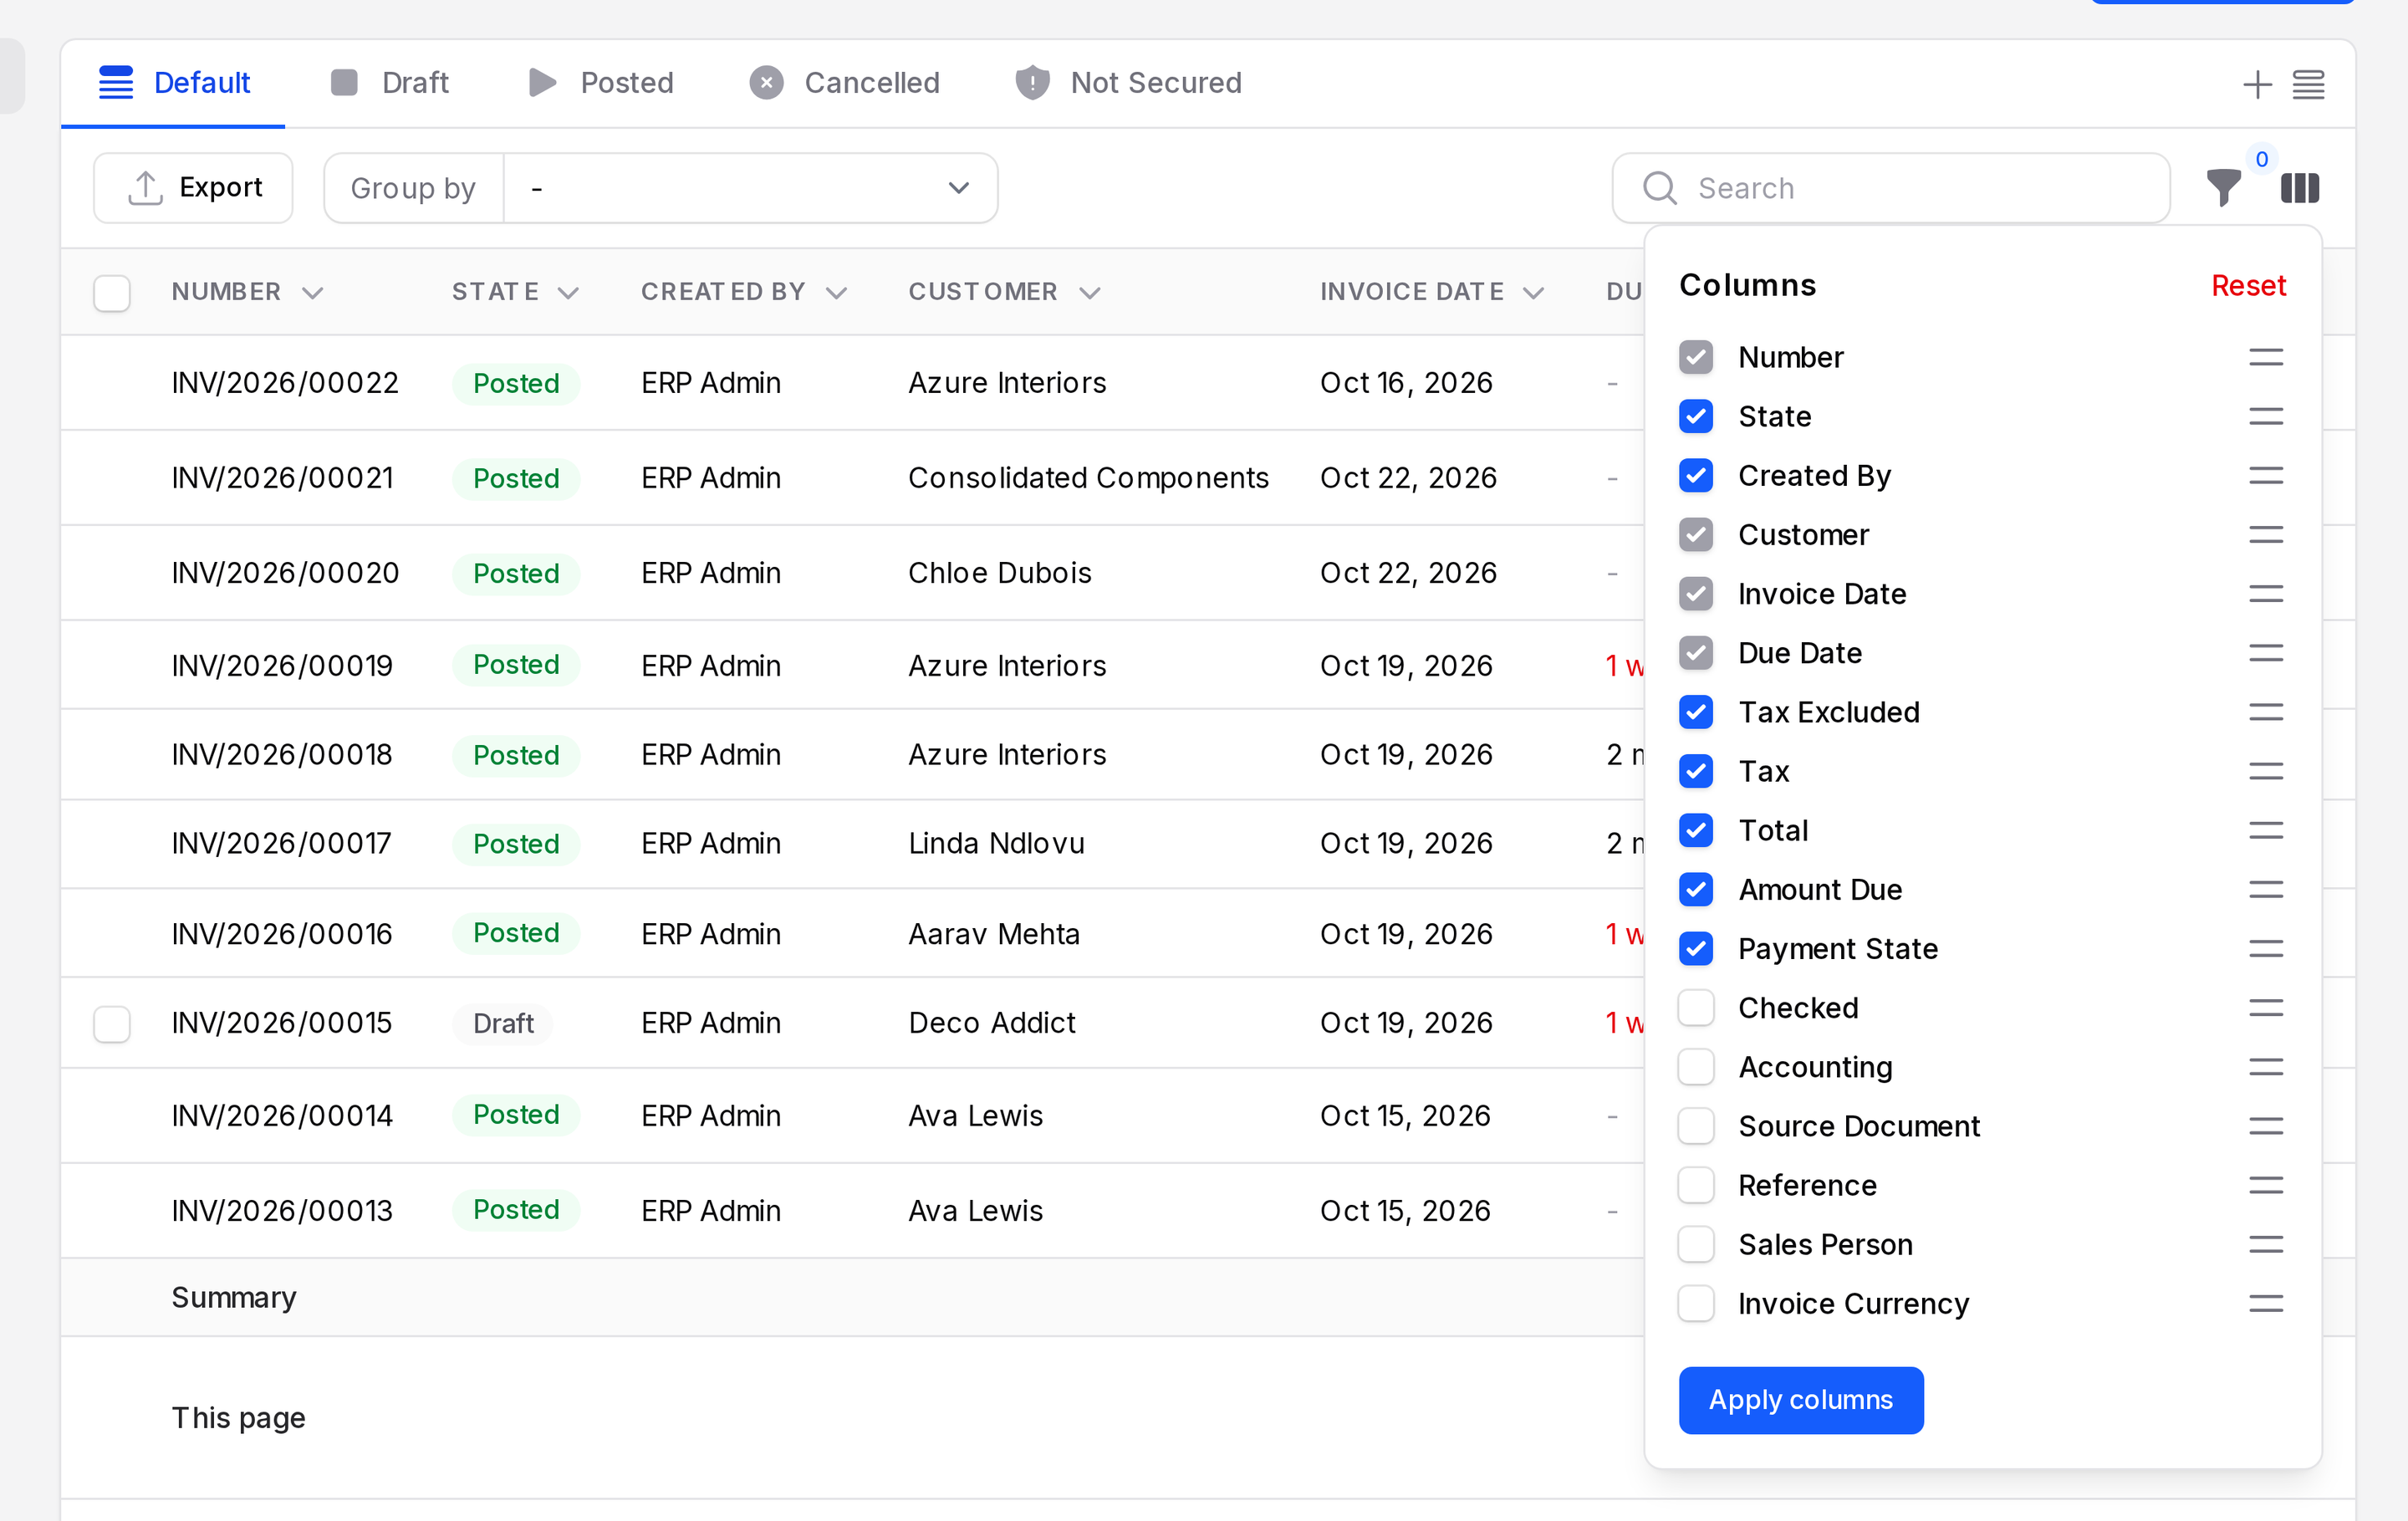
Your choice changes only how you see the list. The records are not changed.
Views
A view is a saved set of search, filters and grouping. Use views for the lists you open every day.
Switch between views
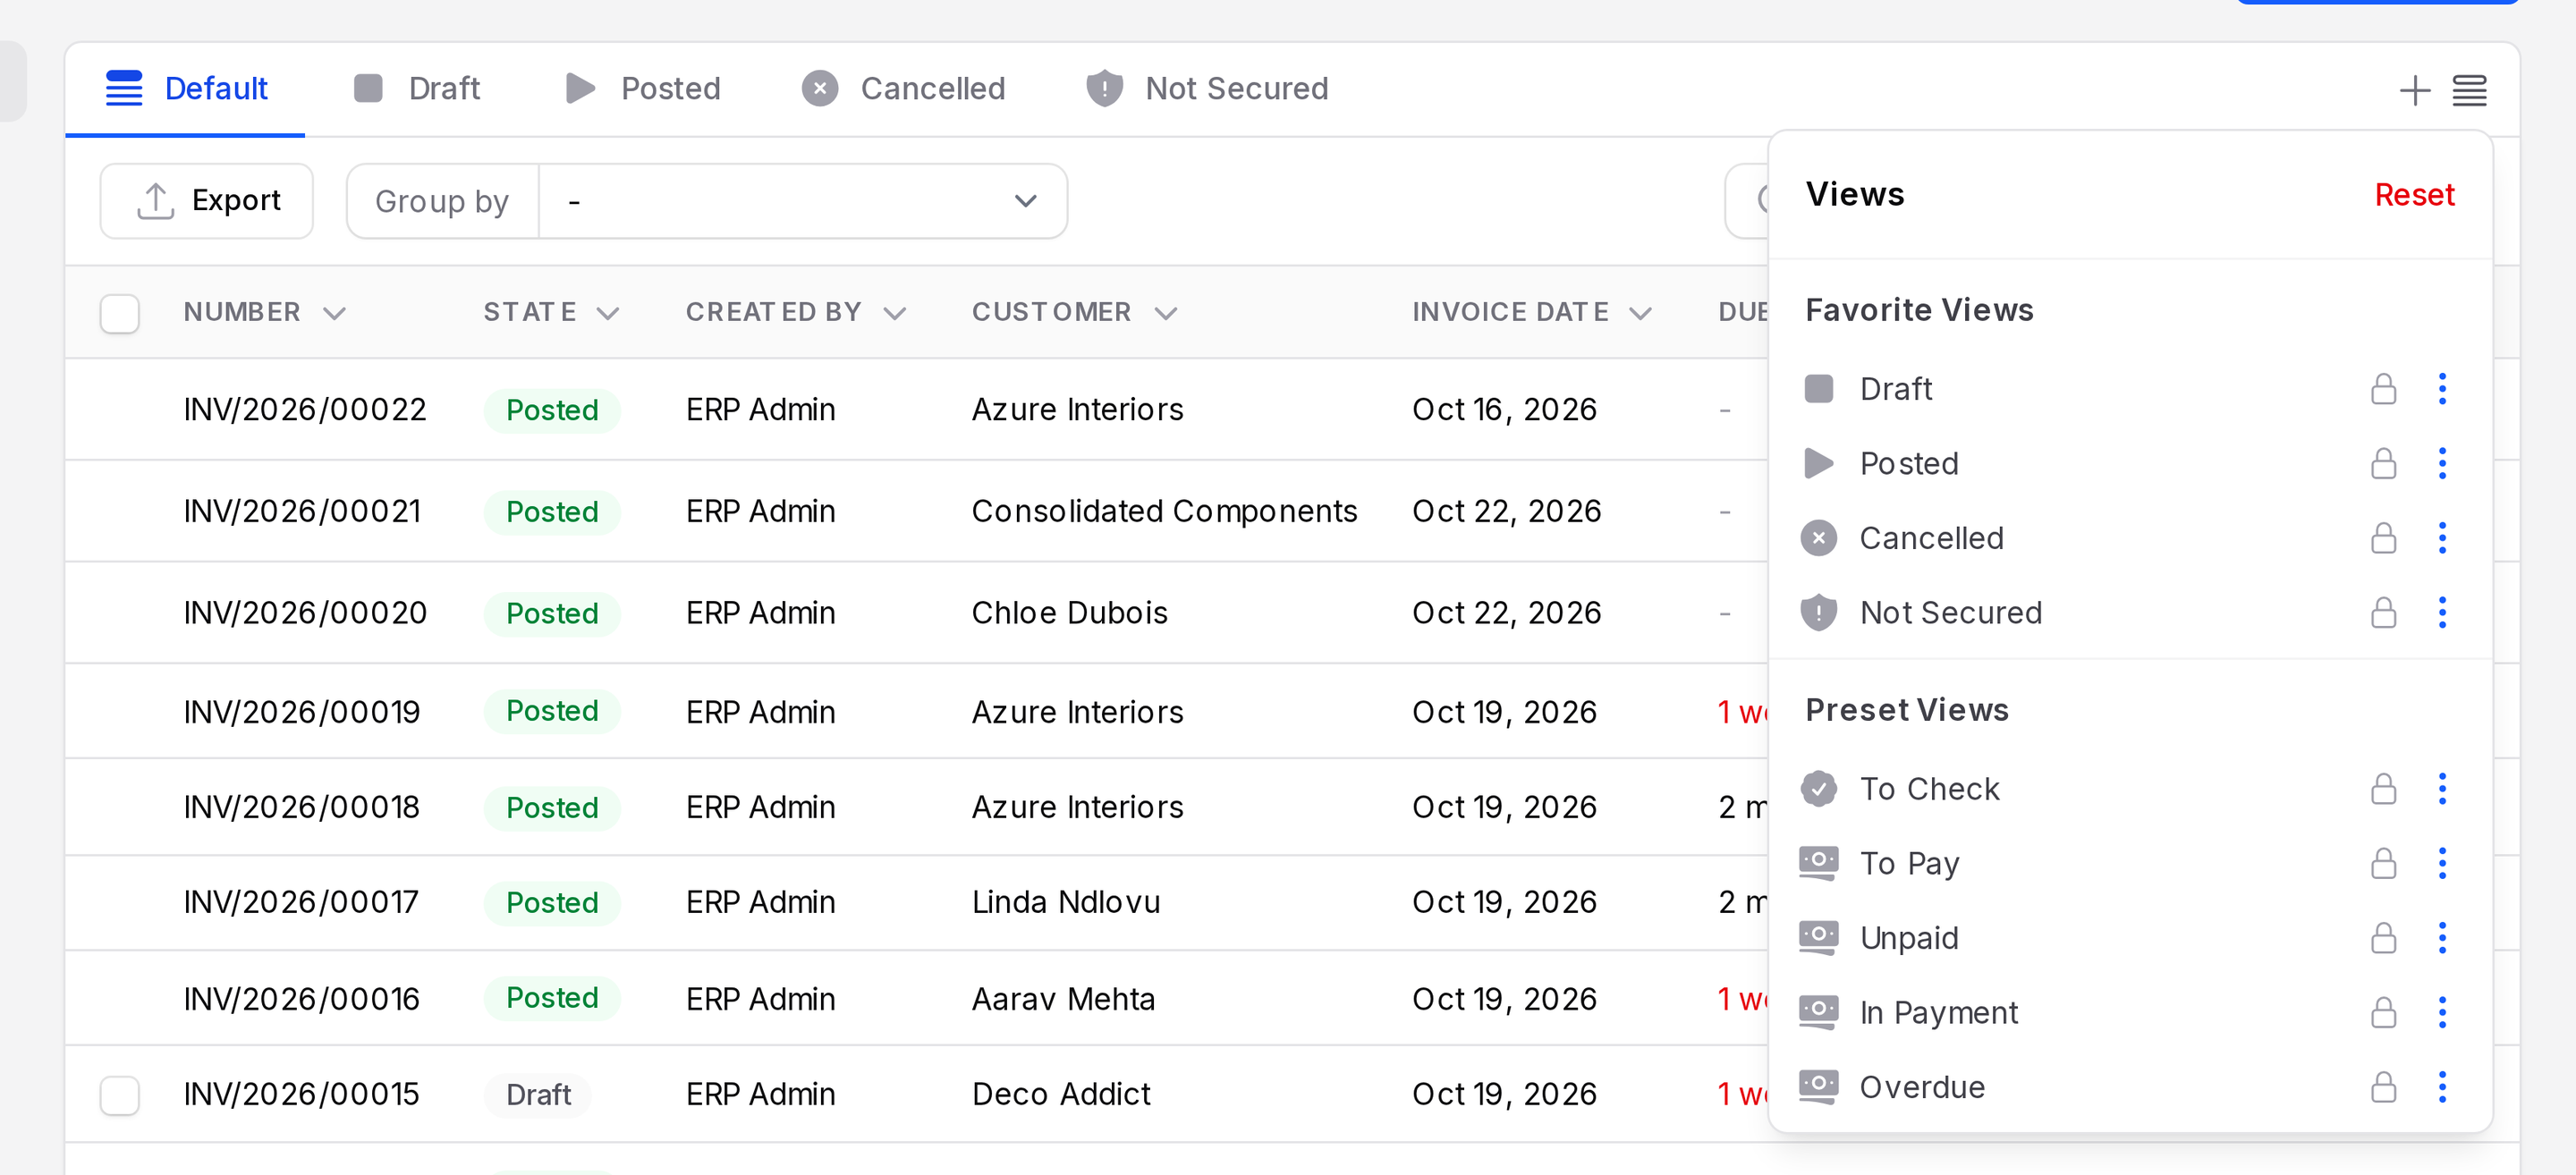
Click a tab above the list to open that view. To see all views, click the three dots at the end of the tabs. The Views menu has Add New and Reset at the top, and lists the views below. It groups them as:
- Favorite Views: The views that show as tabs.
- Saved Views: The views you or other users saved.
- Preset Views: The views that come with the page, such as Default.
Click Reset to go back to the default view.
Save a view
Set up the list the way you want it, with the search, filters and grouping you need.
Click the three dots at the end of the tabs and choose Add New.
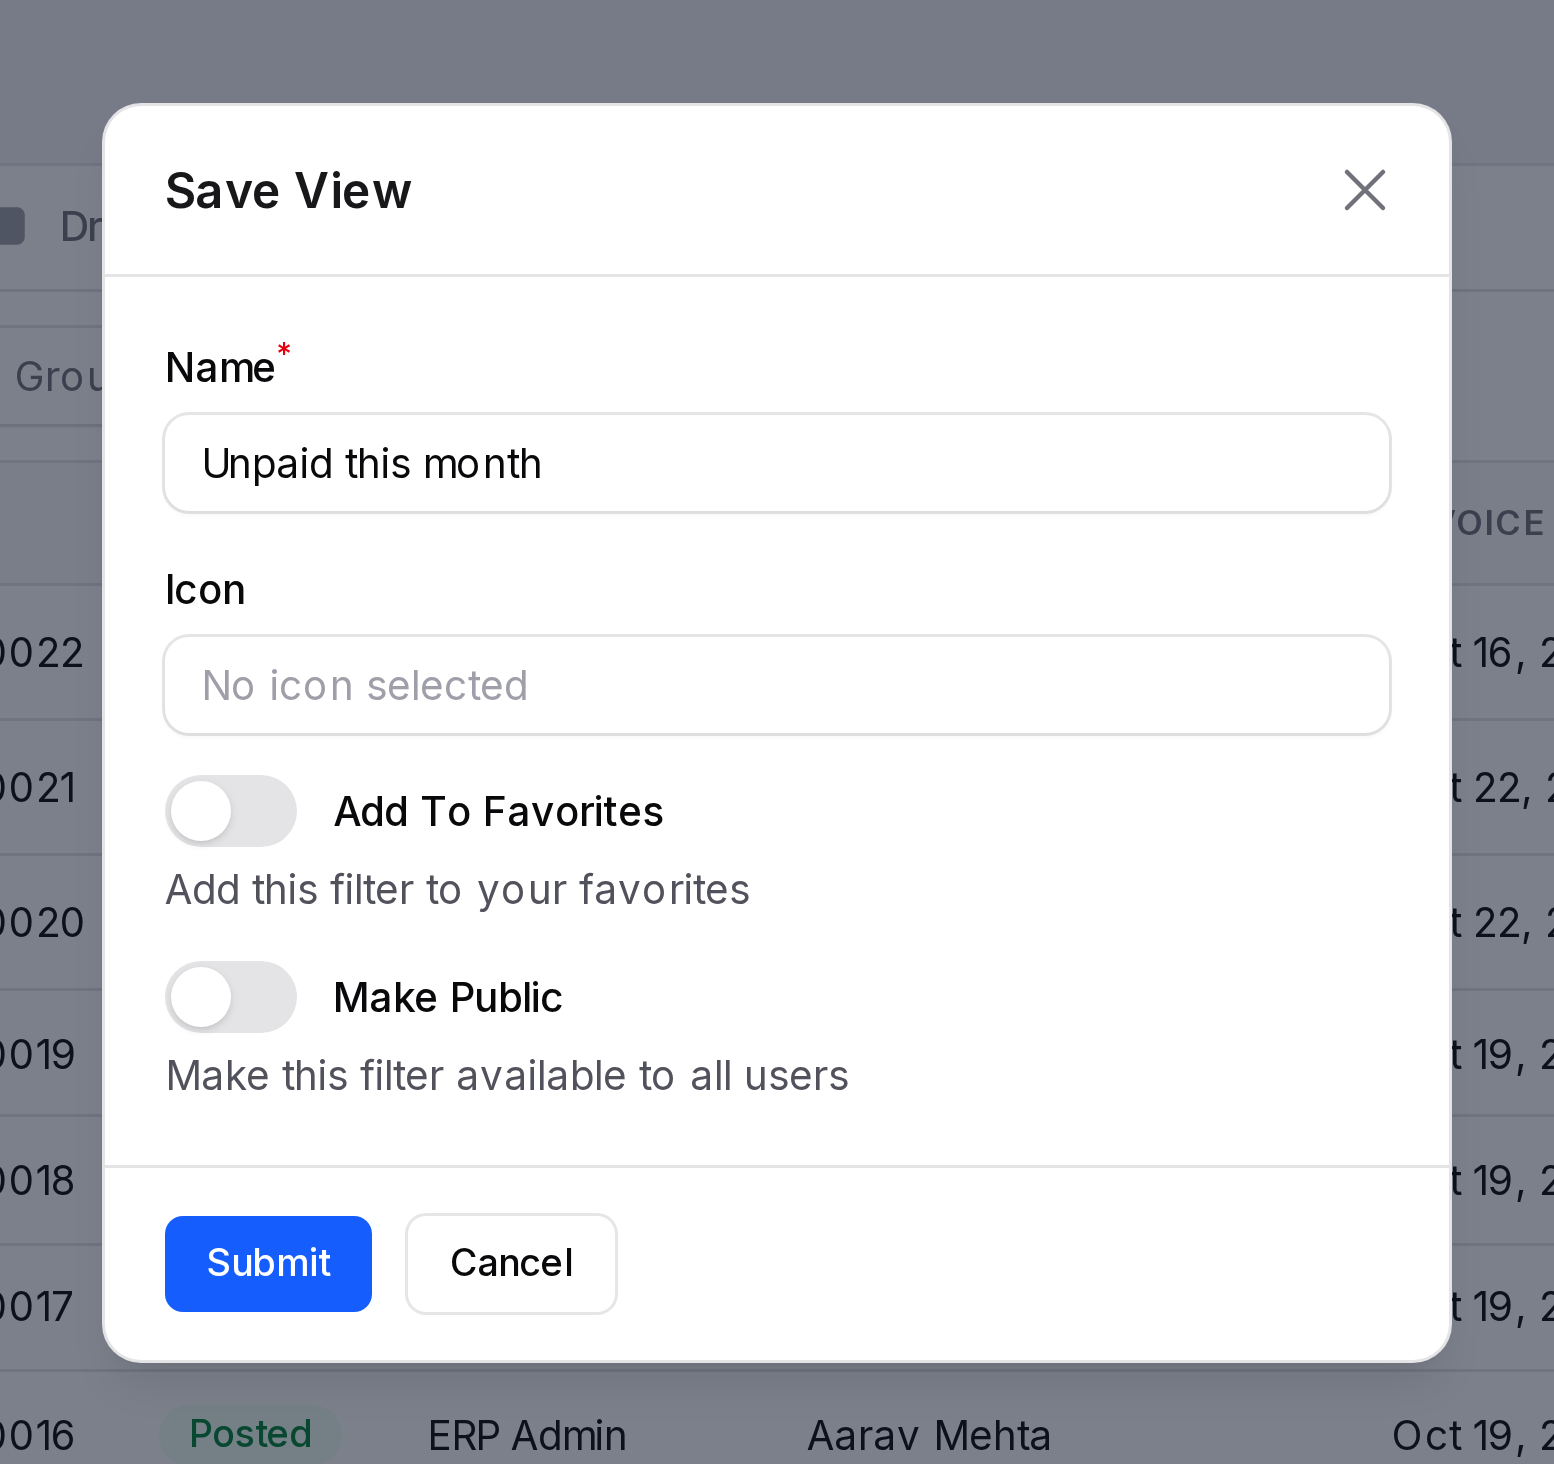
In the Save View window, fill in:
- Name: The title of the view. This field is required.
- Icon: Pick an icon for the tab.
- Add To Favorites: Turn on to show the view as a tab.
- Make Public: Turn on to let all users use the view.
Click Submit, or Cancel to close the window without saving.
Manage a view
Use the actions next to a view in the views menu to:
- Apply View: Open the view.
- Add to Favorites or Remove from Favorites: Show or hide the view as a tab.
- Replace View: Overwrite the view with what is on screen now.
- Delete View: Remove the view.
You can also edit a view to change its name, icon or visibility.
INFO
A lock icon next to a view means you cannot change it. This is the case for preset views.