

Companies
A company is a legal entity that you run in Aureus ERP. Each company has its own details, address, currency, logo and optional branches. Users are given access to companies, and records are kept per company. Your system starts with one company. Add another for a separate legal entity. Add a branch for a site that reports to a company. You manage companies from the Companies tab of the Settings app.
In simple words: A company holds the identity of your business: name, address, currency, logo and branches.
Overview
Open Settings → Companies to see the list of companies.
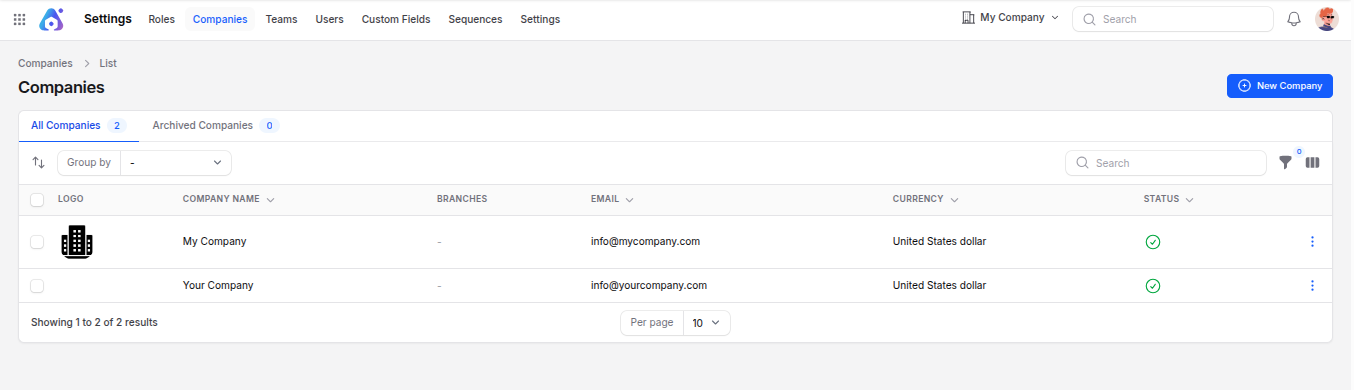
The list has two tabs:
- All Companies: Active companies, with a count badge.
- Archived Companies: Deleted companies, with a count badge.
The list shows these columns:
- Logo: The company logo.
- Company Name: The name.
- Branches: The names of the branches, as badges.
- Email: The company email.
- Currency: The currency of the company.
- Status: A tick or cross icon.
- City, Country, Created By, Created At, Updated At: Hidden at first. Show them from the column menu.
Use the filters Status and Country to narrow the list. You can also group rows by name, city, country, state, email, phone, currency and other fields.
Create a company
Go to
Settings → Companies.Click New Company.
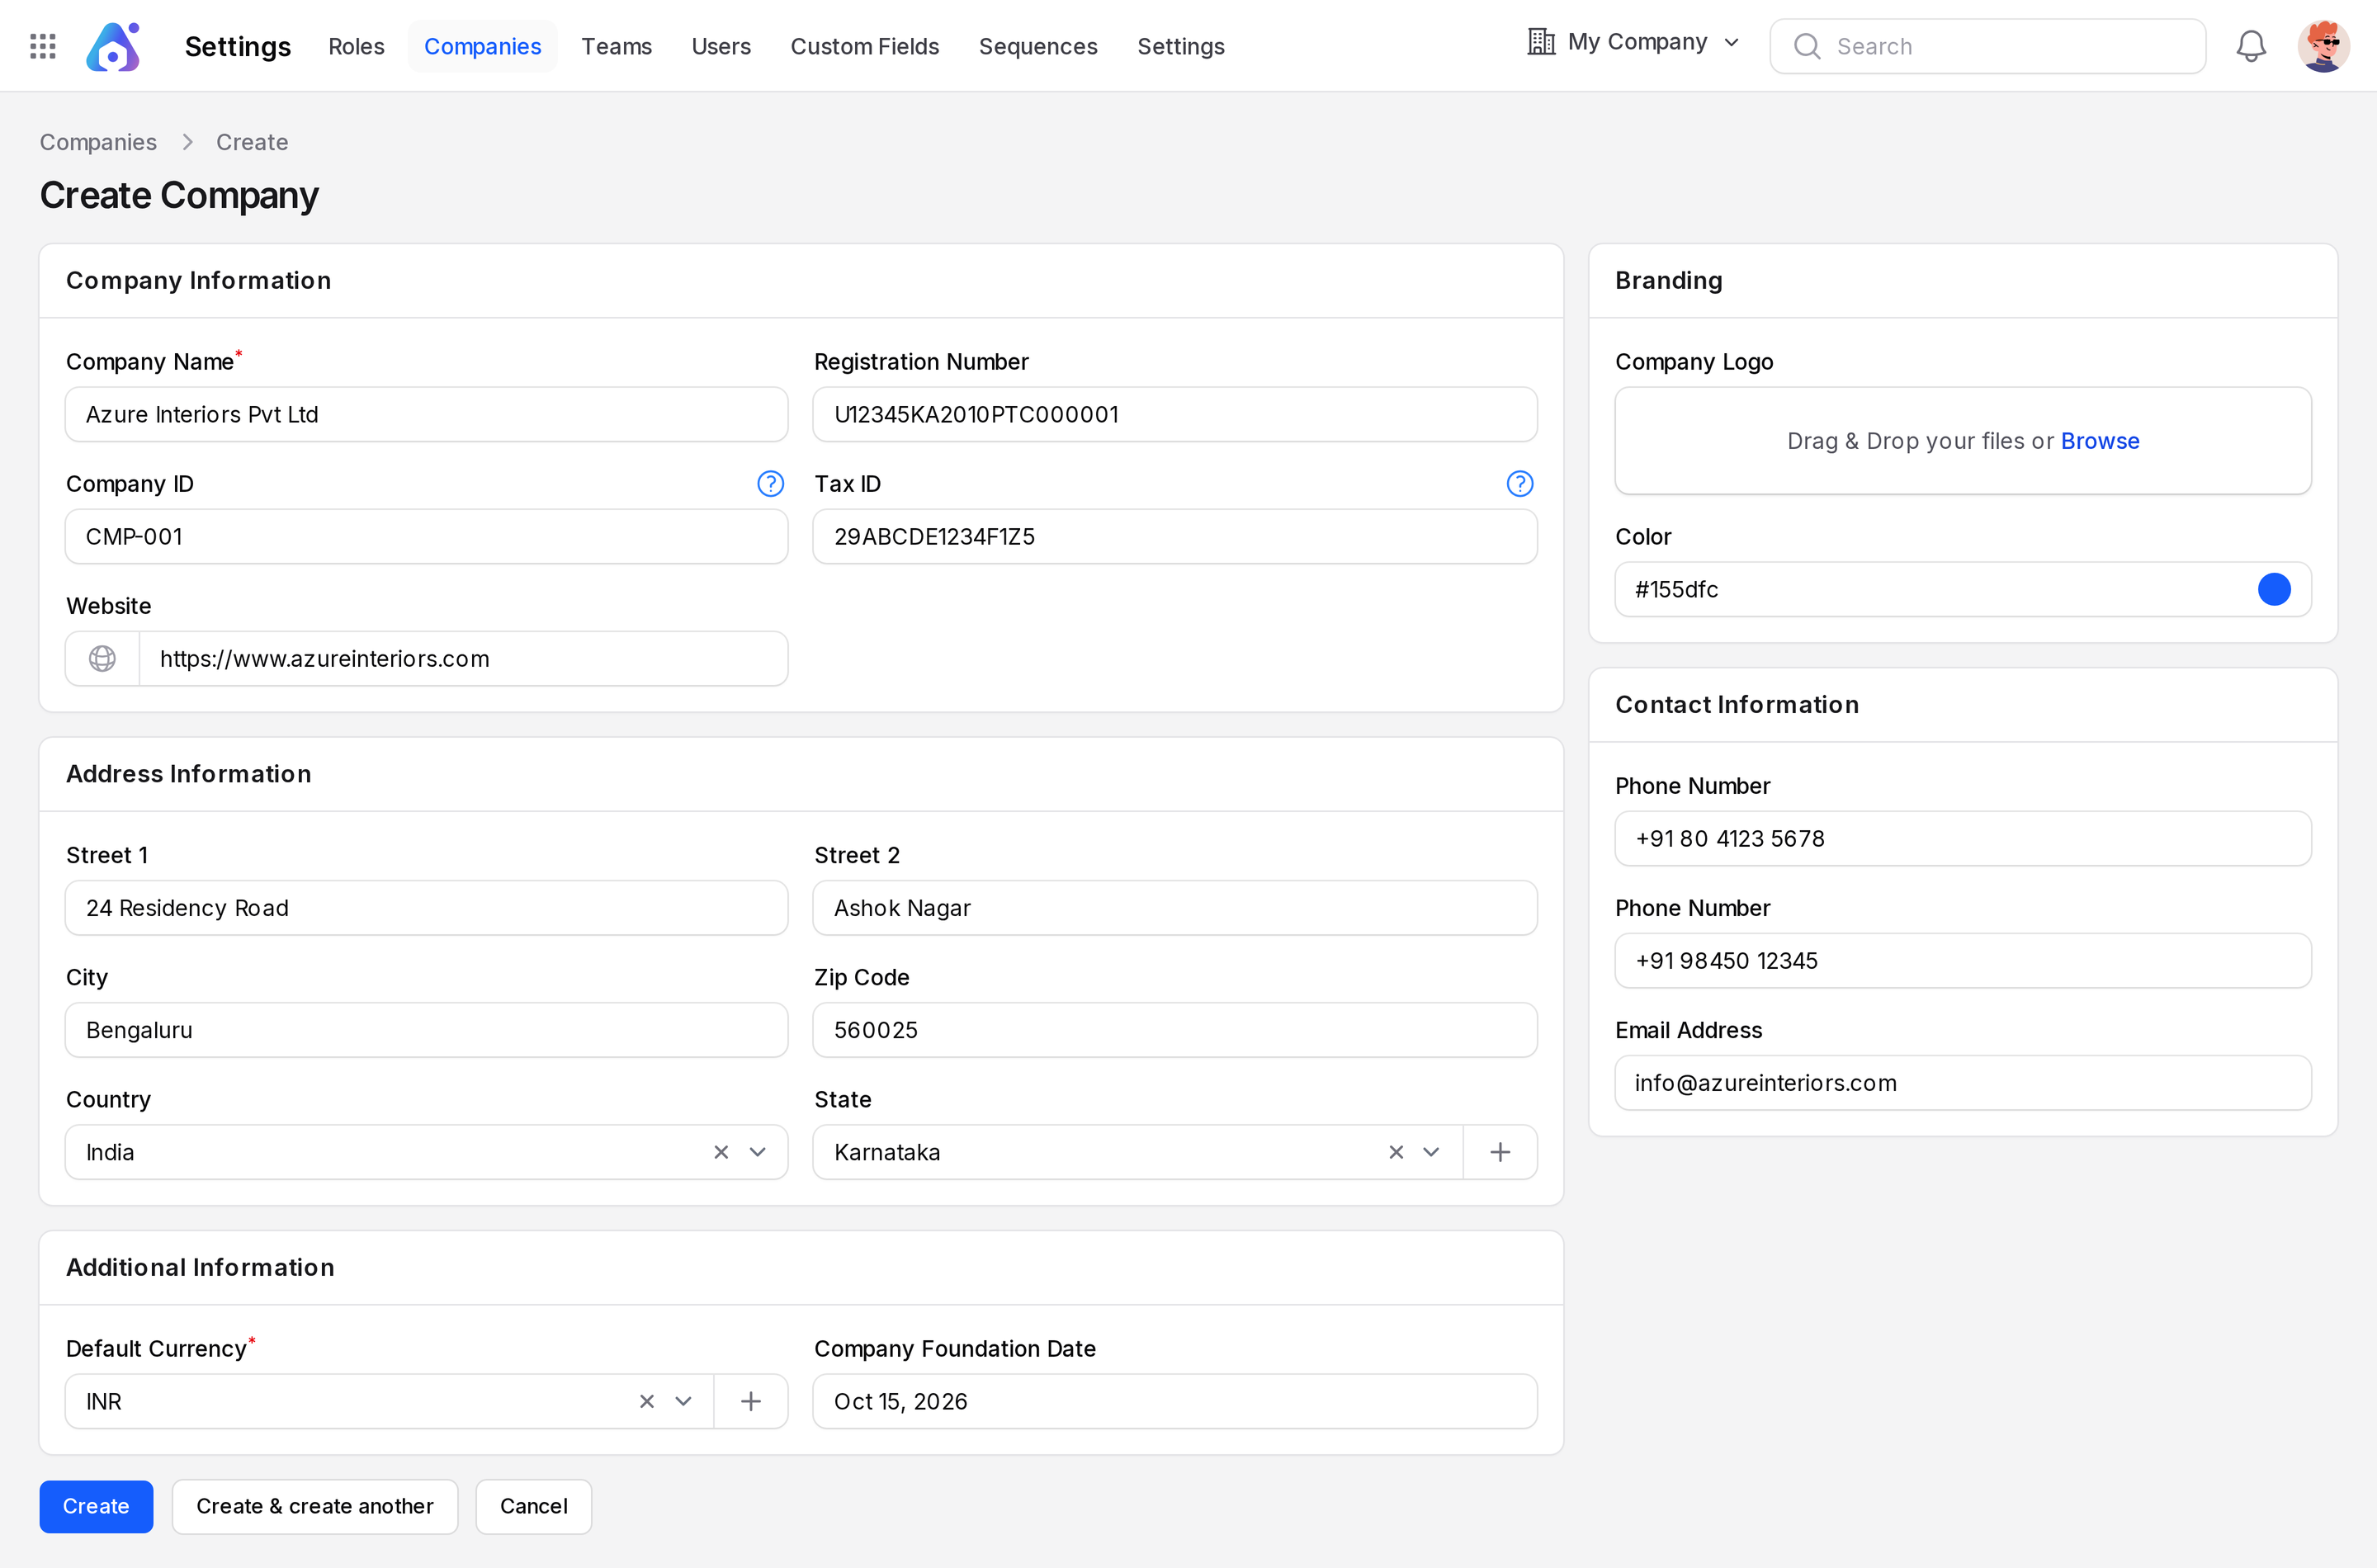
Fill in the form as described below.
Click Create. A company-created message appears.
Company Information
- Company Name: The name. It must be unique. Required.
- Registration Number: The number in the government register, for example
U12345KA2010PTC000001. - Company ID: Your own code for the company, for example
CMP-001. - Tax ID: The tax number, for example
29ABCDE1234F1Z5. It must be unique. - Website: The web address. It must be a valid URL and unique.
Address Information
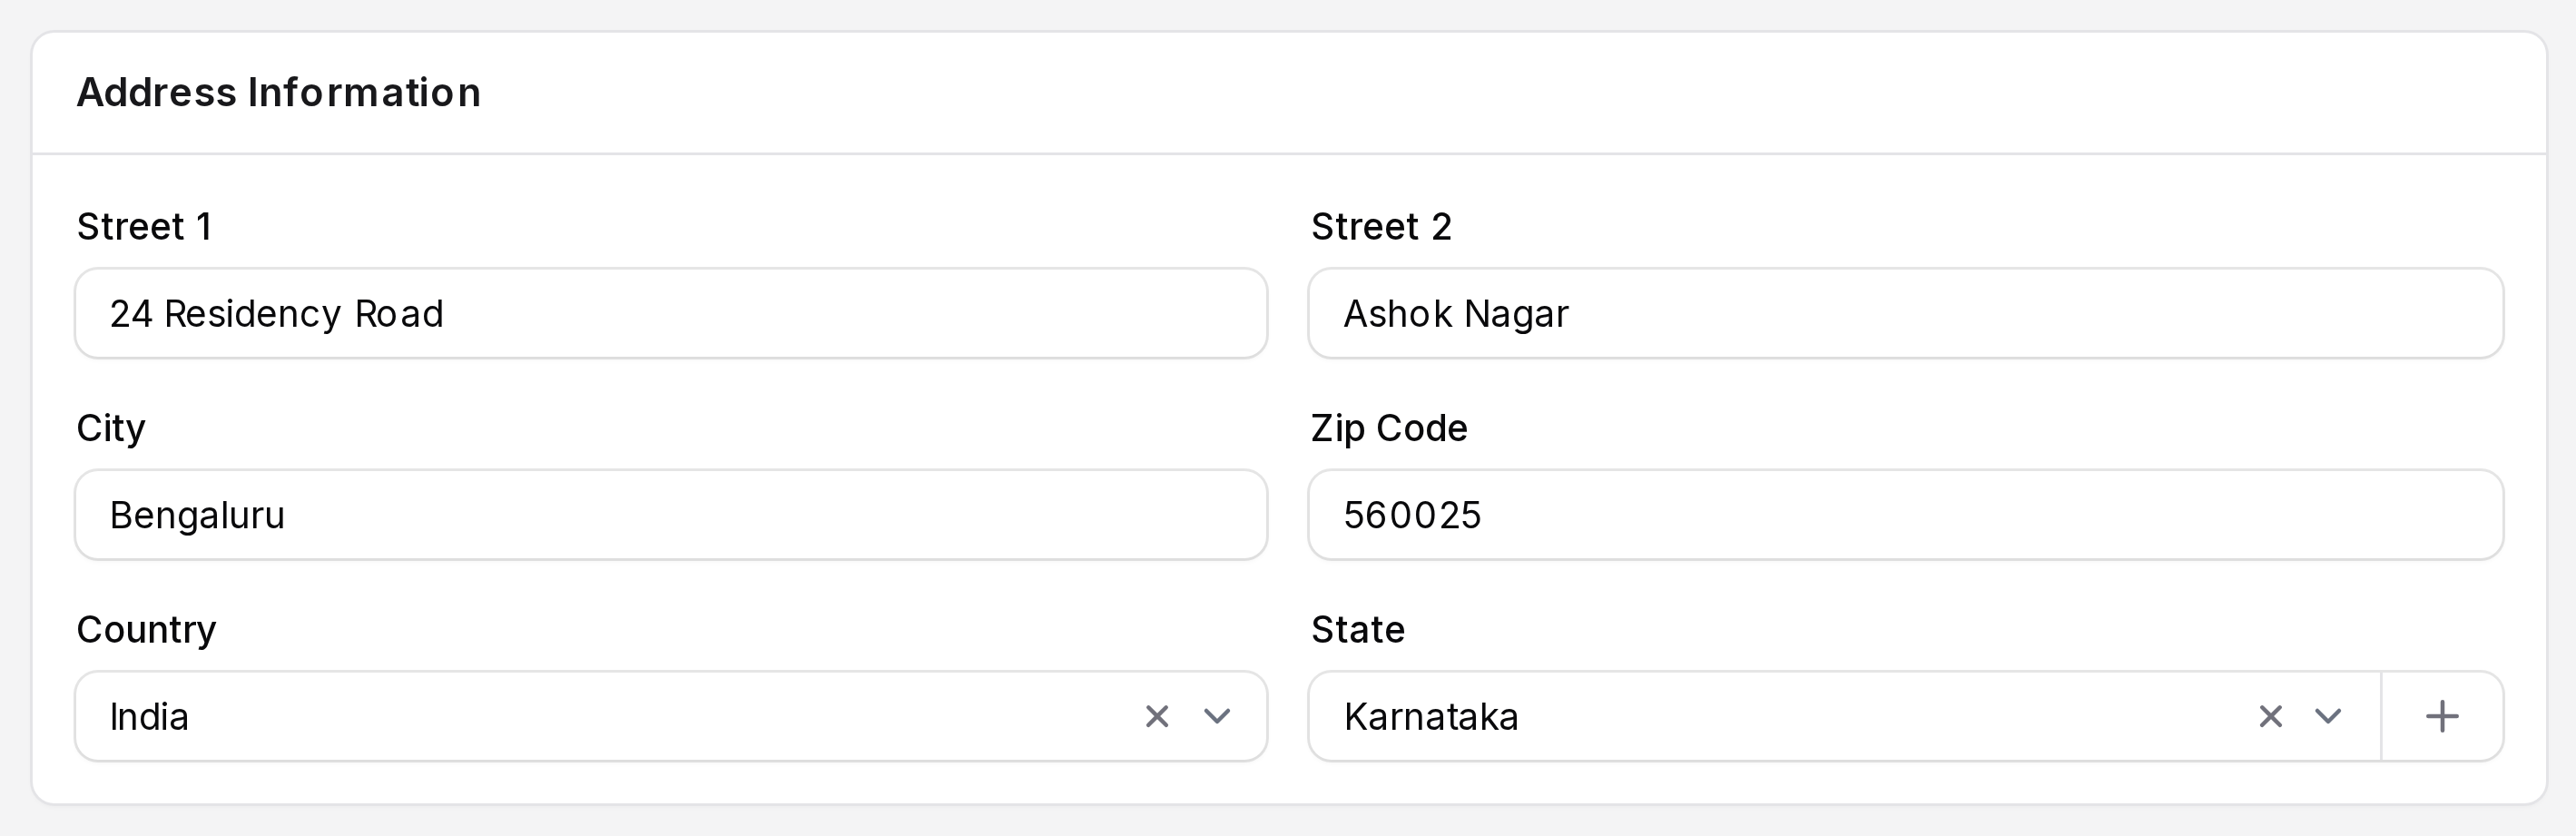
- Street 1: The first address line.
- Street 2: The second address line.
- City: The city.
- Zip Code: The postal code.
- Country: Choose a country. You can search the list.
- State: Choose a state of the selected country. Use the plus icon to create a state with State Name, State Code and Country.
Additional Information
- Default Currency: The currency of this company's books. Required. The system-wide Base Currency is set in Manage currency. Use the plus icon to create a currency with Currency Name, Currency Full Name, Currency Symbol, Currency ISO Numeric, Currency Decimal Places, Currency Rounding and Currency Status.
- Company Foundation Date: The date the company was founded.
Your installed modules or custom fields may add more fields here. See Custom fields.
Branding
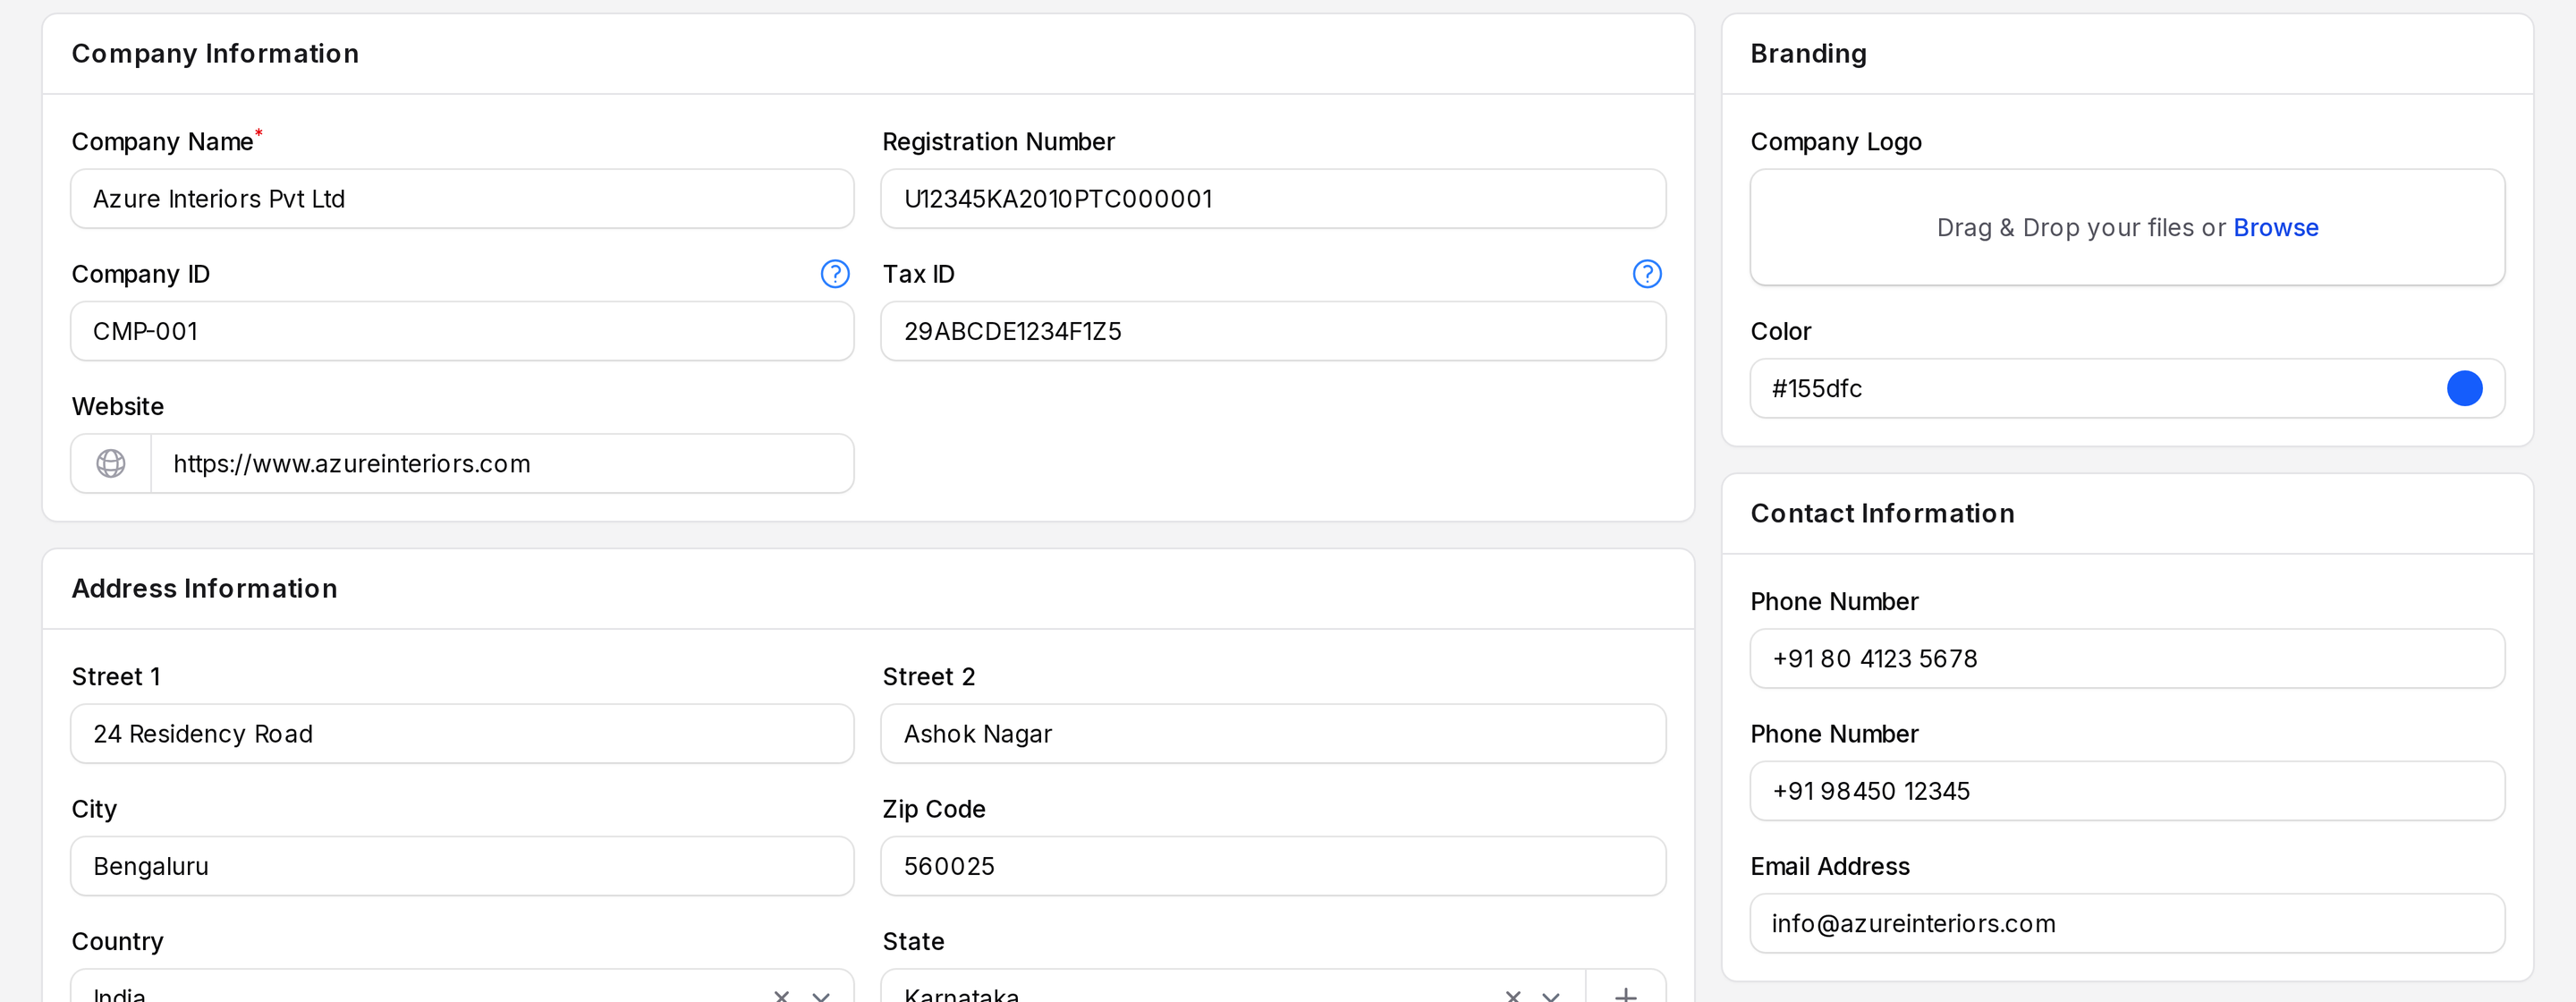
- Company Logo: Upload an image.
- Color: Pick a color. It is stored as a hex code.
Contact Information
- Phone Number (first field): The main phone.
- Phone Number (second field): The mobile phone. The form uses this label twice.
- Email Address: The company email.
Add a branch
A branch is a company that belongs to another company. You add it on the parent company.
Open
Settings → Companies, then edit a company. Scroll to the Branches table.Click New company at the top right of the table. A Create Company window opens.
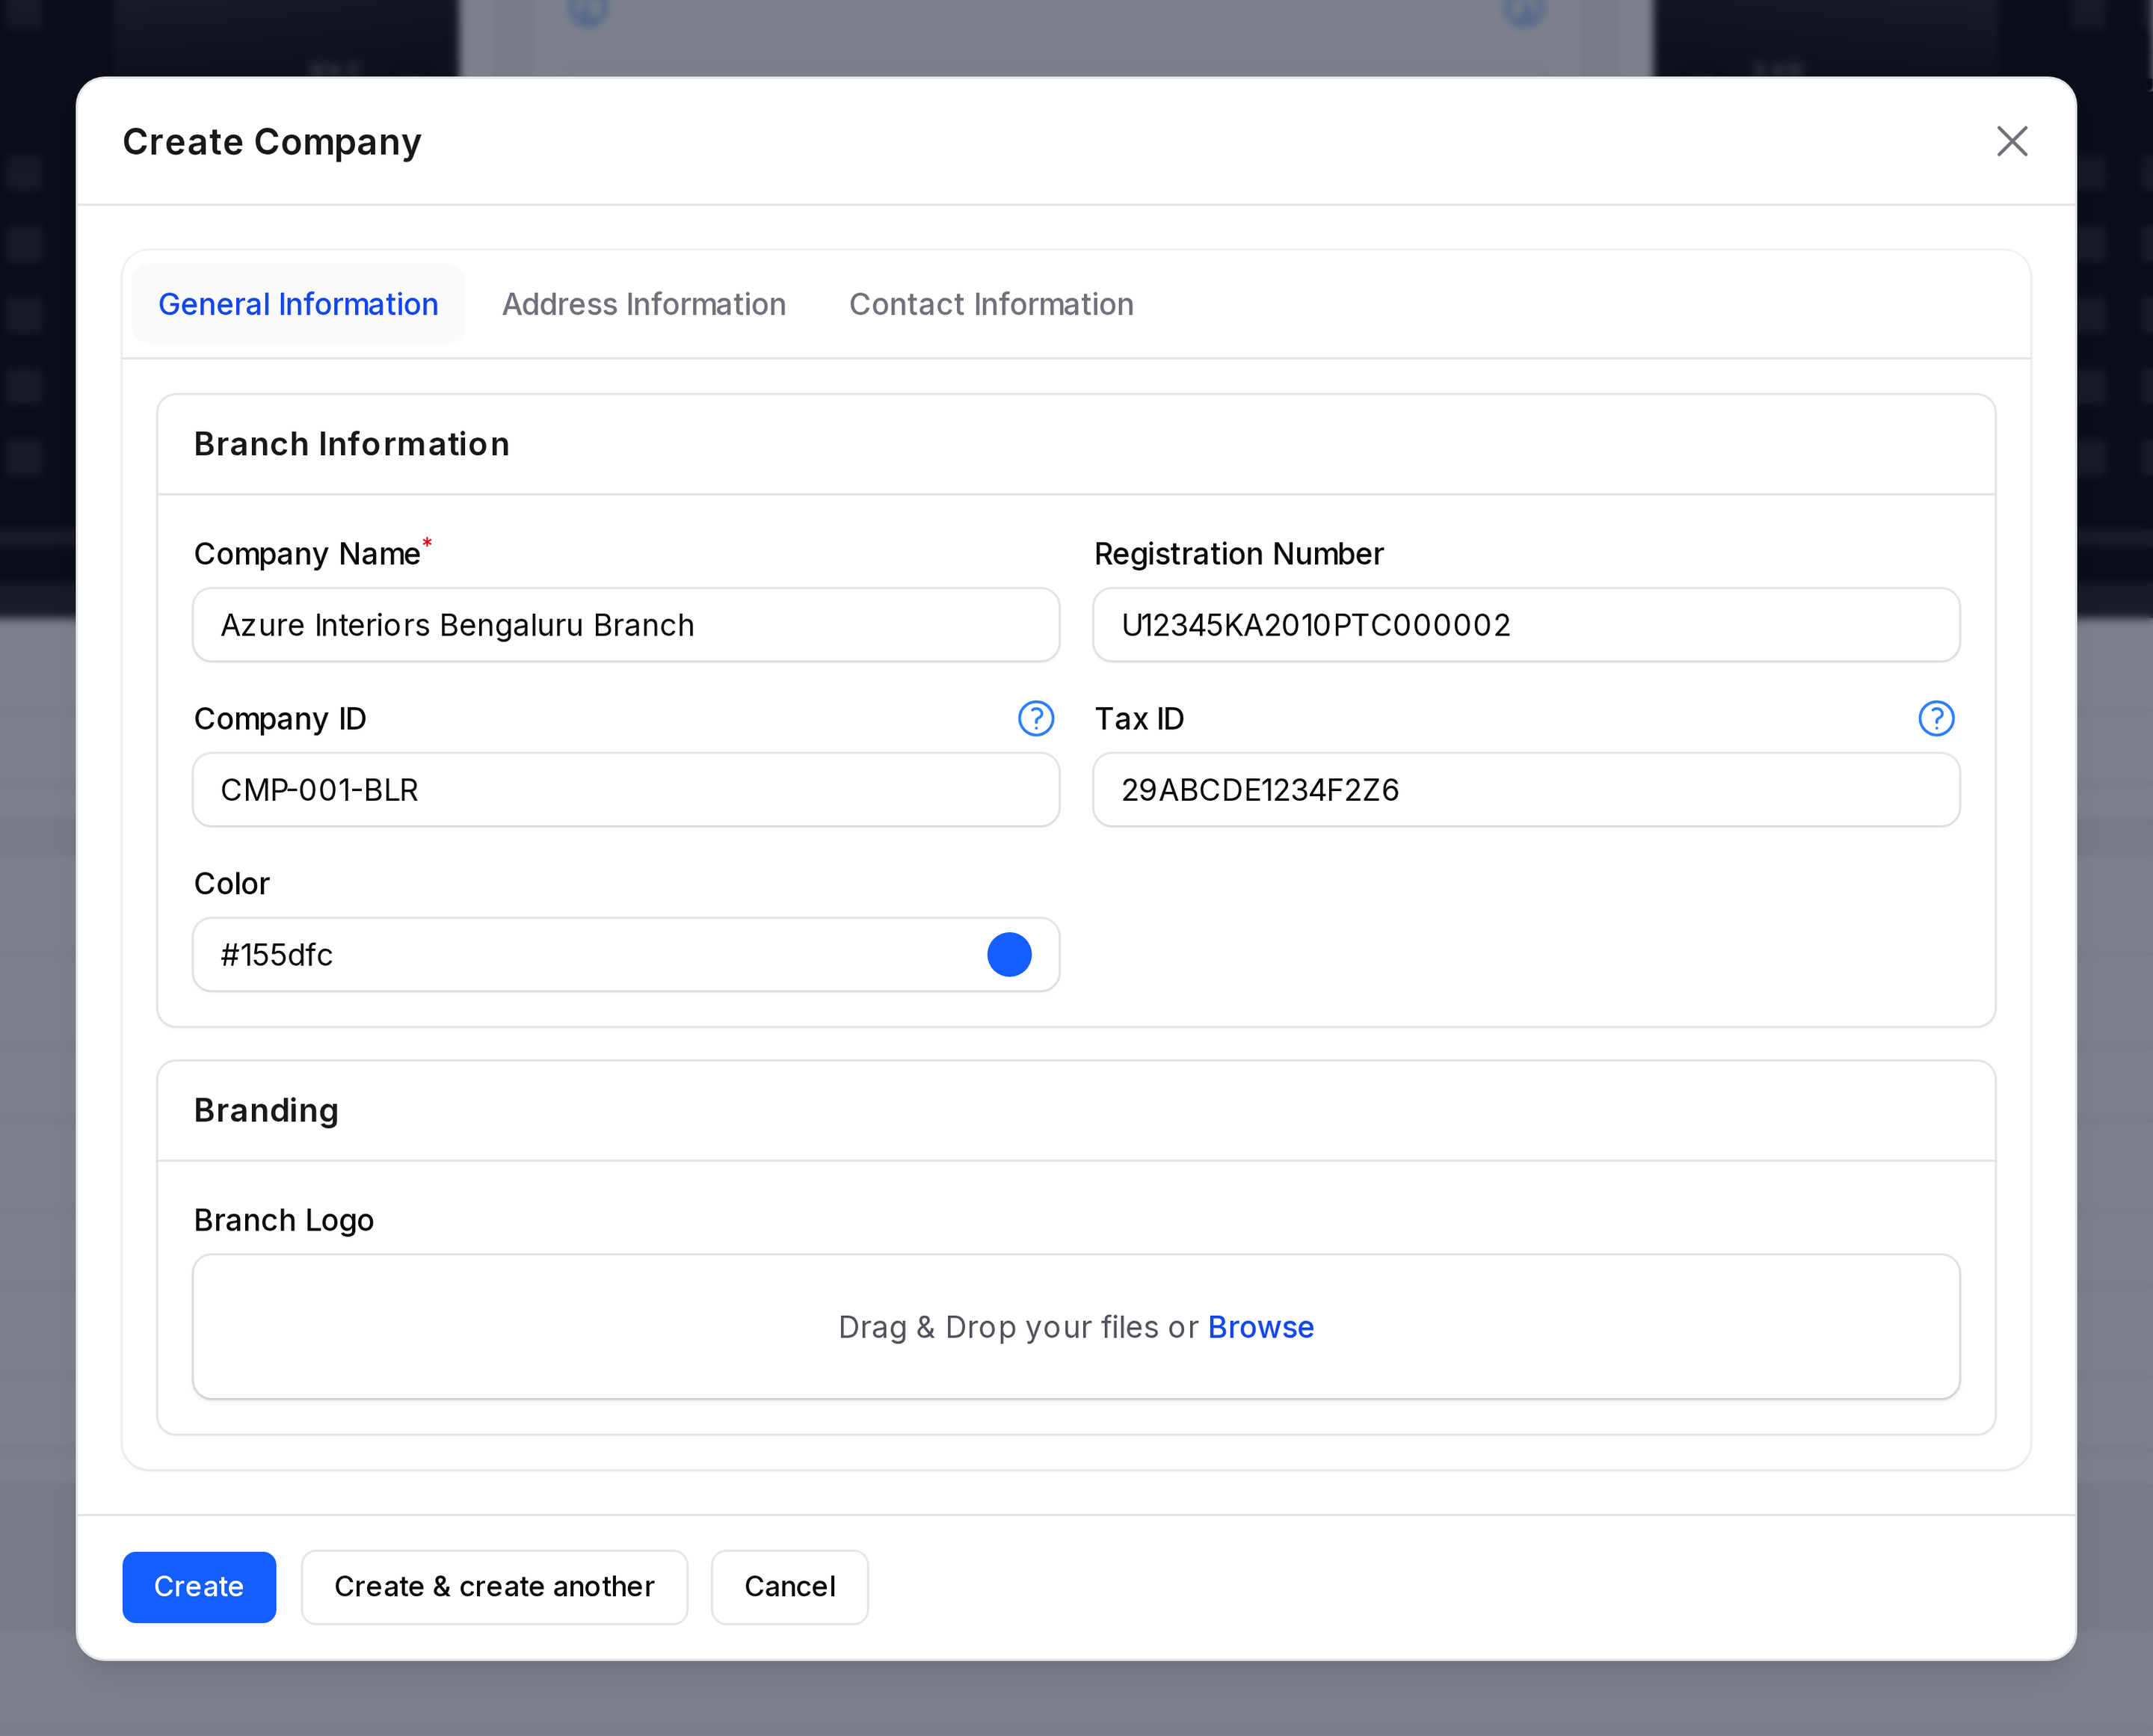
Fill in the three tabs.
Click Create. The branch appears in the table.
The branch form has these tabs:
- General Information: Company Name, Registration Number, Company ID, Tax ID, Color and Branch Logo.
- Address Information: the address fields, Default Currency and Status.
- Contact Information: Email Address and Phone Number.
INFO
A branch name must be unique across all companies.
Actions and statuses
Click the three dots on a row to open these actions:
- View: Opens a read-only page.
- Edit: Opens the form. A Company edited message appears.
- Delete: Moves the company to Archived Companies.
- Restore: Shown on archived companies. Brings the company back.
- Force delete: Shown on archived companies. Removes the company for good.
WARNING
You cannot delete a company that is the default company of a user. Change that user's Default Company first.
WARNING
Force delete fails when other records still use the company. The system shows Company force deletion failed.
To give users access to a company, use Allowed Companies on the user form. See Users.