

Contacts configurations
Configurations are small lists that fill the drop-down fields on the contact form. They are tags, titles, industries, banks and bank accounts. You create each value once and pick it on any contact.
In simple words: Create these lists first. Then the contact form has choices ready.
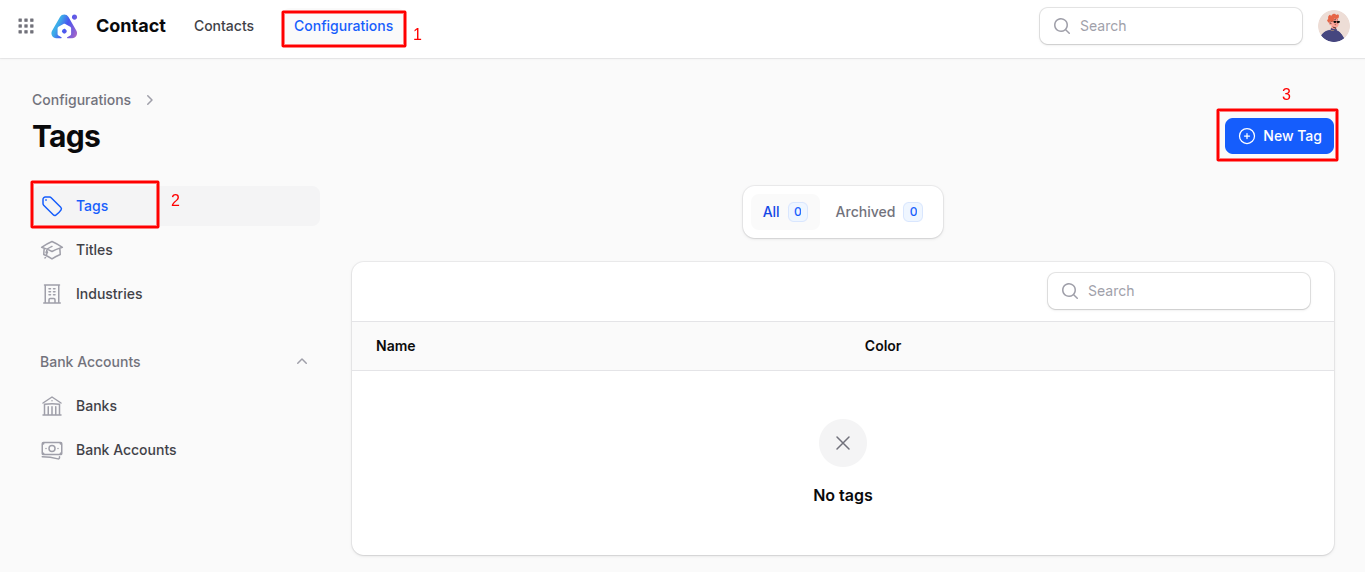
Open Contacts → Configurations.
Tags
A tag is a coloured label such as VIP, Supplier or Lead. It helps you group and find contacts.
- Open
Contacts → Configurations → Tagsand click New Tag.
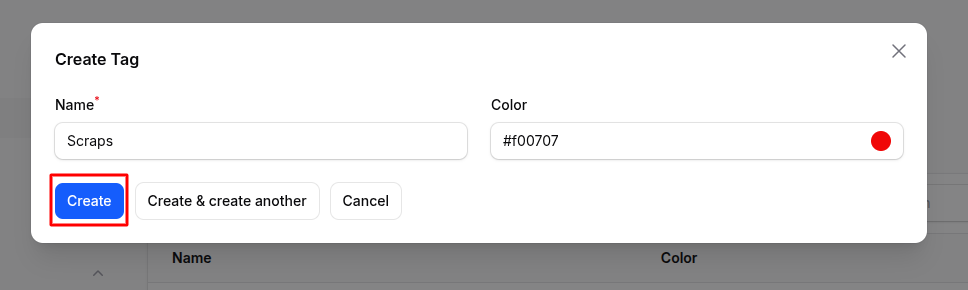
- Fill in the window.
- Name: Required. For example
Supplier. - Color: A colour that makes the tag easy to spot.
- Click Create.
Titles
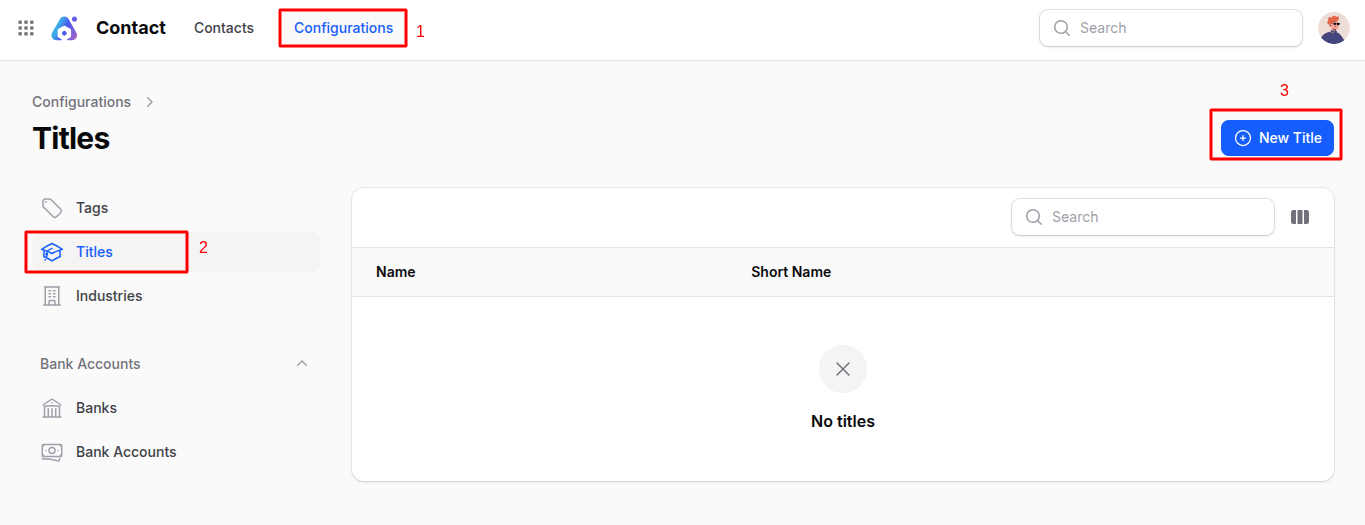
A title is a prefix before a name, such as Dr. or Mr..
- Open
Contacts → Configurations → Titlesand click New Title.
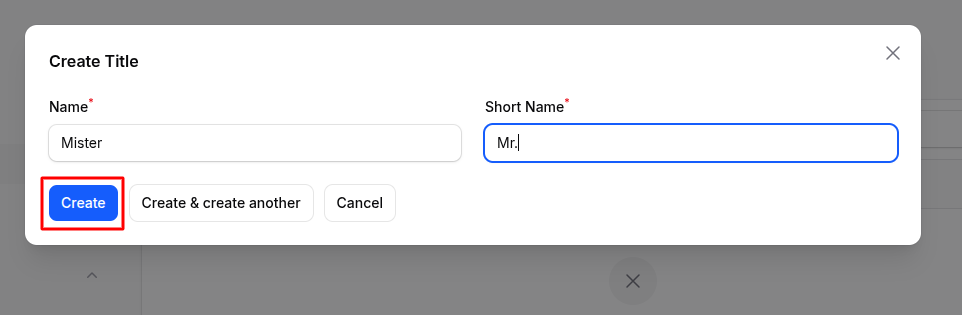
- Fill in the window.
- Name: The full word, for example
Doctor. - Short Name: The abbreviation, for example
Dr..
- Click Create.
Industries
An industry is the business sector of a company, such as retail or healthcare.
- Open
Contacts → Configurations → Industryand click New Industry.
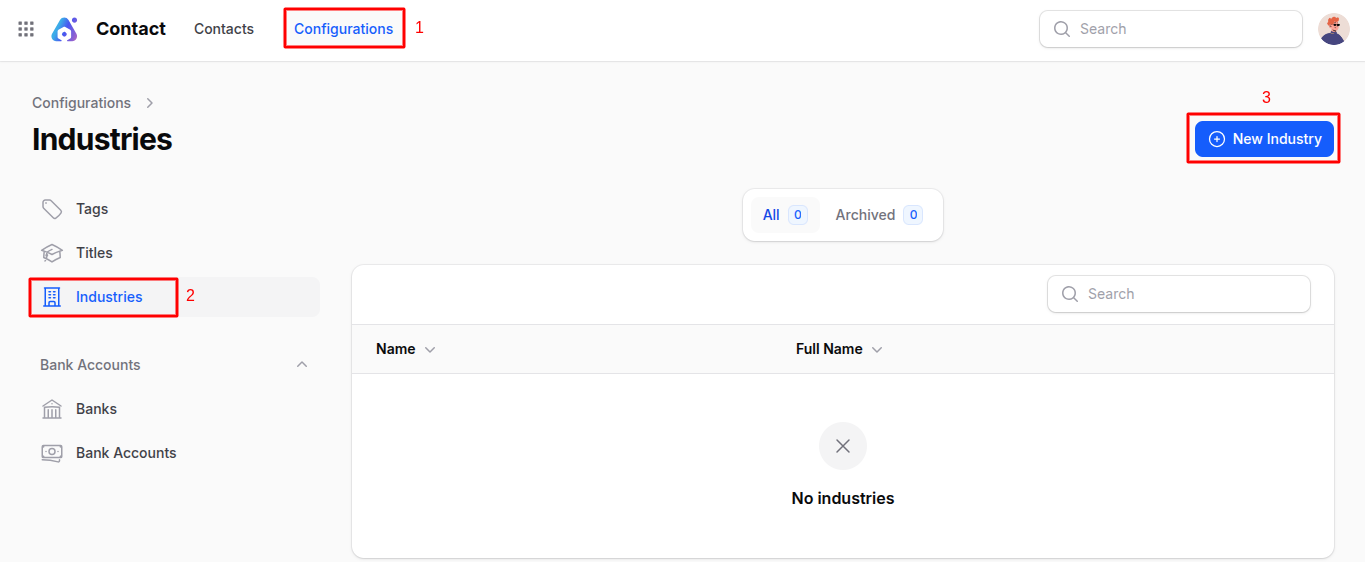
- Fill in the window.
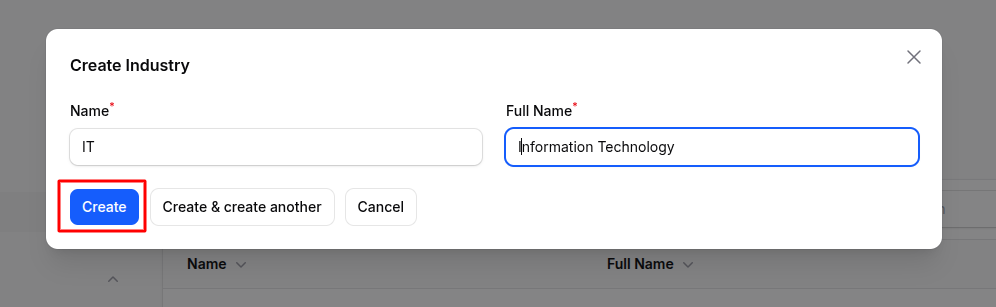
- Name: The short name, for example
IT. - Full Name: The complete name, for example
Information Technology.
- Click Create.
Banks
A bank is a financial institution. Create it once, then link bank accounts to it.
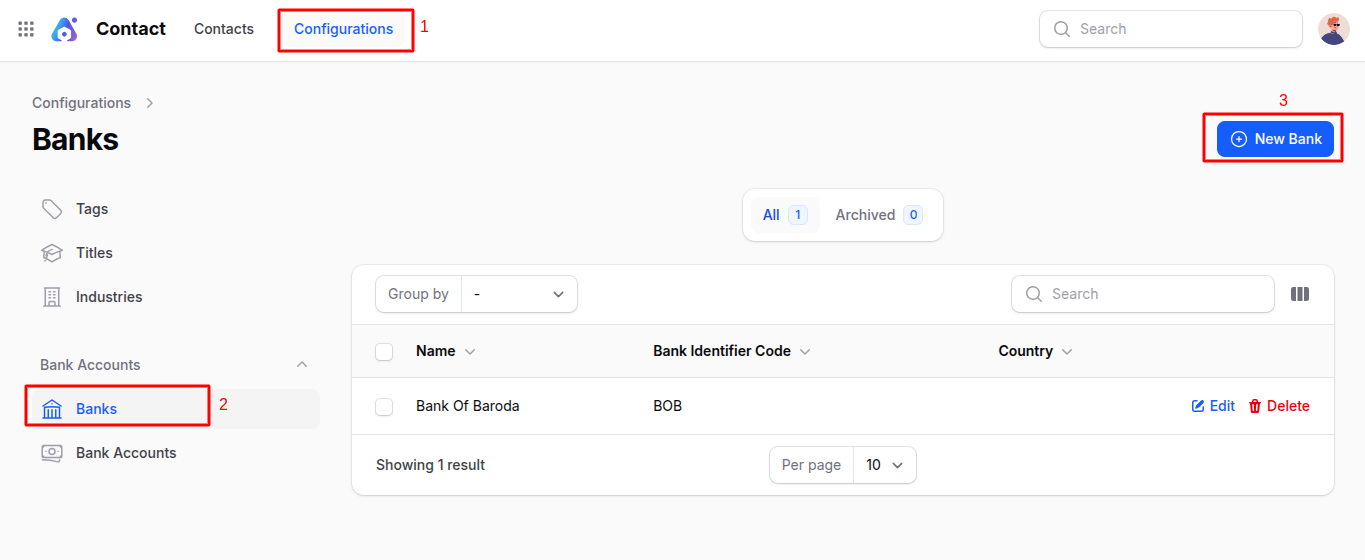
- Open
Contacts → Configurations → Banksand click New Bank.
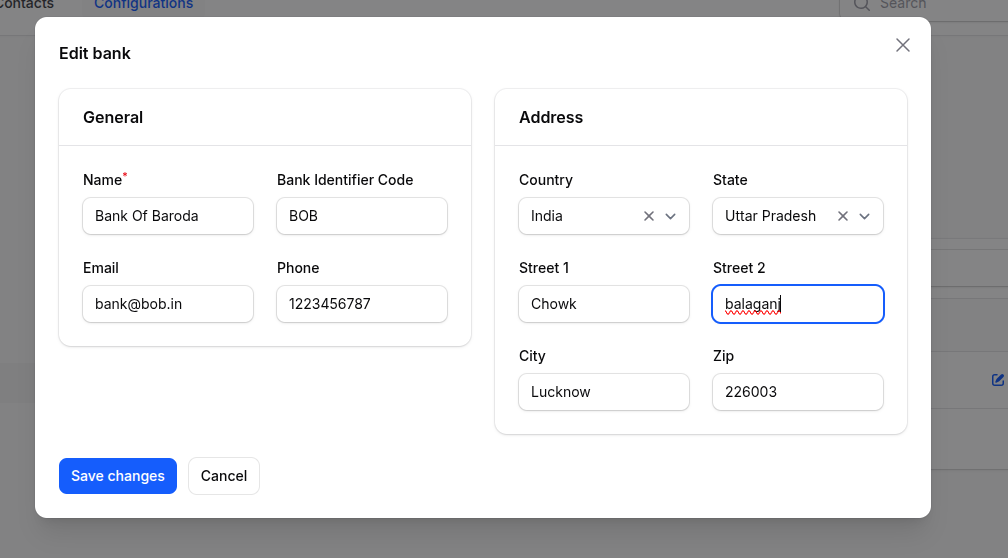
- Fill in the General section.
- Name: The bank name, for example
State Bank. - Bank Identifier Code: The code that identifies the bank, such as the SWIFT or BIC code.
- Email and Phone: How to reach the bank.
- Fill in the Address section: Country, State, Street, City and Zip.
- Click Create.
Bank accounts
A bank account is one account number at a bank. It belongs to a contact, called the account holder.
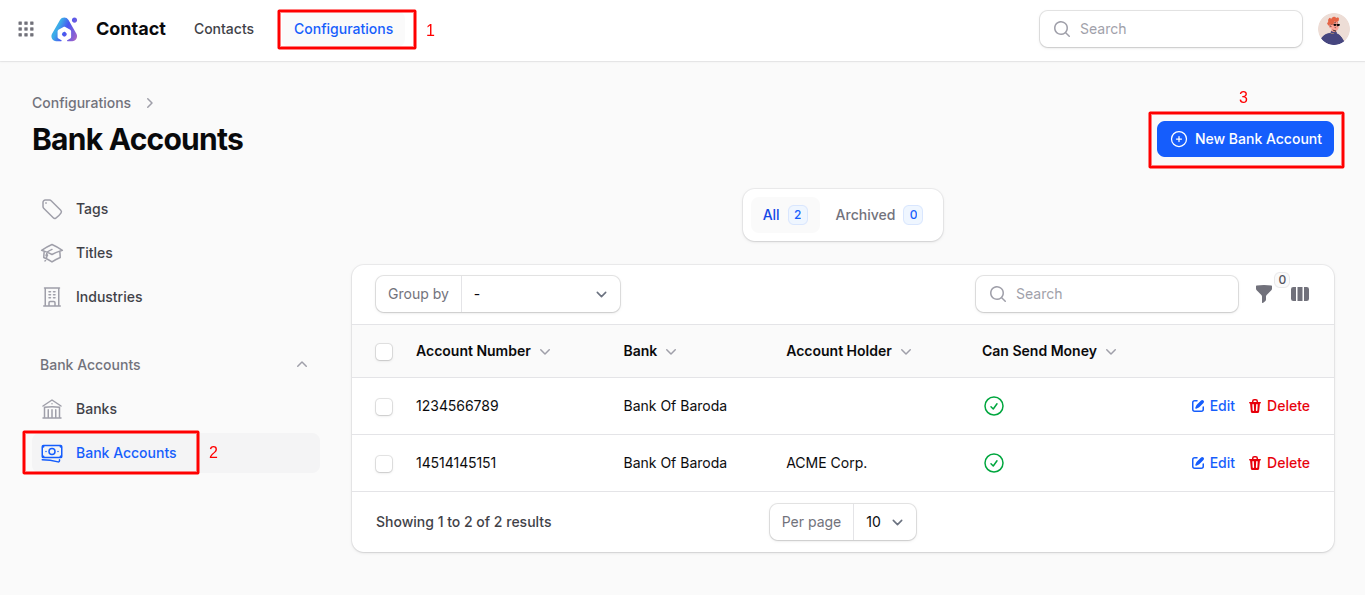
- Open
Contacts → Configurations → Bank Accountsand click New Bank Account.
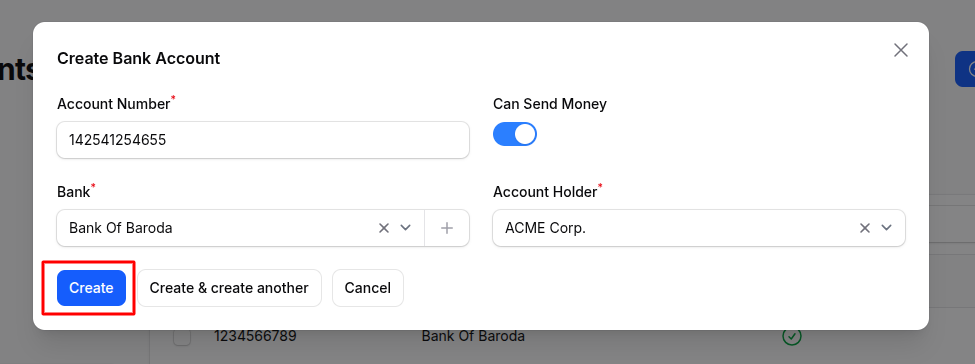
- Fill in the window.
- Account Number: The full number, for example
1234567890. - Can Send Money: Turn it on if you can pay out from this account.
- Bank: The bank this account belongs to.
- Account Holder: The contact who owns the account.
- Click Create.
Actions and statuses
Each list has Edit and Delete on its rows. Click Edit to change a value. Click Delete to remove it.