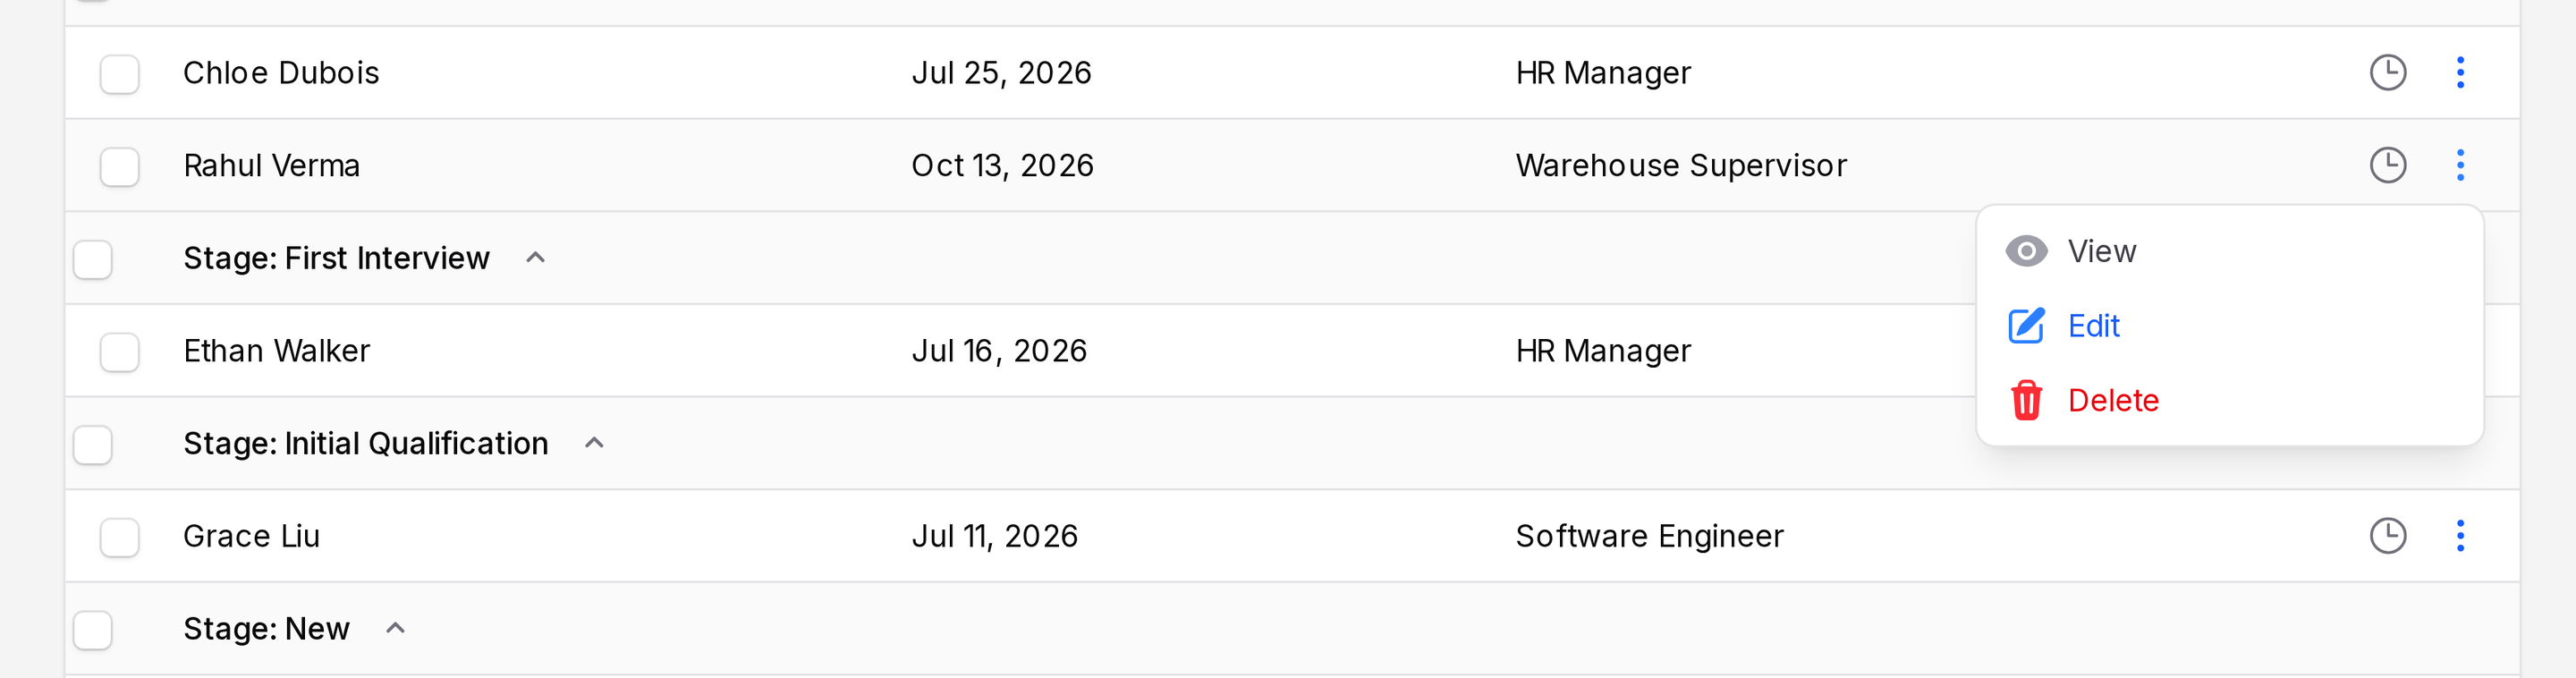
Applicant list
The applicant list shows every application in one table. You use it to find people, see who is in which stage, and open an applicant. Tabs, grouping, filters and columns let you answer questions such as "Who is in the second interview?".
In simple words: One table of all applications, grouped by stage. Use tabs and filters to narrow it down.
Open Recruitments → Applications → Applicants.
Overview
The page title is Applicants. New Applicant at the top right creates an application. See Add an applicant. Under the title you see the tabs. Below them are the Group by selector, the direction selector, the search box, the filter icon and the column icon.
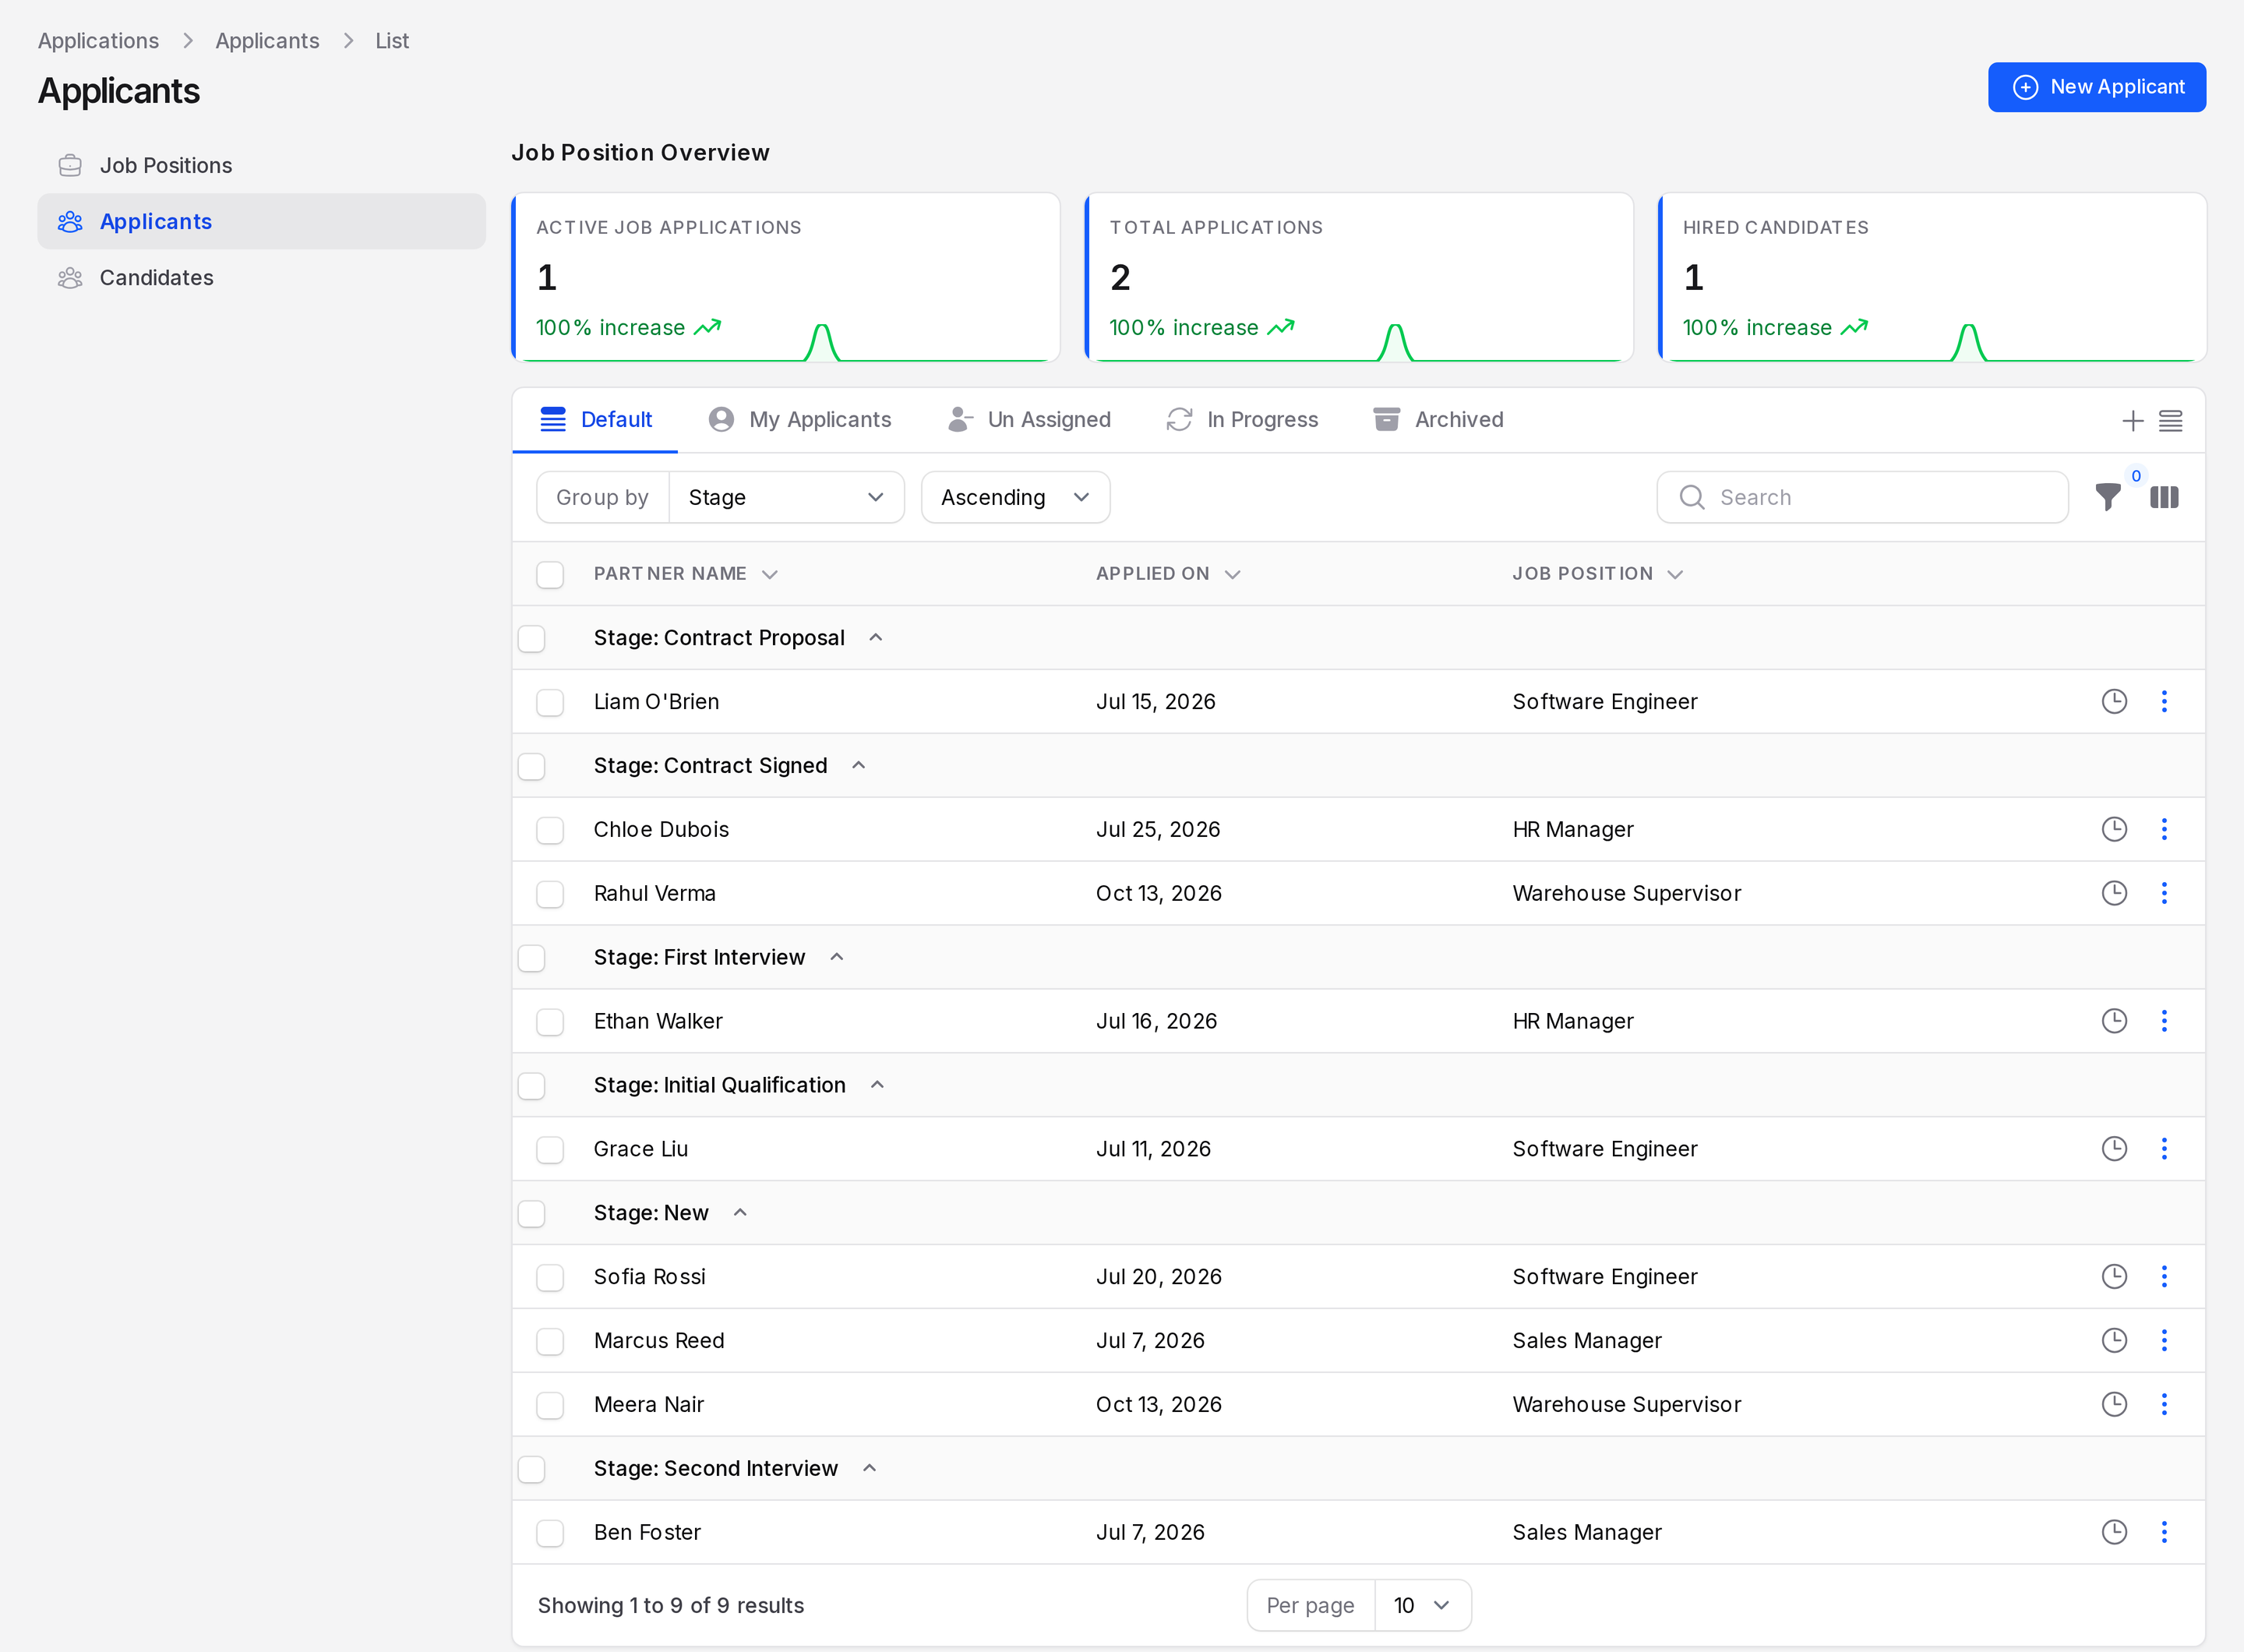
Click a row to open the applicant. Each group header reads Stage: New, Stage: First Interview and so on. Click a header to collapse it.
Tabs
The tabs are saved views. The row of tabs shows five of them:
- Default: all applicants, grouped by Stage.
- My Applicants: applicants where you are the recruiter.
- Un Assigned: applicants without a recruiter.
- In Progress: applicants still in the process.
- Archived: inactive applicants, such as refused ones.
Only Default groups the list by Stage. The other tabs start with Group by set to -, so the rows show in one flat list.
Click the three dots next to the tabs. The Views menu lists Favorite Views (the tabs) and Preset Views. Click the three dots on a view to see Apply View and Add to Favorites.
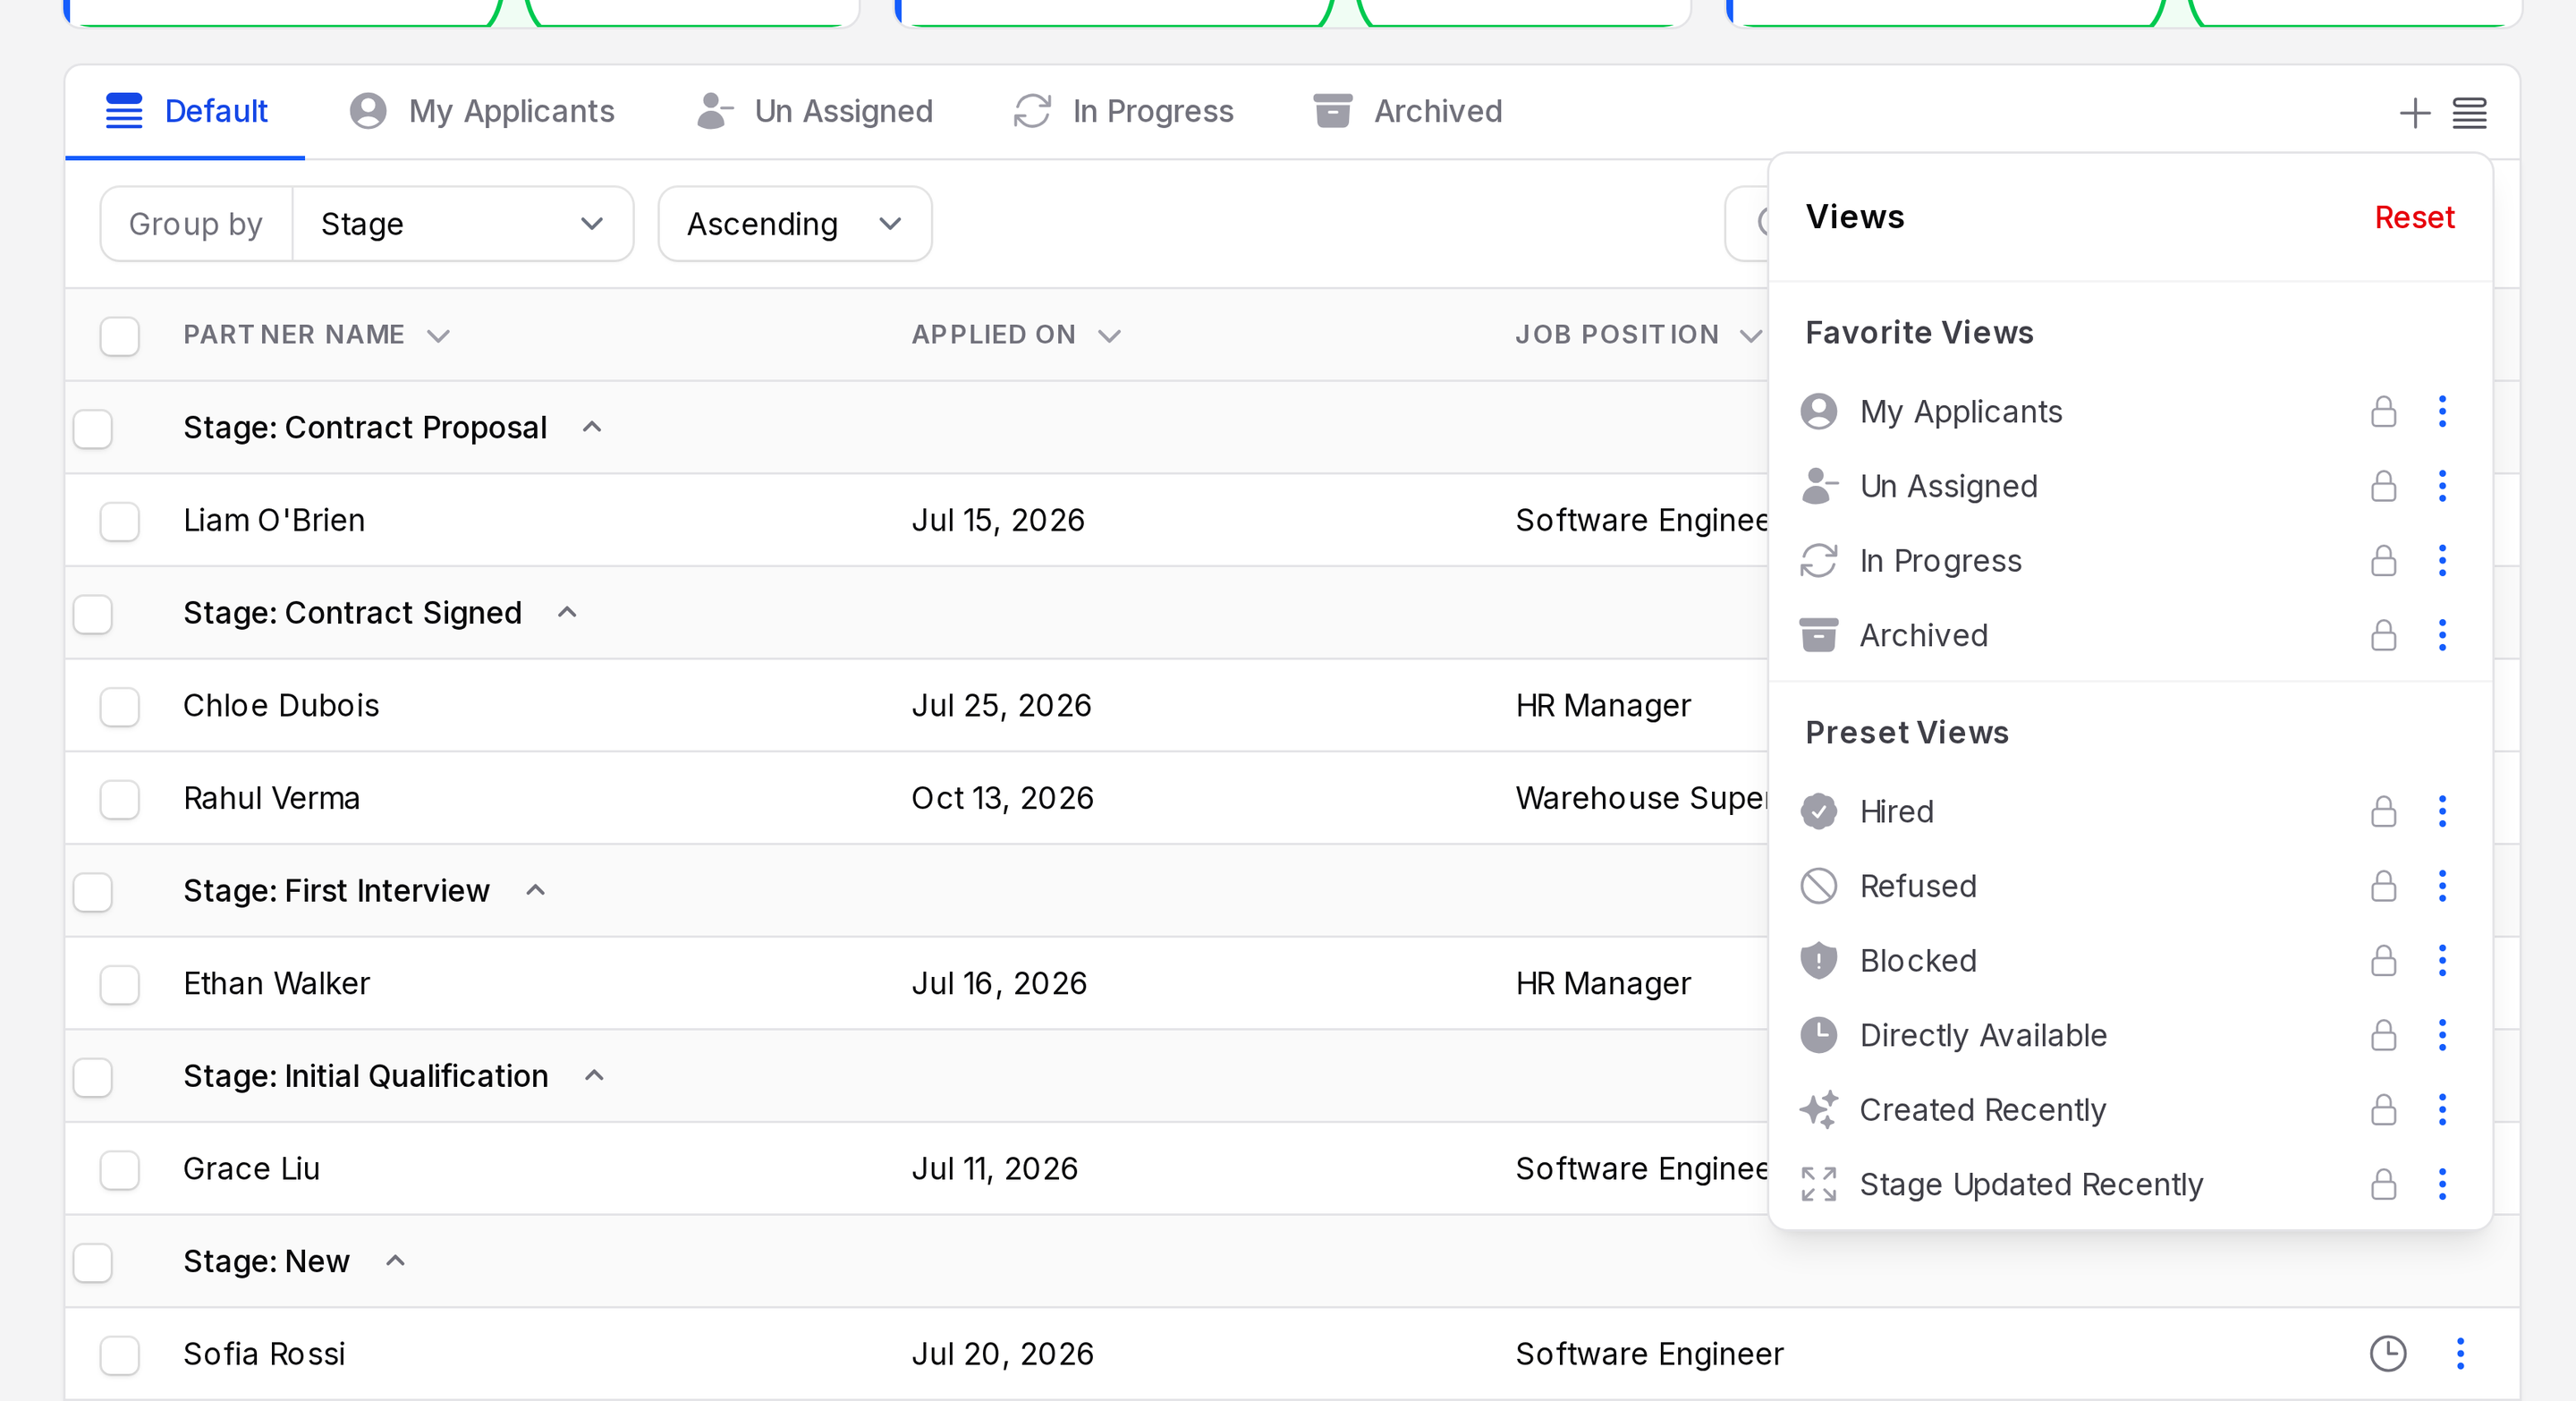
- Hired: applicants who reached a hired stage.
- Refused: applicants with the refused status.
- Blocked: applicants whose state is blocked.
- Directly Available, Created Recently and Stage Updated Recently: extra views you can apply. The last two list recent applicants.
INFO
A view shows rows only when applicants match it. For example, My Applicants lists applicants whose recruiter is you.
The Views menu also has Add New and Reset at the top.
Group the list
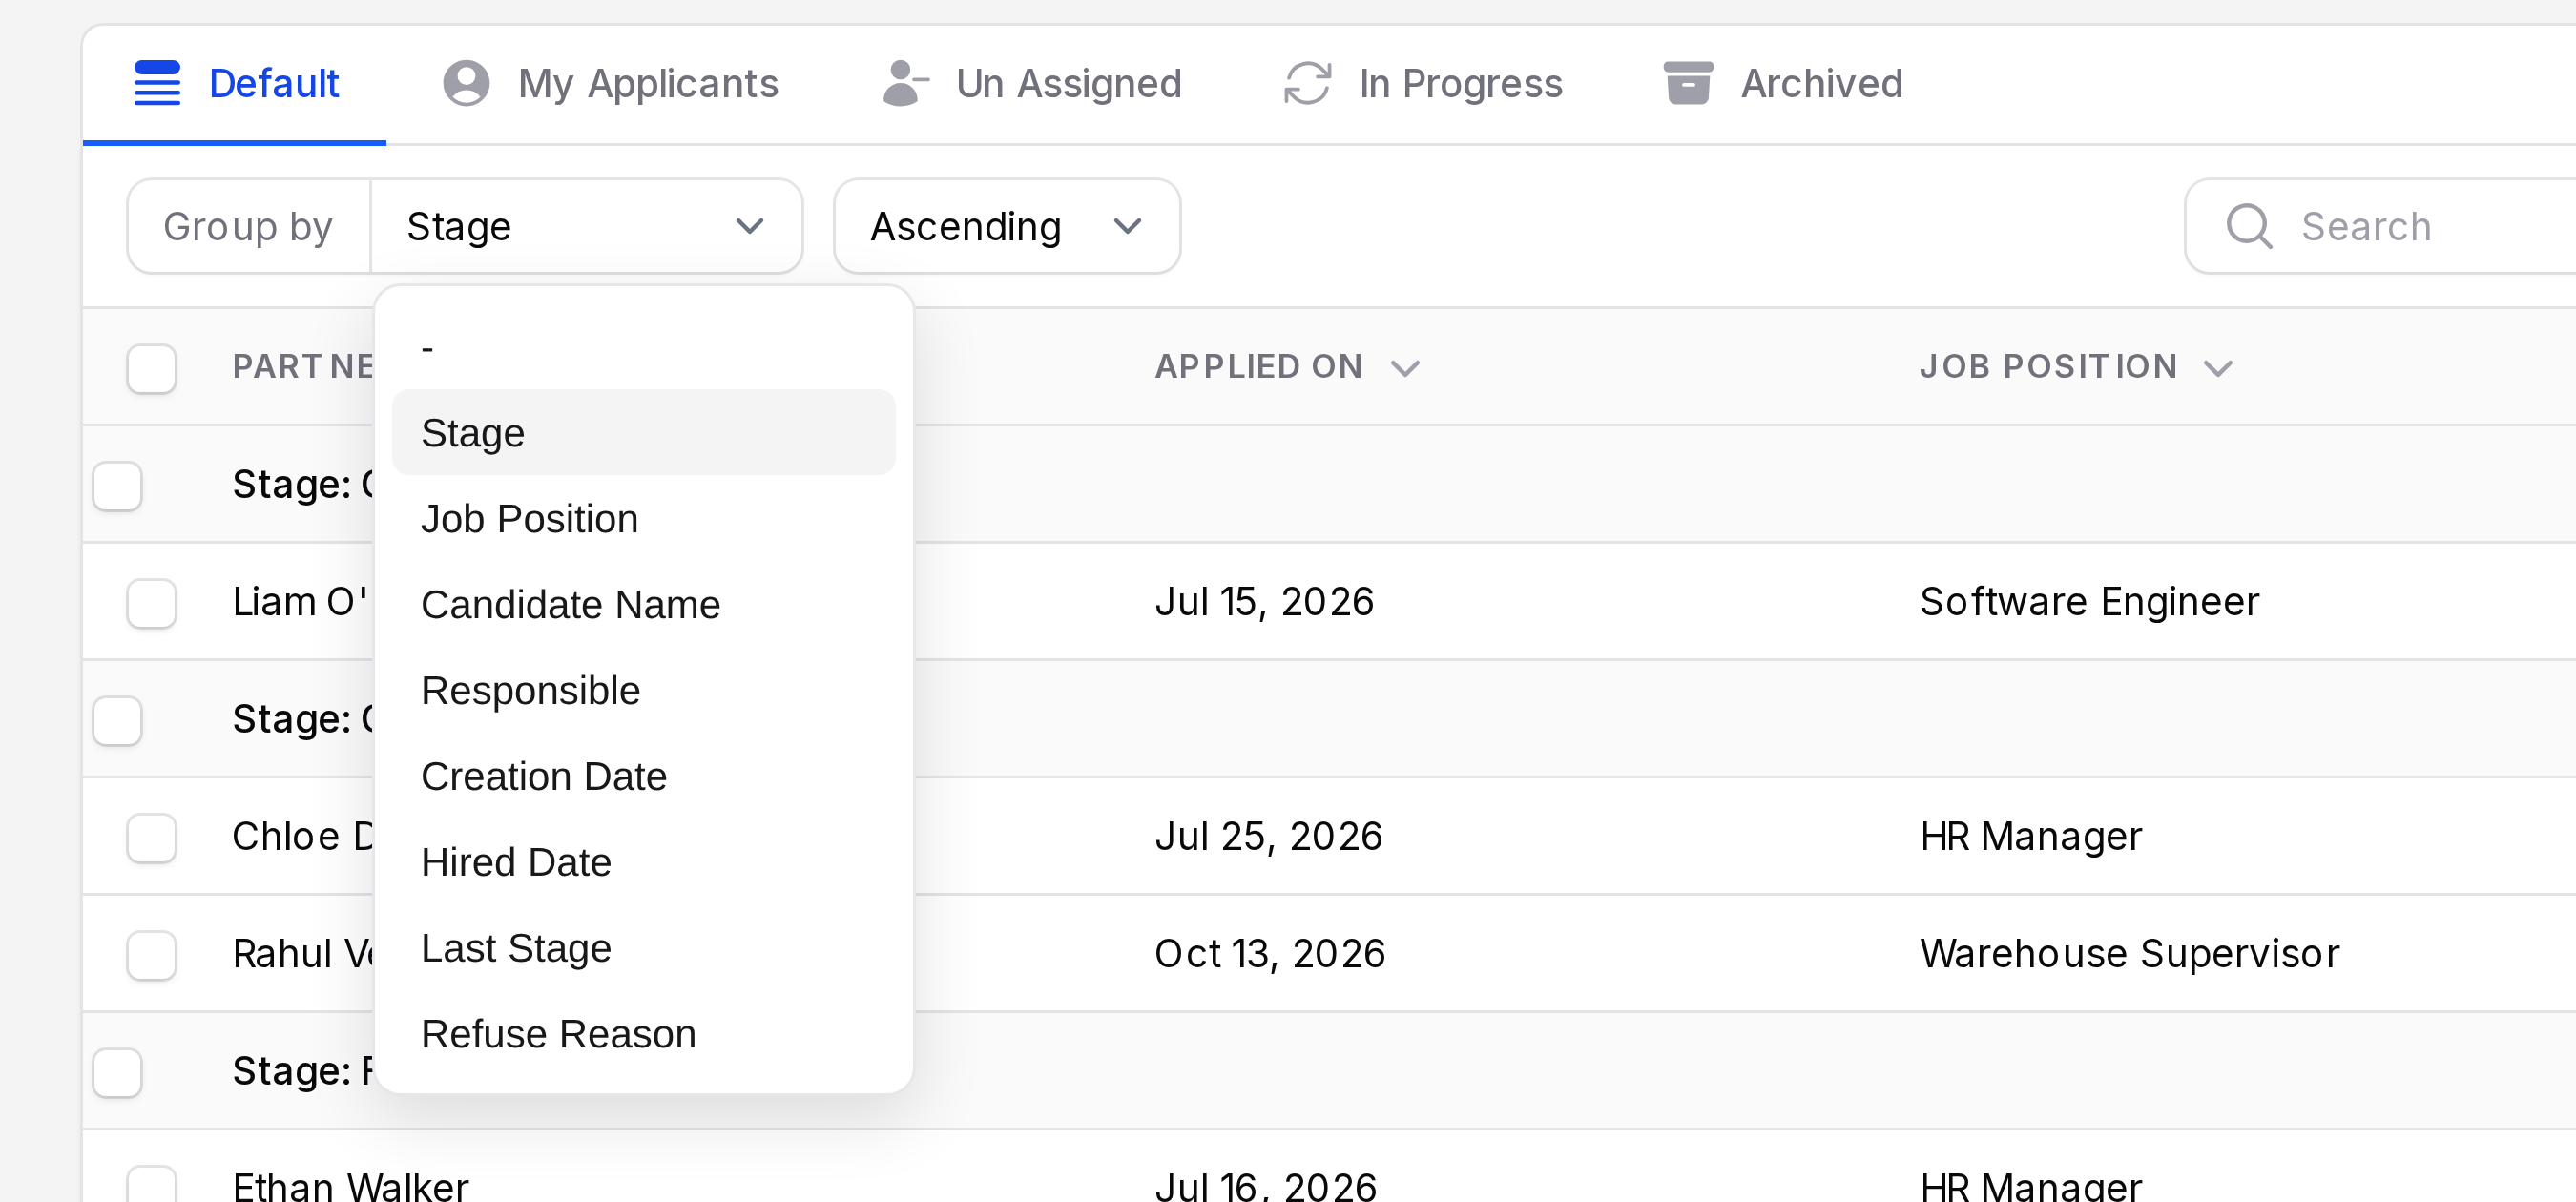
Group by starts on Stage. Choose another value:
- Job Position
- Candidate Name
- Responsible
- Creation Date
- Hired Date
- Last Stage
- Refuse Reason
Choose the dash option (-) for no grouping. Set the direction to Ascending or Descending.
Columns
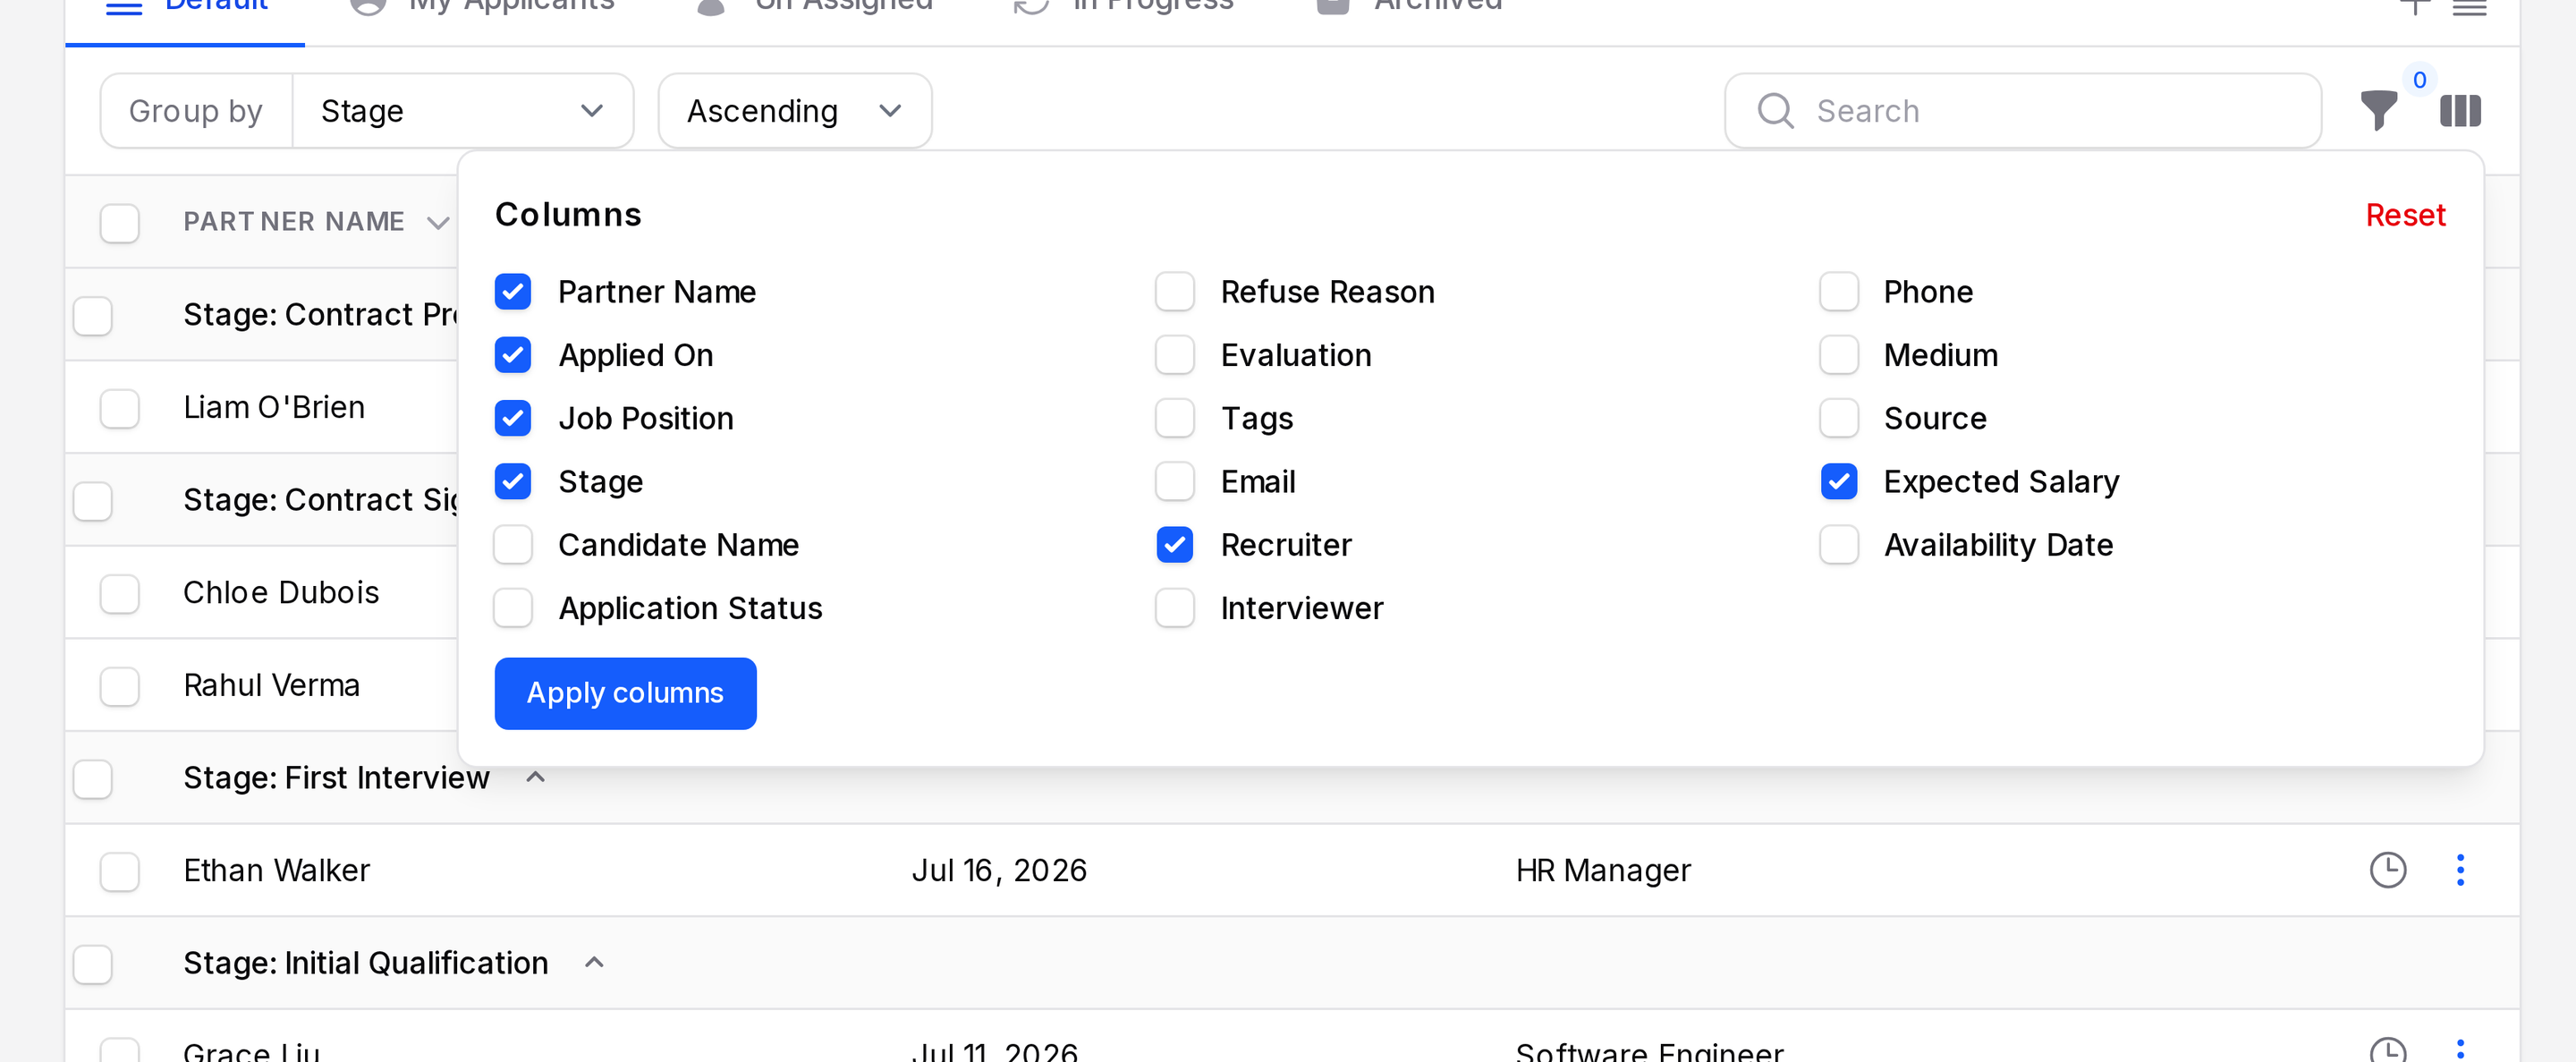
Three columns show at first: Partner Name, Applied On and Job Position. Partner Name is the candidate's full name. Click the column icon. A Columns panel opens with a checkbox for each column. Tick the ones you want, then click Apply columns. Reset restores the default columns. You can add:
Stage, Candidate Name, Application Status, Refuse Reason, Evaluation, Tags, Email, Recruiter, Interviewer, Phone, Medium, Source, Expected Salary and Availability Date.
Search and filters
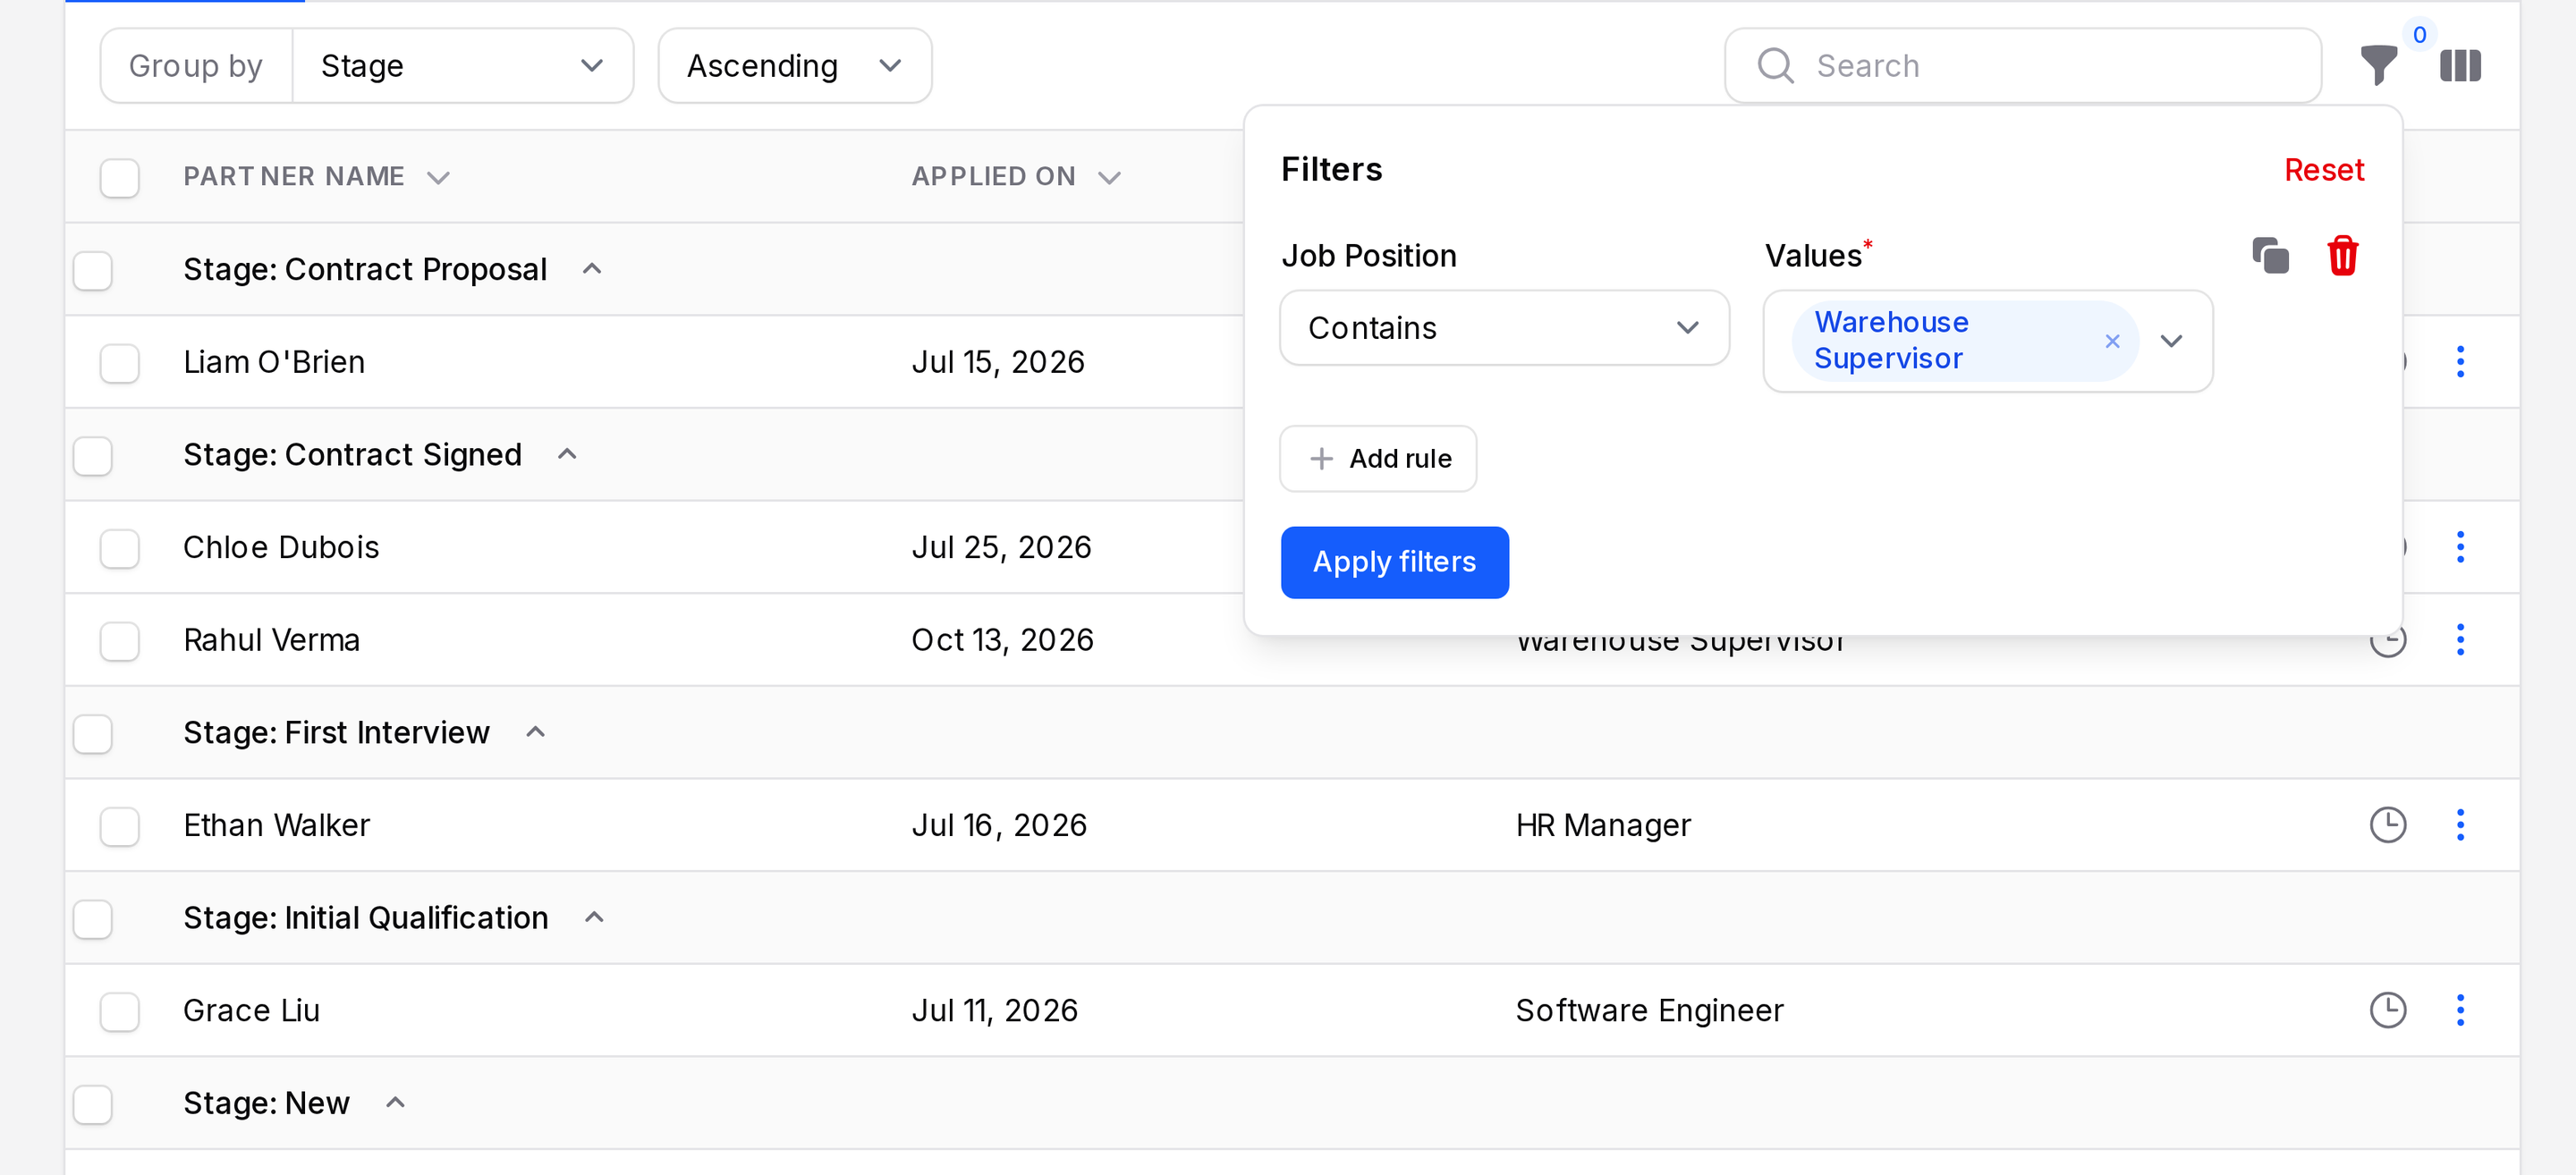
Type in the search box to find an applicant. Click the funnel icon to open Filters. Click Add rule, choose a field, then set the value. Click Apply filters to filter the list. You can filter by:
Source, Medium, Candidate, Last Stage Updated, Stage, Job Position, Priority, Salary Proposed Extra, Salary Expected Extra, Applicant Notes, Applied On and Hired Date. OR condition combines rules.
For example, add a Job Position rule with Contains and pick Warehouse Supervisor to see only that job.
See Search, filter and group for how filters work.
Row actions
The kebab menu on a row has View, Edit and Delete. The clock icon opens the activity action. See Schedule an activity. Use the checkboxes to select several rows.