

Add an employee
Adding an employee creates the record that every other HR task depends on. You enter the person's name and job, then optionally fill work, private and settings details. You can save with only a name and complete the rest later.
In simple words: Fill in who the person is and where they fit in the company, then save.
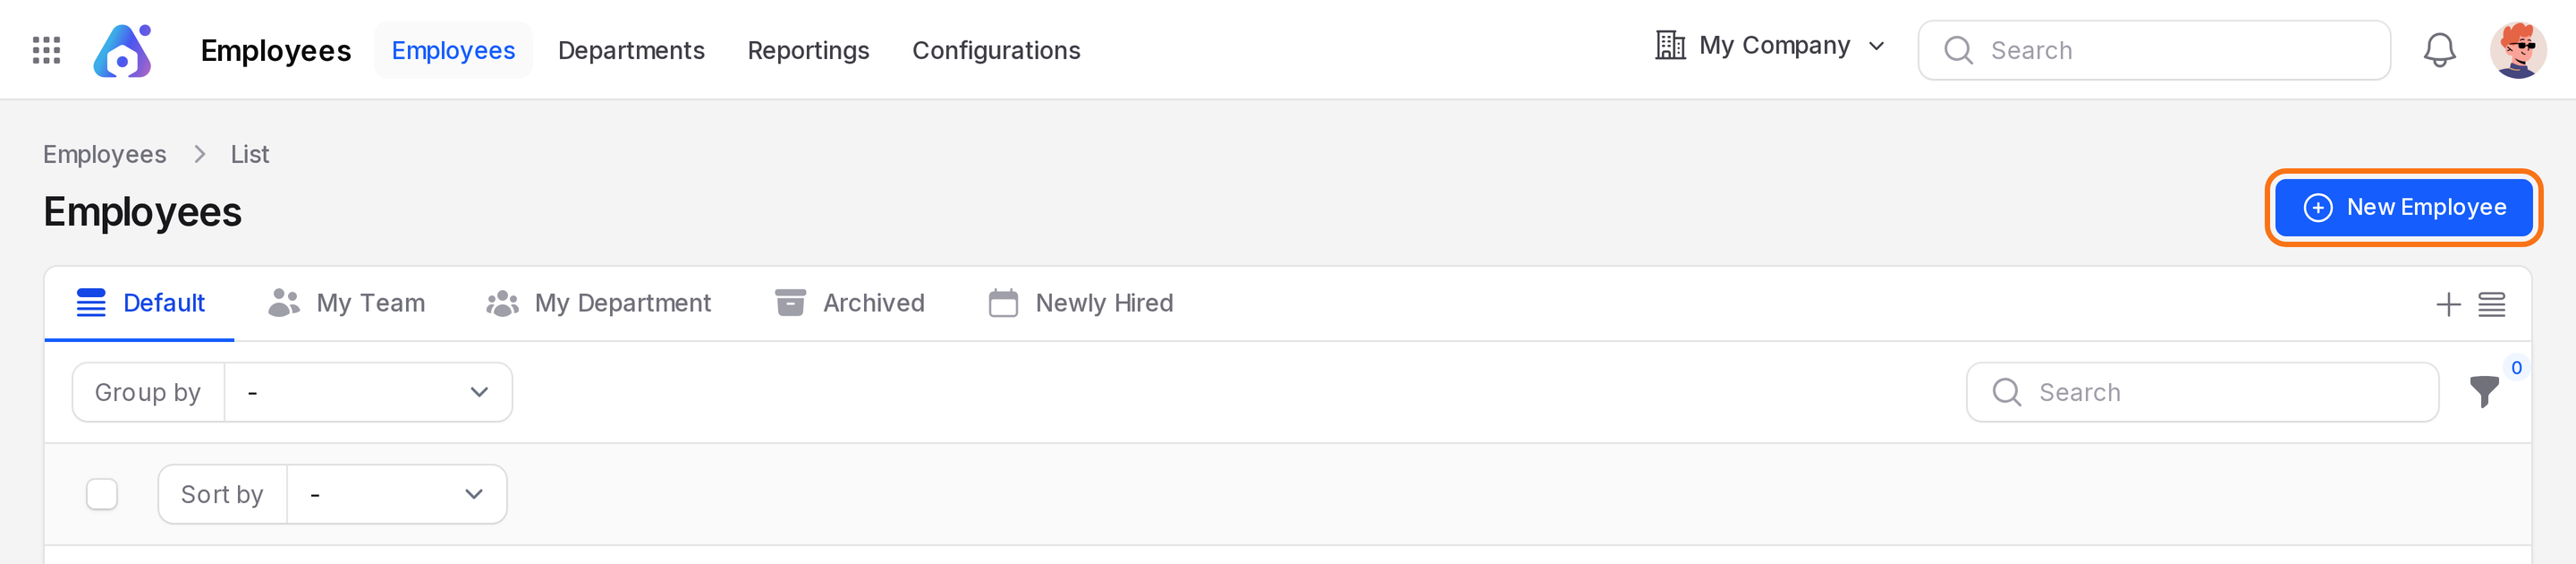
Open Employees → Employees → New Employee.
Prerequisite
The lists on this form come from other pages. Create a department, a job position, tags and a work location first if you need new ones. Skills are added after saving. See Skills and resume.
Only Name is required. Every other field is optional. Fields do not fill each other. For example, choosing a Department does not fill Manager, Coach or Job Position.
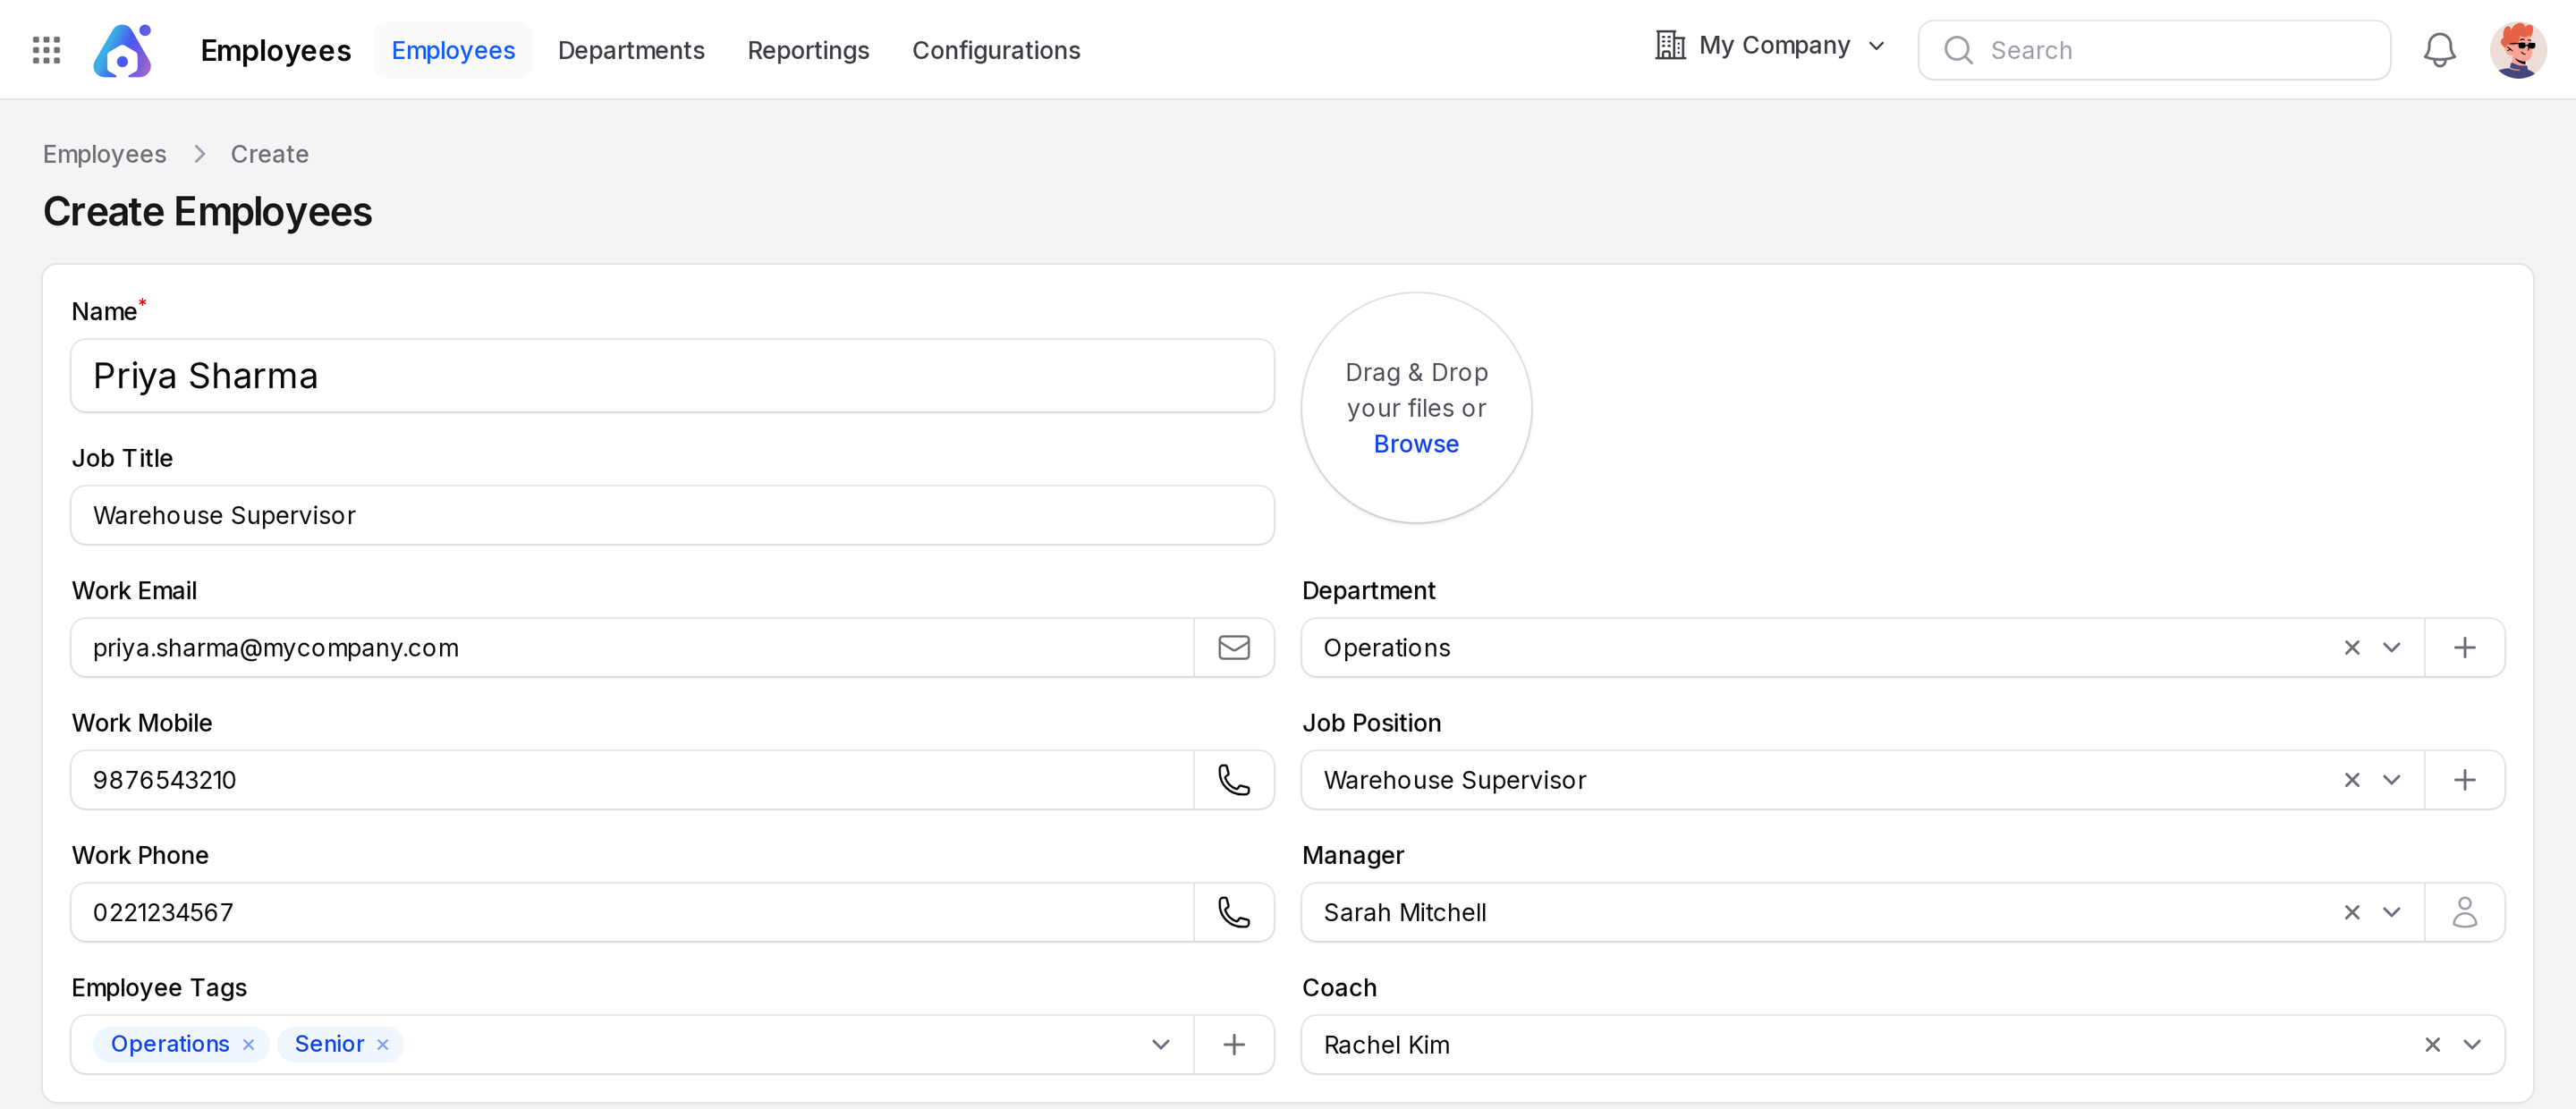
The top block
The top block stays visible above all tabs.
- Name: Required. Type the full name.
- Job Title: The title shown on cards and the profile.
- Avatar: Click Browse or drag an image into the round frame.
- Work Email: The business email. The envelope button opens your mail app.
- Department: Pick one. Click the plus button to create a department without leaving the form.
- Work Mobile: The business mobile number.
- Job Position: Pick one. The plus button creates a new position.
- Work Phone: The desk or office number.
- Manager: The person this employee reports to.
- Employee Tags: Pick several tags. The plus button creates a tag.
- Coach: A person who guides the employee, often during the first months.
Who is who
| Field | Who it is |
|---|---|
| Manager | The employee this person reports to. |
| Coach | An employee who guides this person. |
| Time Off (approver) | The user who approves leave in the Time Off app. |
| Attendance Manager | The user who manages attendance records. |
| Related User | The login of this person. |
Tab: Work Information
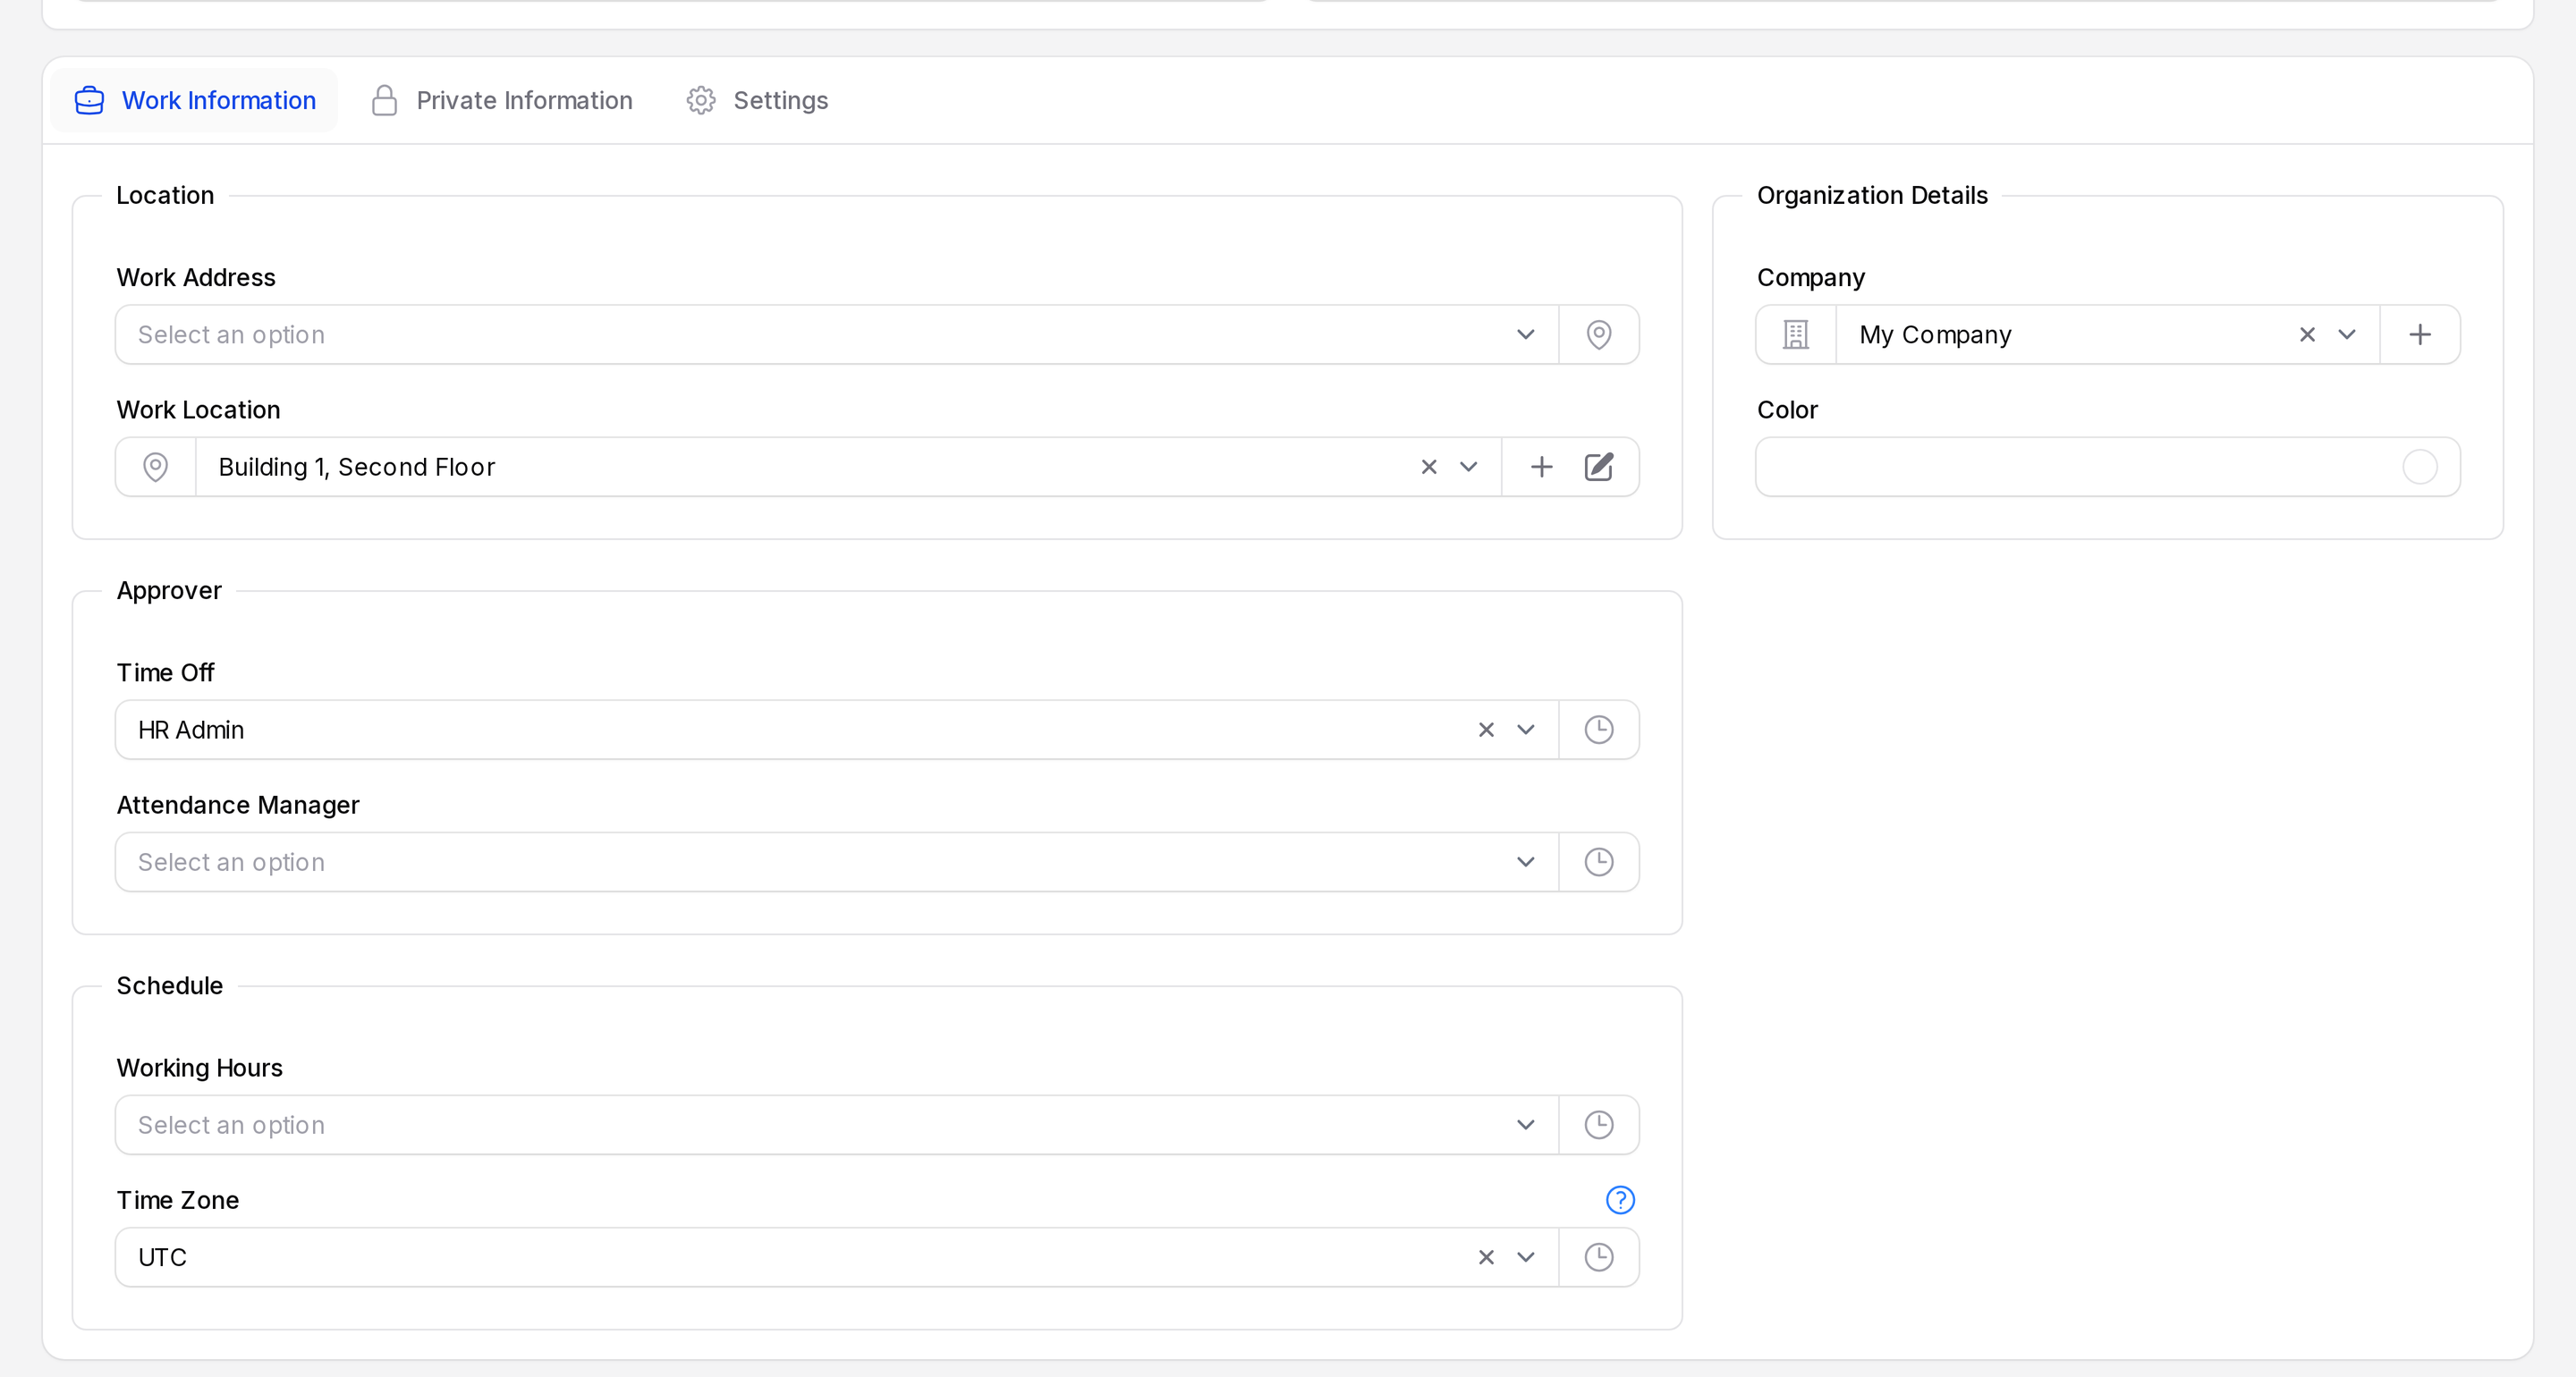
Location
- Work Address: A contact that holds the office address.
- Work Location: Where the person sits, such as Building 1, Second Floor, Home or Other.
Approver
- Time Off: The user who approves this employee's leave requests. The list shows users, such as HR Admin, not employees.
- Attendance Manager: The user who manages this employee's attendance.
Schedule
- Working Hours: The working schedule. It is empty on a new employee and stays empty until you pick one.
- Time Zone: Starts as UTC. Change it to the place where the person works.
Organization Details
- Company: Defaults to My Company. If you change it, Job Position, Work Location and Department clear. Pick them again.
- Color: A colour for this employee.
Tab: Private Information
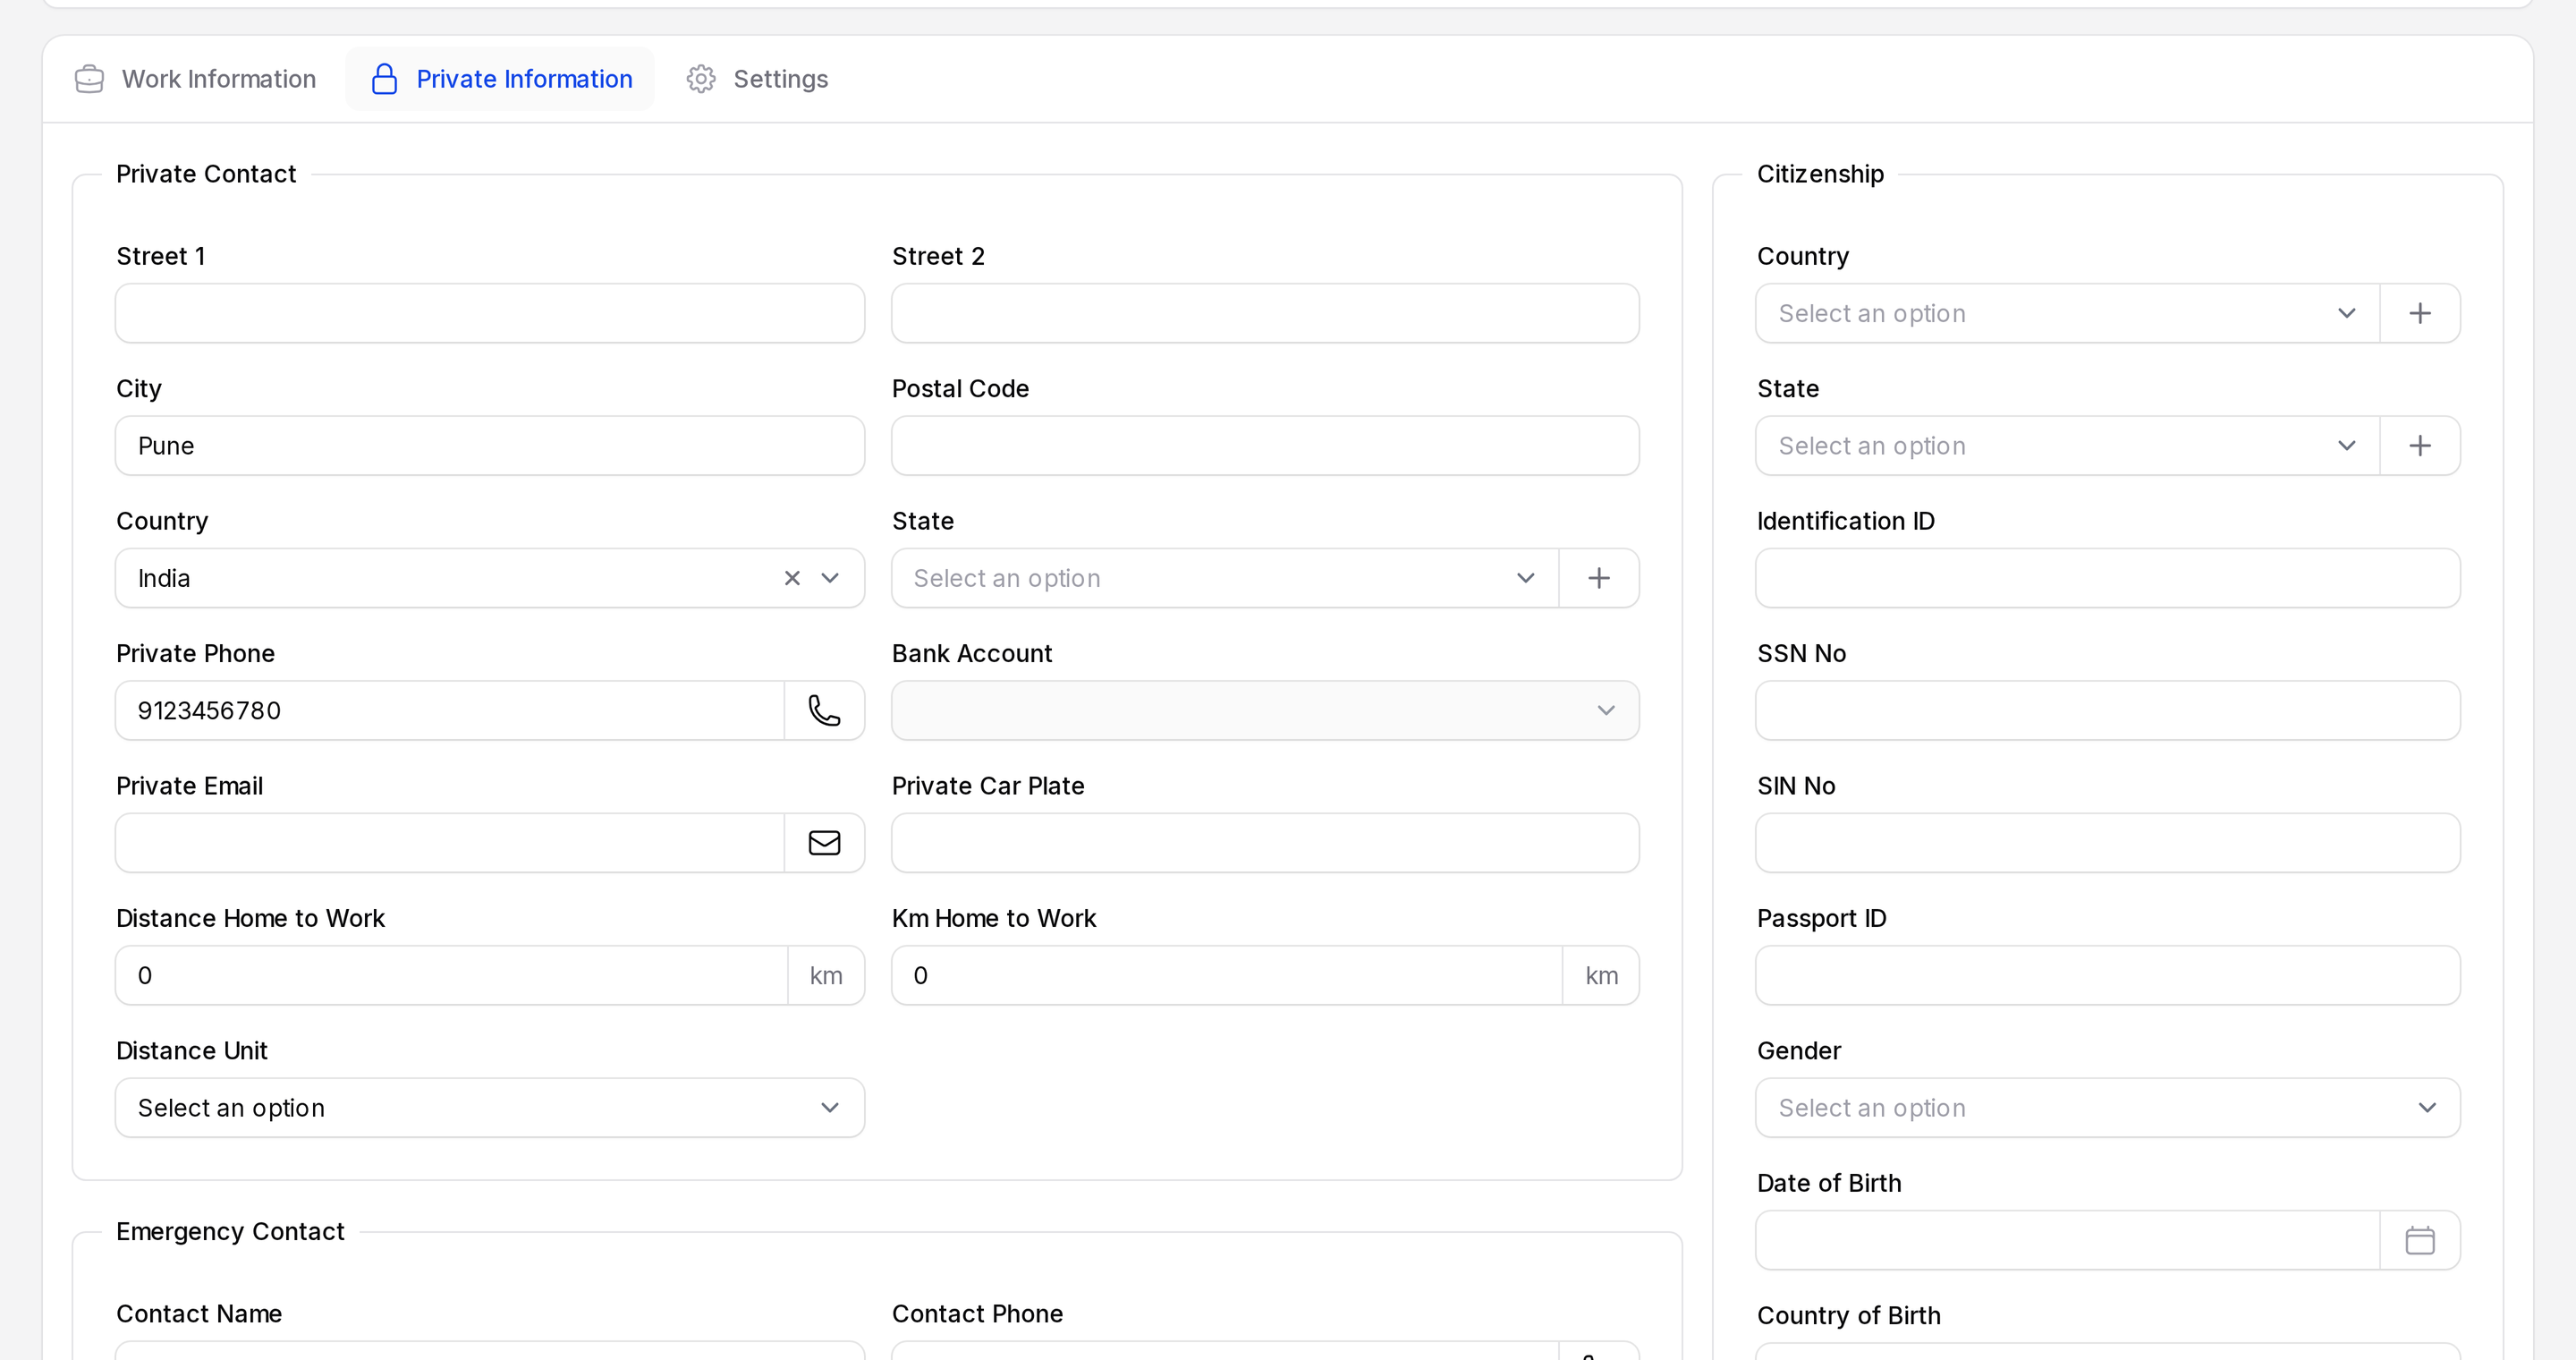
Private Contact
Fill the home address with Street 1, Street 2, City, Postal Code, Country and State. The state list depends on the country. Then add Private Phone, Private Email and Private Car Plate.
Distance Home to Work and Km Home to Work are numbers. Distance Unit switches between Kilometer and Meter.
Bank Account: This field is greyed out on a new employee. It works only after the employee has a related user. See the Settings tab below.
Emergency Contact
- Contact Name: Who to call.
- Contact Phone: Their number.
Family Status
Marital Status: Defaults to Single. Choose Married, Divorced or Widowed and three more fields appear: Spouse Name (required), Spouse Birthday and Number of Children. With Single they stay hidden.
Education
- Certificate Level: Graduated, Bachelor, Master, Doctor or Other.
- Field of Study and School.
Citizenship
Pick Country and State. State is required only when the country needs one. Then fill Identification ID, SSN No, SIN No, Passport ID, Gender, Date of Birth and Country of Birth.
Work Permit
Fill Visa Number, Work Permit No, Visa Expiration and Work Permit Expiration Date. Upload the document in Work Permit.
Tab: Settings
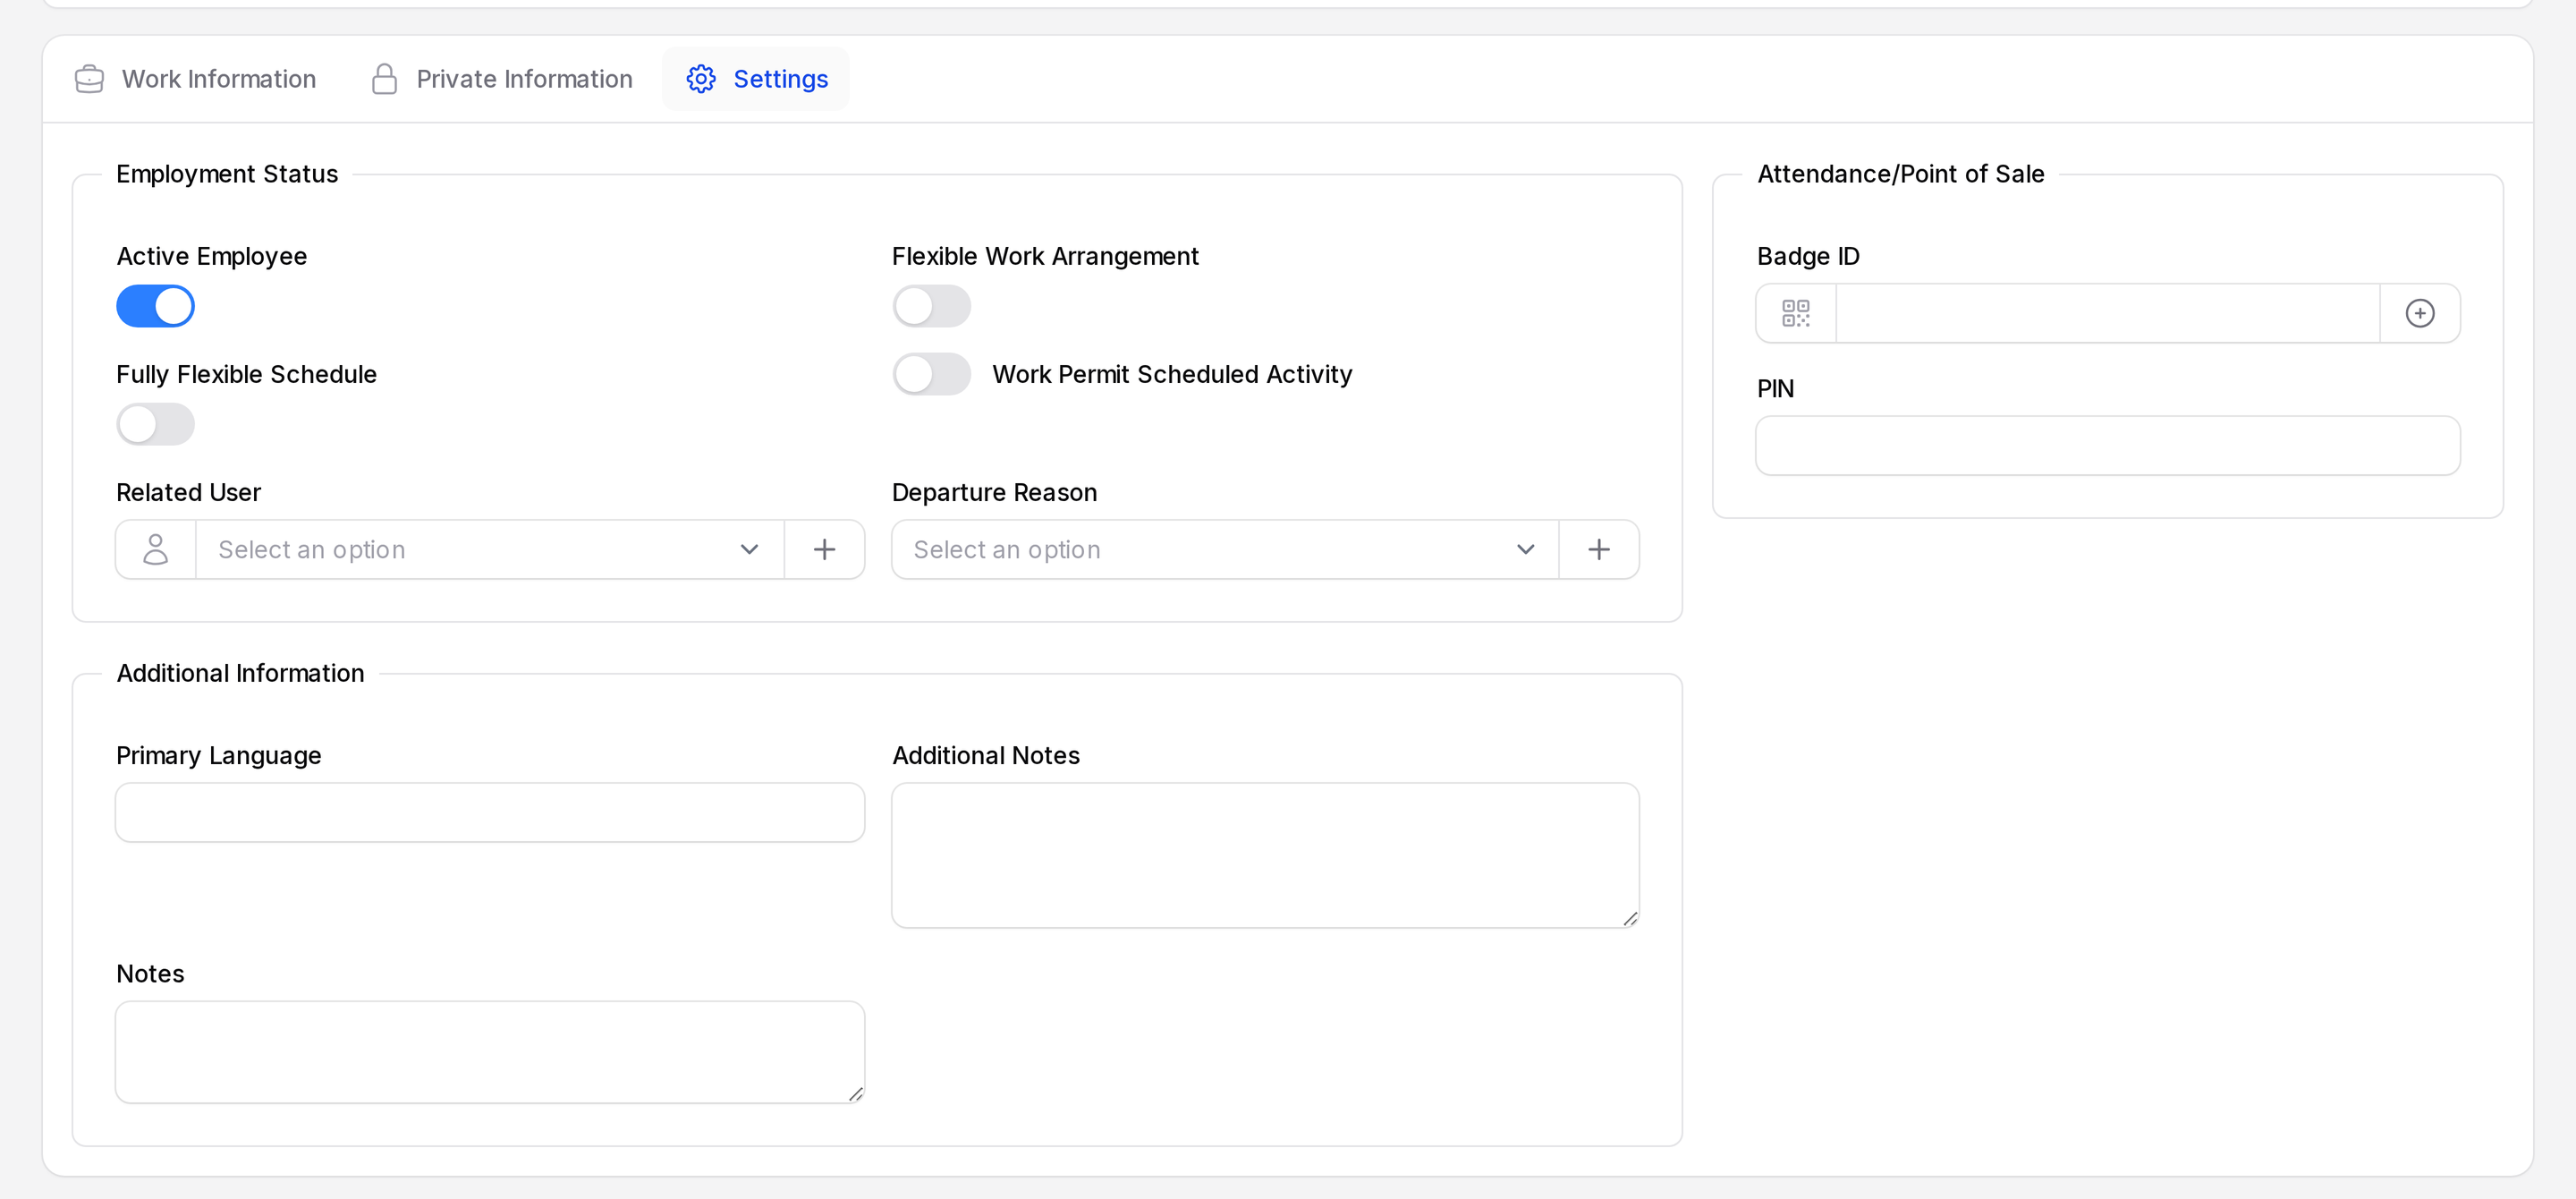
Employment Status
- Active Employee: On by default. Turn it off when the person has left. See Leaving the company.
- Flexible Work Arrangement and Fully Flexible Schedule: Off by default. Turn them on for staff with flexible hours. Leave them off if you do not use flexible hours.
- Work Permit Scheduled Activity: Off by default.
- Related User: The login of this employee. Users that already belong to another employee are greyed out. Click the plus button to create a user. The Create User window opens with Name and Email filled from the employee.
- Departure Reason: Leave empty for current staff.
Additional Information
Primary Language, Additional Notes and Notes.
Attendance/Point of Sale
- Badge ID: Type a code, or click the plus button at the end to generate an 8 character code. It is saved only when you save the employee.
- PIN: A PIN code for this employee.
Example: add Priya Sharma
Priya is the new Warehouse Supervisor in the Operations department.
- Open
Employees → Employeesand click New Employee.
- In the top block, type Priya Sharma as Name and Warehouse Supervisor as Job Title.
- Set Department to Operations and Job Position to Warehouse Supervisor.
- Set Manager to Sarah Mitchell and Coach to Rachel Kim.
- Pick the tags Operations and Senior.
- Type priya.sharma@mycompany.com as Work Email, 9876543210 as Work Mobile and 0221234567 as Work Phone.
- Open the Work Information tab. Set Work Location to Building 1, Second Floor and Time Off to the user HR Admin. Leave Working Hours empty and keep Time Zone as UTC.
- Open the Private Information tab. Enter Pune as City, India as Country and 9123456780 as Private Phone. Keep Marital Status as Single.
- Under Emergency Contact, enter Anil Sharma and 9988776655.
- Under Education, choose Bachelor and type Logistics as Field of Study.
- Open the Settings tab. Leave Active Employee on.
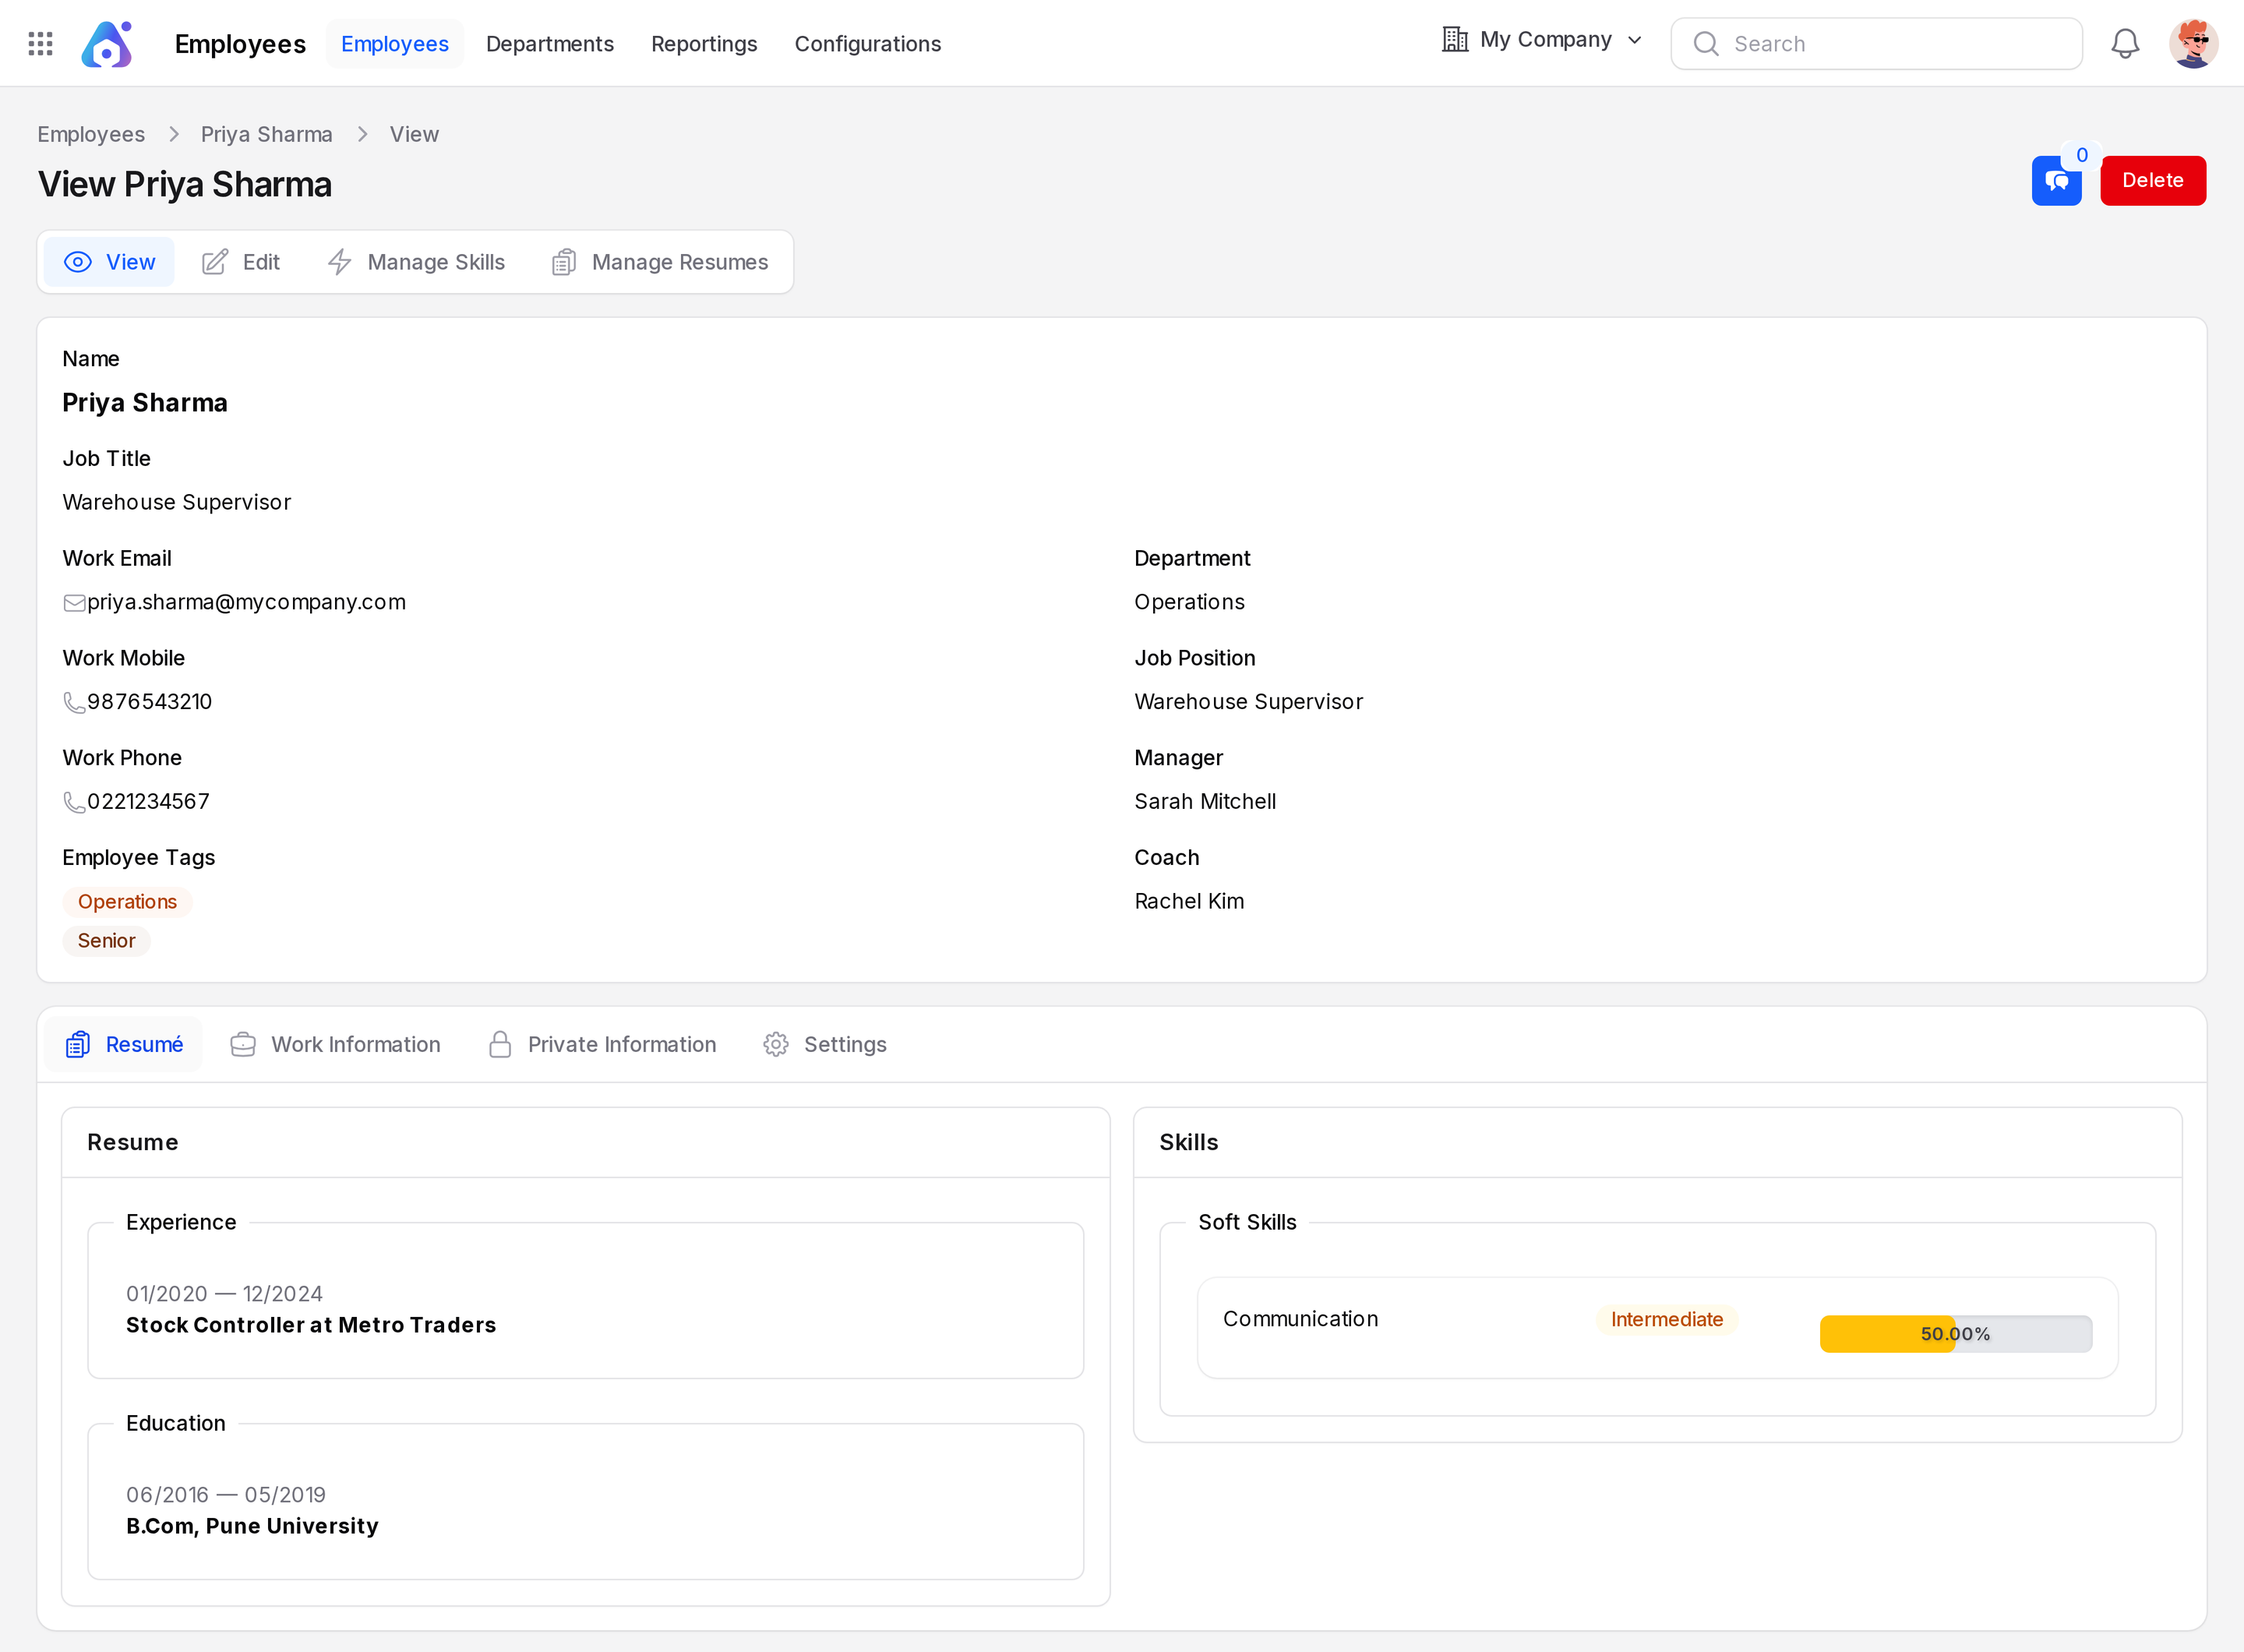
- Click Create. An Employee created notification says The employee has been created successfully. Aureus opens the profile with the Resume tab open. It is empty at first.
Create, Create and create another, Cancel
- Create: saves the employee and opens the profile page on the Resume tab.
- Create & create another: saves and opens a blank form. Use it for batch entry.
- Cancel: leaves without saving.
Behind the scenes
Each time you save an employee, Aureus creates a matching contact marked as an employee. It copies the name, work email, job title, phones, colour and company. If the contact exists, Aureus updates it on every save. See Contacts.
TIP
Related User needs a user to exist first. Create one in Manage users or with the plus button.