

Restaurant tables
A restaurant register shows a floor plan instead of a plain product grid. You click a table, take the order for that table, and send it on. This page uses the Spice Route Kitchen & Bar register to show the floor plan, a table order, guests, transfers and split orders.
In simple words: Click the table, add the dishes, and pay when the guests are ready.
Settings
Table features turn on in the register. Go to Point of Sale → Configurations → Point of Sale, open the register and use the Restaurant Mode tab.
- Is a Bar/Restaurant: Turns on tables and preparation tickets. It is locked while a session is open.
- Allow Bill Splitting: Adds the Split action to a table order.
- Early Receipt Printing: Adds the Bill action to print a receipt before payment.
- Eat in / Take out: Lets you switch an order between dine in and take out.
- Floors & Tables Map: Lists the floors and tables of the register.
See Set up a register for the full form.
The floor plan
Open the terminal and click your register. The Home page shows the floor plan.
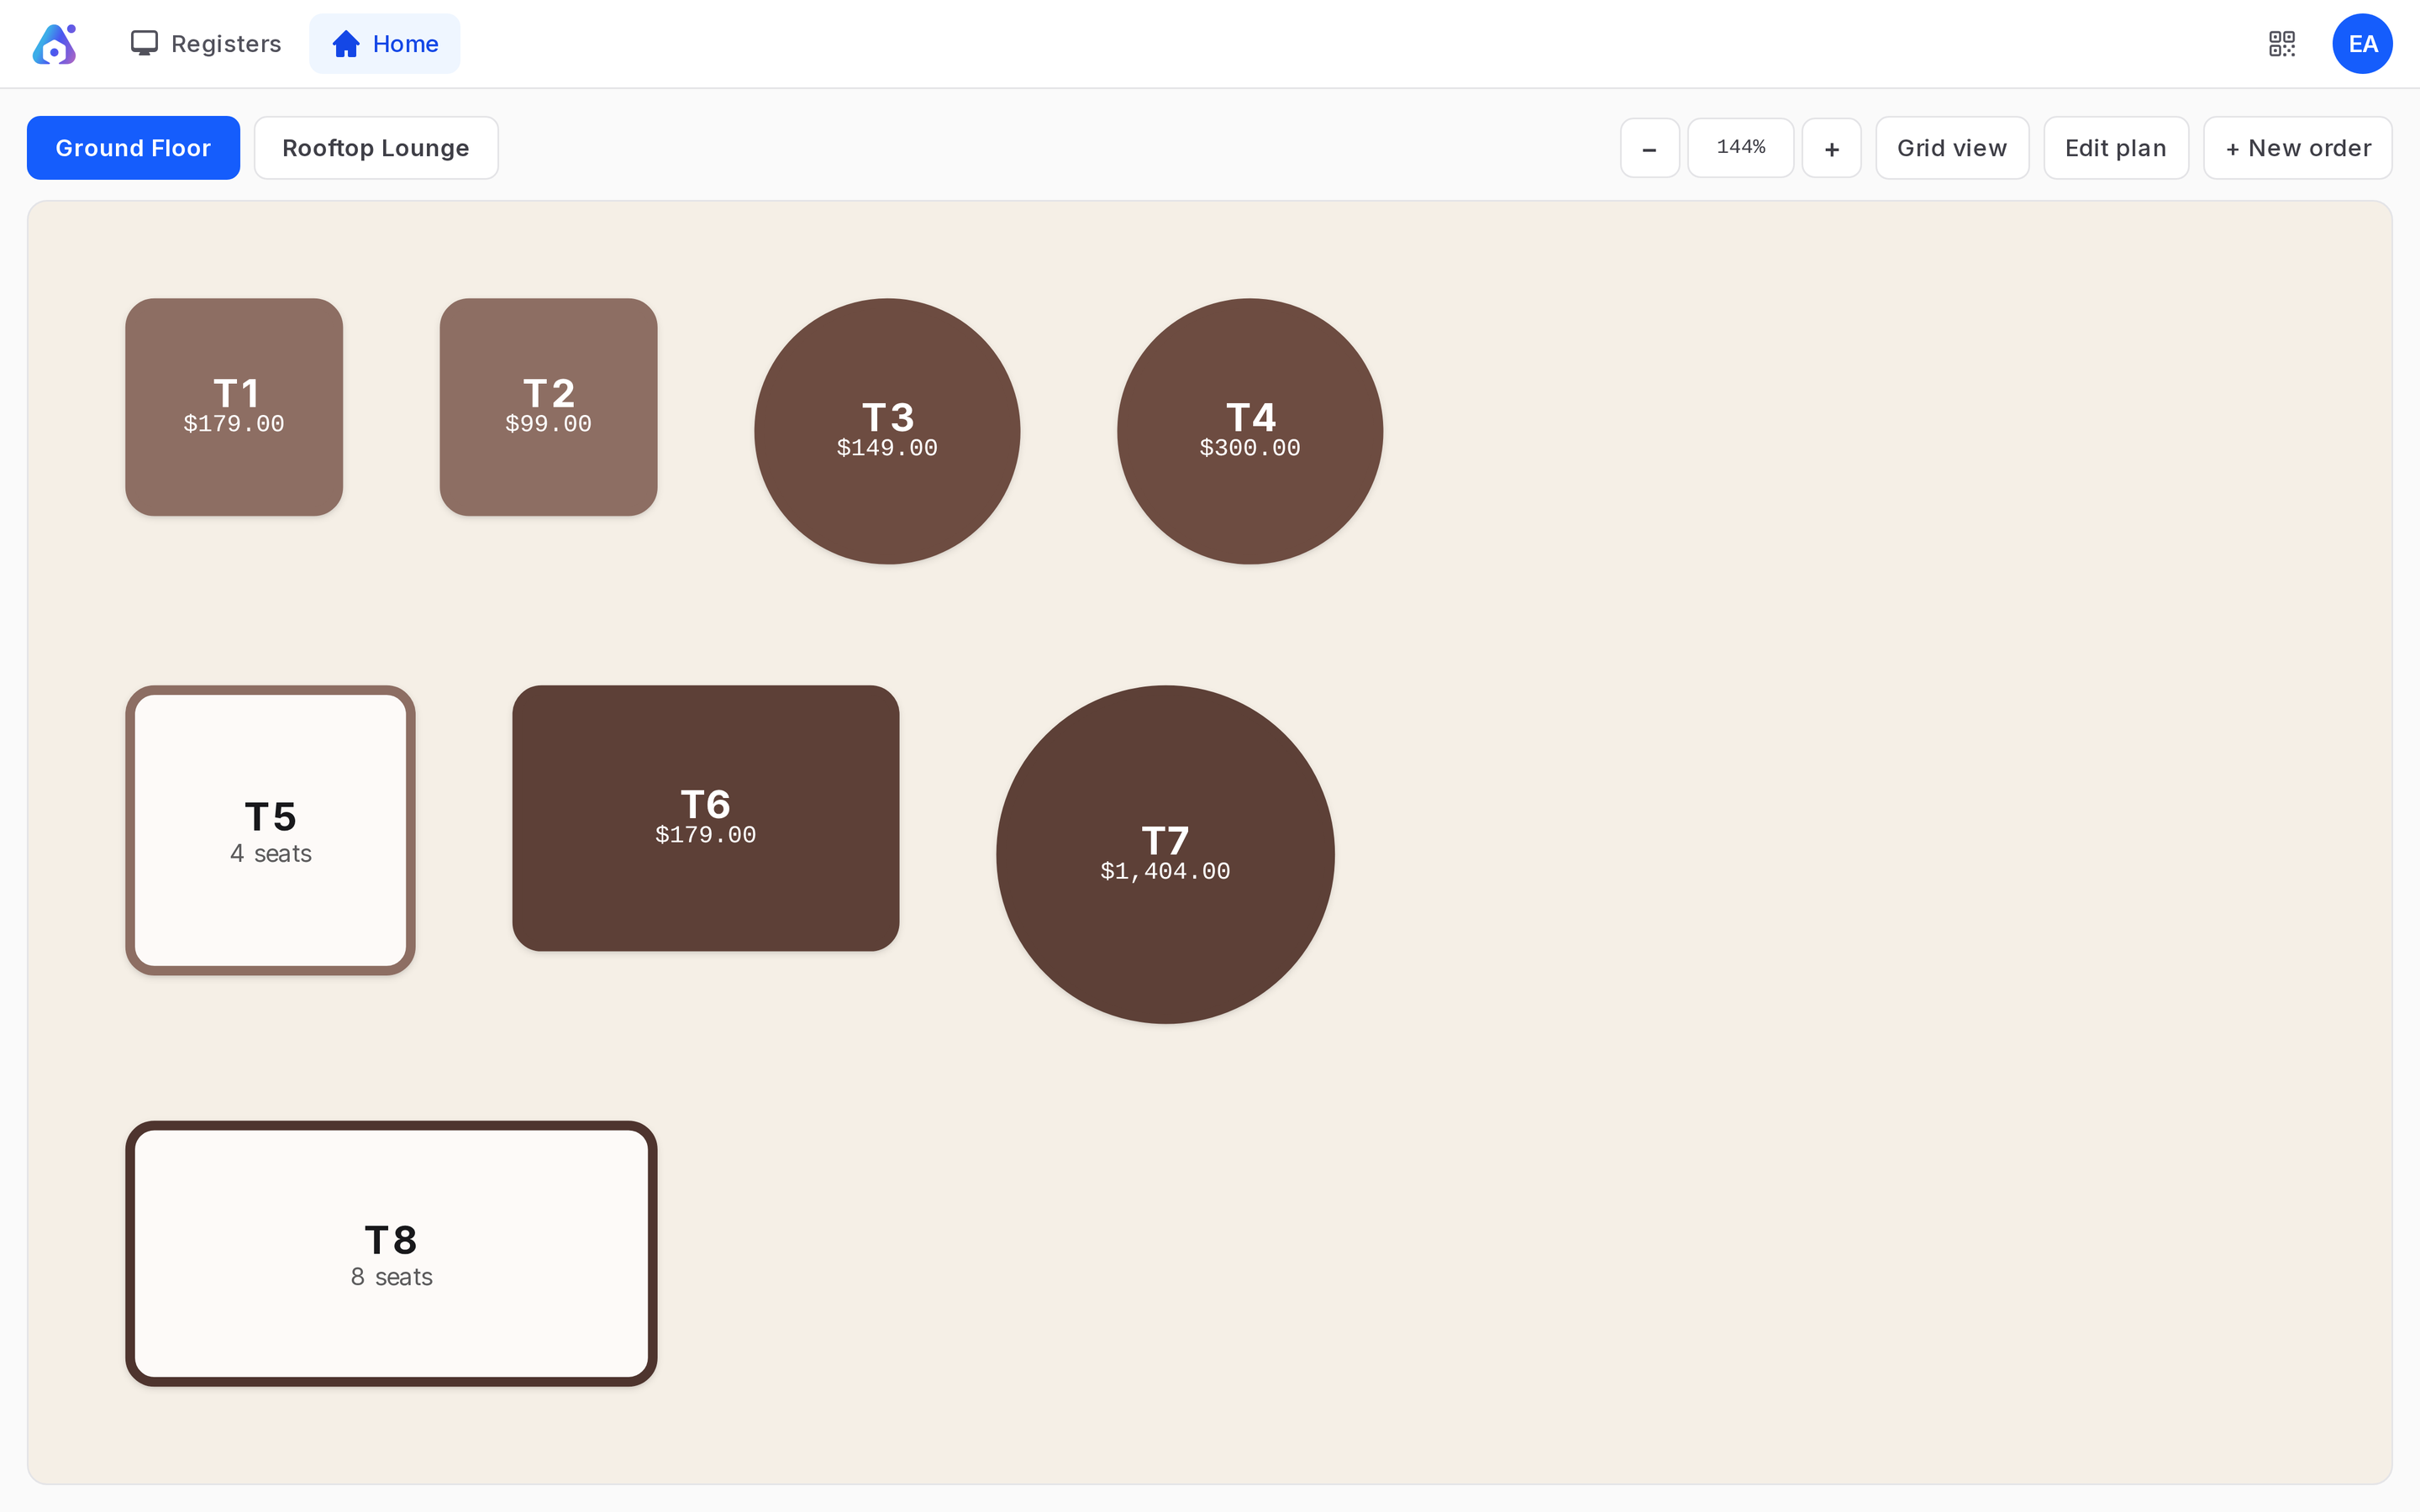
- Floor tabs: One tab per floor, such as Ground Floor and Rooftop Lounge.
- Tables: Each table shows its name and number of seats, for example T4, 4 seats. A table with open orders shows how many orders and guests it has. Tables can be square, round or wide.
- Zoom: Use -, the percentage and + to resize the plan.
- Grid view: Shows the tables as a simple list of tiles. Use Map view to go back.
- Edit plan: Lets you change the layout. See below.
- + New order: Starts an order that is not tied to a table.
Take a table order
- Click the table, for example T4. The order screen opens with a Table T4 chip.
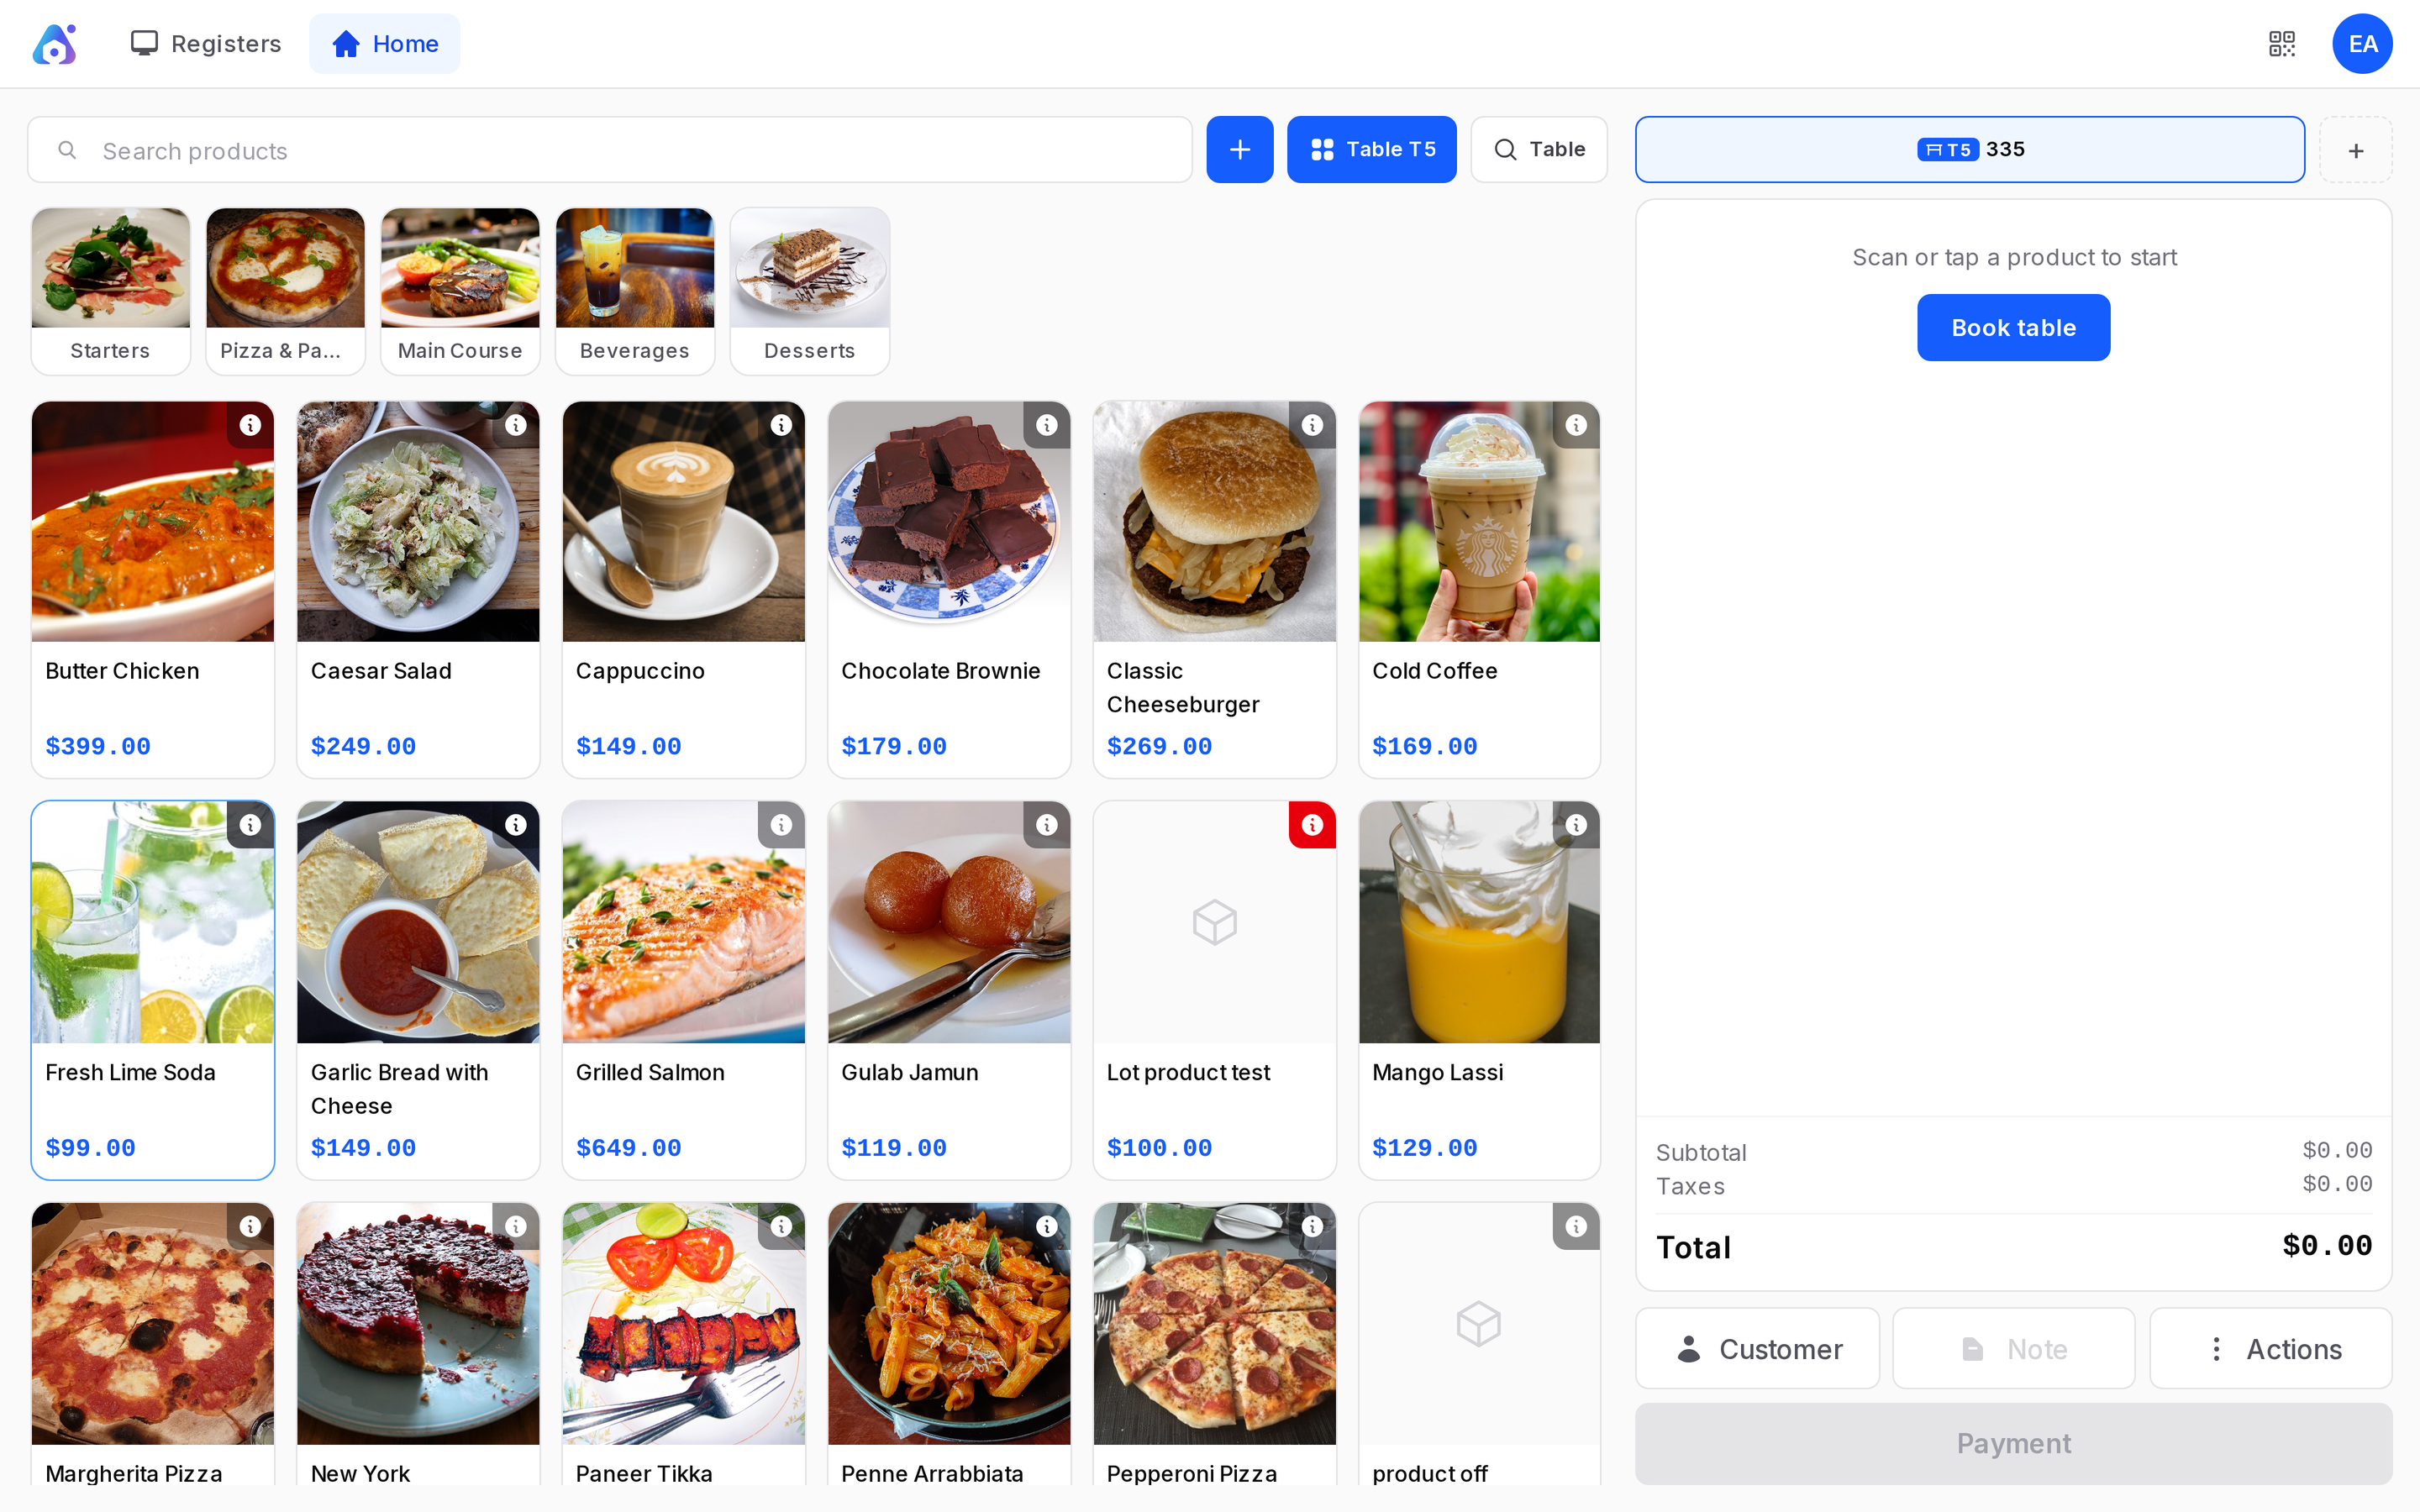
- Click a category, such as Main Course, then the dishes.
- Select a line and use the number pad Qty mode to change the quantity.
- Select a line and click Note to add a Kitchen note, such as Wait.
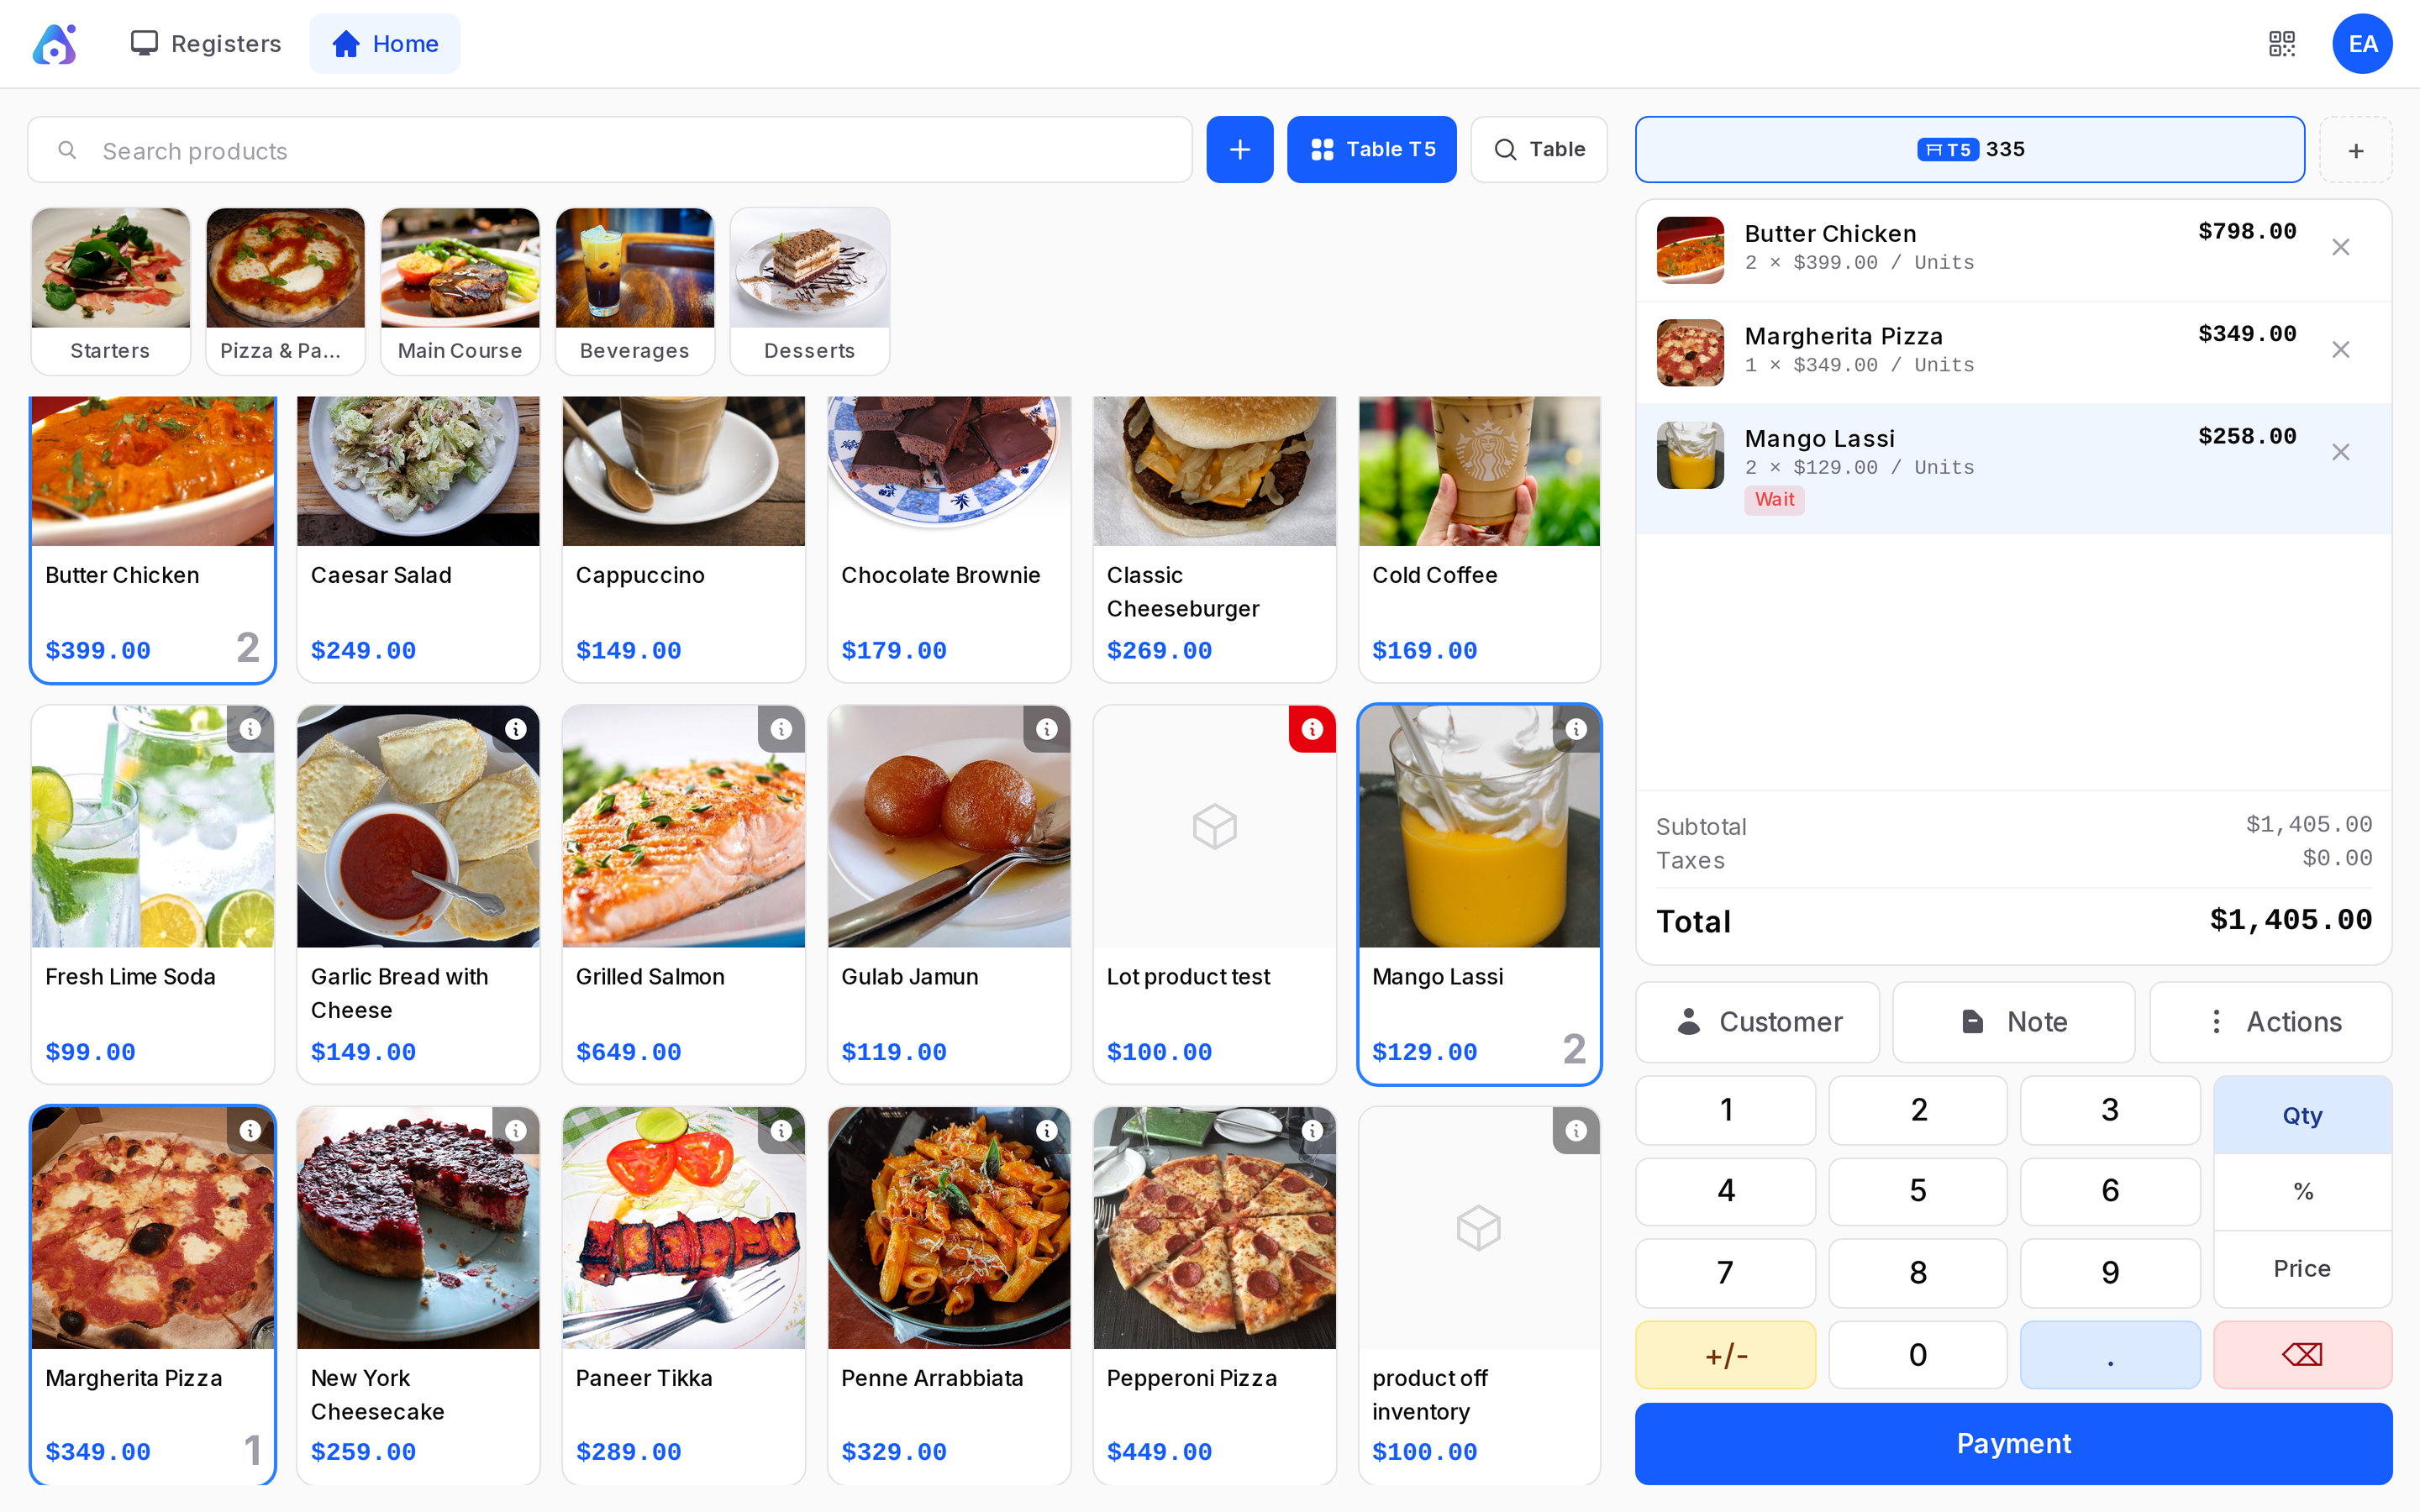
Example: For table T4 add Butter Chicken x2 (798), Margherita Pizza (349) and Mango Lassi x2 (258). Add the note Wait to the Mango Lassi. The total is 1,405.
Click Table T4 to go back to the floor plan. The order stays on the table. Click the table again to continue it. Use the Table search chip to jump to a table by number.
Actions on a table order
Click Actions.
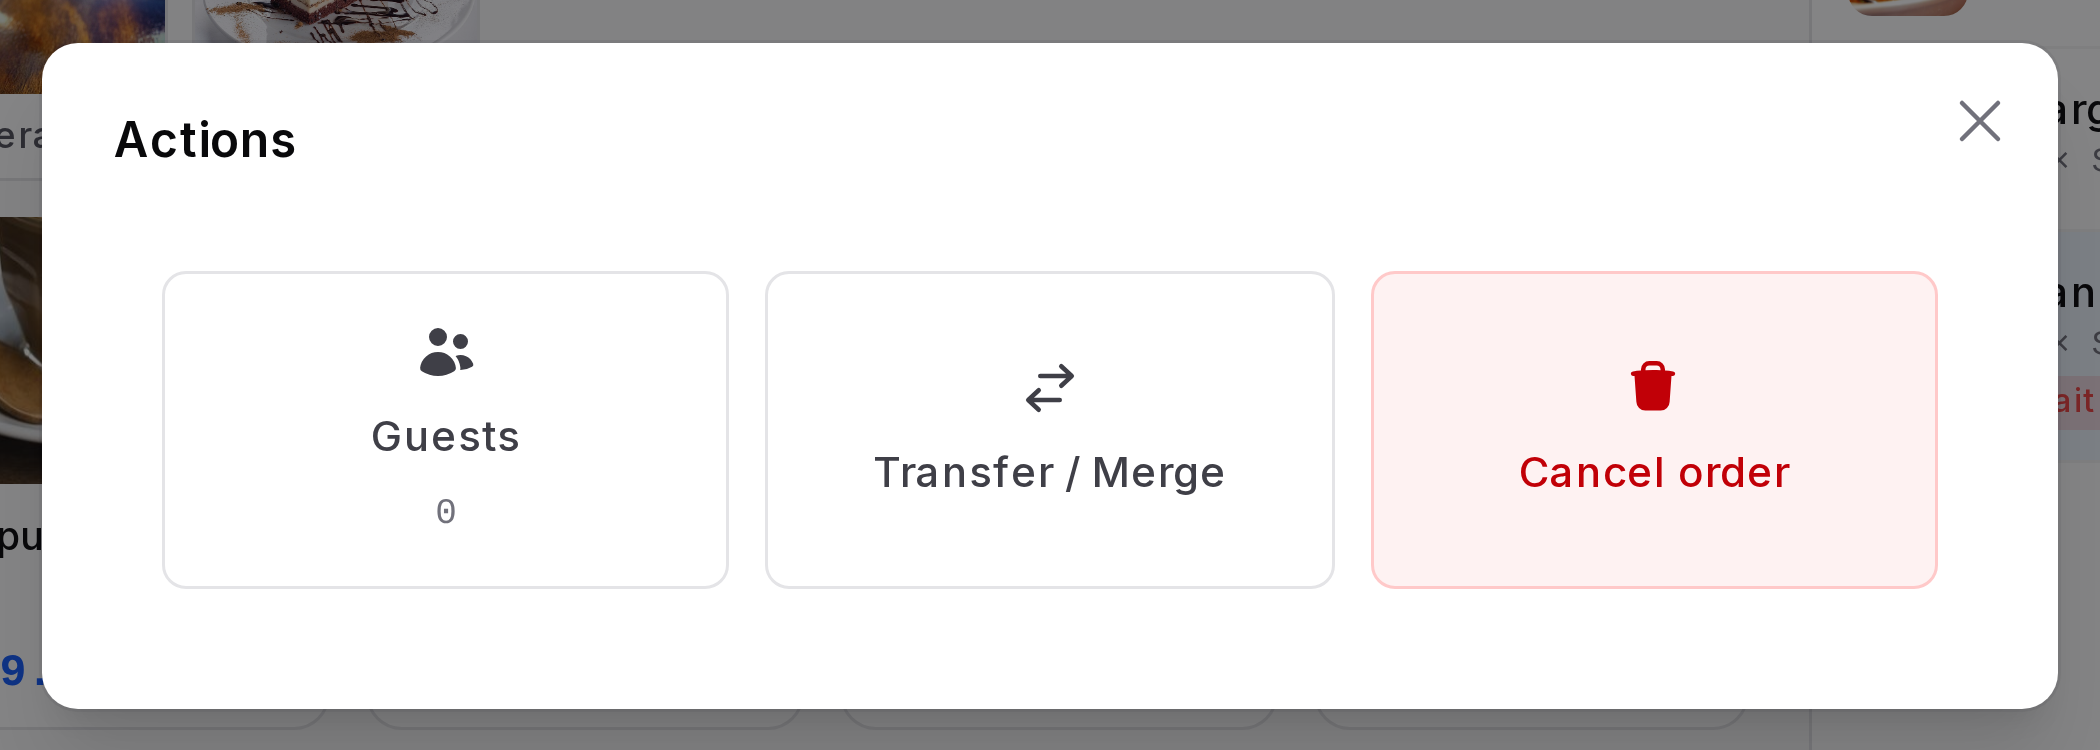
- Guests: Sets the number of guests. The window shows the amount per guest.
- Transfer / Merge: Moves the order to another table. If that table already has an order, the two orders merge. An order with payments cannot merge.
- Cancel order: Deletes the order after you confirm.
- Split: Splits one order into separate orders. It shows when Allow Bill Splitting is on.
- Bill: Prints a receipt before payment. It shows when Early Receipt Printing is on.
- Switch to Takeaway and Switch to Dine in: Change the order type when Eat in / Take out is on.
- Edit Order Name: Names an order that has no table, for example "18:45 John 4P".
Split an order
- Click Actions, then Split.
- Tap a line to move one unit to the New bill. Tap again to move more.
- Click Split Order.
Each part then has its own payment.
Book a table
On a table with no lines, click Book table. The table is marked as booked and you return to the floor plan. Click Release table to free it.
Edit the plan
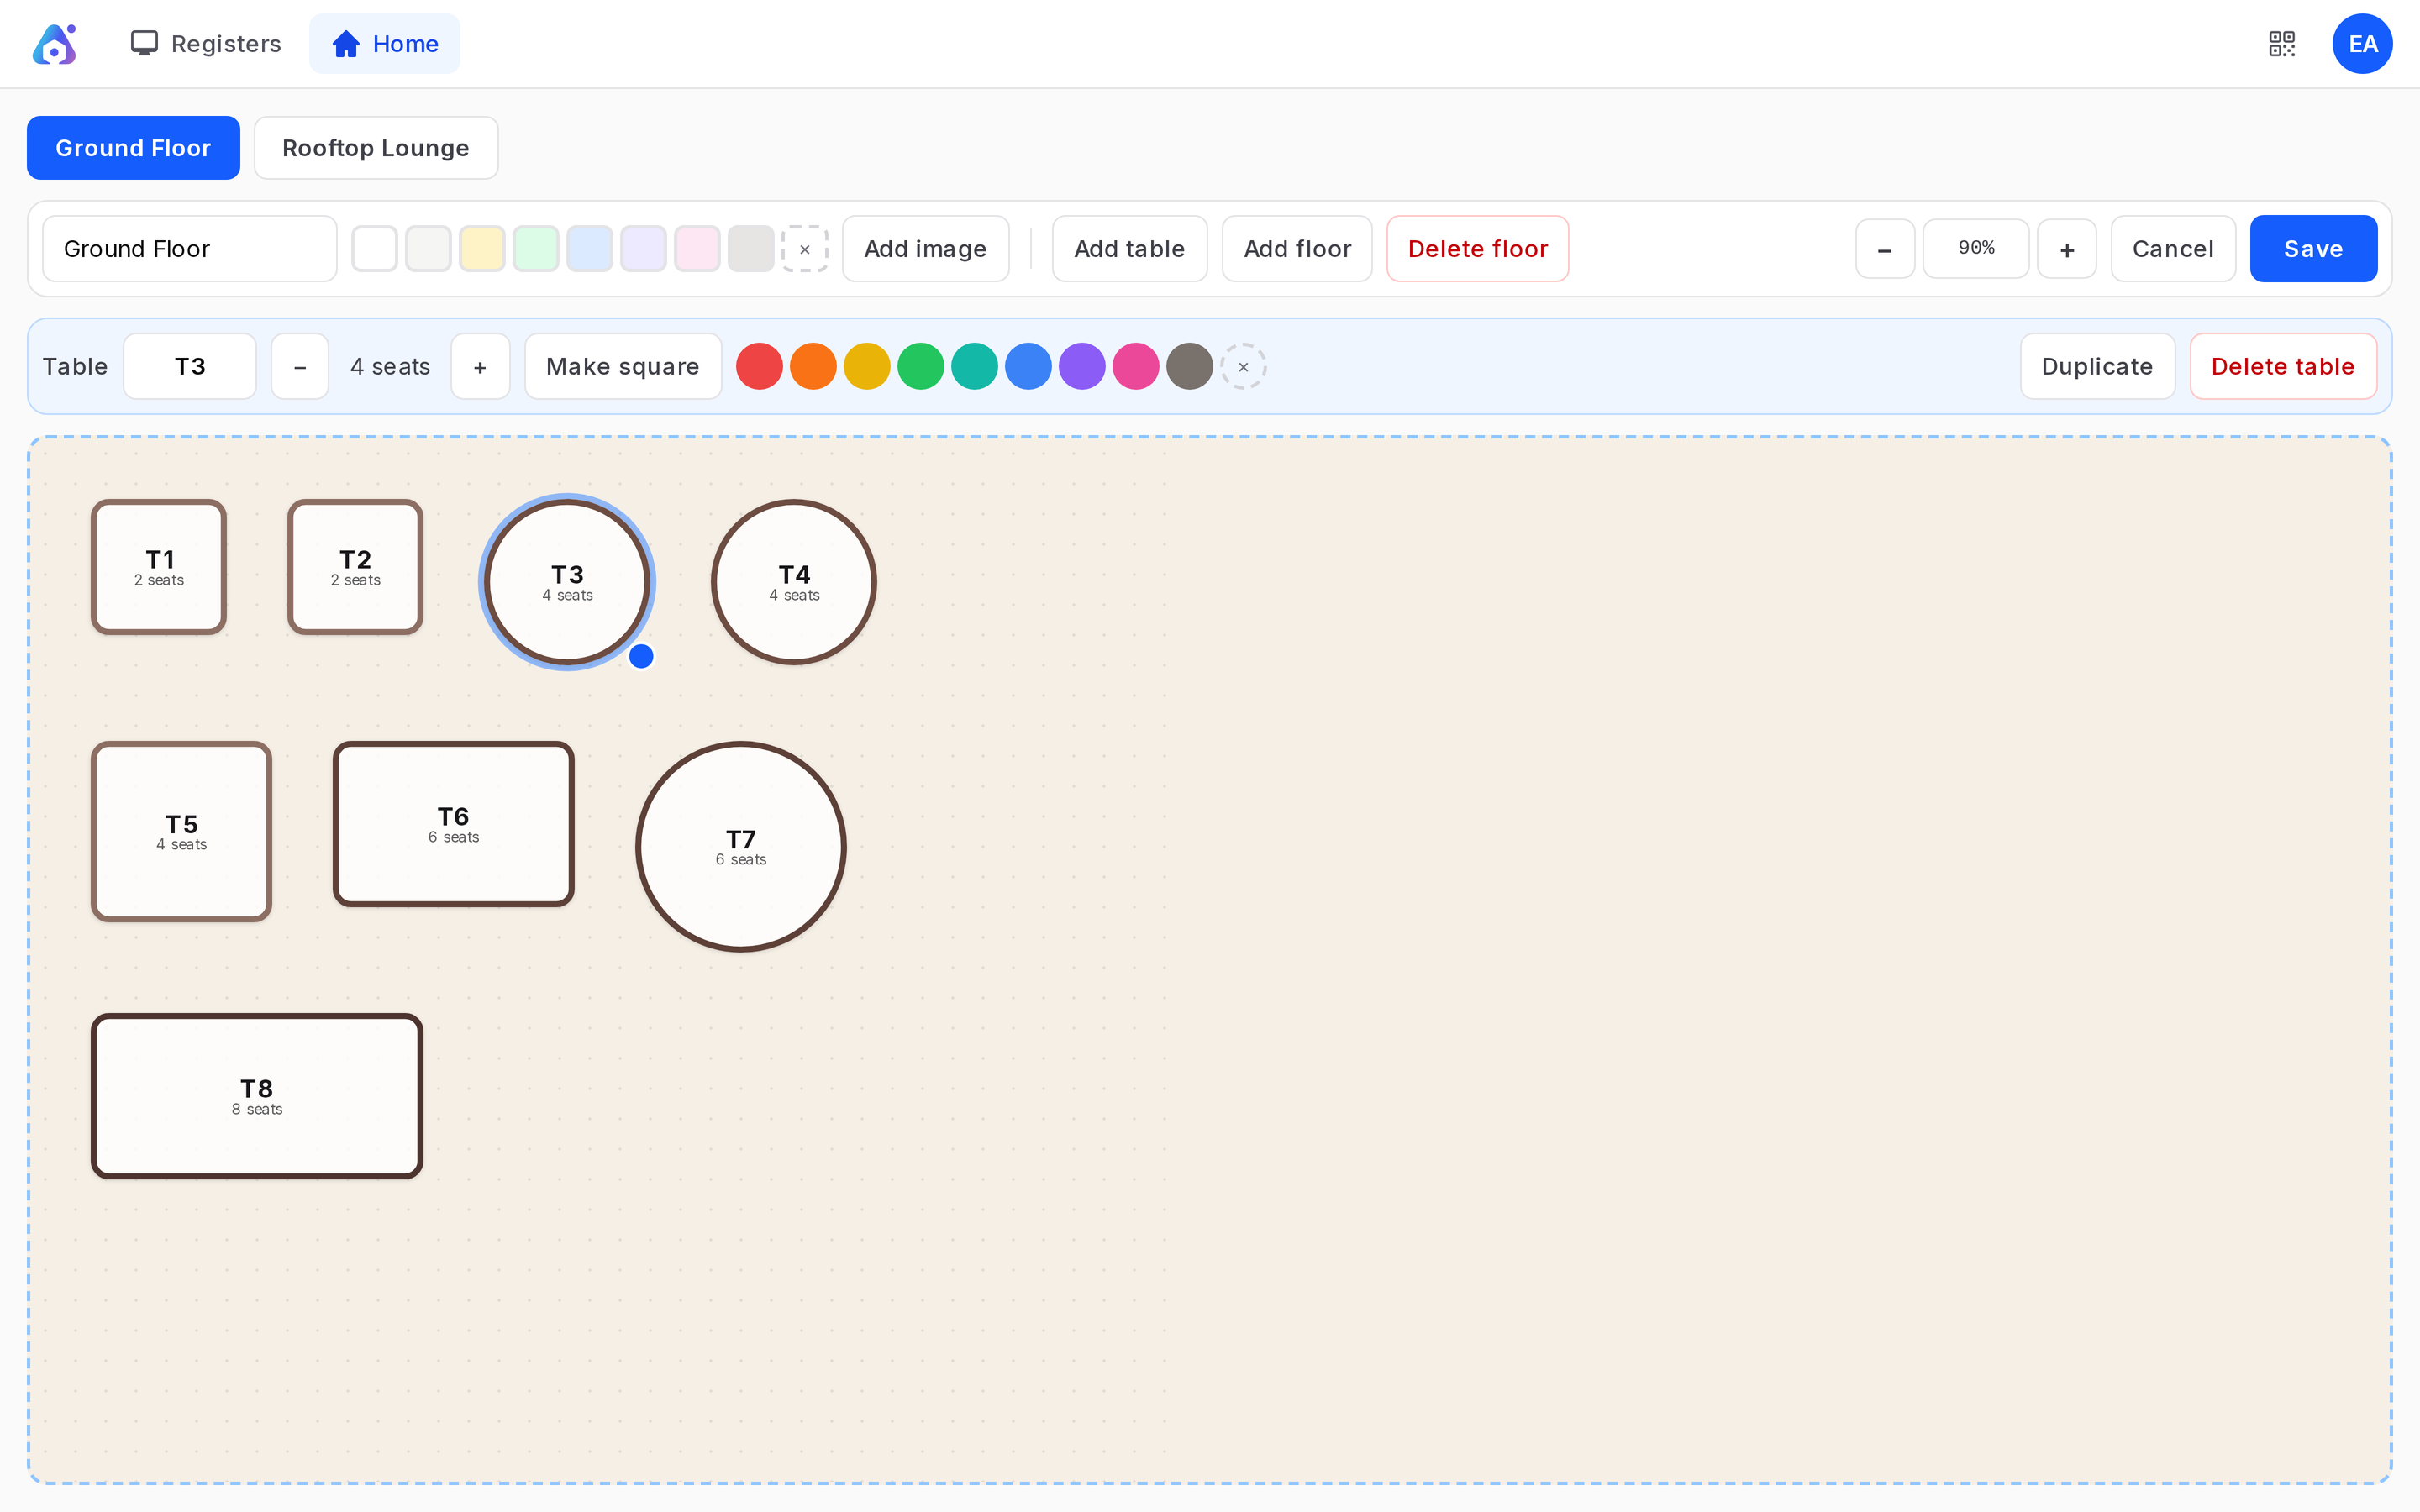
- Click Edit plan.
- Drag a table to move it. Drag the corner handle to resize it. Tap a table to edit it.
- Use Add table, Add floor, Fewer seats, More seats, Make round, Make square, Duplicate or Delete table.
- Set the Floor name and the Floor background. Add an image if you like.
You can also manage floors in the back office. See Set up a register.
Pay
Click Payment on the order. The steps are the same as in a shop. See Pay and receipt.
TIP
Set Guests early. The amount per guest helps when you split the check at the table.