

Create a project
A project groups the tasks, people, dates and hours of one job. The project list shows every project as a card. You can filter the cards, mark favorites, and open a project to see its details.
In simple words: Open the project list, click New Project, fill the form and click Create.
Open Project → Projects.
About the example
This page creates a second project, Customer Portal Launch, so the pictures show a fresh form. The rest of the guide uses Website Revamp. Create both if you want to follow every page.
Before you start
- Add project stages if Enable Project Stages is on.
- Create the customer in Contacts.
- Switch on the features you need in Project settings.
Overview
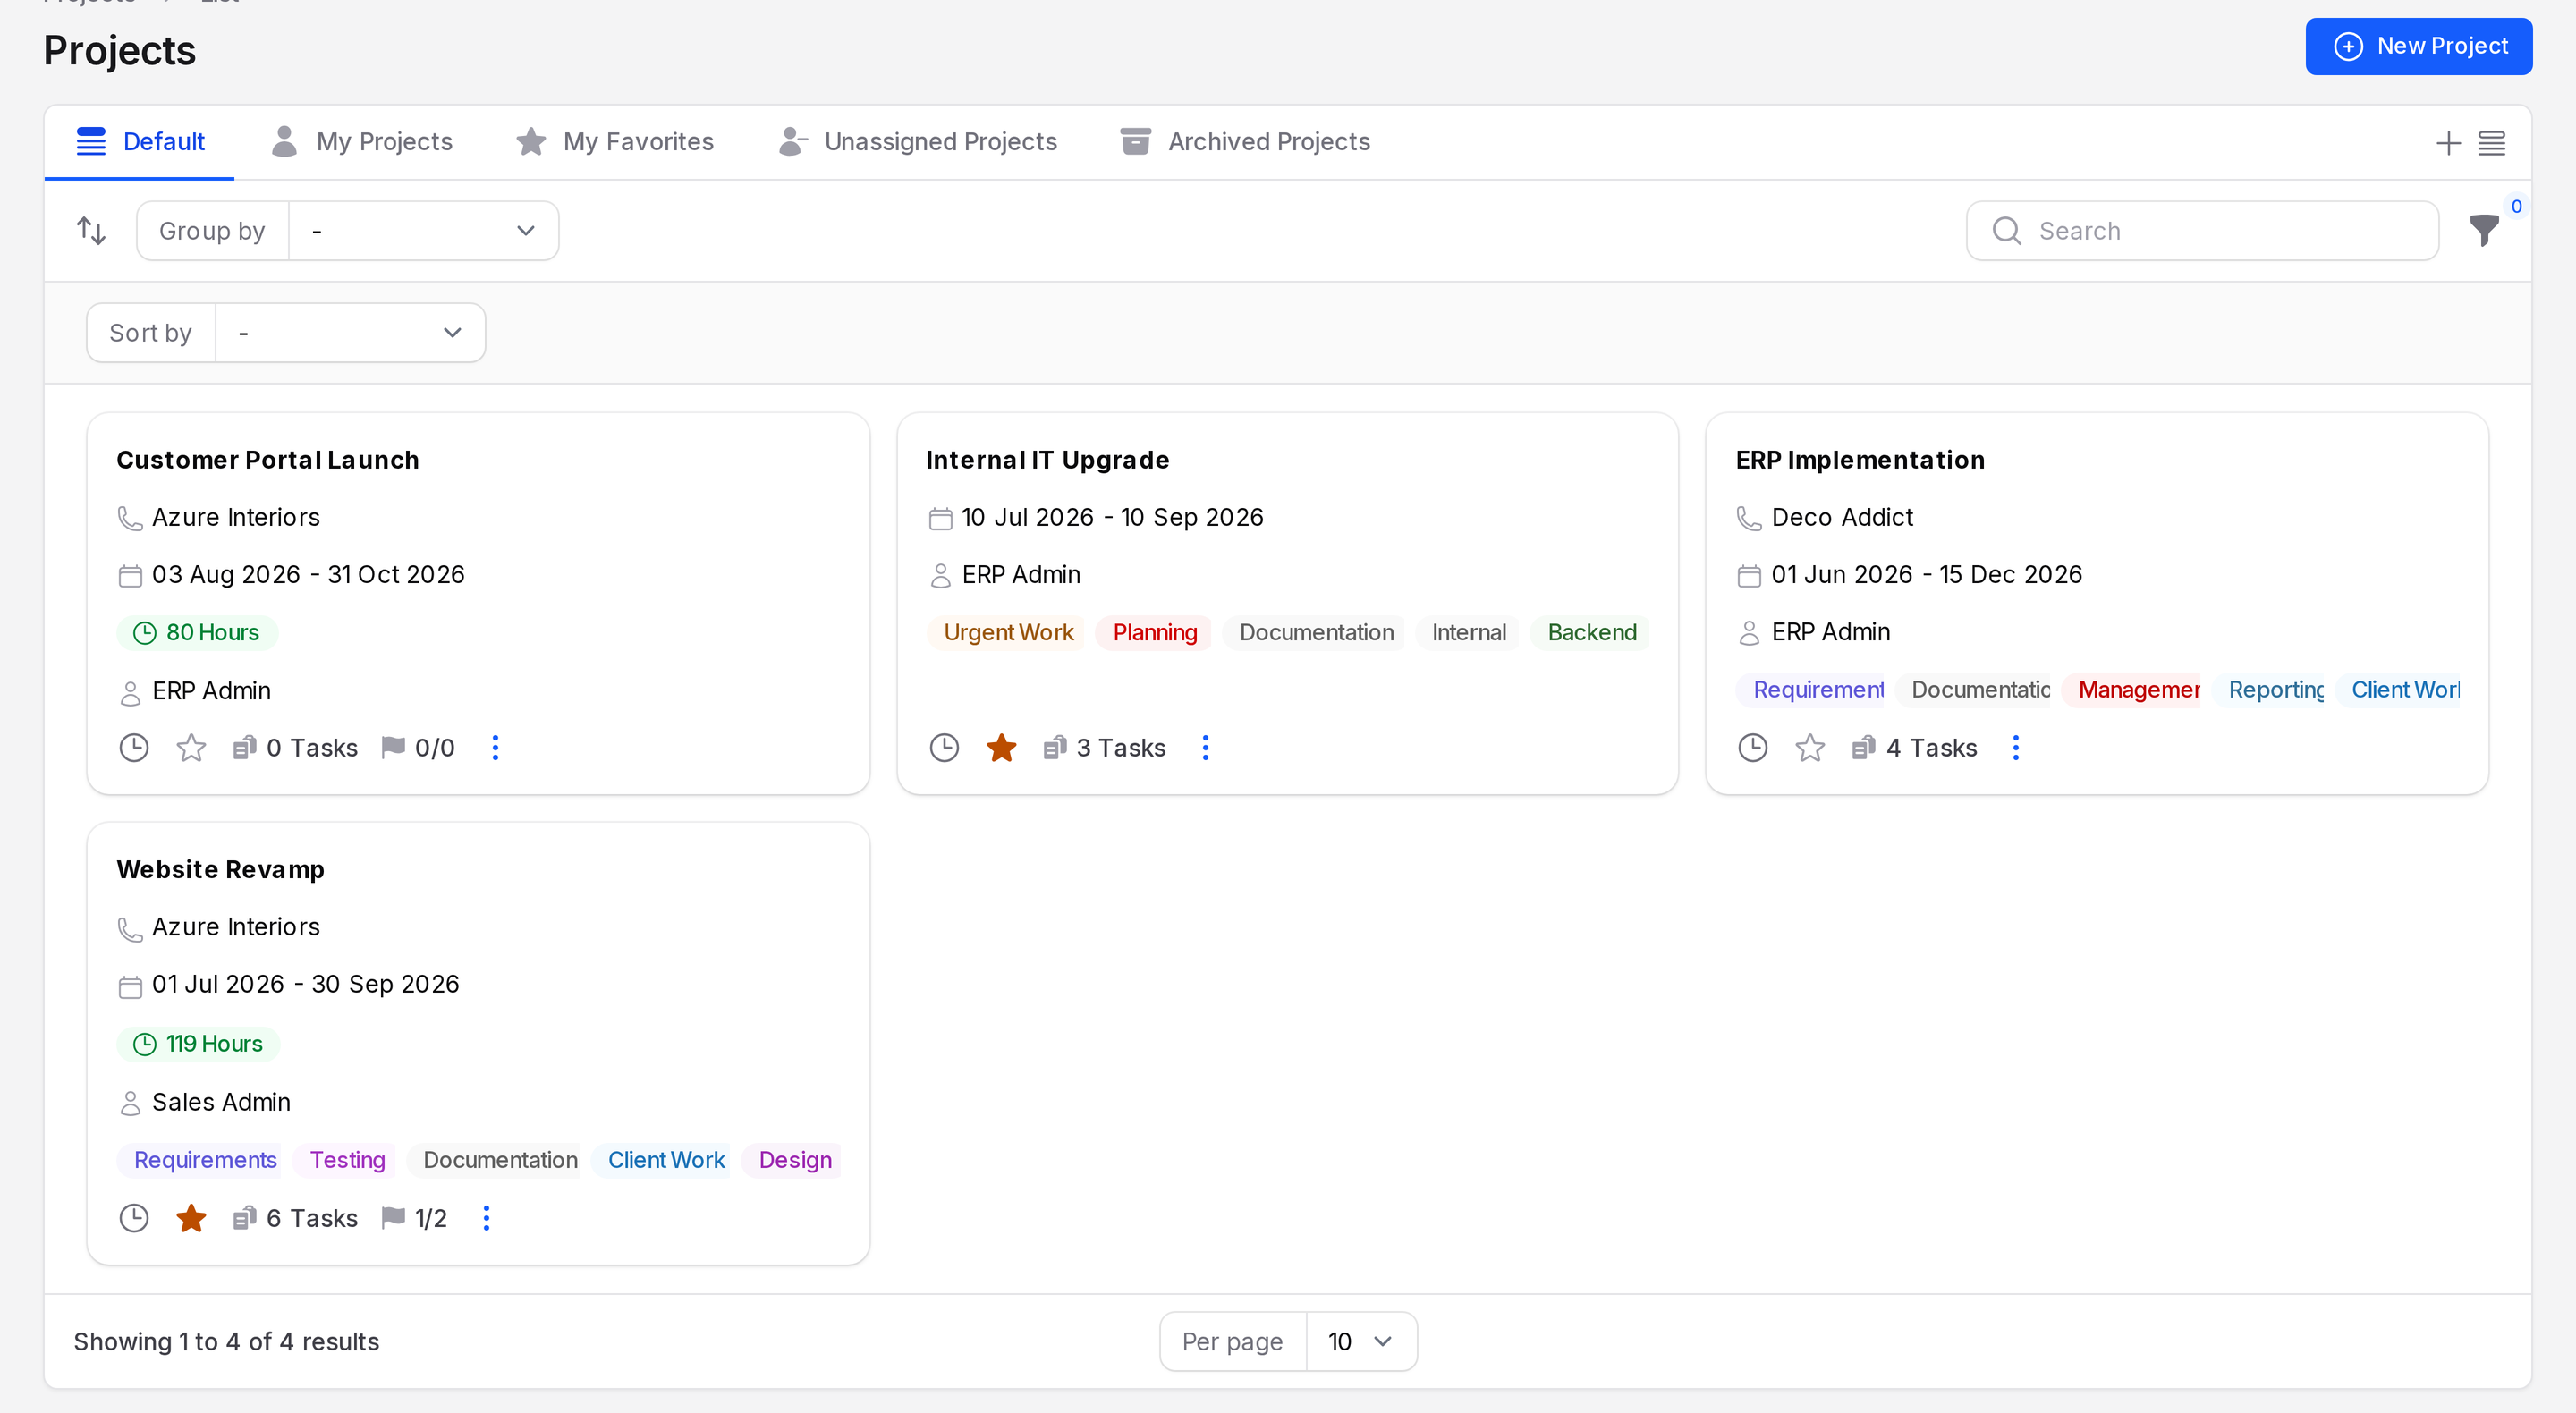
Projects appear as cards, not as a table. Each card shows the name, the customer, the planned dates, the project manager and the tags. A badge with remaining hours appears when timesheets and milestones are on for the project.
Tabs
- Default: every project.
- My Projects: projects where you are the project manager.
- My Favorites: projects you marked with the star.
- Unassigned Projects: projects with no project manager.
- Archived Projects: projects you deleted. You can restore them.
Group by, filters and search
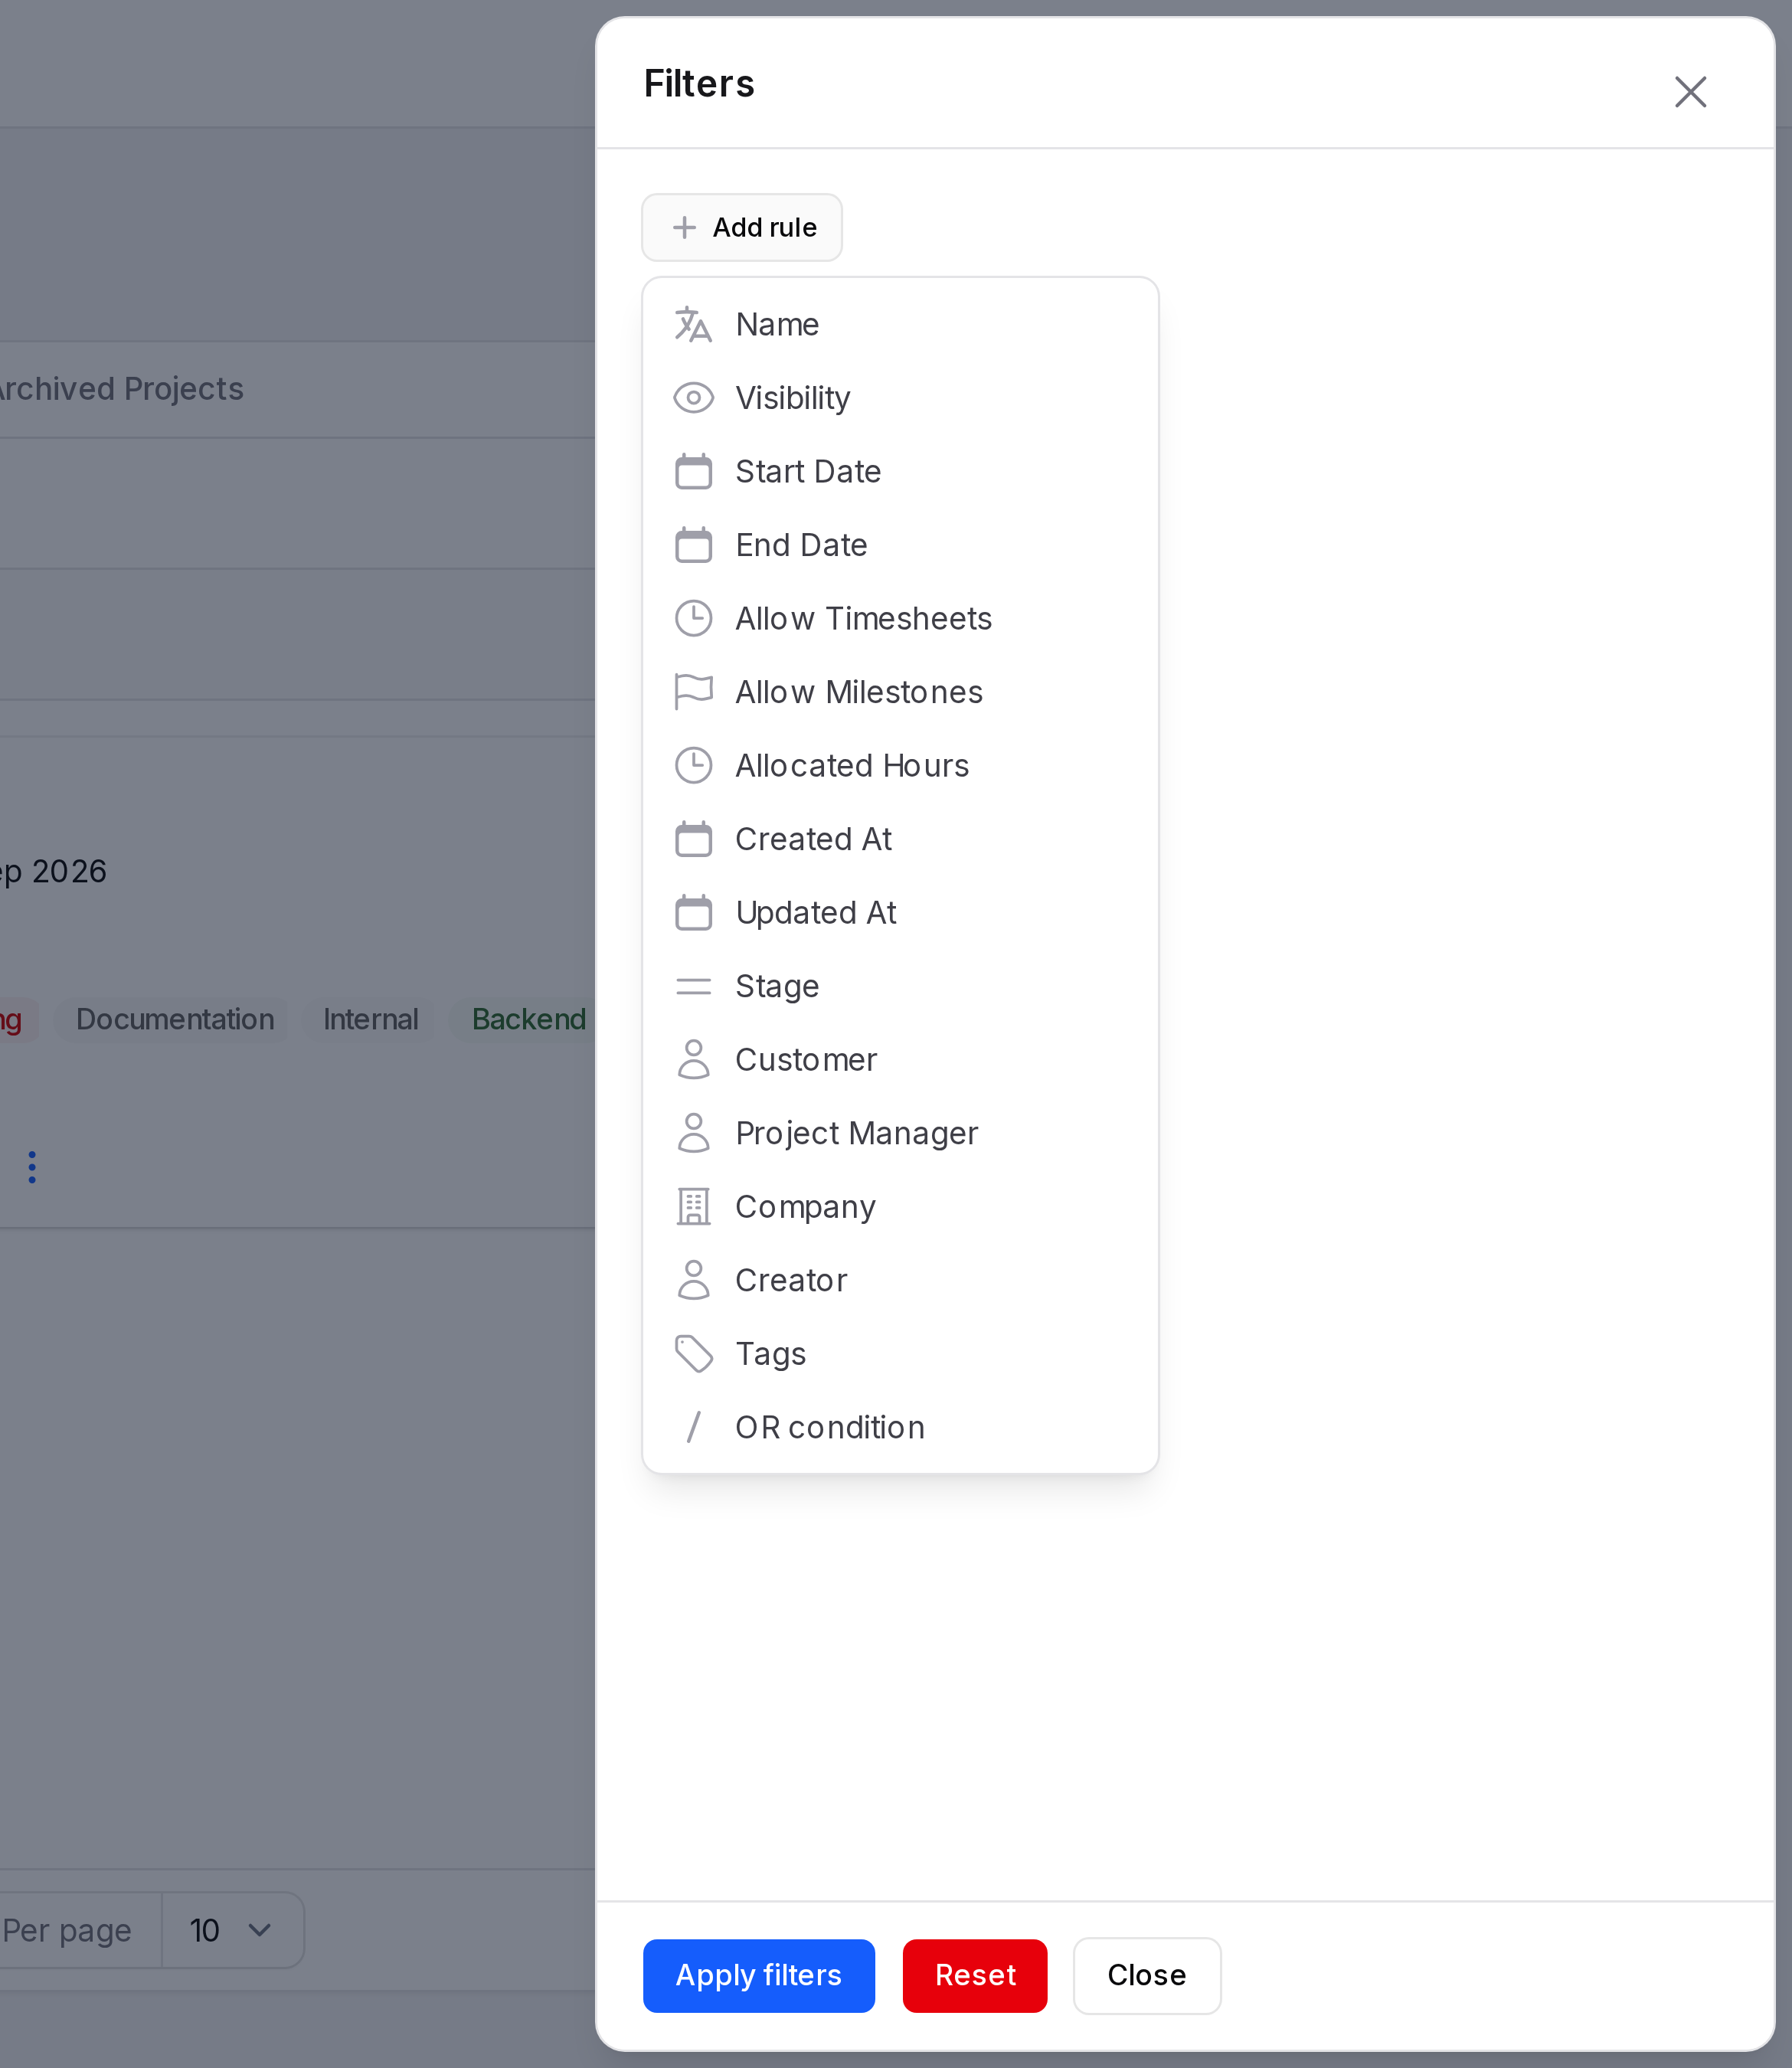
Group the cards by Stage, Project Manager, Customer or Created At. Use the search box to find a project by name. Open the filter panel to narrow the list. You can filter by Name, Visibility, dates, Stage, Customer, Project Manager and Tags.
Card buttons
- Star: marks the project as your favorite. It then shows in My Favorites.
- Tasks: shows the number of tasks. Click it to open the tasks of that project.
- Milestones badge: shows completed over total, for example 1/2. It appears when Enable Milestones and Allow Milestones are on.
- Three dot menu: Edit, Delete, Restore and Force delete.
Create project
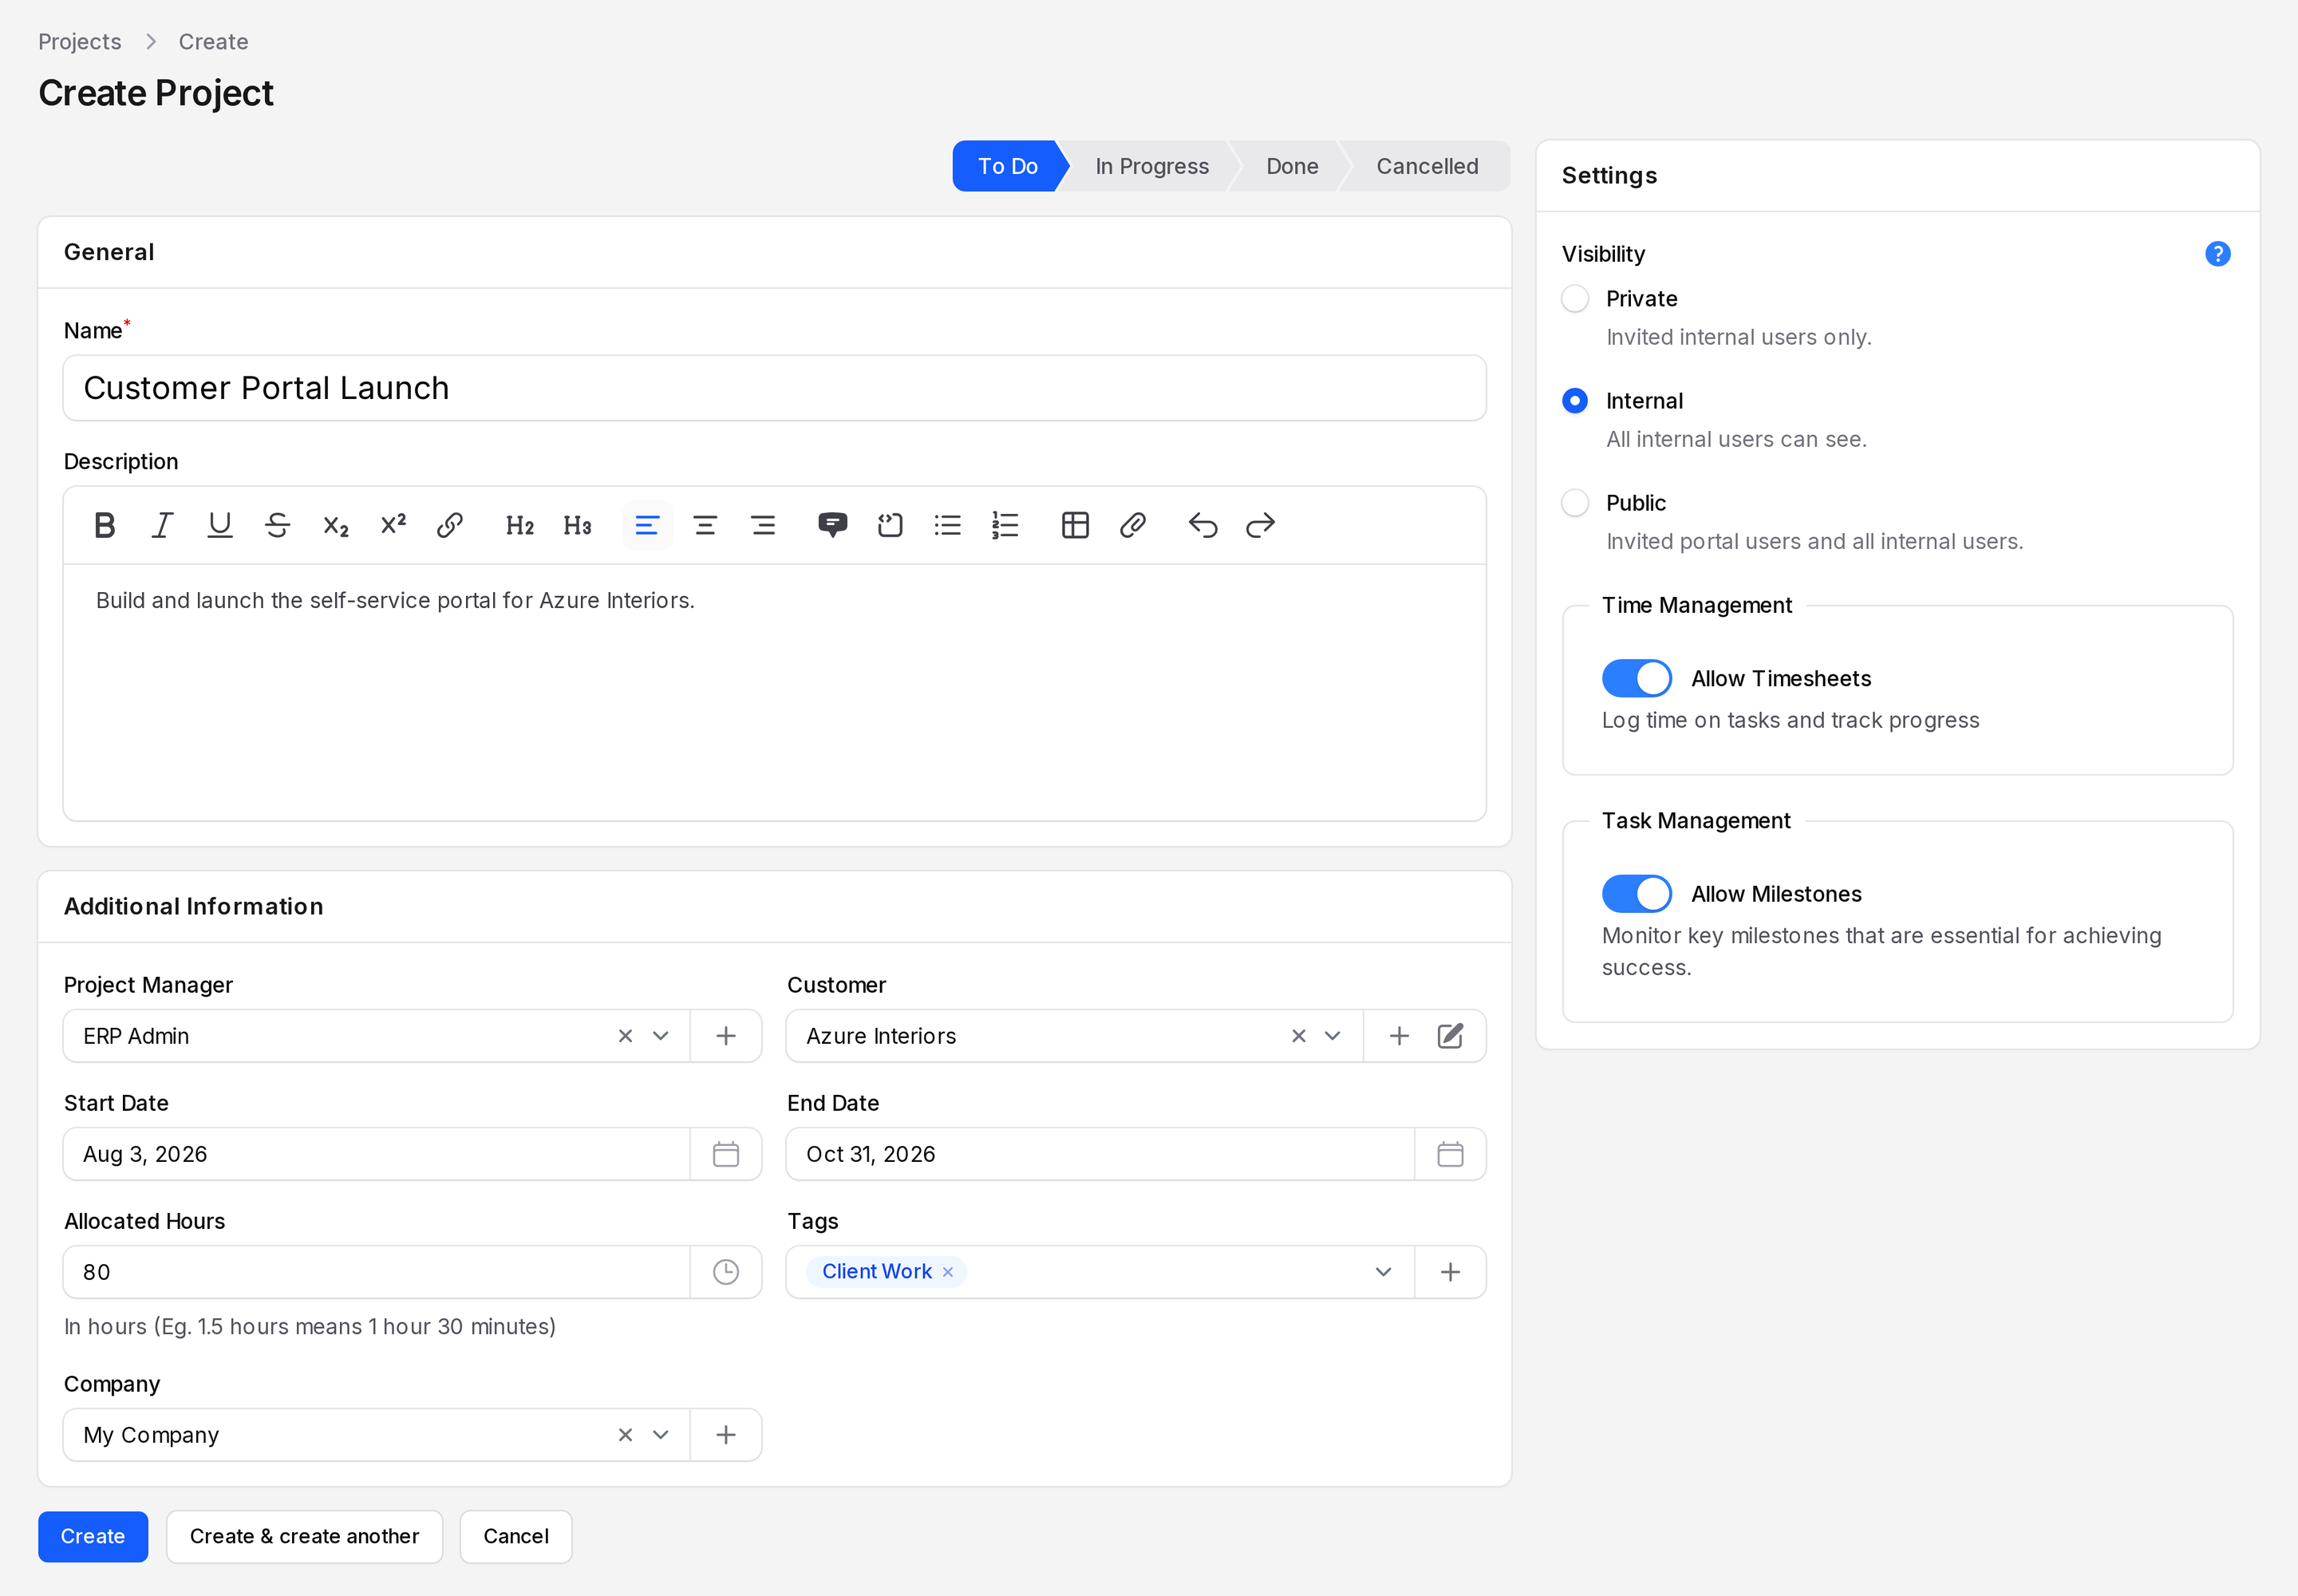
- Click New Project. The page is titled Create Project.
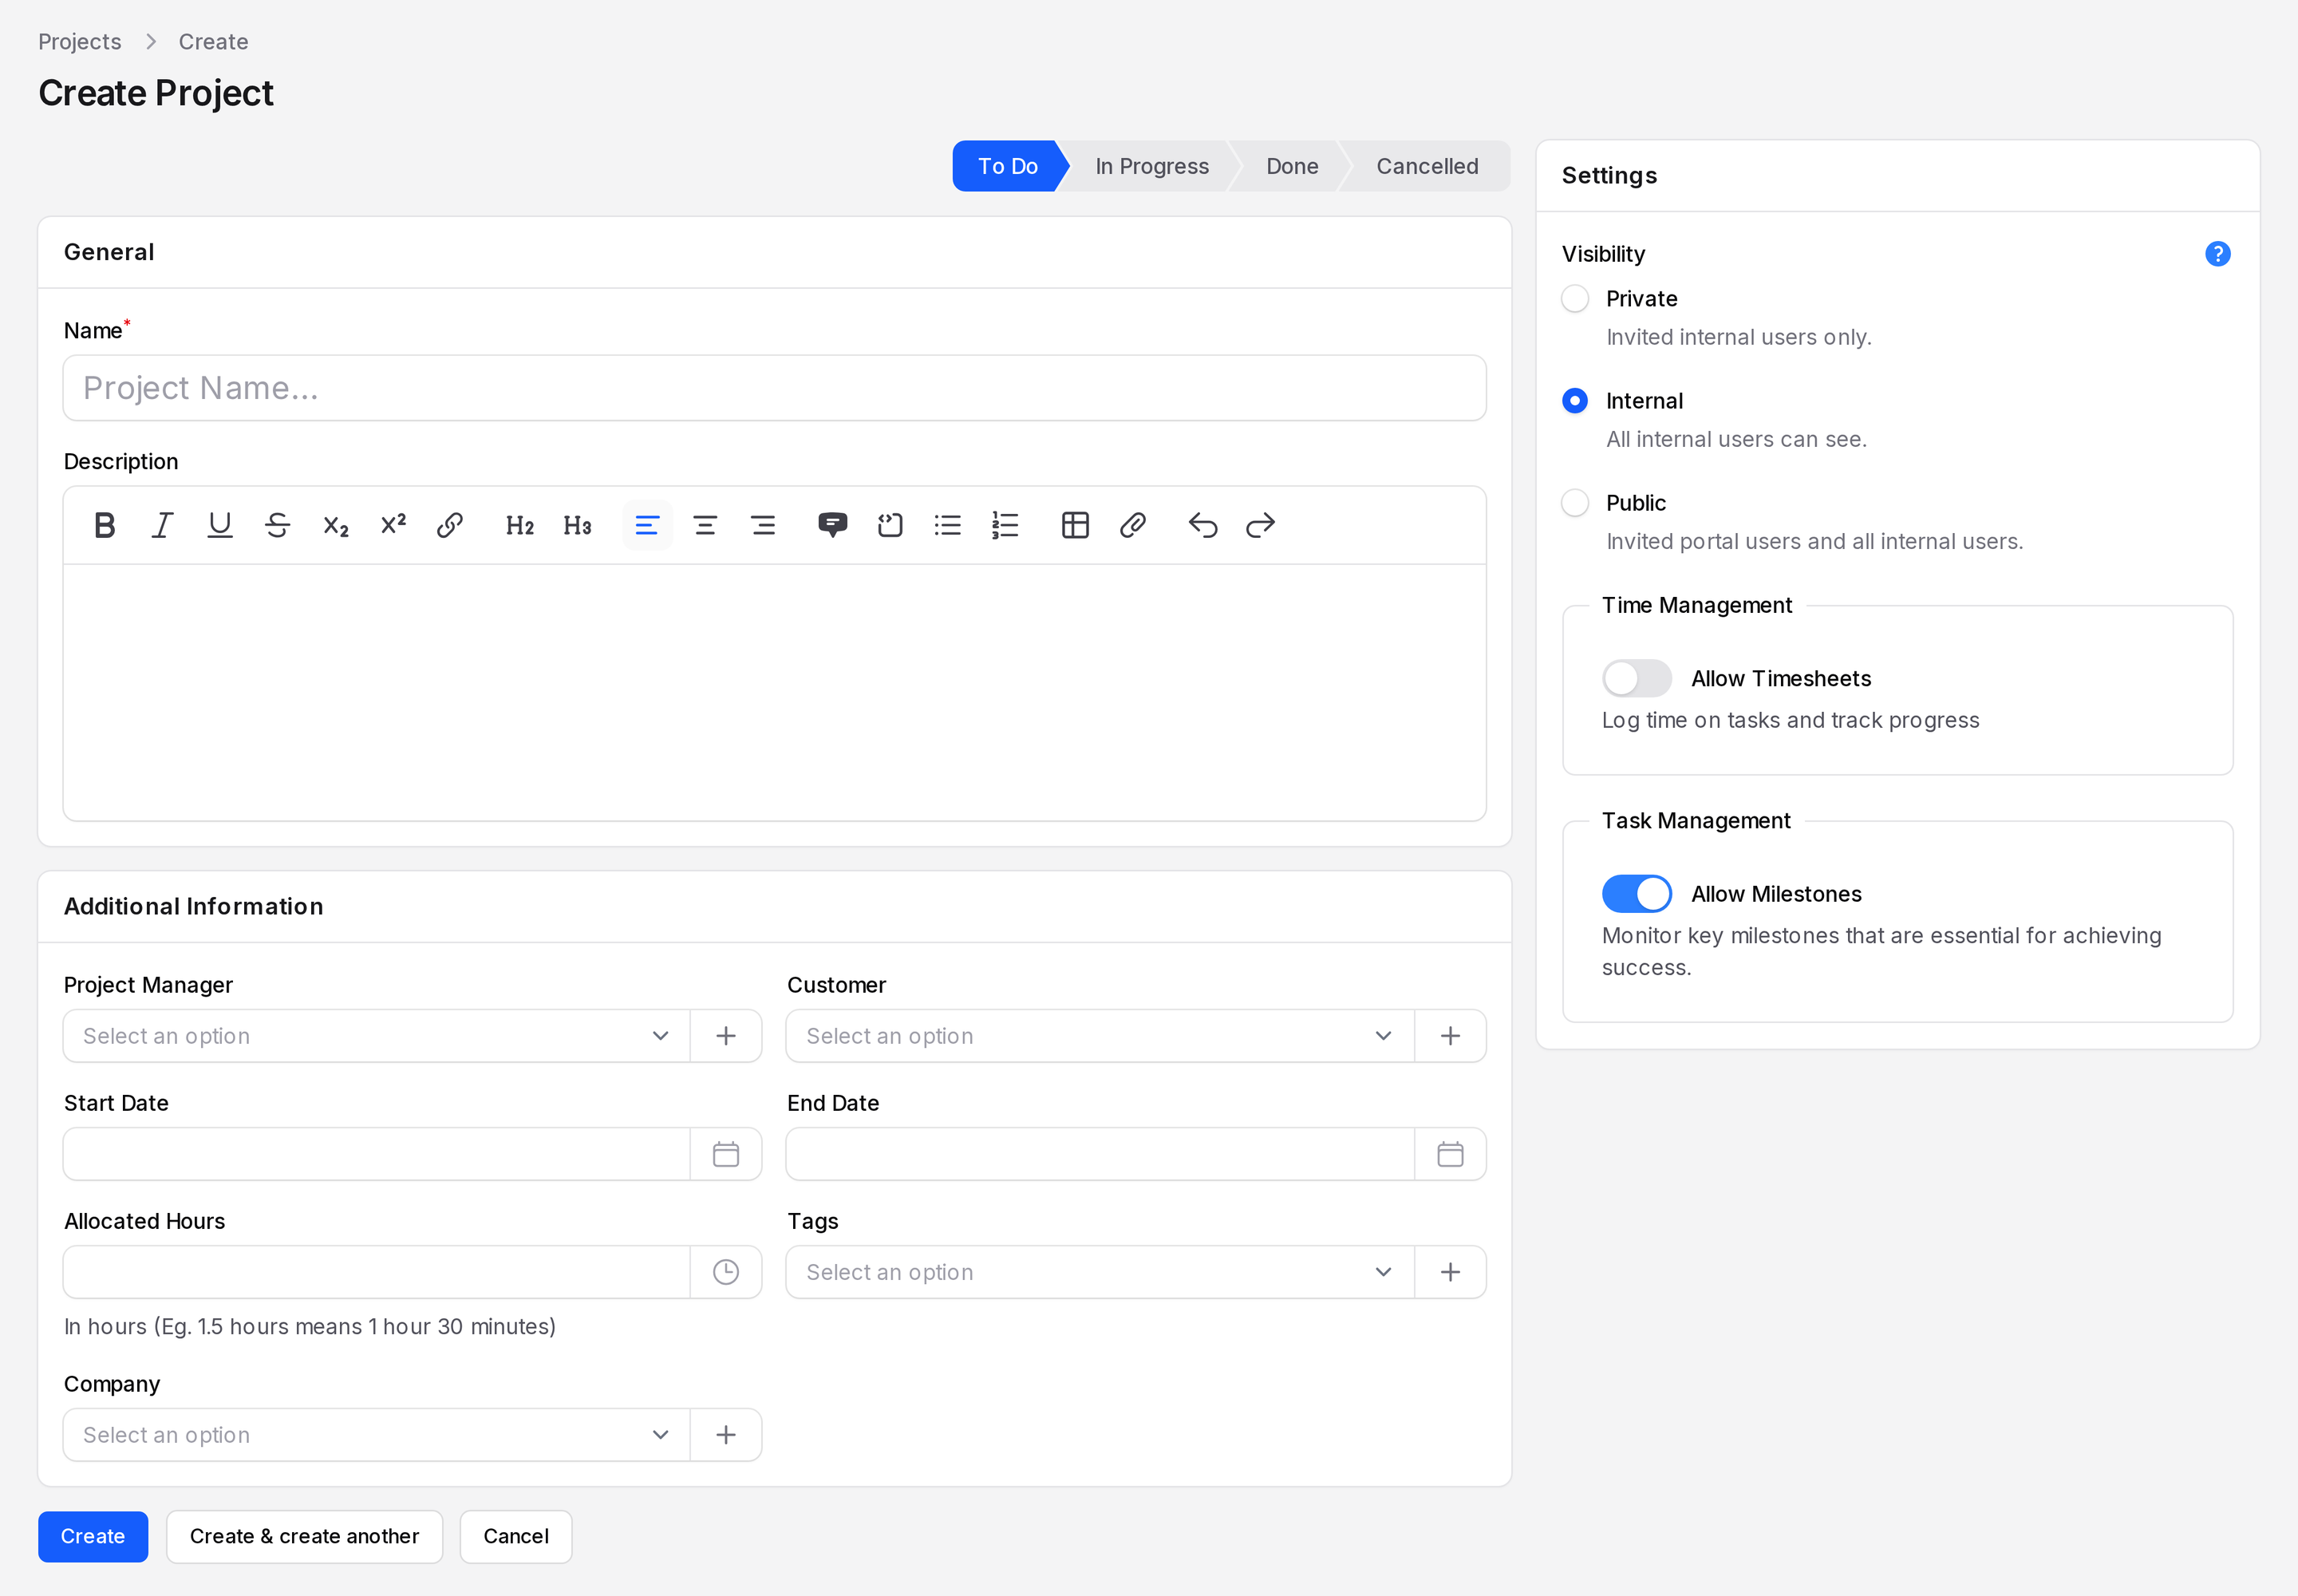
- If the stage bar shows, keep To Do or click another stage. It needs Enable Project Stages. The first stage is chosen for you.
General
- Type Customer Portal Launch in Name. Add a short Description if you like.
- Name: Required. Up to 255 characters.
- Description: Free text with formatting.
Additional Information
- Choose ERP Admin as Project Manager.
- Choose Azure Interiors as Customer.
- Set Start Date to 03 Aug 2026 and End Date to 31 Oct 2026.
- If you switched on Enable Timesheets, enter 80 in Allocated Hours. Otherwise the field is hidden.
- Pick the tag Client Work in Tags.
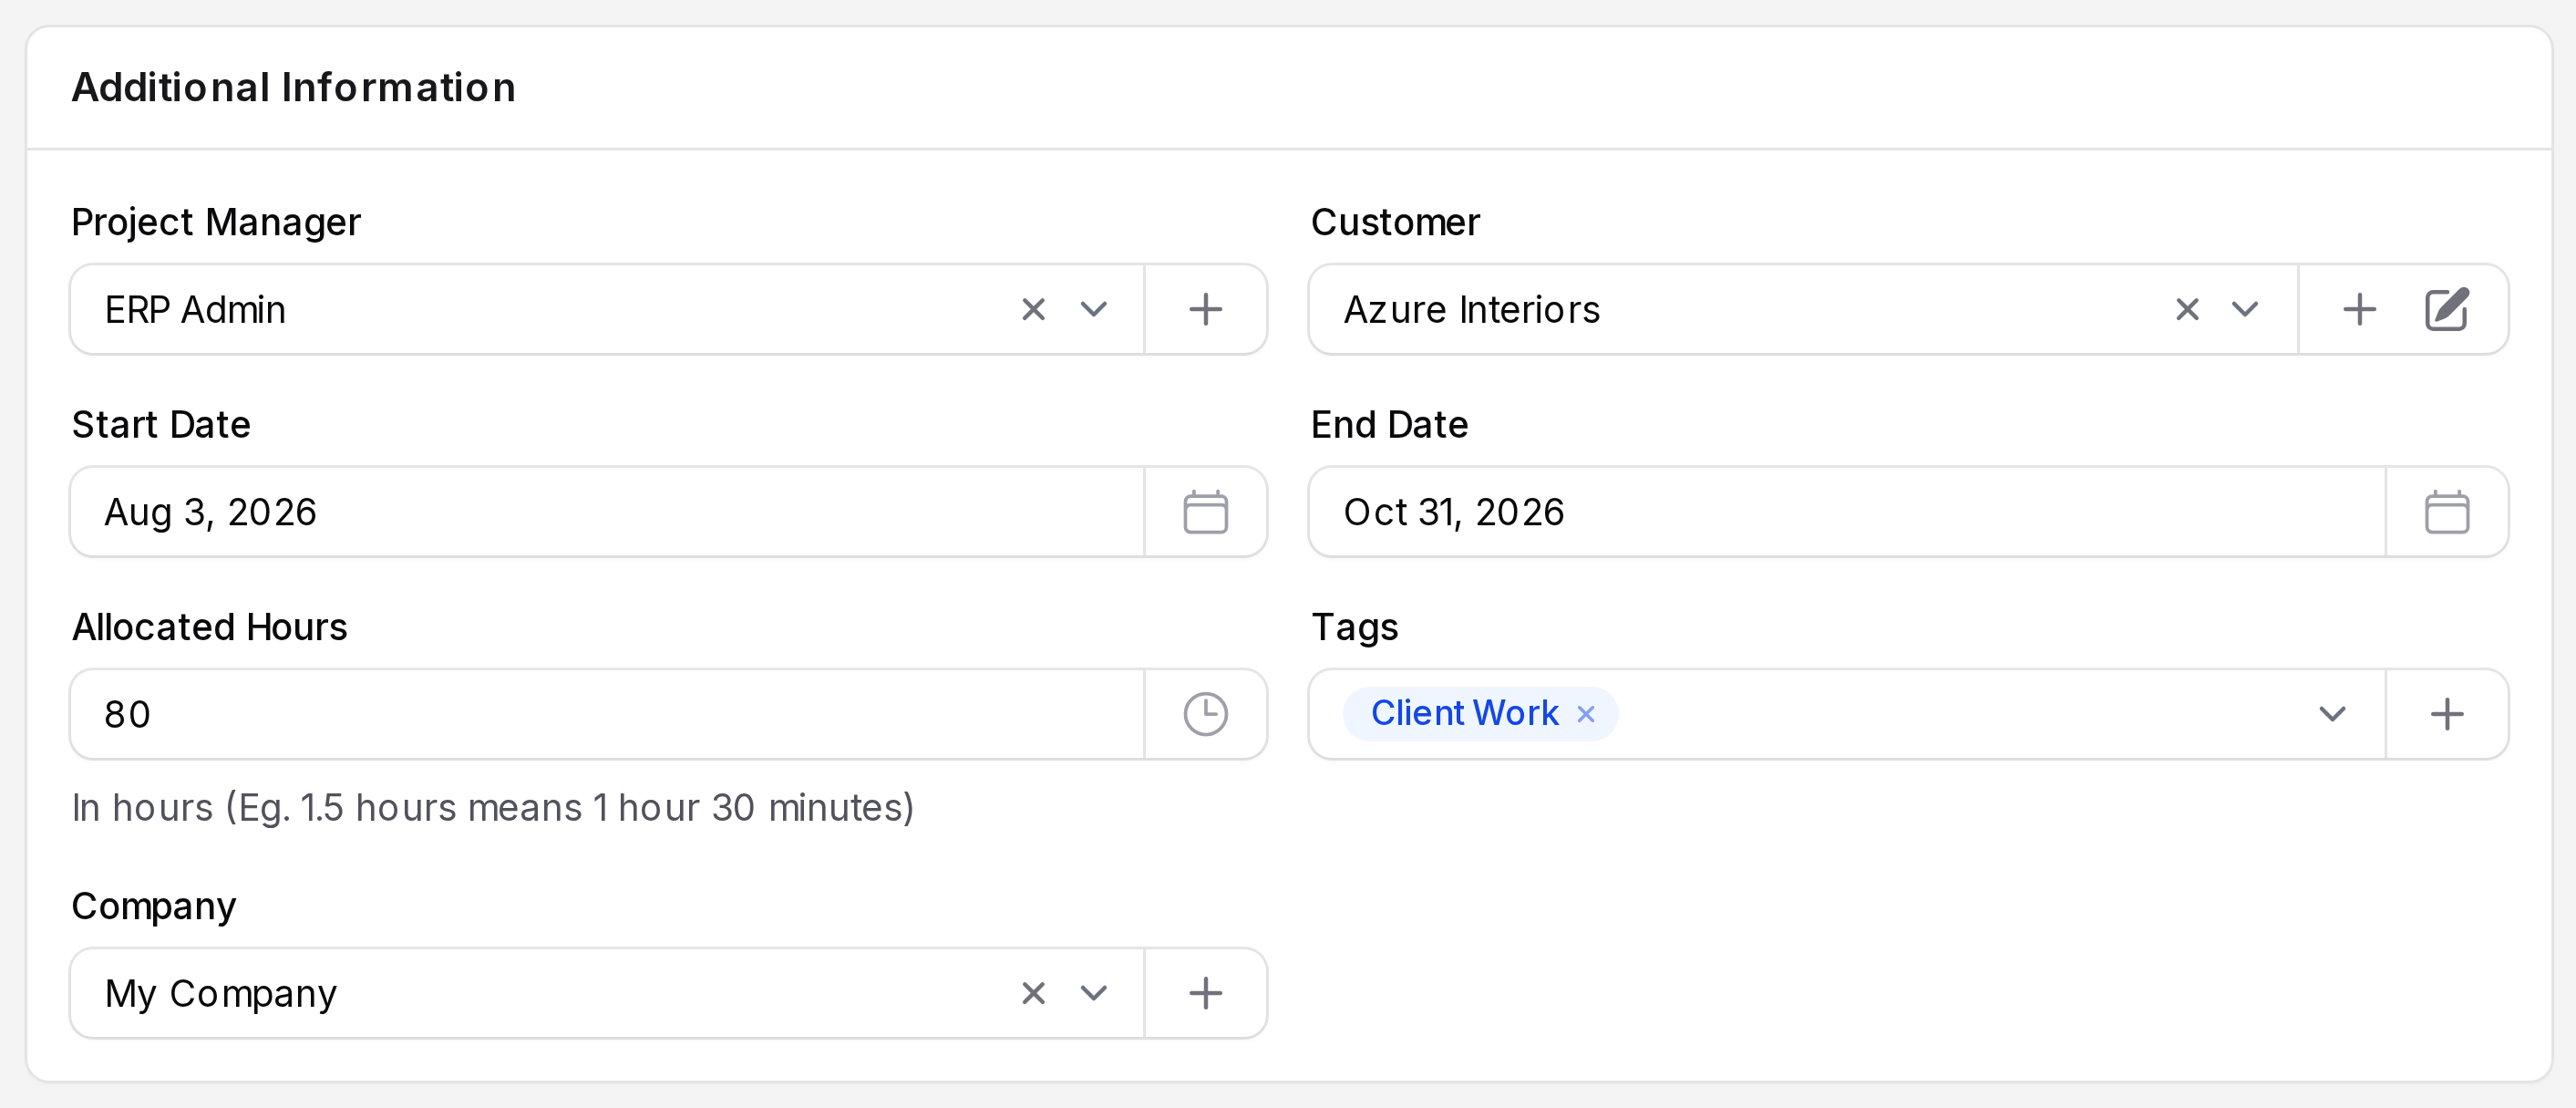
- Project Manager: The user who runs the project. Click the plus icon in the field to add a user.
- Customer: The company or person the work is for. Click the plus icon in the field to create a contact without leaving the form.
- Start Date and End Date: Fill both or neither. The end date cannot be before the start date.
- Allocated Hours: The planned hours. Use decimals: 1.5 means 1 hour 30 minutes. Shown only when Enable Timesheets is on.
- Tags: Labels from Tags. You can create a tag here.
- Company: The company that owns the project. It matters when you run more than one company in Aureus.
Settings
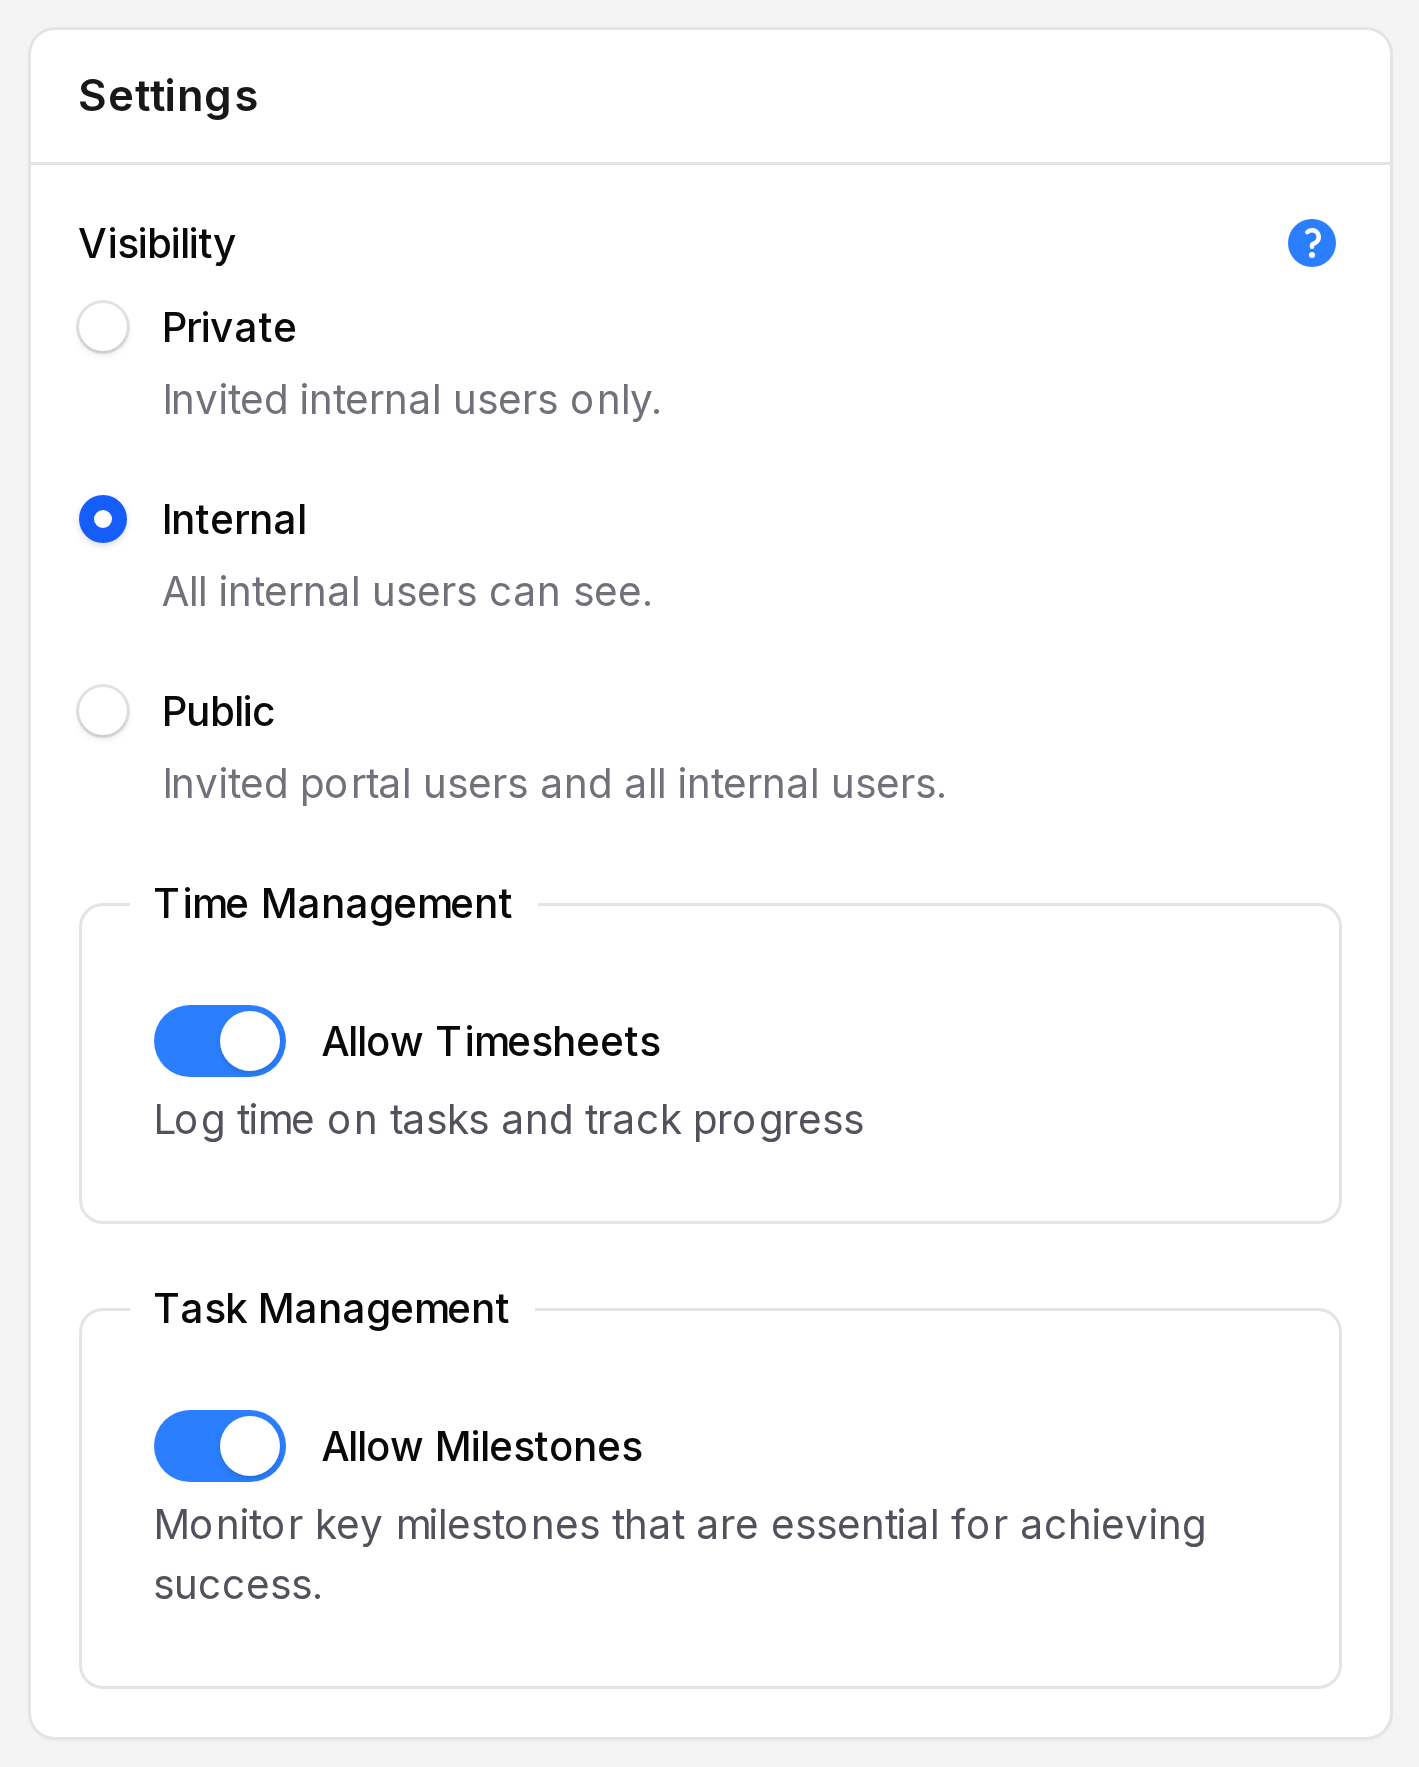
- In the Settings card on the right, leave Visibility on Internal. Switch on Allow Timesheets and Allow Milestones.
- Visibility:
- Private for invited internal users only.
- Internal for all internal users (default). An internal user is a person with an Aureus login. A portal user is a customer with portal access. See Portal access.
- Public for invited portal users and all internal users.
- Allow Timesheets: Lets people log hours on the project tasks. Needs Enable Timesheets.
- Allow Milestones: Lets you add milestones. Needs Enable Milestones. It is on by default.
- Click Create. Click Create & create another to start a new form. Click Cancel to leave.
View, edit and archive
After you save, the View page opens. The top links are View, Edit, Tasks and Milestones. Milestones shows only when the project allows milestones.
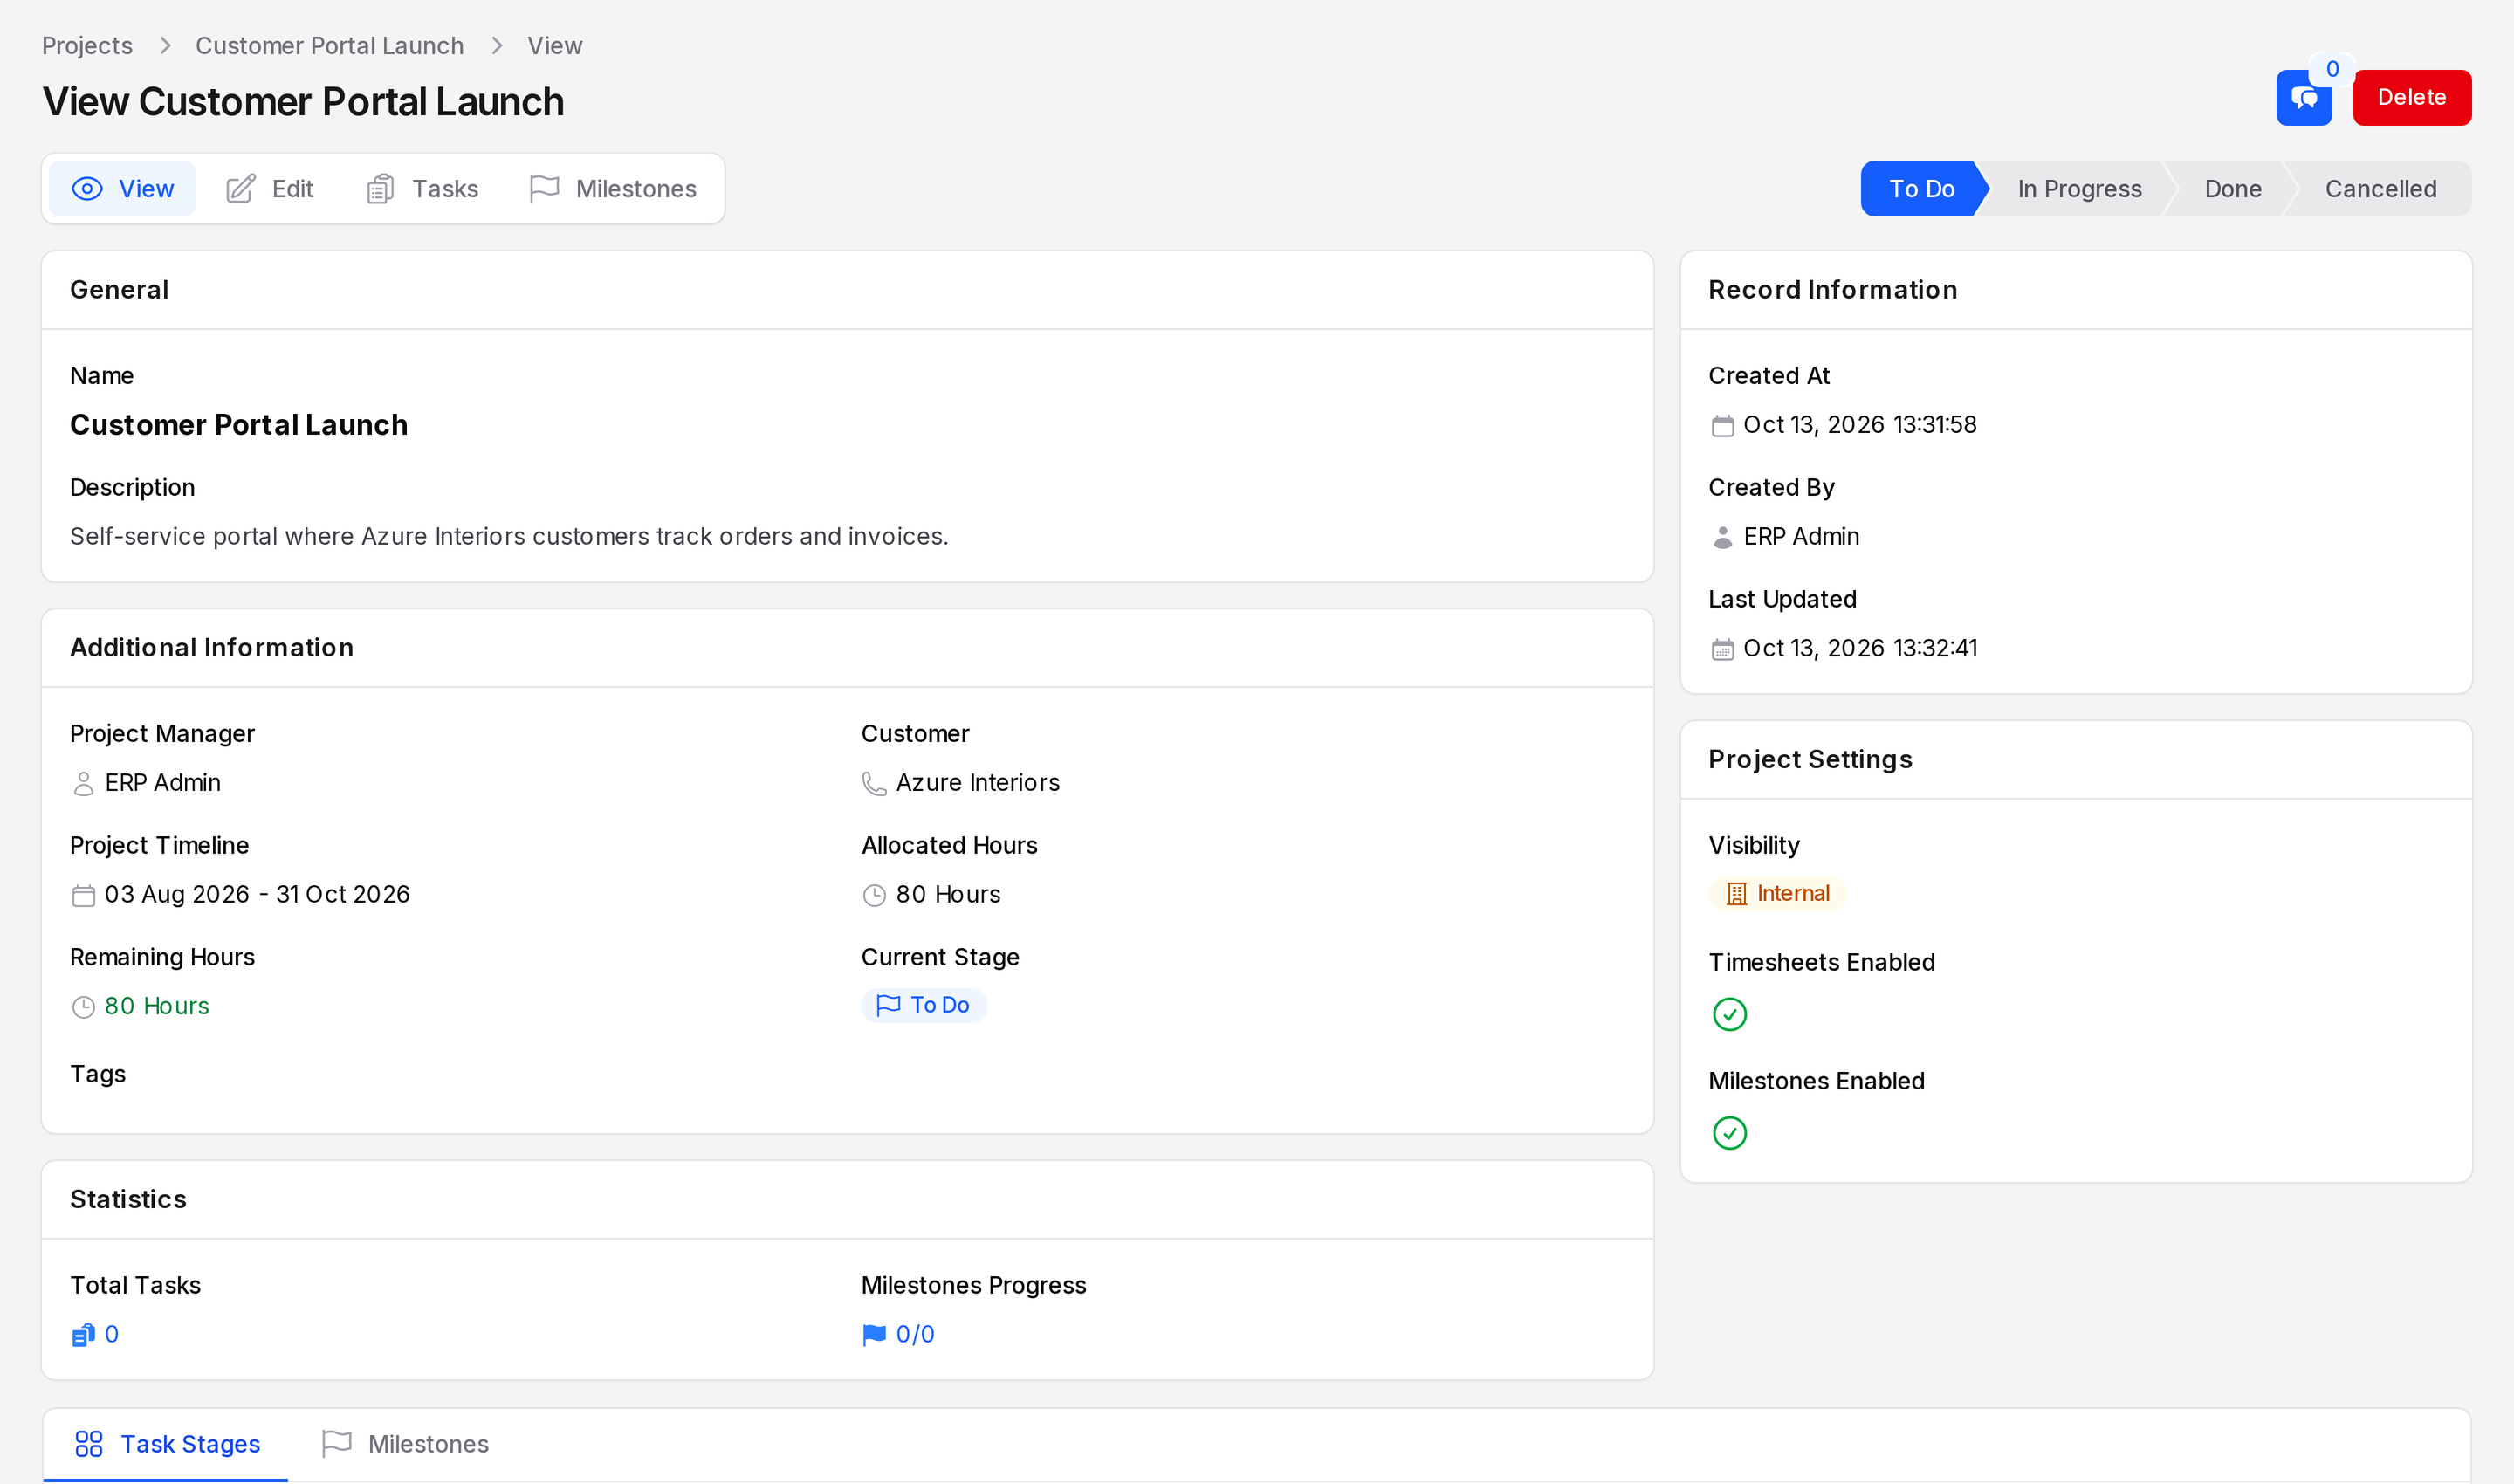
The page shows these sections:
- General: name and description.
- Additional Information: manager, customer, timeline, allocated and remaining hours, current stage and tags.
- Statistics: Total Tasks and Milestones Progress.
- Project Settings: visibility and what is enabled.
Below the sections, the Task Stages and Milestones tabs list the stages and milestones of this project.
Use the Chatter button for messages, followers and activities. See Chatter.
Actions and statuses
- Edit: opens the same form. Change values and save.
- Delete: archives the project. It moves to Archived Projects.
- Restore: in Archived Projects, brings the project back.
- Force delete: removes the project for good. It fails if other records still use the project.
- Drag a card: changes the card order.
WARNING
Force delete cannot be undone. Use Delete if you may need the project again.