Transfers
In the Inventory module, transfers represent the movement of products between different locations, warehouses, vendors, and customers.
Transfers help you manage the flow of goods within the organization from receiving purchased products to delivering customer orders, handling internal stock movements, or processing dropshipping operations.
Use Case:
Transfers ensure seamless tracking of product movement, proper stock adjustments, and transparency across all supply chain stages from procurement to sales.
Receipts
Definition:
A Receipt records the inbound movement of goods from a supplier or vendor to your warehouse.
It helps you confirm that products purchased are received and updated in stock.
Use Case:
Used when goods are received against a Purchase Order. This process ensures your warehouse accurately reflects incoming inventory.
The data grid also displays automatically created receipts when a purchase order is confirmed.
Steps to Create a New Receipt
- Navigate to
Inventory → Operations → Transfers → Receiptsas shown below:
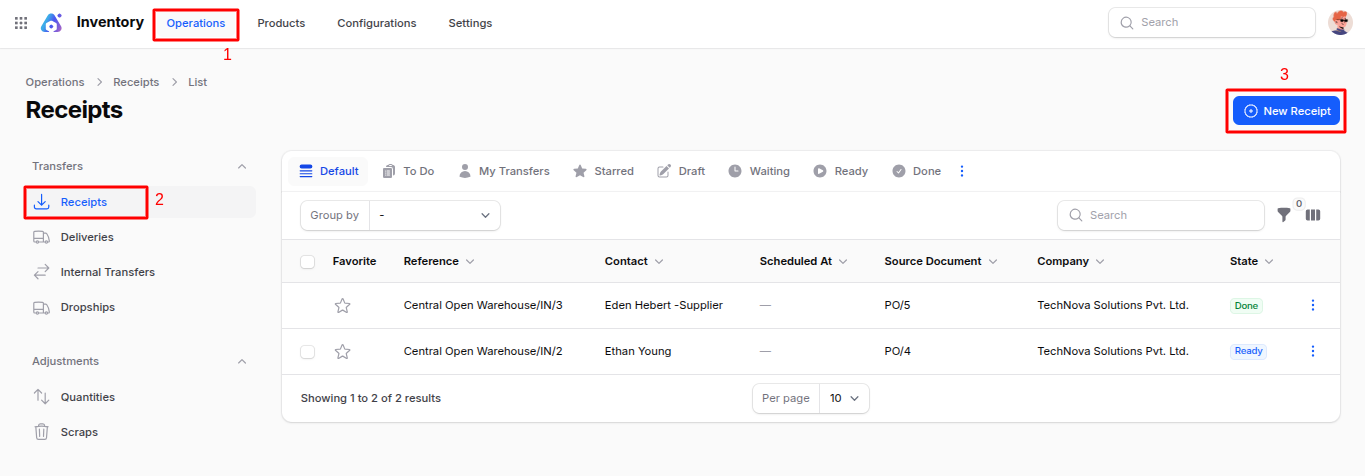
Fill in the following details:
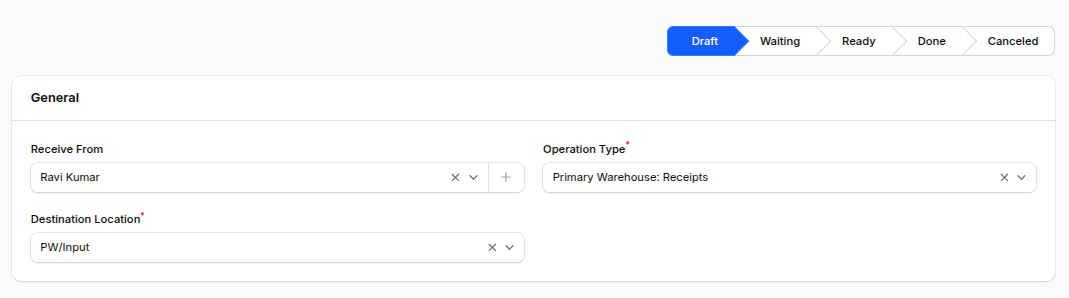
General Section
- Receive From: Select the vendor or supplier sending the goods.
- Operation Type: Preselected based on your warehouse configuration (e.g.,
Primary Warehouse: Receipt). - Destination Location: Preselected warehouse input location (e.g.,
Primary/Input).
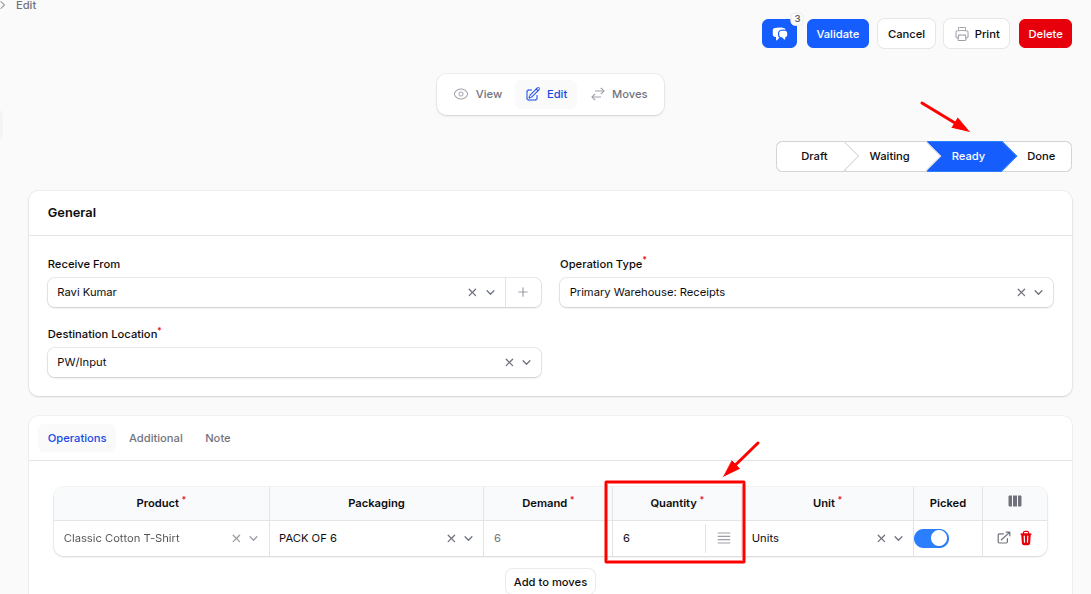
Operations Section
To add products:
Click Add to Moves, then select:
- Product: Choose the product being received.
- Packaging: Choose the packaging type (e.g., Box, Crate, Pallet).
- Demand: Enter the expected quantity to receive.
- Unit: Select the unit of measure (e.g., Units, Dozens).
- Picked: Toggle to mark the product as picked.
- You can add multiple product lines here.
<ImagePopup src="/images1/inventory/receipt_operations_section.png" alt="Receipt Operations Section" />
Additional Section
- Responsible: The user handling the receipt process.
- Scheduled At: The planned date/time of receipt.
- Source Document: Auto-linked purchase order or reference document.
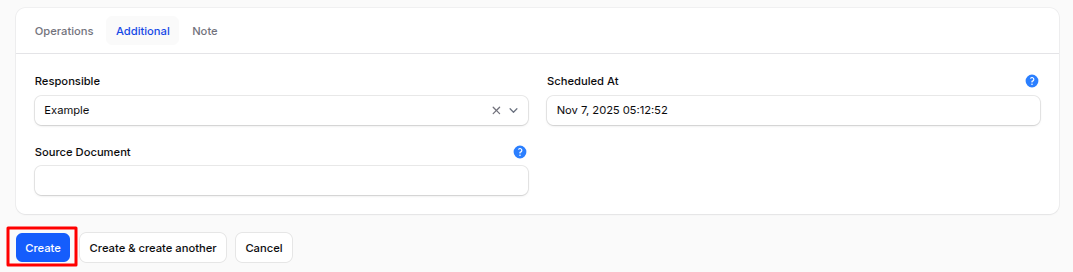
- Action Buttons:
- Create – Save and open the receipt record.
- Create & Create Another – Save and open a new blank form.
- Cancel – Discard and return to list view.
Receipt Workflow Actions
Once created, you are redirected to the Receipt View Page, which includes:
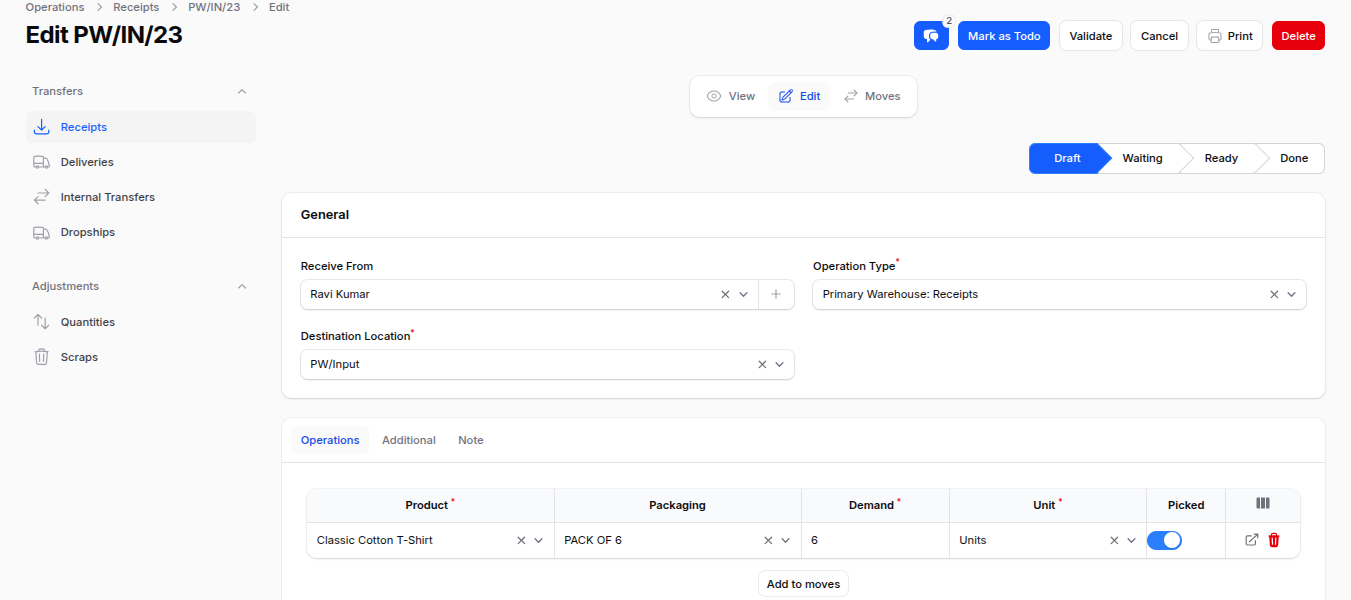
- View: View all receipt details.
- Edit: Modify details in draft state.
- Mark as To Do: Changes the status from Draft → Ready, validating stock availability.
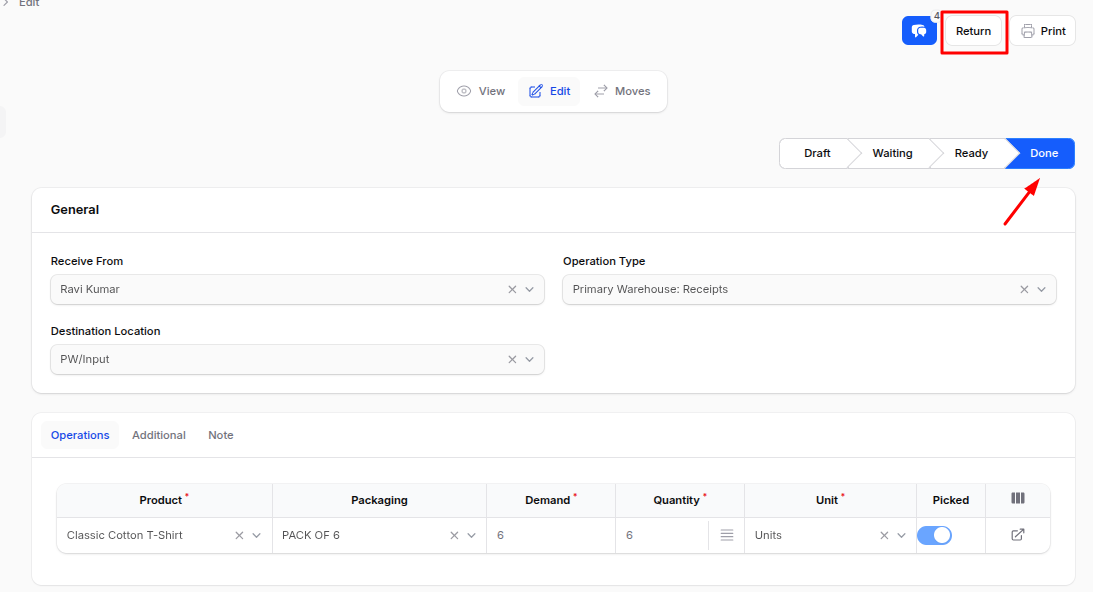
- Validate: Confirms the receipt and updates inventory (status becomes Done). Fields become read-only.
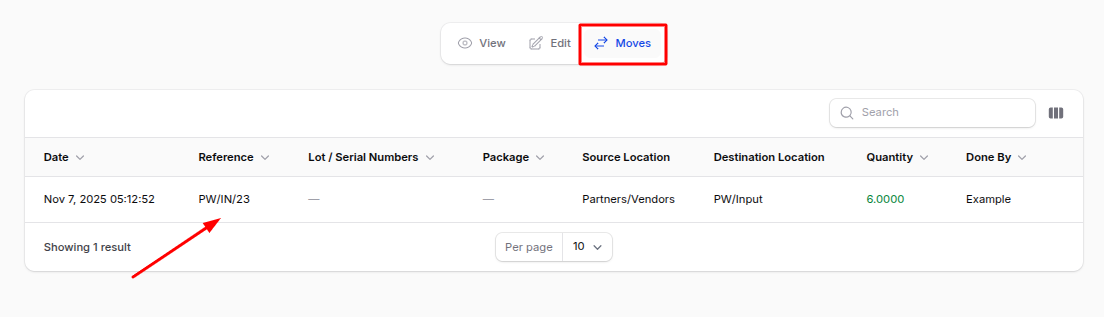
- Moves: Review all product moves linked to the receipt.
- Return: Available after validation — creates a reverse receipt (delivery).
- Cancel / Delete: Stop or remove the receipt record.
Deliveries
Definition:
A Delivery Order records the outbound movement of goods from your warehouse to a customer.
Use Case:
Used when fulfilling sales orders or shipping goods to customers. It ensures accurate stock deductions and transparent delivery tracking.
The data grid also displays automatically created deliveries when a Sales Order is confirmed.
Steps to Create a New Delivery
Navigate to
Inventory → Operations → Transfers → Deliveriesas shown below: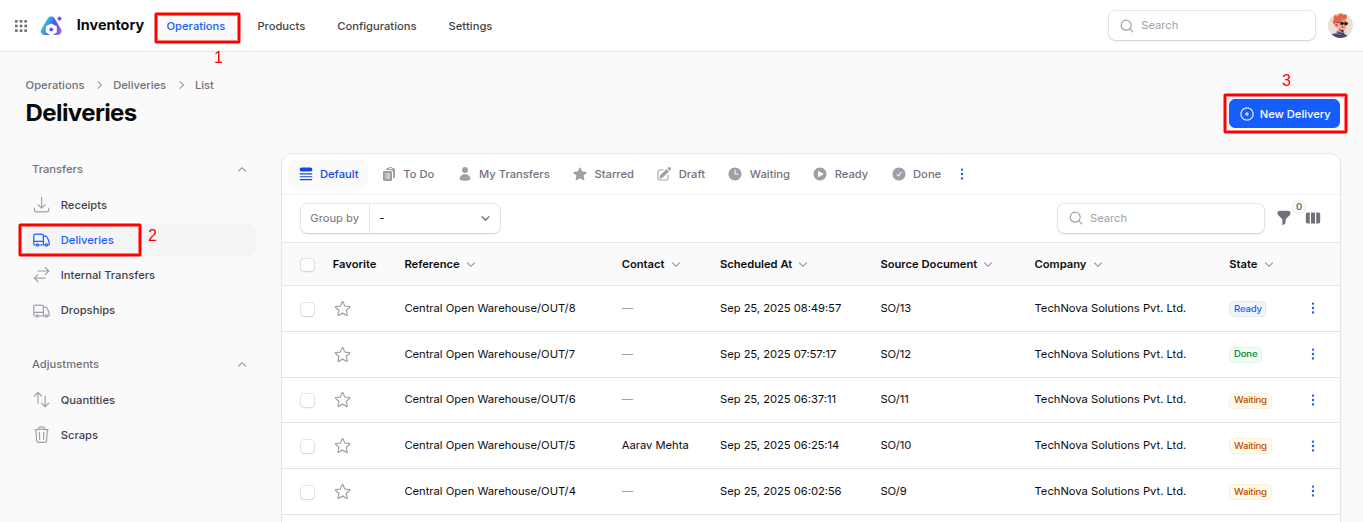
Fill in the following details:
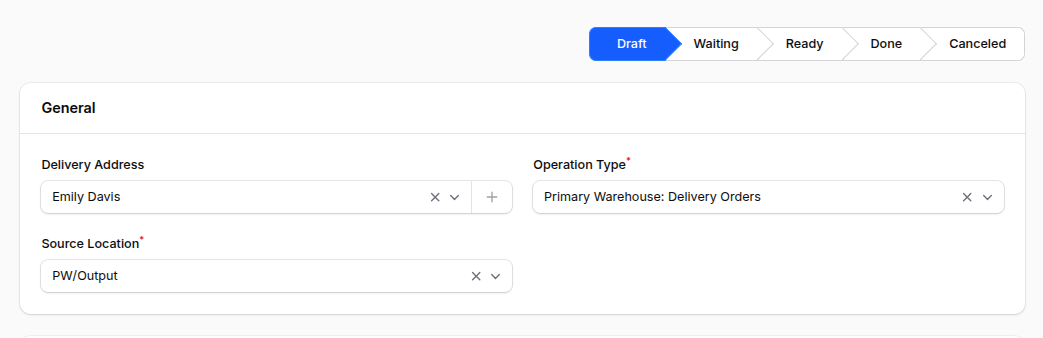
General Section
- Delivery Address: Select the customer receiving the goods.
- Operation Type: Preselected (e.g.,
Primary Warehouse: Delivery Order). - Destination Location: Preselected warehouse output location (e.g.,
Primary/Output).
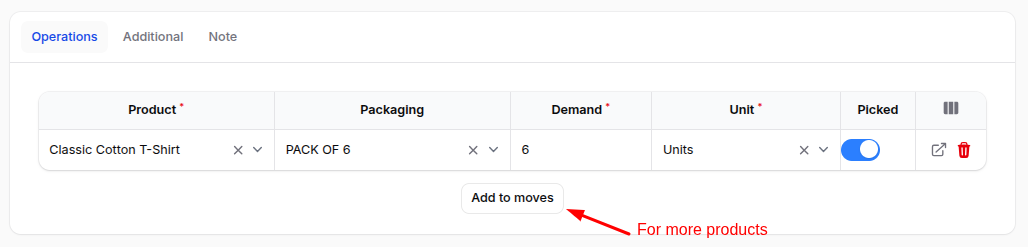
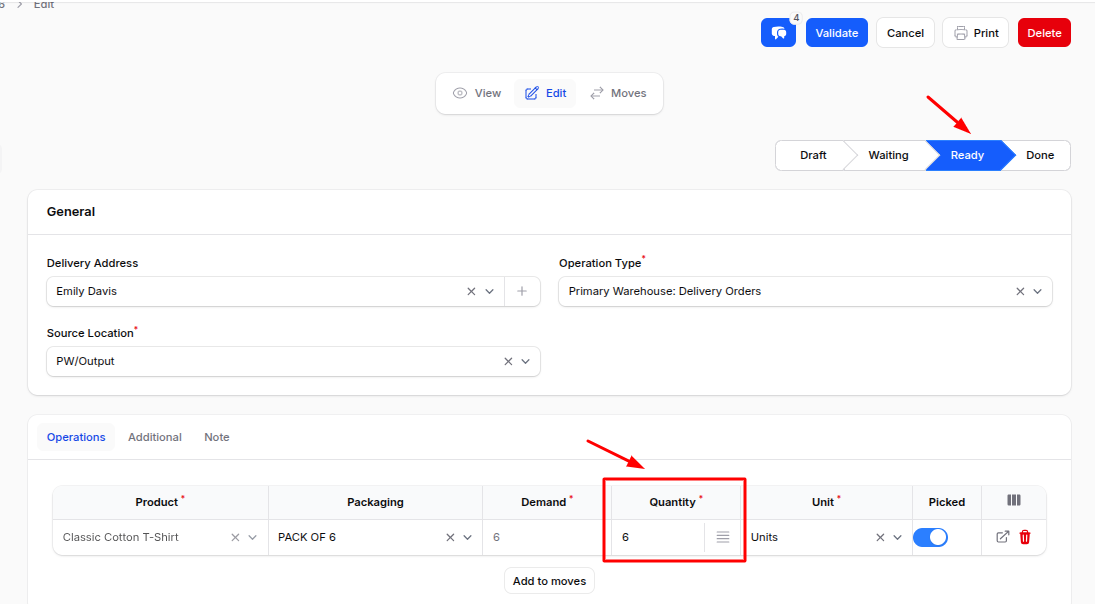
Operations Section
- Click Add to Moves, then select:
- Product: Choose the product to deliver.
- Packaging: Specify the packaging used for the shipment.
- Demand: Enter quantity to deliver.
- Unit: Select the unit of measure.
- Picked: Enable to mark products picked for delivery.
Additional Section
- Responsible: Person managing the delivery.
- Shipping Policy: Choose whether to ship all items together or as available.
- Scheduled At: Planned delivery date.
- Source Document: Linked sales order or reference.
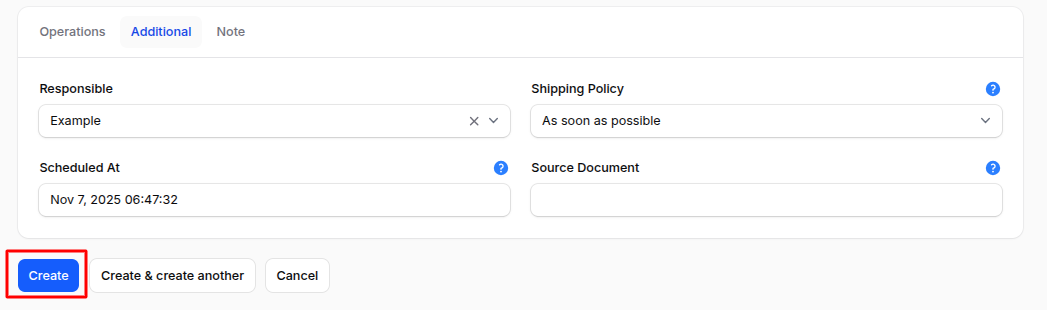
Action Buttons:
- Create – Save and open the delivery record.
- Create & Create Another – Save and create another record.
- Cancel – Exit without saving.
Delivery Workflow Actions
After creation, you are redirected to the Delivery View Page, which includes:
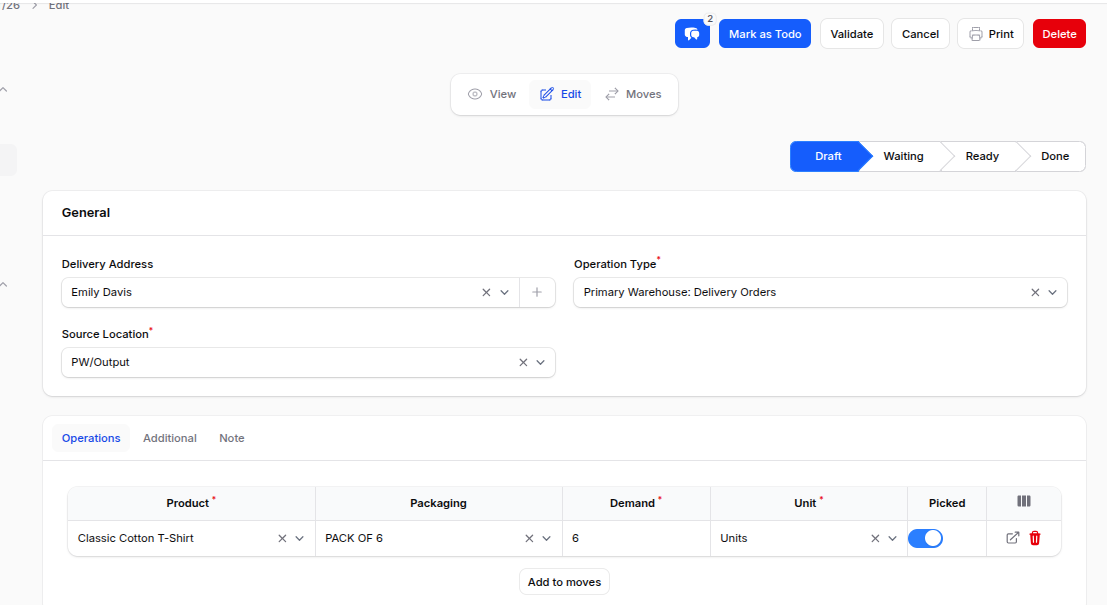
- Mark as To Do: Changes status from Draft → Ready, validates stock availability.
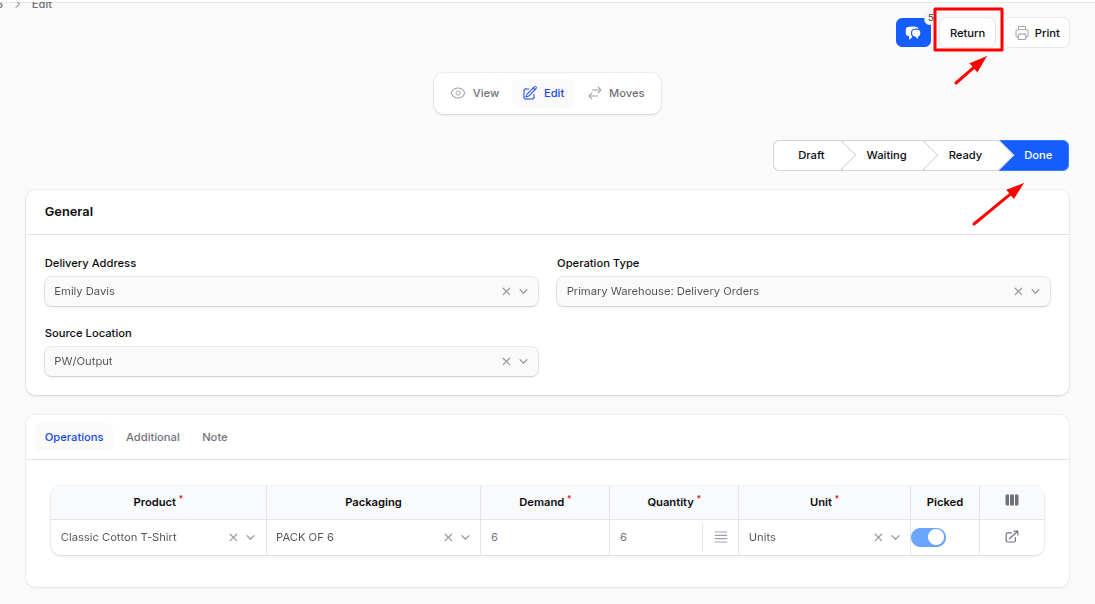
- Validate: Confirms delivery, reduces stock, and changes status to Done.
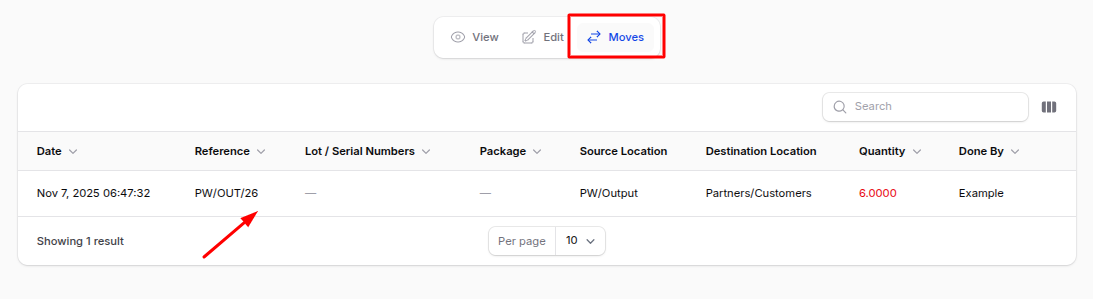
- Moves: View all product moves associated with the delivery.
- Return: Creates a return (receipt) for the delivery.
- Cancel / Delete: Stop or remove the delivery record.
Internal Transfers
Definition:
An Internal Transfer represents the movement of products within your own warehouse — from one location to another.
Use Case:
Used when products move between areas (e.g., from stock to packing zone or quality control). It helps maintain location-level inventory accuracy.
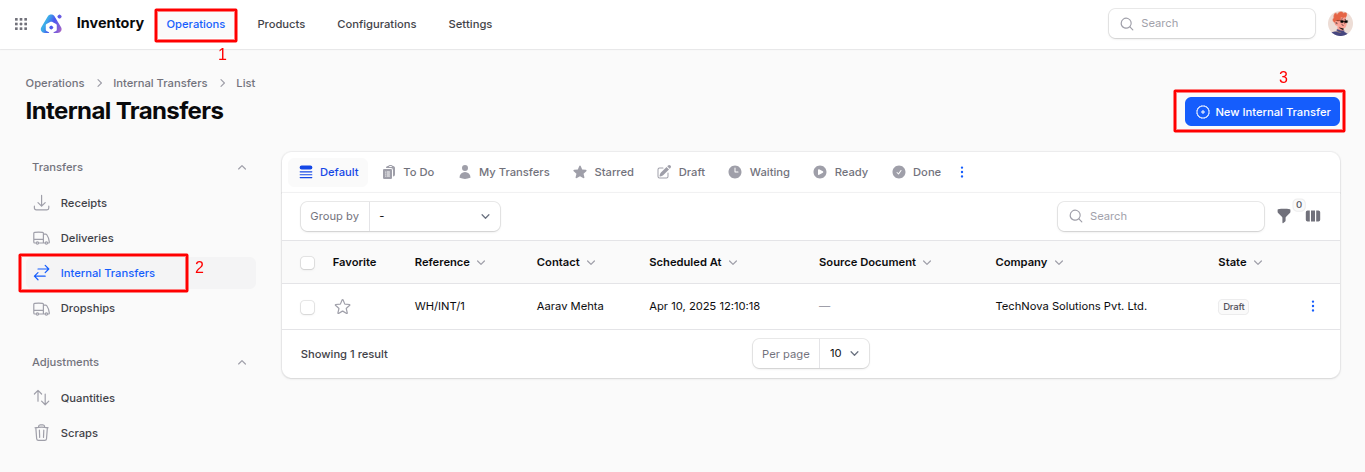
Steps to Create a New Internal Transfer
- Navigate to
Inventory → Operations → Transfers → Internal Transfersas shown below:
Fill in the following details:
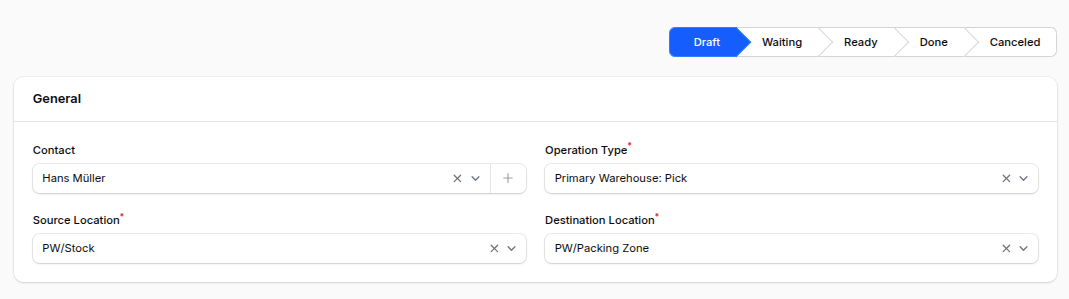
General Section
- Contact: Internal contact or responsible person.
- Operation Type: Preselected (e.g.,
Primary Warehouse: Pick). - Source Location: Preselected source location (e.g.,
Primary/Stock). - Destination Location: Preselected destination (e.g.,
Primary/Packing Zone).
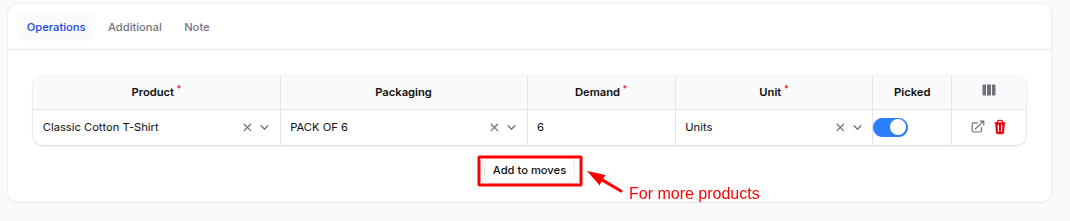
Operations Section
- Product: Product to move internally.
- Packaging: Choose packaging if applicable.
- Demand: Quantity to move.
- Unit: Unit of measure.
- Picked: Toggle to mark as picked.
Additional Section
- Responsible: User managing the internal movement.
- Shipping Policy: Choose transfer policy.
- Scheduled At: Date for transfer.
- Source Document: Related reference.
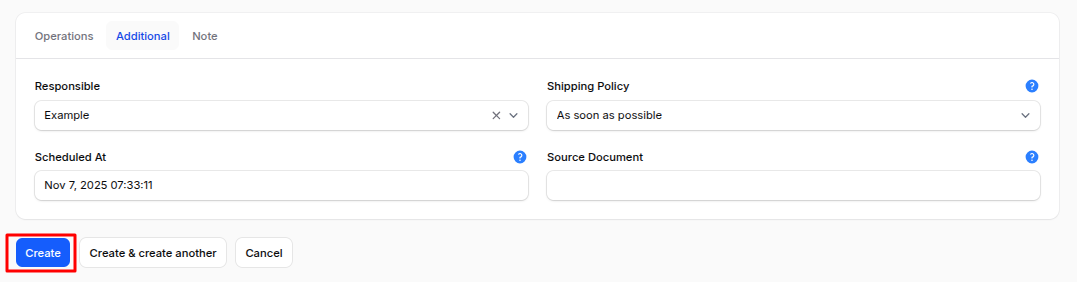
- Action Buttons:
- Create
- Create & Create Another
- Cancel
Internal Transfer Workflow Actions
After creation, you are redirected to the Internal Transfer View Page, which includes:
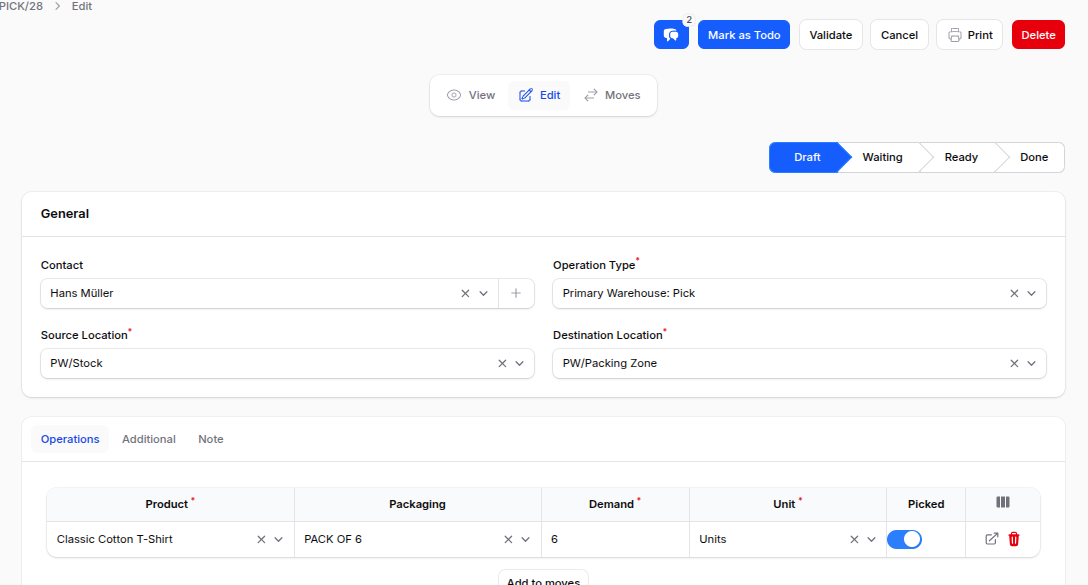
- Mark as To Do: Status changes from Draft → Ready, checks stock availability, and creates move records.

- Validate: Completes transfer, updating locations (status Done).
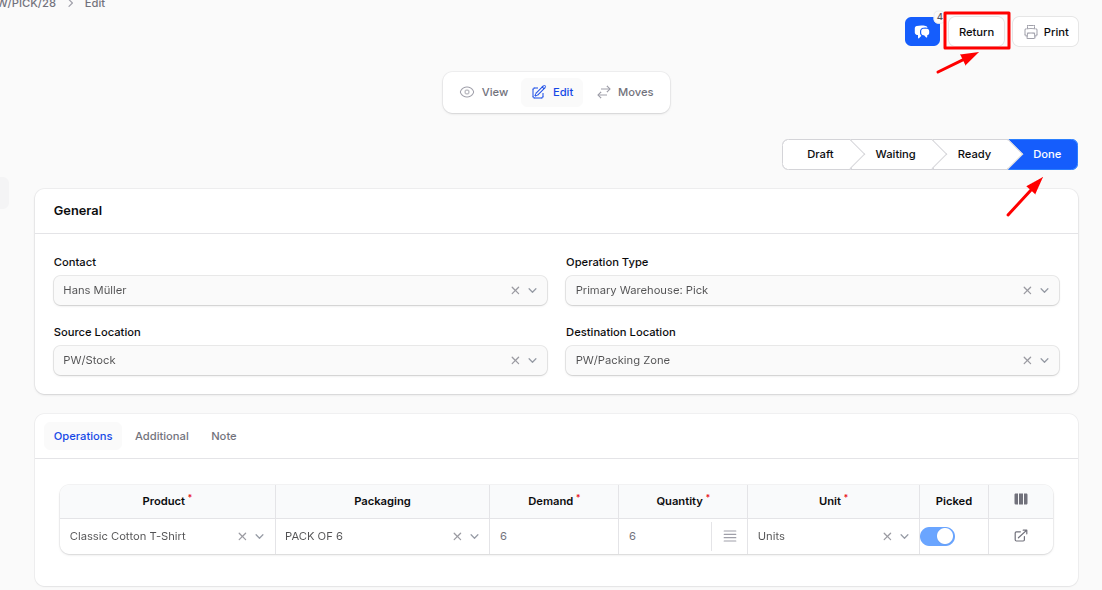
- Return: Reverses the movement (e.g., from packing zone back to stock).
- Cancel / Delete: Remove or discard the record.
Dropships
Definition:
Dropship Transfers record the movement of products shipped directly from the vendor to the customer without passing through your warehouse.
Use Case:
Useful for direct-to-customer fulfillment, reducing warehouse handling and improving delivery time.
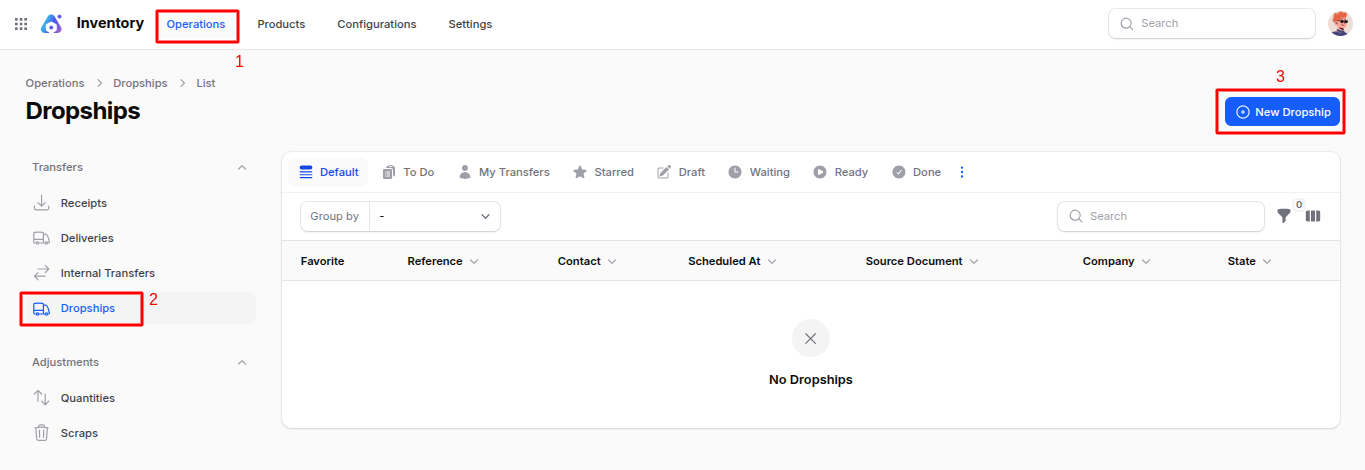
Steps to Create a New Dropship
- Navigate to
Inventory → Operations → Transfers → Dropshipsas shown below:
Fill in the following details:
General Section
- Operation Type: Preselected as Dropship.
- Source Location: Auto-selected as Partner/Vendor.
- Destination Location: Auto-selected as Partner/Customer.
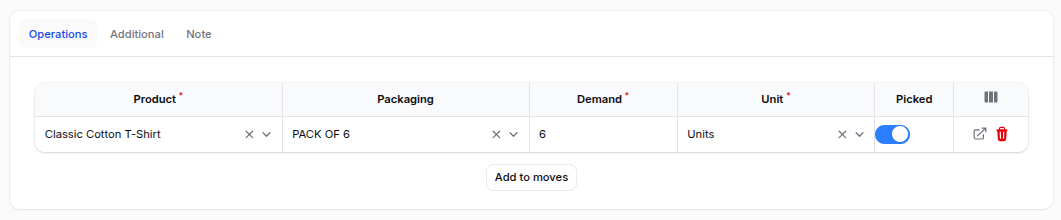
Operations Section
- Product: Select the product being dropshipped.
- Packaging: Select packaging type.
- Demand: Quantity to deliver.
- Unit: Unit of measure.
- Picked: Enable if products are picked.

Additional Section
- Responsible: The user managing the dropship.
- Shipping Policy: Define delivery rule.
- Scheduled At: Planned shipping date.
- Source Document: Linked purchase or sales order.
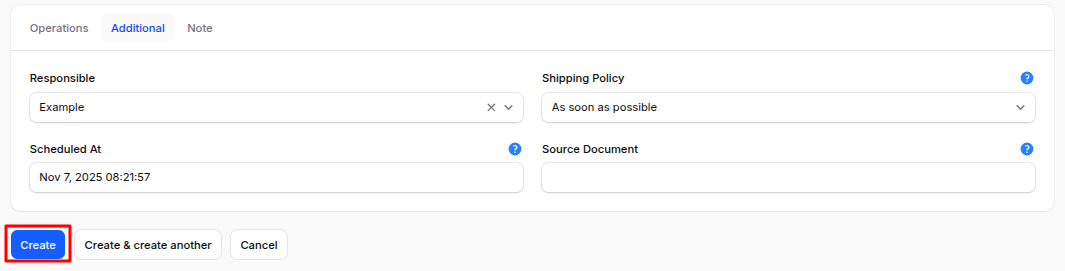
- Action Buttons:
- Create
- Create & Create Another
- Cancel
Dropship Workflow Actions
- Mark as To Do: Changes status from Draft → Ready, validating moves.
- Validate: Completes the dropship (status Done).
- Return: Reverses the dropship (customer → vendor).
- Cancel / Delete: Stop or remove the record.
Summary
The Transfers module in Inventory provides complete control over product movements:
- Receipts: Record inbound goods from vendors.
- Deliveries: Track outbound goods to customers.
- Internal Transfers: Manage intra-warehouse stock movement.
- Dropships: Handle direct vendor-to-customer shipments.
Each transfer type supports:
- Operation Tracking: Monitor every stage of movement.
- Validation Workflow: Ensure accuracy before updating stock.
- Returns Management: Reverse any completed operation.
This ensures full transparency, accuracy, and efficiency in warehouse operations across all movement types.