Project
The Project Plugin helps you manage your company's projects, assign team members, track deadlines, organize tasks, and streamline communication. It is ideal for any organization that handles client-based work, internal project planning, or service-based workflows.
Create a New Project
Steps to Create a Project
Navigate to
Project → Projects → New Projectas shown in the below image.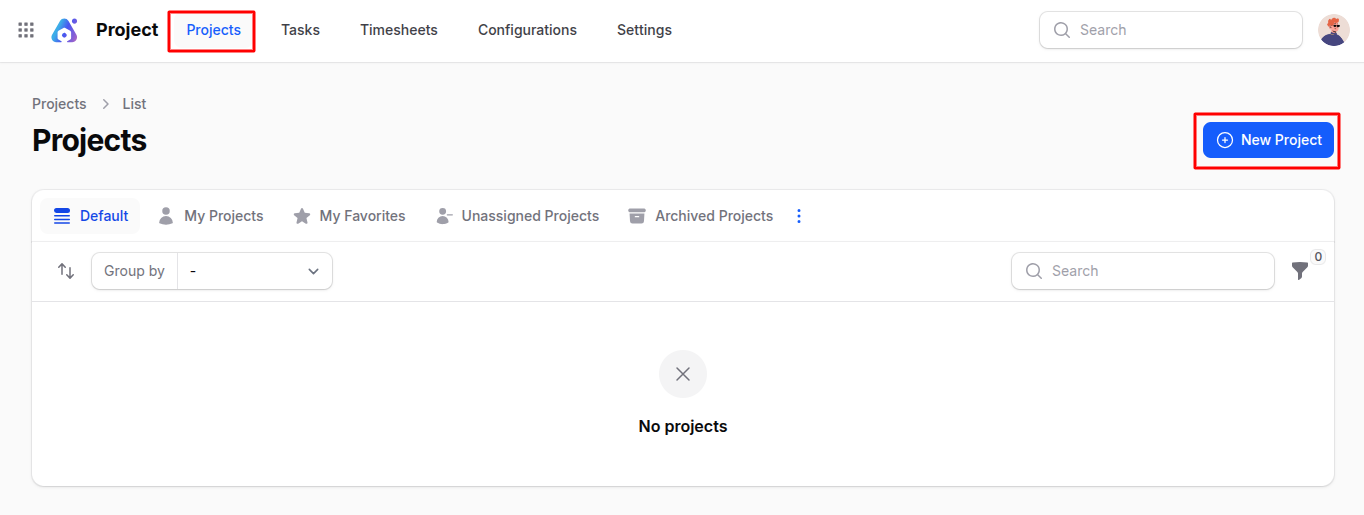
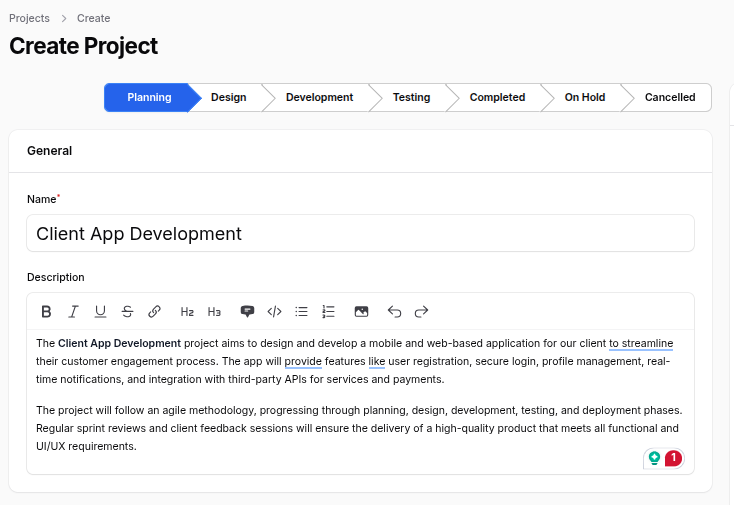
Fill out the following details in the form that appears:
General Section
- Name: Enter the name of the project (e.g., Website Redesign, Client Onboarding).
- Description: Provide a brief overview or purpose of the project. Helps team members understand the goal.
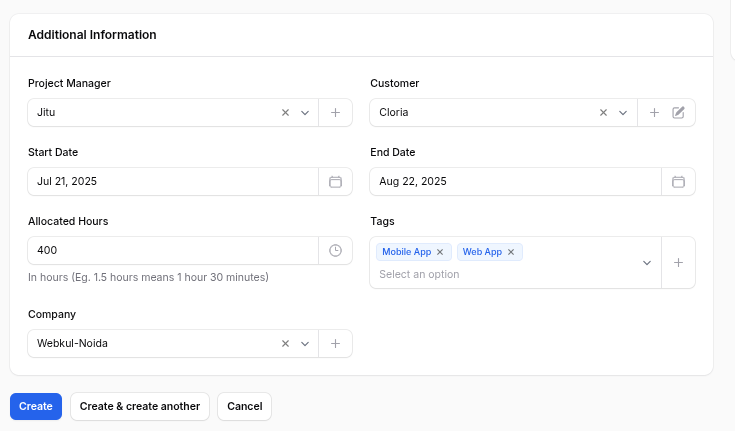
Additional Information
- Project Manager: Assign the team member responsible for managing the project.
- Customer: Link the project to a specific customer or client. Useful for client-based work.
- Start Date: Choose the date when the project will begin.
- End Date: Select the expected date of project completion.
- Allocated Hours: Define the total number of working hours expected for the project. Helps in workload planning.
- Tags: Add labels to organize and filter projects (e.g., Urgent, Internal, Long-Term).
- Company: Select the company under which this project is being managed, if applicable.
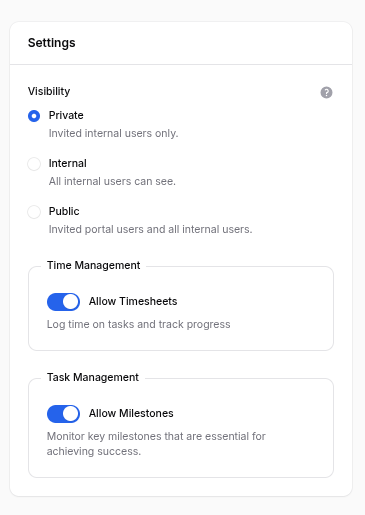
Settings
Visibility Options
- Private: Only invited internal users can see the project.
- Internal: All internal users can view the project.
- Public: Internal users and invited external (portal) users can view the project.
Time Management
- Allow Timesheets: Enable to allow users to log their time against this project.
Task Management
- Allow Milestones: Enable to track significant phases of the project like design, development, testing, etc.
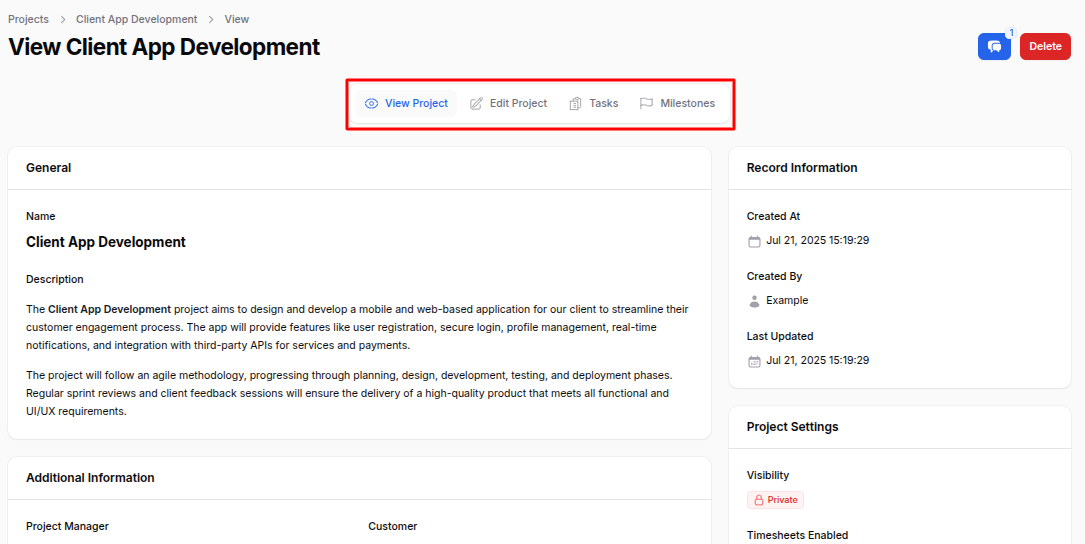
After Creating the Project
Click Create. You will be redirected to the View Project page. Here, you'll see:
- Edit Project: Modify project details.
- Tasks: Manage all tasks under this project.
- Milestone: Track major progress points (if enabled).
Task Creation in a Project
Steps to Create a Task
On the View Project page, click Tasks.
Click on the New Task button.
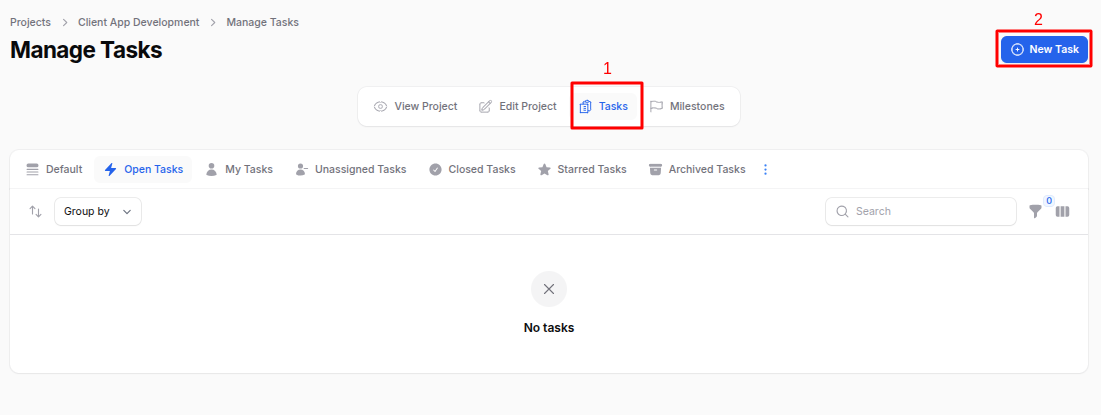
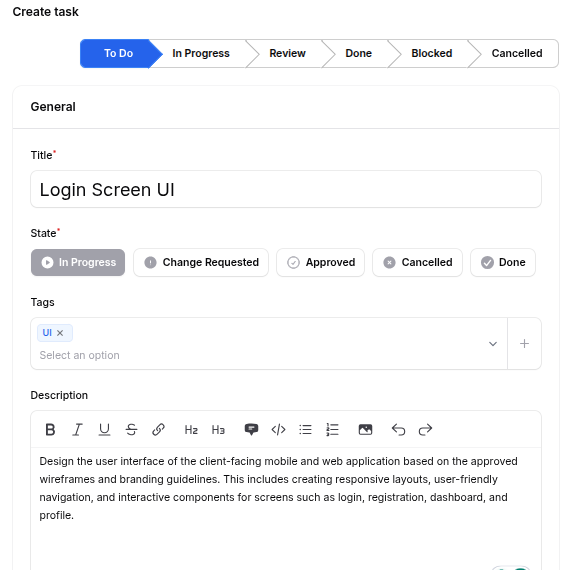
Fill out the task creation form:
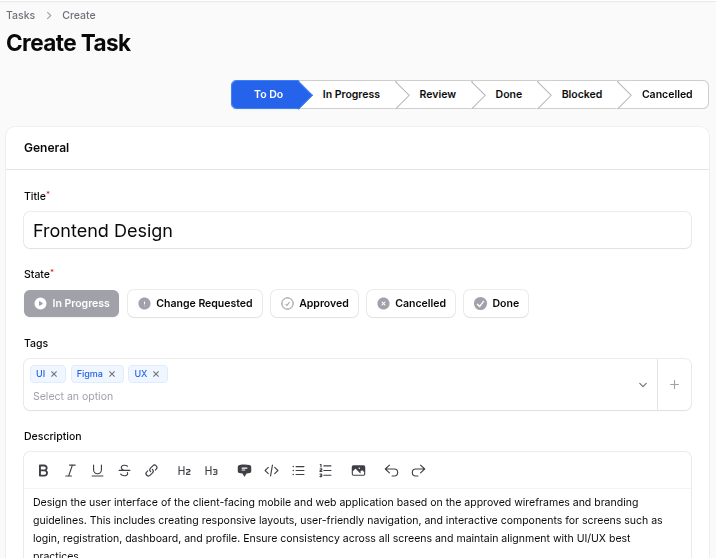
General Section
Title: Task title (e.g., Design Landing Page, API Integration).
State: Task progress state:
- In Progress
- Change Requested
- Approved
- Cancelled
- Done
Tags: Add tags or create new ones using (+) button to label or group tasks.
Description: Provide a detailed explanation of the task.
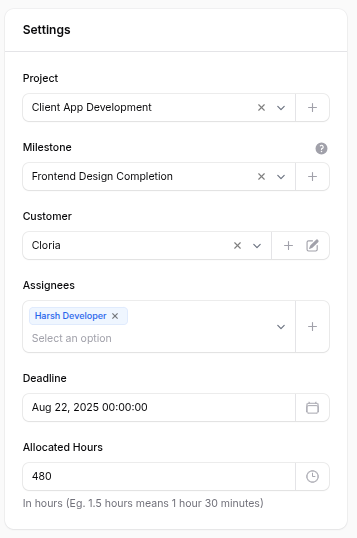
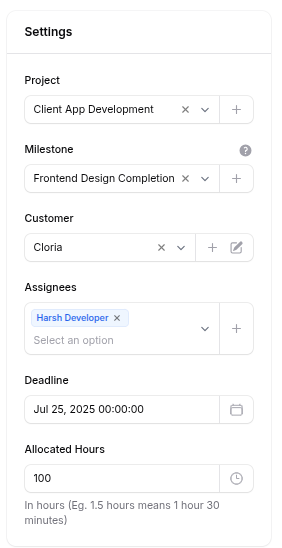
Settings Section
- Project: Select the project this task belongs to. Defaults to the current project.
- Customer: Link to a customer, if applicable.
- Assignees: Choose users responsible for this task. The task becomes visible in their dashboard.
- Deadline: Set the task completion date.
- Allocated Hours: Estimate time required for the task.
Click Create to save the task. You will be redirected to the View Task page.
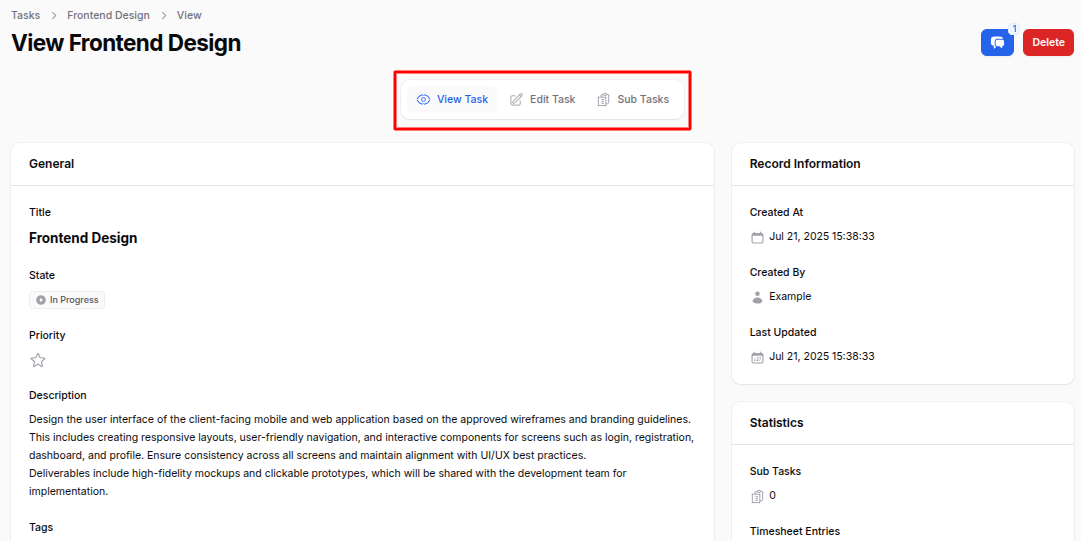
On View Task Page
- Edit Task: Modify the task details.
- Delete: Permanently remove the task.
- Sub Tasks: Click to create smaller, trackable items within this task.
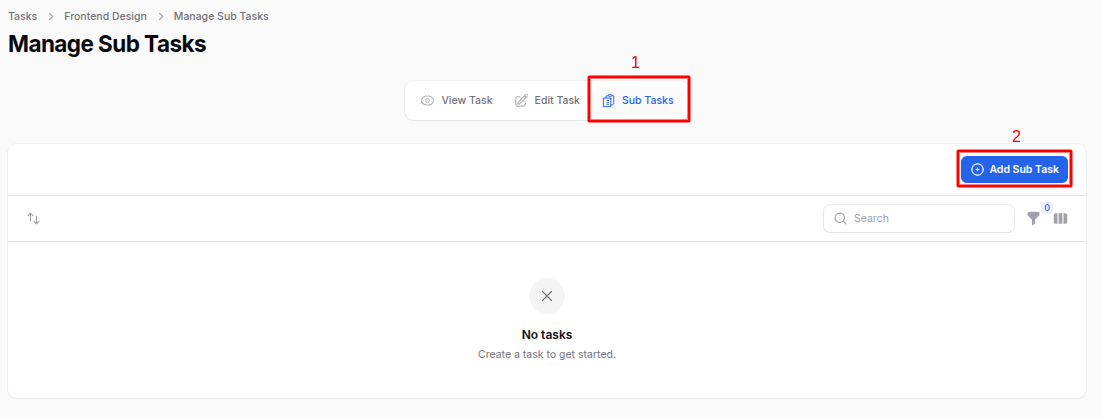
Sub Task Creation
Steps to Create a Sub Task
On the View Task page, click Sub Tasks.
Click the Create Sub Task button.
A modal form will appear. Fill in the details:
General Section
- Title: Sub task title.
- State: Same progress stages as tasks.
- Tags: Add or create new tags.
- Description: Detail the sub task requirements.
Settings Section
- Project: Automatically selected based on the parent task.
- Customer: Link if applicable.
- Assignees: Select users to work on the sub task.
- Deadline: Set the deadline.
- Allocated Hours: Estimated hours for this sub task.
Action Buttons
- Create: Save the sub task.
- Create & Create Another: Save and open a new sub task form.
- Cancel: Close the form without saving.
Once created, sub tasks will appear under the Sub Tasks section in the View Task page.
📌 Use Case Example
Example: You’re managing a software development project for a client.
- Create the project “Client App Development” and assign a project manager.
- Add tasks like "Frontend Design", "Backend API Development", "Testing", each with different assignees and deadlines.
- For "Frontend Design", create sub tasks like "Login Screen UI", "Dashboard Layout", etc.
- Enable Allow Timesheets to track developer time on each task.
- Track key stages using Milestones like "Design Phase Complete" or "Beta Launch".
This structured approach keeps the team aligned and helps management monitor progress easily.
Summary
Projects module in AureusERP allow for efficient management of tasks, deadlines, and team collaboration. By utilizing features like task assignments, sub tasks, milestones, and timesheets, organizations can streamline their project workflows and ensure successful project delivery.