Task
The Task feature in AureusERP's Project Module is designed to manage work items within a project. Each task represents a specific activity or deliverable to be completed by an assignee within a set timeframe. Tasks help break down large projects into manageable parts, and they support collaboration, progress tracking, and time estimation.
Use Case
Use the task creation feature to assign responsibilities, plan workloads, track deadlines, and ensure that team members have clear direction. Tasks are useful in projects of any size and are central to project execution.
Create a New Task
Steps to Create a Task
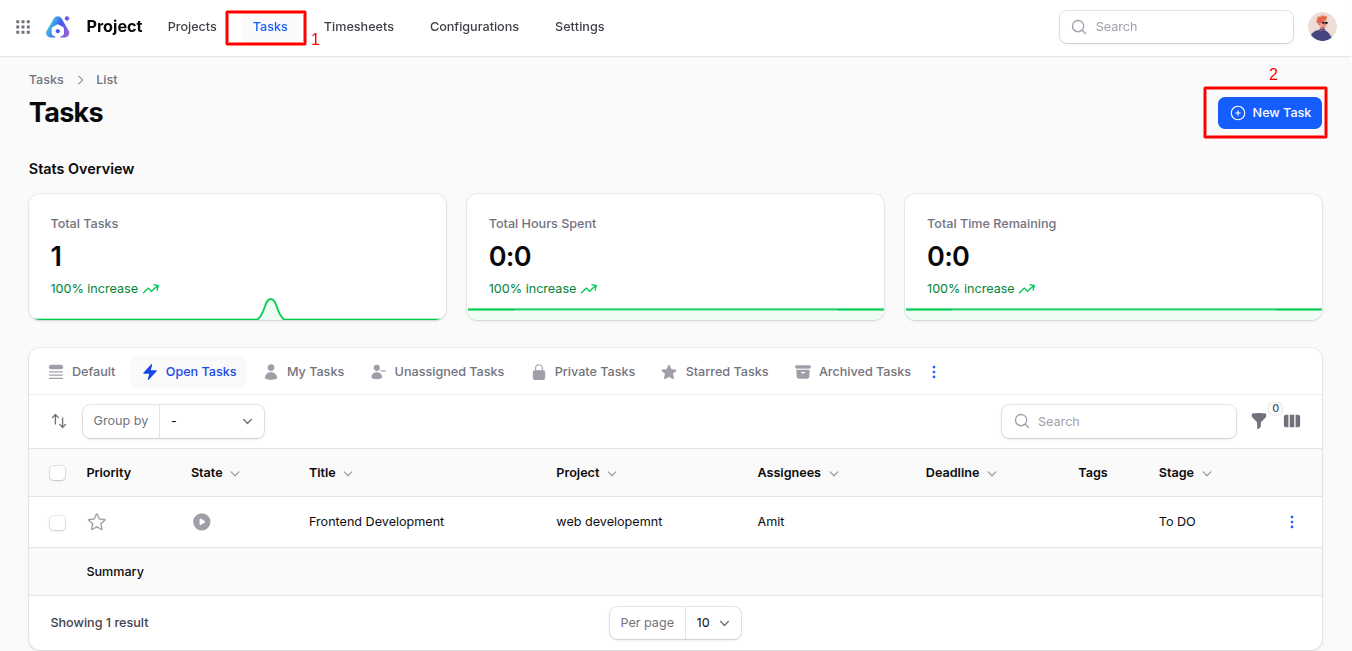
- Navigate to
Project → Tasks → New Taskas shown in the below image.
Fill out the required and optional details in the task form:
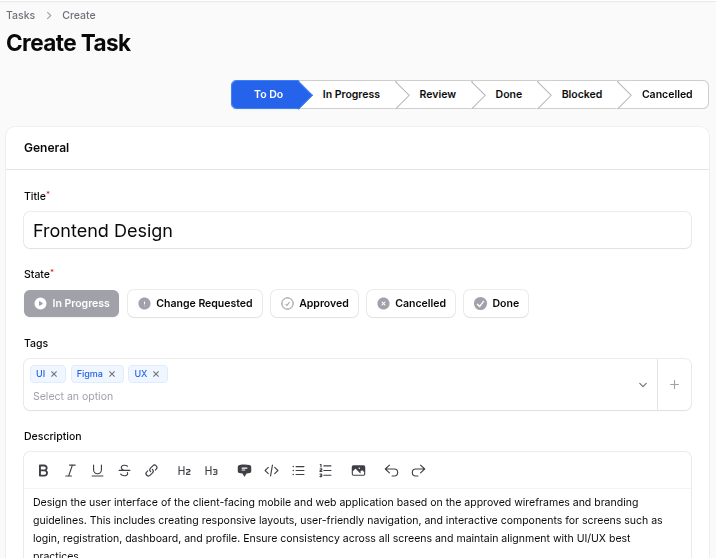
General Section
Title: The name or subject of the task.
State:
Represents the current progress or lifecycle stage of the task.
- In Progress: Task is currently being worked on.
- Change Requested: Work is completed but requires revisions.
- Approved: Task is completed and accepted.
- Cancelled: Task has been stopped and will not be continued.
- Done: Task is finished successfully.
Tags:
- Optional labels that help categorize or filter tasks.
- Examples:
UI,Backend,Urgent,Bugfix. - You can create new tags using the (+) button.
Description:
- A detailed explanation of what the task entails, objectives, resources, or steps to complete it.
- Example: "Create a responsive landing page for the marketing campaign. Use brand colors and mobile-first design."
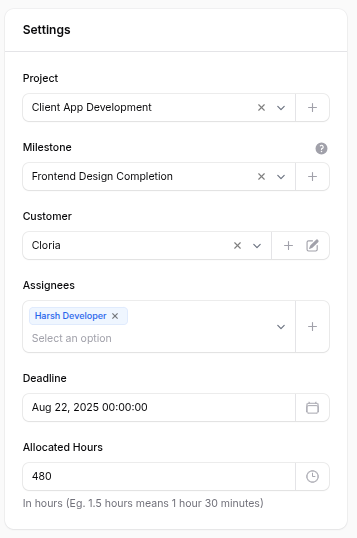
Settings Section
Project:
- Choose the project this task belongs to.
- If you're inside a project while creating the task, it will be auto-selected.
Customer:
- Optional. If this task is tied to a specific customer, you can link it here.
- Useful for client projects or external work.
Assignees:
- Select one or more users responsible for completing this task.
- Assignees will see the task on their dashboard.
Deadline:
- The last date by which the task should be completed.
- Helps with prioritization and planning.
Allocated Hours:
- Estimated time required to complete the task.
- Used for timesheet entries, tracking efficiency, and resource planning.
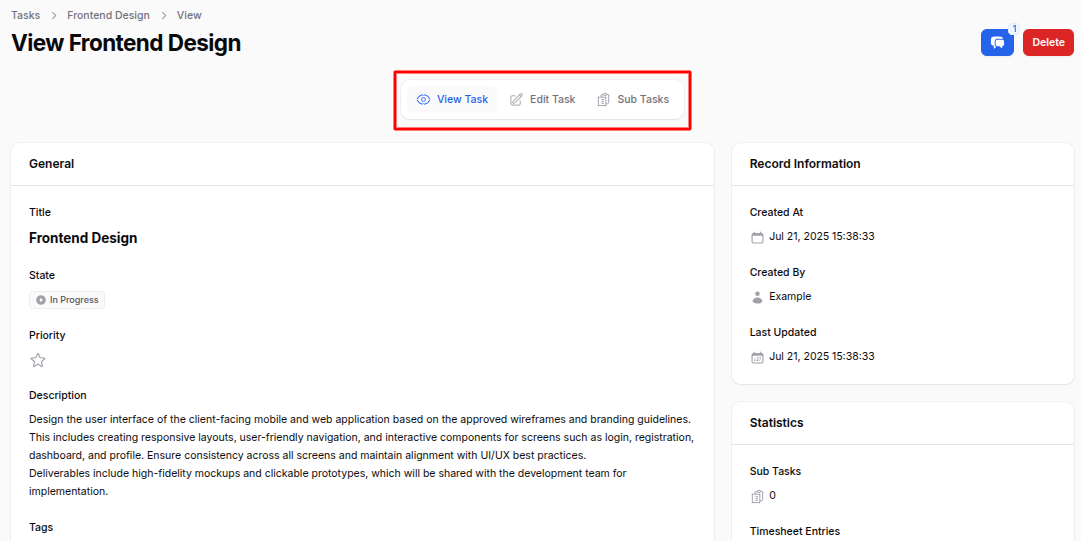
After Creation
After clicking Create, you are redirected to the View Task page.
From here you can:
- Edit Task: Modify any task details.
- Delete: Permanently remove the task.
- Sub Tasks: Manage and add sub tasks related to this task.
Sub Task Creation
Sub tasks allow you to divide a main task into smaller, more manageable activities. This improves tracking and helps delegate specific responsibilities.
Steps to Create a Sub Task
- From the View Task page, click the Sub Tasks button.
- Click the Create Sub Task button.
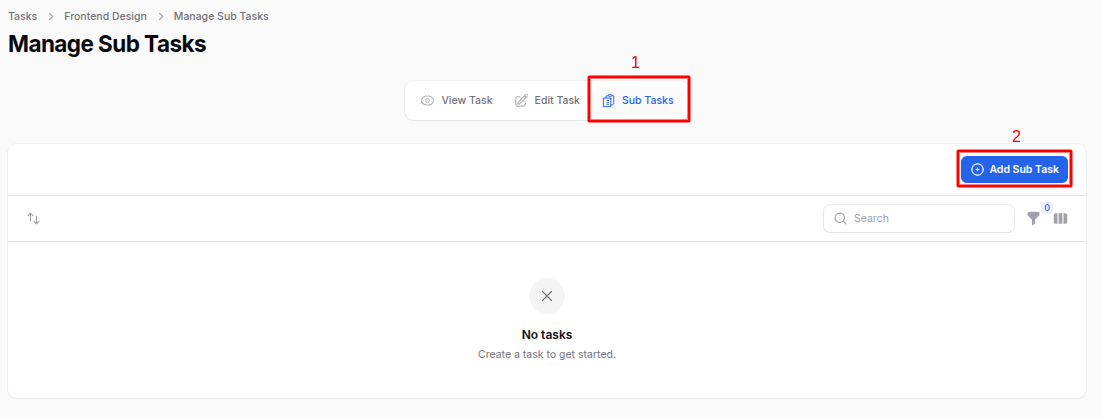
A modal will appear for sub task creation.
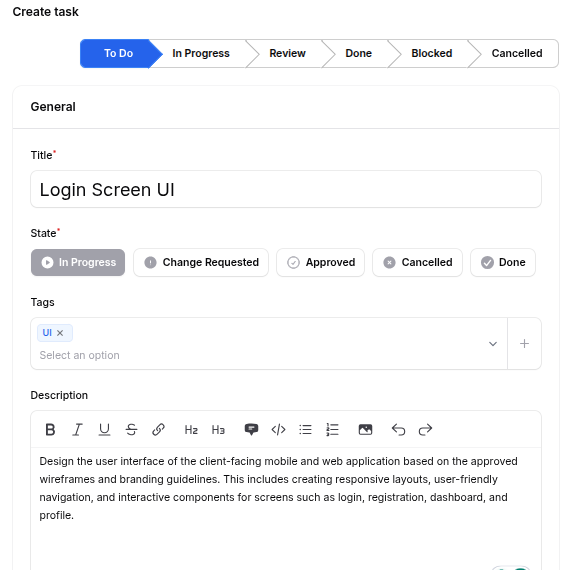
General Section
Title:
- Name of the sub task.
- Example: "Write HTML layout", "Prepare icon set".
State:
- Tracks the sub task's progress.
- Same options as tasks:
In Progress,Change Requested,Approved,Cancelled,Done.
Tags: Add or create tags to classify sub tasks.
Description: Explain the sub task scope, expectations, or instructions.
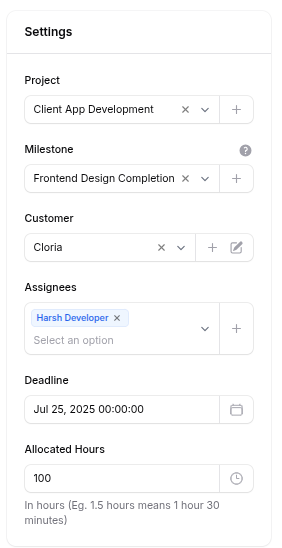
Settings Section
- Project: Pre-selected based on the parent task’s project.
- Customer: Optional. Attach if the sub task is client-specific.
- Assignees: Assign one or more team members.
- Deadline: Define the completion date for the sub task.
- Allocated Hours: Estimate how much time the sub task should take.
- Sub Task Actions
- Create: Save and create the sub task.
- Create & Create Another: Save and continue creating additional sub tasks.
- Cancel: Close the form without saving.
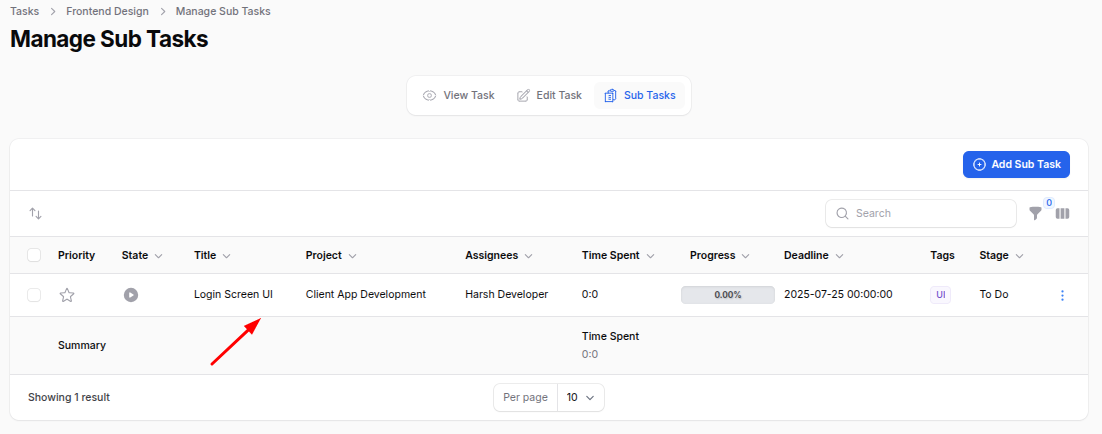
Once created, the sub task appears under the Sub Tasks tab in the parent task. You can use this to assign specialized portions of work, especially in large or complex tasks.
Summary
The Task and Sub Task features provide an organized structure to manage work efficiently in any project. Tasks represent core units of work, while sub tasks allow for granular breakdowns. Together, they help ensure accountability, clarity, and timely project delivery.